RockPi S セットアップ
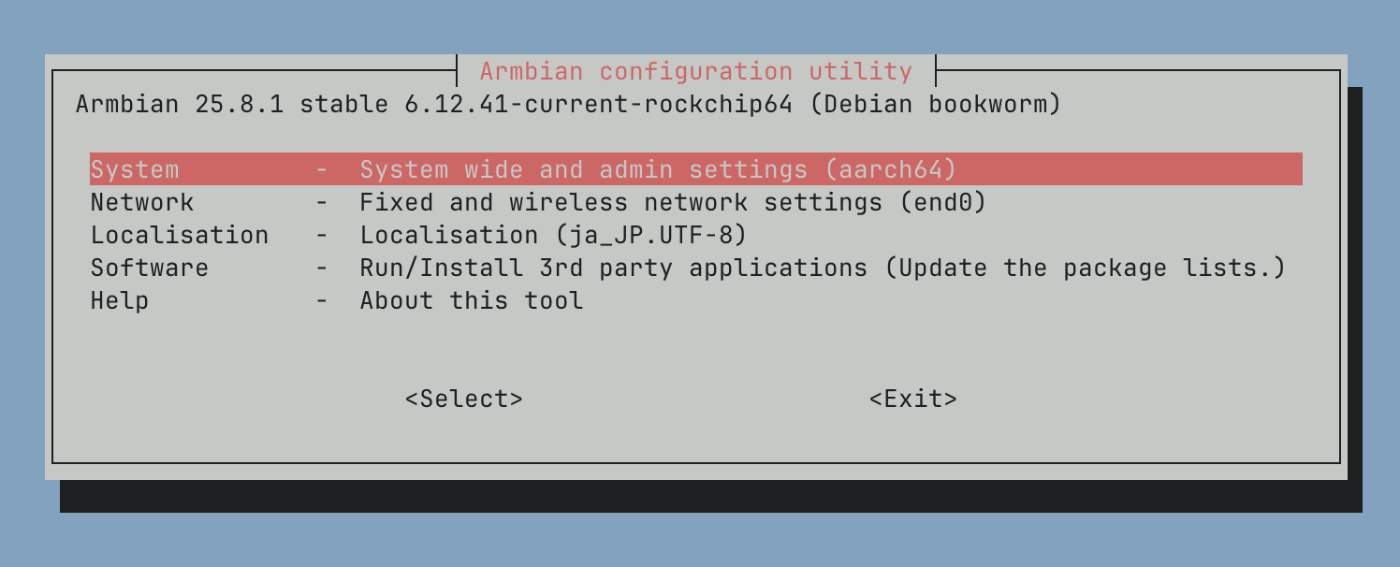
https://www.armbian.com/rockpi-s/ の手順通り armbian を入れてみる。
SDNAND 1GB だったため容量が足りずに書き込みは無理だった。
SDカードに balenaEtcher を使ってイメージを書き込んで解決。初回起動
   _             _    _
   /_\  _ _ _ __ | |__(_)__ _ _ _
  / _ \| '_| '  \| '_ \ / _` | ' \
 /_/ \_\_| |_|_|_|_.__/_\__,_|_||_|

 v25.8.1 for Rockpi S running Armbian Linux 6.12.41-current-rockchip64

 Packages:     Debian stable (bookworm), possible distro upgrade (trixie)
 Updates:      Kernel upgrade enabled and 2 packages available for upgrade
 IPv4:         (LAN) 192.168.100.15 (WAN) 124.87.6.220

 Performance:

 Load:         31%               Uptime:       6 min
 Memory usage: 22% of 466M
 CPU temp:     46°C              Usage of /:   3% of 57G

 Commands:

 Configuration : armbian-config
 Upgrade       : armbian-upgrade
 Monitoring    : htop

root@rockpi-s:~#
そして SSH の公開鍵を置く。
root@rockpi-s:~# echo 'ssh-ed25519 AAAA...' >> .ssh/authorized_keys
root@rockpi-s:~# chmod 600 .ssh/authorized_keys
こんな感じで簡単にパスワードログインをオフにできた


apt install network-manager をする
これで nmcli を利用できるようになるので https://wiki.radxa.com/RockpiS/Debian#WIFI_Connection を参考に Wi-Fi の接続を行えるようになる。ドキュメントにあるように 2.4GHz しかサポートされてない。Bluetooth も同様。
Wi-Fi の一覧をスキャンするコマンド
nmcli dev wifi

rockpis.local というローカル DNS を割り当てる
apt install avahi-daemon で Avahi デーモンをインストールする。(mDNS が有効になる)
hostnamectl set-hostname rockpis で hostname を変更できるので再起動する。
その後 macOS とか別の端末から ping rockpis.local とかで ping を打ってみる。
telegraf をインストールする。https://docs.influxdata.com/telegraf/v1/install/ を参考にするだけで大丈夫。
chissoku を /etc/telegraf/telegraf.d/chissoku.conf に設定して telegraf 経由で InfluxDB へ送る。
--stdout.iterations=1 --stdout.interval=1 で即時、1回きりの実行になる
# ===== chissoku を1回実行して JSON 1行を出す → 60秒ごとに繰り返し =====
[[inputs.exec]]
  commands = ["/usr/local/bin/chissoku --output=stdout --stdout.iterations=1 --stdout.interval=1 -q --tags lab /dev/ttyACM0"]
  timeout  = "10s"
  interval = "60s"
  data_format = "json_v2"

  # chissoku の JSON:
  # {"co2":1242,"humidity":31.3,"temperature":29.4,"tags":["Living"],"timestamp":"2023-02-01T20:50:51.240+09:00"}
  [[inputs.exec.json_v2]]
    measurement_name = "co2_env"
    timestamp_path   = "timestamp"
    # chissoku は ISO8601(+TZ) を出すので Go 参照時刻で指定
    timestamp_format = "2006-01-02T15:04:05.999999999Z07:00"
    timestamp_timezone = "Local"

    # 数値フィールド
    [[inputs.exec.json_v2.field]]
      path = "co2"
      type = "int"
    [[inputs.exec.json_v2.field]]
      path = "humidity"
      type = "float"
    [[inputs.exec.json_v2.field]]
      path = "temperature"
      type = "float"

    # 任意:--tags で1個だけ渡す場合、それを location タグとして保存
    [[inputs.exec.json_v2.tag]]
      path = "tags.0"
      rename = "location"
      type = "string"

# ===== InfluxDB 2 への出力 =====
[[outputs.influxdb_v2]]
  urls = ["http://192.168.100.14:8086"]
  token = "$INFLUX_TOKEN"
  organization = "proxmox"
  bucket       = "ROCK Pi S"

[agent]
skip_processors_after_aggregators = true
こんな感じでテストもできる
telegraf --test --config /etc/telegraf/telegraf.d/chissoku.conf
2025-08-31T15:12:49Z I! Loading config: /etc/telegraf/telegraf.d/chissoku.conf
2025-08-31T15:12:49Z I! Starting Telegraf 1.35.4 brought to you by InfluxData the makers of InfluxDB
2025-08-31T15:12:49Z I! Available plugins: 238 inputs, 9 aggregators, 34 processors, 26 parsers, 65 outputs, 6 secret-stores
2025-08-31T15:12:49Z I! Loaded inputs: exec
2025-08-31T15:12:49Z I! Loaded aggregators:
2025-08-31T15:12:49Z I! Loaded processors:
2025-08-31T15:12:49Z I! Loaded secretstores:
2025-08-31T15:12:49Z W! Outputs are not used in testing mode!
2025-08-31T15:12:49Z I! Tags enabled: host=rockpis
> co2_env,host=rockpis,location=lab co2=805i,humidity=40.6,temperature=32.5 1756653171000000000
Telegraf に渡す API Token
https://docs.influxdata.com/telegraf/v1/configuration/#example-telegraf-environment-variables を参考にできる。/etc/default/telegraf が telegraf.service が参照するので INFLUX_TOKEN=... のようにファイルへ書き込めば利用される。
Telegraf にシリアルポートを読む権限を与える
/dev/ttyACM0 を telegraf ユーザーが権限を持ってなかったため、以下のコマンドを実行して権限を付与する
root@rockpis:~# ls -l /dev/ttyACM0
crw-rw---- 1 root dialout 166, 0  9月  1 00:30 /dev/ttyACM0
root@rockpis:~# usermod -aG dialout telegraf
びっくりしたんだけど、NTP で時刻合わせが働いてないことに気づいたので以下を行った
apt install chrony -y-
nano /etc/chrony/chrony.conf- 日本の NTP サーバーを追加
server ntp.nict.jp iburstserver ntp.jst.mfeed.ad.jp iburst
- 日本の NTP サーバーを追加
systemctl restart chrony
CPU の温度も以下のスクリプトを書けば取れる。これは motd を作成してる /etc/update-motd.d/ に存在するスクリプトからロジックを拝借した。/usr/local/bin/boardtemp として実行権限を与え保存する。
#!/bin/bash

getboardtemp() {
  local raw_temp board_temp
  if [ -f /etc/armbianmonitor/datasources/soctemp ]; then
    read raw_temp </etc/armbianmonitor/datasources/soctemp 2>/dev/null
    if [[ "$raw_temp" =~ ^[1-9][0-9]*\.?[0-9]*$ ]] && awk "BEGIN {exit !($raw_temp < 200)}"; then
      # degree C
      board_temp="${raw_temp%.*}"
    else
      # usually millidegree C
      board_temp=$(awk '{printf("%d",$1/1000)}' <<<"${raw_temp}")
    fi
  elif [ -f /etc/armbianmonitor/datasources/pmictemp ]; then
    board_temp=$(awk '{printf("%d",$1/1000)}' </etc/armbianmonitor/datasources/pmictemp)
  else
    return 1
  fi
  board_temp=$((board_temp + CPU_TEMP_OFFSET))
  printf "%s\n" "${board_temp}"
}

getboardtemp
これを
/etc/telegraf/telegraf.d/boardtemp.conf を作成する。
[[inputs.exec]]
  commands = ["/usr/local/bin/boardtemp"]
  name_override = "cpu_temperature"
  timeout = "5s"
  data_format = "value"
  interval = "10s"

[[outputs.influxdb_v2]]
  urls = ["http://192.168.100.14:8086"]
  token = "$INFLUX_TOKEN"
  organization = "proxmox"
  bucket       = "ROCK Pi S"

[agent]
skip_processors_after_aggregators = true
ちゃんとテストもする
telegraf --test --config /etc/telegraf/telegraf.d/boardtemp.conf
2025-09-02T12:05:17Z I! Loading config: /etc/telegraf/telegraf.d/boardtemp.conf
2025-09-02T12:05:17Z I! Starting Telegraf 1.35.4 brought to you by InfluxData the makers of InfluxDB
2025-09-02T12:05:17Z I! Available plugins: 238 inputs, 9 aggregators, 34 processors, 26 parsers, 65 outputs, 6 secret-stores
2025-09-02T12:05:17Z I! Loaded inputs: exec
2025-09-02T12:05:17Z I! Loaded aggregators:
2025-09-02T12:05:17Z I! Loaded processors:
2025-09-02T12:05:17Z I! Loaded secretstores:
2025-09-02T12:05:17Z W! Outputs are not used in testing mode!
2025-09-02T12:05:17Z I! Tags enabled: host=rockpis
> cpu_temperature,host=rockpis value=40i 1756814717000000000
network 関連のメトリクスも送りたいので /etc/telegraf/telegraf.conf の一部をコメントアウトして有効にする
[[inputs.net]]
interfaces = ["wlan0", "lo"]
ignore_protocol_stats = true
Wi-Fi のみの利用なのでこうしてる。Ethernet を利用する場合はおそらく interfaces へ "eth*" を加えることができる
Plug Mini の消費電力を送る
/usr/local/bin/sb_plug_status に shell script を記載する。環境変数は /etc/default/telegraf に記載する
#!/usr/bin/env bash
set -euo pipefail

: "${SWITCHBOT_API_TOKEN:?export please}"
: "${SWITCHBOT_API_SECRET:?export please}"
DEVICE_ID="${1:?Usage: sb_plug_Status <DEVICE_ID>}"

BASE_URL="https://api.switch-bot.com/v1.1/devices"
t="$(date +%s%3N)"
nonce="$(uuidgen)"
sign="$(printf '%s' "${SWITCHBOT_API_TOKEN}${t}${nonce}" \
  | openssl dgst -sha256 -hmac "${SWITCHBOT_API_SECRET}" -binary \
  | base64 -w 0)"

curl -sS --request GET \
  -H "Content-Type: application/json; charset=utf8" \
  -H "Authorization: ${SWITCHBOT_API_TOKEN}" \
  -H "sign: ${sign}" -H "t: ${t}" -H "nonce: ${nonce}" \
  "${BASE_URL}/${DEVICE_ID}/status"
/etc/telegraf/telegraf.d/switchbot_plugmini.conf を作成して telegraf 経由で送れるようにする。30分に一回を想定。
[[inputs.exec]]
  commands  = ["/usr/local/bin/sb_plug_status <device-id>"]
  timeout   = "10s"
  interval  = "30m"
  data_format = "json_v2"

  [[inputs.exec.json_v2]]
    measurement_name = "switchbot.plugmini"

    [[inputs.exec.json_v2.field]]
      path = "body.voltage"
      type = "float"   # Volt
    [[inputs.exec.json_v2.field]]
      path = "body.electricCurrent"
      type = "float"   # mA
    [[inputs.exec.json_v2.field]]
      path = "body.electricityOfDay"
      type = "int"     # minutes
    [[inputs.exec.json_v2.field]]
      path = "body.weight"
      type = "float"   # 「日消費電力(W相当)」

    [[inputs.exec.json_v2.tag]]
      path = "body.deviceId"
      rename="device_id"
      type = "string"
    [[inputs.exec.json_v2.tag]]
      path = "body.deviceType"
      rename = "device_type"
      type = "string"
    [[inputs.exec.json_v2.tag]]
      path = "body.power"
      rename = "power_state"
      type = "string"  # "on"/"off"