【Ruby】RailsのDevise(ログイン機能)導入手順
はじめに:
プログラミング初学者がRailsアプリケーションでログイン機能を実装する上で必要な知識として、Deviseがある。プログラミング初学者がVScodeを用いてRails環境の構築後、Deviseを用いてユーザー新規登録とログイン機能を実装できることを目標とした記事となっている。
開発環境:
環境構築がまだの方はこちらから
- windows 11
- Ubuntu 22.04
- wsl 2.1.5.0
- ruby 3.2.3
- rails 6.1.7
- sqlite3 3.37.2
deviseとは:
・railsで作ったwebアプリケーションに簡単に認証機能(ログイン機能)を実装できるgemのこと。
・devise を利用すると、このユーザテーブルを自動的に作成してくれる。
deviseを導入する
1.deviseをインストールする
1.Gemfileの最後の行に下記を追記する
gem 'devise'
↓Gemのリスト(よく使われているライブラリを見つけてみよう!)
2.gemをインストールする
$ bundle install
3.deviseをインストールする
$ rails g devise:install
2.userモデルを作成し、マイグレーションを実行する
1: userモデルを作成する。
$ rails g devise User
※モデルの命名規則は、1文字目が大文字+単数形であるため「User」となる。
※deviseのモデルを作成するため、deviseと入れる。rails g modelでない点に注意。
2: モデルファイルとマイグレーションが作成されているのを確認する。
class User < ApplicationRecord
  # Include default devise modules. Others available are:
  # :confirmable, :lockable, :timeoutable, :trackable and :omniauthable
  devise :database_authenticatable, :registerable,
         :recoverable, :rememberable, :validatable
end
# frozen_string_literal: true

class DeviseCreateUsers < ActiveRecord::Migration[6.1]
  def change
    create_table :users do |t|
      ## Database authenticatable
      t.string :email,              null: false, default: ""
      t.string :encrypted_password, null: false, default: ""

      ## Recoverable
      t.string   :reset_password_token
      t.datetime :reset_password_sent_at

      ## Rememberable
      t.datetime :remember_created_at

      ## Trackable
      # t.integer  :sign_in_count, default: 0, null: false
      # t.datetime :current_sign_in_at
      # t.datetime :last_sign_in_at
      # t.string   :current_sign_in_ip
      # t.string   :last_sign_in_ip

      ## Confirmable
      # t.string   :confirmation_token
      # t.datetime :confirmed_at
      # t.datetime :confirmation_sent_at
      # t.string   :unconfirmed_email # Only if using reconfirmable

      ## Lockable
      # t.integer  :failed_attempts, default: 0, null: false # Only if lock strategy is :failed_attempts
      # t.string   :unlock_token # Only if unlock strategy is :email or :both
      # t.datetime :locked_at


      t.timestamps null: false
    end

    add_index :users, :email,                unique: true
    add_index :users, :reset_password_token, unique: true
    # add_index :users, :confirmation_token,   unique: true
    # add_index :users, :unlock_token,         unique: true
  end
end
3: 新規登録時にユーザー名を使用したいため、[name]カラムをマイグレーションファイルに追記する。
class DeviseCreateUsers < ActiveRecord::Migration[6.1]
  def change
    create_table :users do |t|
      ## Database authenticatable
      t.string :email,              null: false, default: ""
      t.string :encrypted_password, null: false, default: ""
   ## ↓を追加している。
      t.string :name,               null: false, default: ""

      ## Recoverable
      t.string   :reset_password_token
      t.datetime :reset_password_sent_at
4: マイグレーションを実行する
rails db:migrate
3.サーバーを立ち上げ、新規登録画面とログイン画面の表示を確認する。
1: サーバーを起動する。
rails s
2: ルーティングを確認するコマンドを実行し、出力結果を確認する。
rails routes -g user
                  Prefix Verb   URI Pattern                    Controller#Action
        new_user_session GET    /users/sign_in(.:format)       devise/sessions#new
            user_session POST   /users/sign_in(.:format)       devise/sessions#create
    destroy_user_session DELETE /users/sign_out(.:format)      devise/sessions#destroy
       new_user_password GET    /users/password/new(.:format)  devise/passwords#new
      edit_user_password GET    /users/password/edit(.:format) devise/passwords#edit
           user_password PATCH  /users/password(.:format)      devise/passwords#update
                         PUT    /users/password(.:format)      devise/passwords#update
                         POST   /users/password(.:format)      devise/passwords#create
cancel_user_registration GET    /users/cancel(.:format)        devise/registrations#cancel
   new_user_registration GET    /users/sign_up(.:format)       devise/registrations#new
  edit_user_registration GET    /users/edit(.:format)          devise/registrations#edit
       user_registration PATCH  /users(.:format)               devise/registrations#update
                         PUT    /users(.:format)               devise/registrations#update
                         DELETE /users(.:format)               devise/registrations#destroy
                         POST   /users(.:format)               devise/registrations#create
3: http://localhost:3000/users/sign_upにアクセスし、新規登録画面が表示されるか確認する。
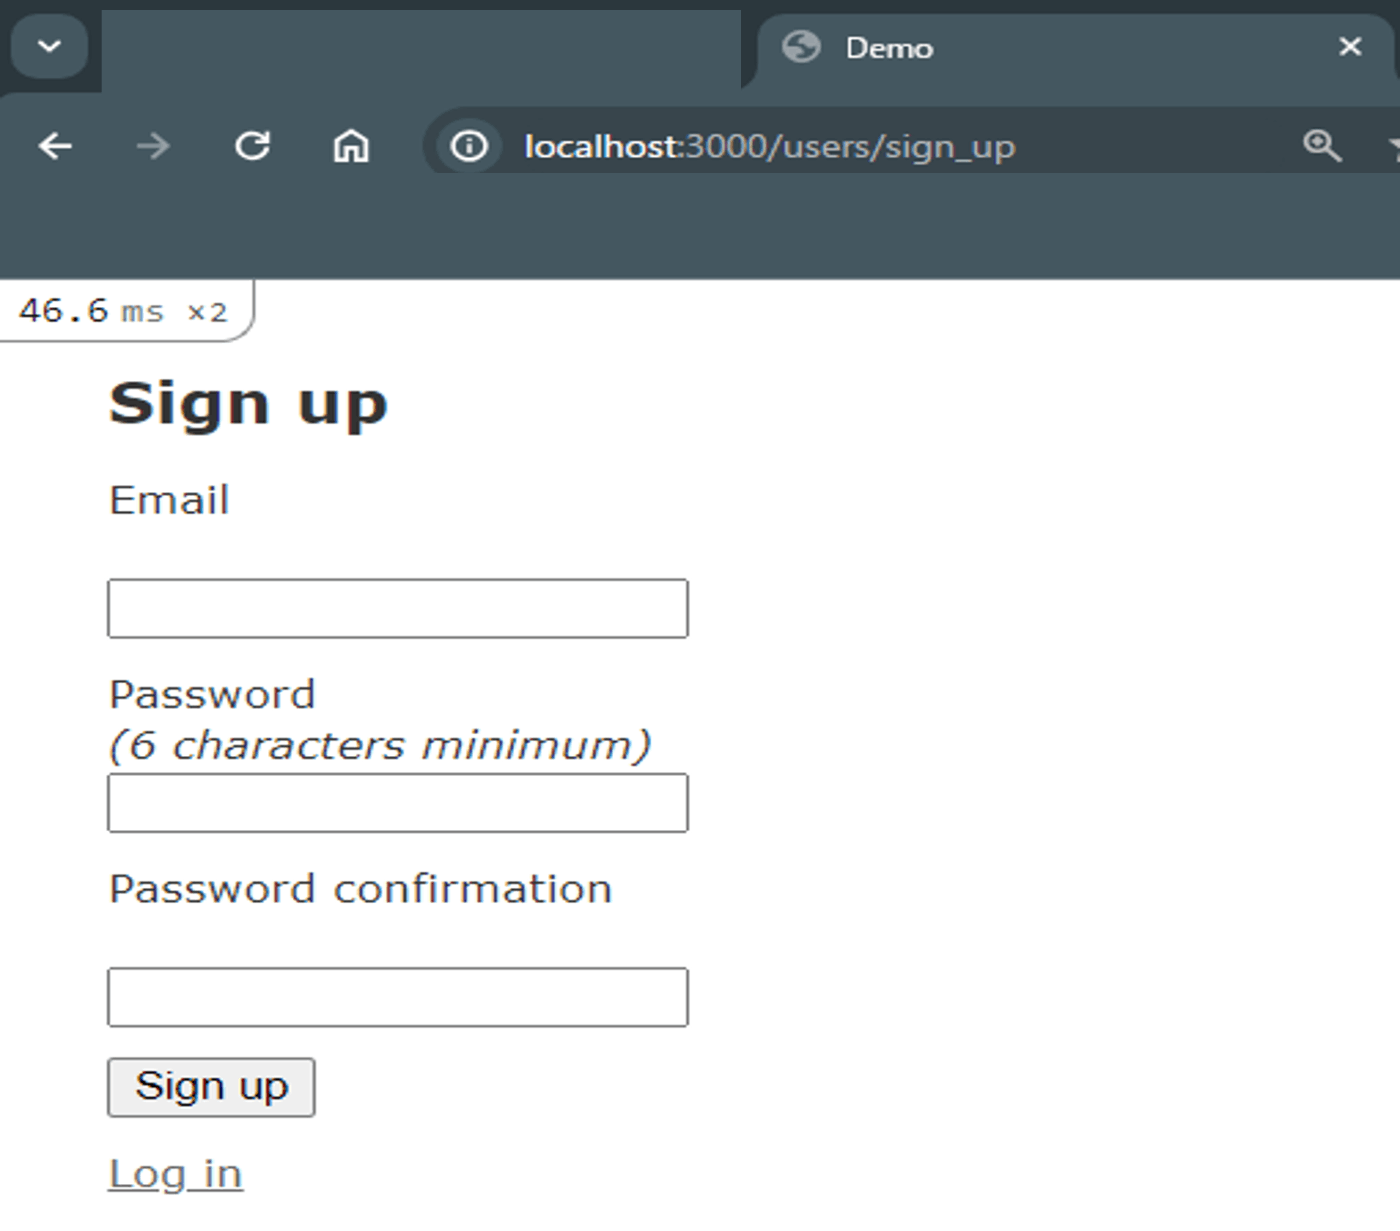
新規登録画面
4: http://localhost:3000/users/sign_inにアクセスし、ログイン画面が表示されるか確認する。
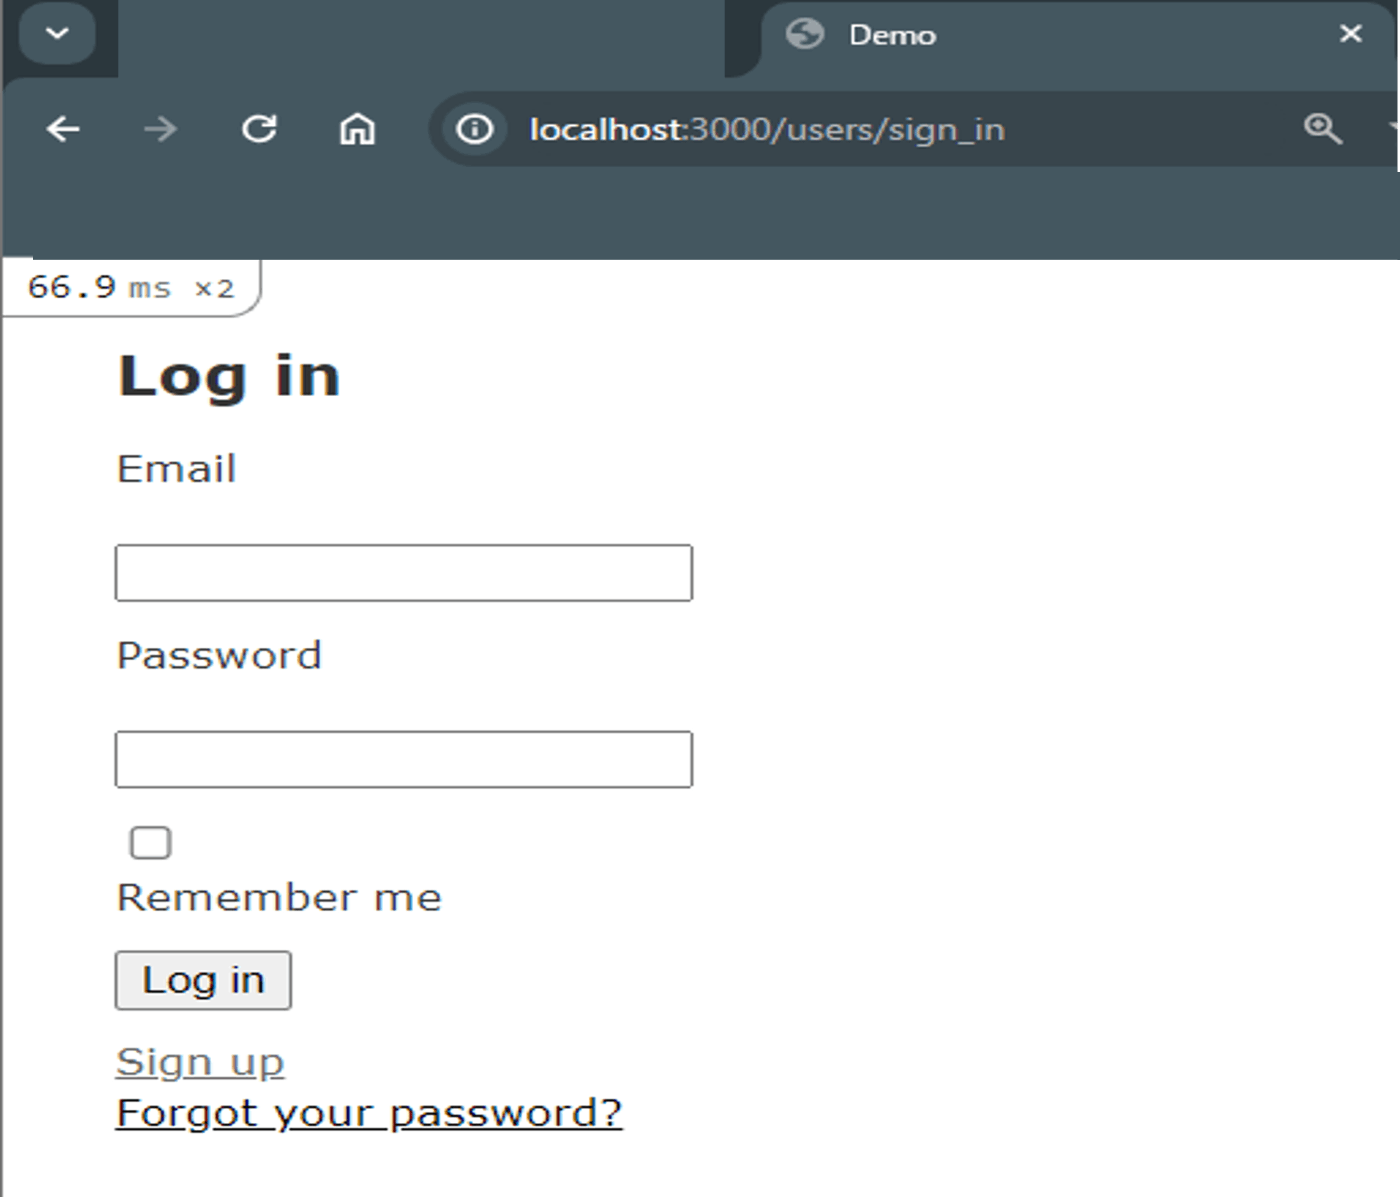
ログイン画面
4.deviseビューをカスタマイズする。(新規登録画面にユーザーネーム(name)のフォームとログアウトボタンを作成)
1: カスタマイズするための、Viewを作成する。
rails g devise:views
Running via Spring preloader in process 349902
      invoke  Devise::Generators::SharedViewsGenerator
      create    app/views/devise/shared
      create    app/views/devise/shared/_error_messages.html.erb
      create    app/views/devise/shared/_links.html.erb
      invoke  form_for
      create    app/views/devise/confirmations
      create    app/views/devise/confirmations/new.html.erb
      create    app/views/devise/passwords
      create    app/views/devise/passwords/edit.html.erb
      create    app/views/devise/passwords/new.html.erb
      create    app/views/devise/registrations
      create    app/views/devise/registrations/edit.html.erb
      create    app/views/devise/registrations/new.html.erb
      create    app/views/devise/sessions
      create    app/views/devise/sessions/new.html.erb
      create    app/views/devise/unlocks
      create    app/views/devise/unlocks/new.html.erb
      invoke  erb
      create    app/views/devise/mailer
      create    app/views/devise/mailer/confirmation_instructions.html.erb
      create    app/views/devise/mailer/email_changed.html.erb
      create    app/views/devise/mailer/password_change.html.erb
      create    app/views/devise/mailer/reset_password_instructions.html.erb
      create    app/views/devise/mailer/unlock_instructions.html.erb
2: ビューにユーザーネーム(name)のフォームを追加する。
<h2>Sign up</h2>

<%= form_for(resource, as: resource_name, url: registration_path(resource_name)) do |f| %>
  <%= render "devise/shared/error_messages", resource: resource %>

    #### 追加 ####
  <div class="field">
    <%= f.label :name %><br>
    <%= f.text_field :name %>
  </div>
  #### ここまで ####
  <div class="field">
    <%= f.label :email %><br />
    <%= f.email_field :email, autofocus: true, autocomplete: "email" %>
  </div>

  <div class="field">
    <%= f.label :password %>
    <% if @minimum_password_length %>
    <em>(<%= @minimum_password_length %> characters minimum)</em>
    <% end %><br />
    <%= f.password_field :password, autocomplete: "new-password" %>
  </div>

  <div class="field">
    <%= f.label :password_confirmation %><br />
    <%= f.password_field :password_confirmation, autocomplete: "new-password" %>
  </div>

  <div class="actions">
    <%= f.submit "Sign up" %>
  </div>
<% end %>

<%= render "devise/shared/links" %>
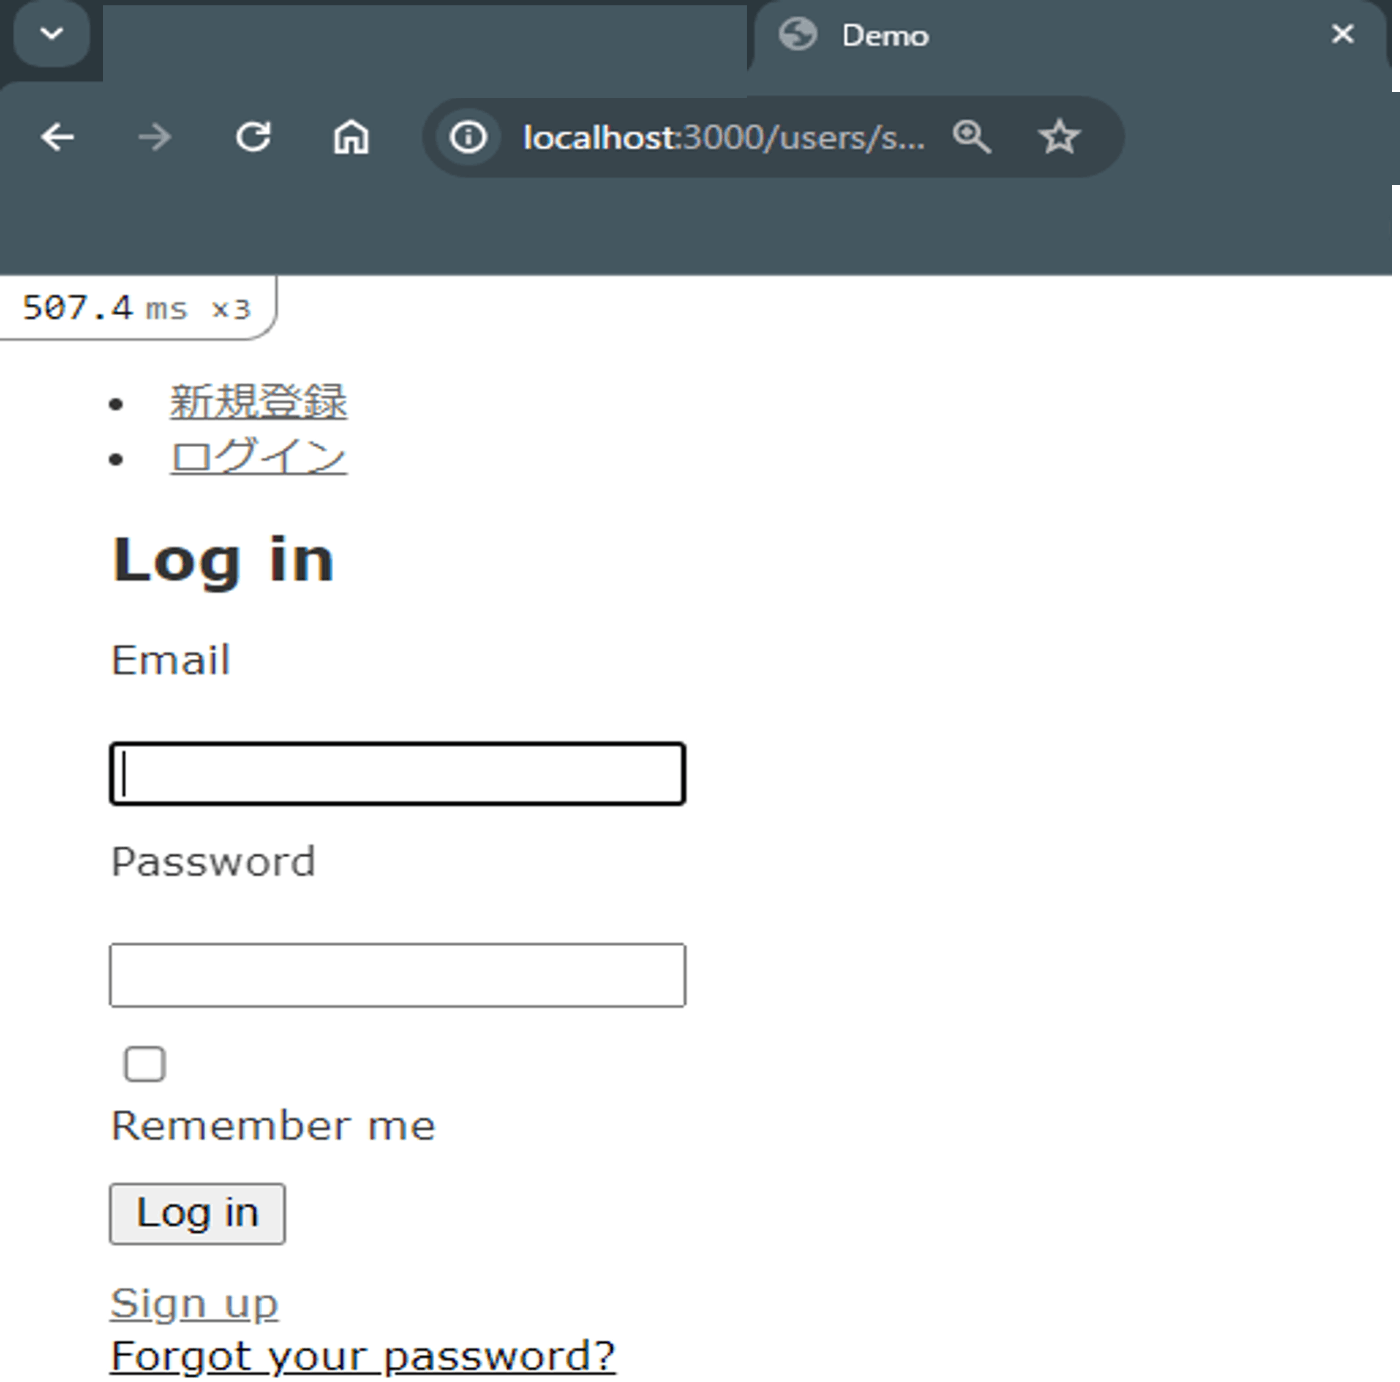
3: http://localhost:3000/users/sign_upにアクセスし、表示を確認する。

nameを追加した新規登録画面
4: app/views/layouts/application.html.erbファイルを編集し、ログアウトリンクを作成する。
<!DOCTYPE html>
<html>
  <head>
    <title>Demo</title>
    <meta name="viewport" content="width=device-width,initial-scale=1">
    <%= csrf_meta_tags %>
    <%= csp_meta_tag %>

    <%= stylesheet_link_tag 'application', media: 'all', 'data-turbolinks-track': 'reload' %>
    <%= javascript_pack_tag 'application', 'data-turbolinks-track': 'reload' %>
  </head>
  #### ここから追加 ####
  <header>
    <% if user_signed_in? %>
      <li>
        <%= link_to "ログアウト", destroy_user_session_path, method: :delete %>
      </li>
    <% else %>
      <li>
        <%= link_to "新規登録", new_user_registration_path %>
      </li>
      <li>
        <%= link_to "ログイン", new_user_session_path %>
      </li>
    <% end %>
  </header>
  #### ここまで追加 ####
  <body>
    <%= yield %>
  </body>
</html>

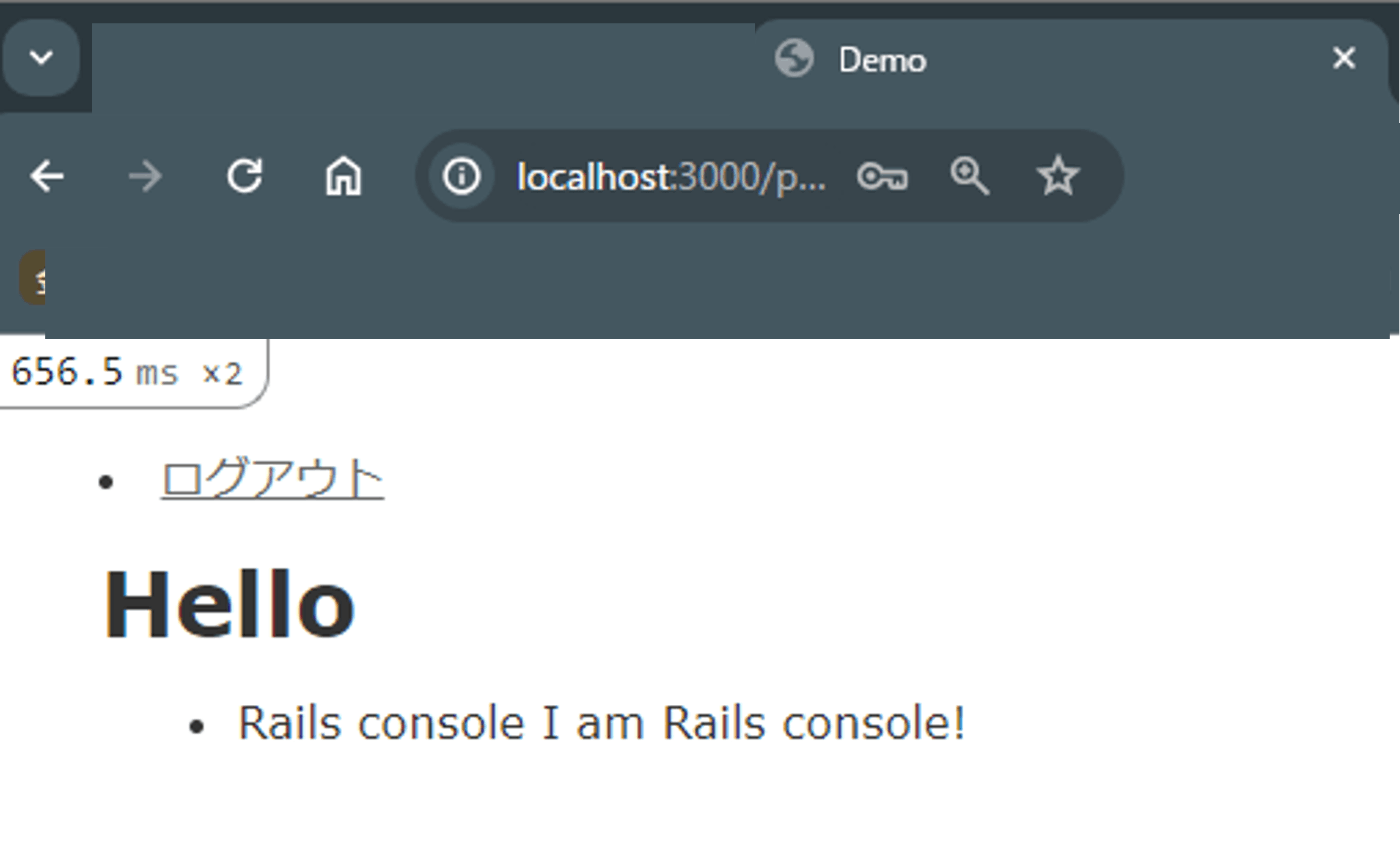
ヘッダーが追加された状態の新規登録画面
※ログインしたら、ログアウトボタンが表示されるようになる。
5.deviseコントローラをカスタマイズする①(nameを保存できるようにし、新規登録後の処理を追加する)
1: deviseのコントローラを作成する。
rails g devise:controllers users
Running via Spring preloader in process 350371
      create  app/controllers/users/confirmations_controller.rb
      create  app/controllers/users/passwords_controller.rb
      create  app/controllers/users/registrations_controller.rb
      create  app/controllers/users/sessions_controller.rb
      create  app/controllers/users/unlocks_controller.rb
      create  app/controllers/users/omniauth_callbacks_controller.rb
===============================================================================

Some setup you must do manually if you haven't yet:

  Ensure you have overridden routes for generated controllers in your routes.rb.
  For example:

    Rails.application.routes.draw do
      devise_for :users, controllers: {
        sessions: 'users/sessions'
      }
    end

===============================================================================
2: app/controllers/registrations_controller.rbのコメントアウト部分の解除し、[:attribute]を[:name]に変更する。
class Users::RegistrationsController < Devise::RegistrationsController
  <!-- この部分のコメントアウトを解除する -->
  before_action :configure_sign_up_params, only: [:create]
  before_action :configure_account_update_params, only: [:update]
  <!-- ここまで -->

  # GET /resource/sign_up
  # def new
  #   super
  # end

  # POST /resource
  # def create
  #   super
  # end

  # GET /resource/edit
  # def edit
  #   super
  # end

  # PUT /resource
  # def update
  #   super
  # end

  # DELETE /resource
  # def destroy
  #   super
  # end

  # GET /resource/cancel
  # Forces the session data which is usually expired after sign
  # in to be expired now. This is useful if the user wants to
  # cancel oauth signing in/up in the middle of the process,
  # removing all OAuth session data.
  # def cancel
  #   super
  # end
  <!-- この部分の該当部分のコメントアウトを解除する -->
  protected

  # If you have extra params to permit, append them to the sanitizer.
  def configure_sign_up_params
   devise_parameter_sanitizer.permit(:sign_up, keys: [:name])
  end

  # If you have extra params to permit, append them to the sanitizer.
  def configure_account_update_params
    devise_parameter_sanitizer.permit(:account_update, keys: [:name])
  end

  # The path used after sign up.
  def after_sign_up_path_for(resource)
    super(resource)
  end

  # The path used after sign up for inactive accounts.
  def after_inactive_sign_up_path_for(resource)
    super(resource)
  end
  <!-- ここまで -->
end
【authenticate_user!とは】(応用編)】
・ユーザーの認証(ログイン)を確認するためのもの。ユーザーがログインしていない場合に、ログイン画面にリダイレクトする。
以下のようなbefore_actionの使い方をしていたとしましょう。
class User::PostsController < ApplicationController
  before_action :authenticate_user!
勘の良い方はお気づきかと思いますが、authenticateは「認証する」user!は「ユーザーでない」という意味。ログインしていないユーザーはそのコントローラのアクションを実行させないようになっている。
【public/private/protectedメソッドとは(応用編)】
【public】
- クラスの主な責任や目的を明らかにする
- 外部から実行されることが想定される
- 思いつくままに変更されたりはしない
- 他者が依存したとしても安全
- テストで完全に文書化されている
【private】
- 実装の詳細に関わる部分
- 外部から実行されることは想定されていない
- 変更されやすい
- 他者が依存するのは危険
【protected】
- 外部からは隠蔽されている
- 仲間(自クラスかサブクラスのレシーバー、親子関係にあるクラスのみ)からは実行可能
【before_actionのオプションとは】(発展編)】
before_actionは以下のオプションを指定でき、アクションを実行する前処理が可能となる。
| オプション | 意味 |
|---|---|
| :only | 適用したいアクションを指定 |
| :except | 適用しないアクションを指定 |
| :if | 適用する条件を指定 |
| :unless | 適用しない条件を指定 |
例)
class User::PostsController < ApplicationController
  before_action :authenticate_user!, only: [:edit, :update]
ログインしているユーザーのみeditとupdateアクションの処理に進める。
3: 新規登録後に遷移させたいPathを確認する。
rails routes -g post
Prefix   Verb   URI Pattern                      Controller#Action
     posts GET    /posts(.:format)               posts#index  #このPathを選択
           POST   /posts(.:format)               posts#create
new_post   GET    /posts/new(.:format)           posts#new
edit_post  GET    /posts/:id/edit(.:format)      posts#edit
     post  GET    /posts/:id(.:format)           posts#show
           PATCH  /posts/:id(.:format)           posts#update
           PUT    /posts/:id(.:format)           posts#update
           DELETE /posts/:id(.:format)           posts#destroy
4: 新規登録完了後の遷移先のPath(posts_path=投稿一覧)を指定する。
class Users::RegistrationsController < Devise::RegistrationsController
  before_action :configure_sign_up_params, only: [:create]
  before_action :configure_account_update_params, only: [:update]
  ~~
  ~~
 # The path used after sign up.
  def after_sign_up_path_for(resource)
    posts_path
  end

  # The path used after sign up for inactive accounts.
  def after_inactive_sign_up_path_for(resource)
    posts_path
  end
5: ルーティングファイル(route.rb)の中に記載されているdevise_for :usersを以下のように変更する。
Rails.application.routes.draw do
  devise_for :users, controllers: {
    registrations: 'users/registrations'
  }
  resources :posts
end
6: 新規登録フォームの内容を入力し、[sign up]ボタンを押したあとに投稿一覧画面が表示されるか確認する。
新規登録後の投稿一覧画面
7: ログアウトボタンを押した後の処理を追加する。(①と②を変更)
class Users::SessionsController < Devise::SessionsController
  # before_action :configure_sign_in_params, only: [:create]

  # GET /resource/sign_in
  # def new
  #   super
  # end

  # POST /resource/sign_in
  # def create
  #   super
  # end

  # DELETE /resource/sign_out
  # def destroy
  #   super
  # end

  protected ①コメントを解除する。

  # If you have extra params to permit, append them to the sanitizer.
  # def configure_sign_in_params
  #   devise_parameter_sanitizer.permit(:sign_in, keys: [:attribute])
  # end

 ②サインアウト後のリダイレクト先を指定するメソッドを追加する。
  def after_sign_out_path_for(resource_or_scope)
    new_user_session_path
  end
end
7: ログアウトボタンを押した後にログイン画面に遷移するか確認する。
ログアウト完了画面
6.deviseコントローラをカスタマイズする②(ログイン後の処理を追加する)
1: 先ほど新規登録を行ったユーザーでログインして投稿一覧(posts_path)が表示されるようにするため、app/controllers/users/sessions_controller.rbの内容を2か所更新する。
class Users::SessionsController < Devise::SessionsController
  <!-- この部分の該当部分のコメントアウトを解除する -->
  before_action :configure_sign_in_params, only: [:create]
  <!-- ここまで -->

  # GET /resource/sign_in
  # def new
  #   super
  # end

  # POST /resource/sign_in
  # def create
  #   super
  # end

  # DELETE /resource/sign_out
  # def destroy
  #   super
  # end

  protected

  # If you have extra params to permit, append them to the sanitizer.
   # def configure_sign_in_params
   #   devise_parameter_sanitizer.permit(:sign_in, keys: [:attribute])
   # end
  <!-- 追加   -->
  # サインイン後のリダイレクト先を指定する
  def after_sign_in_path_for(resource)
    posts_path
  end
 <!-- ここまで -->
  # サインアウト後のリダイレクト先を指定する
  def after_sign_out_path_for(resource_or_scope)
    new_user_session_path
  end
end
2: ルーティングファイル(routes.rb)を編集する。
Rails.application.routes.draw do
  devise_for :users, controllers: {
    registrations: 'users/registrations',
    sessions: 'users/sessions'
  }
  resources :posts
end
3: ログイン画面からログインに必要な内容を入力し、「Log in」を押す。投稿一覧画面に遷移すれば成功!
まとめ
参考サイト
おわりに
今回、プログラミング初学者がRailsアプリケーションを動かす際に必要なDeviseについて学んだ。MVCモデルやCRUDを理解しながら、Deviseを実装することで、自分の思い描くログイン機能が実装可能となる。
Discussion
公式の情報よりもわかりやすく、初のdevise導入をスムーズに行うことができました。
ありがとうございました。
わざわざコメントありがとうございます。今後の励みになります。
なにかご要望がありましたら、コメントまでお願い致します^^