Gemma モデルで推論パイプラインを試してみた
はじめに
こんにちは、クラウドエース データソリューション部所属の中村です。
クラウドエースの IT エンジニアリングを担うシステム開発部の中で、特にデータ基盤構築・分析基盤構築からデータ分析までを含む一貫したデータ課題の解決を専門とするのがデータソリューション部です。
データソリューション部 では、Google Cloud が提供しているデータ領域のプロダクトについて、新規リリースをキャッチアップするための調査報告会を毎週実施しています。 新規リリースの中でも、特に重要と考えるリリースを掘り下げ、記事として公開しています。
今回紹介するのは、2024年2月21日に発表された Dataflow に関するリリースです。
このリリースにより、Dataflow で Gemma モデルの推論を利用できるようになりました。
本記事では、Google Colaboratory(以下 Google Colab)、Workbench および Dataflow の3つの環境で Gemma モデルで推論する方法についてご紹介します。
なお、Workbench は DirectRunner の実行環境として利用するため、Notebook は使用しないことをご承知おきください。
Gemmaモデルとは
Gemma モデルは、Google が開発した軽量なオープンモデルです。
Gemini(旧 Bard) の技術に基づいたモデルで、テキスト生成やチューニングに利用できます。
パラメータ数の違う「2B」と「7B」の2種類のモデルウェイトが用意されています。
Kaggle からダウンロードして使うこともできます。
Dataflowとは
Dataflow は、Apache Beam で記述されたリアルタイムまたはバッチ処理を並列分散して処理できるプロダクトです。
サーバーレスでフルマネージドなプロダクトのため、スケーリングやログ収集・負荷分散などを自動的に行います。
そのため、インフラ部分の管理は Google Cloud にお任せして、ユーザーはデータパイプライン開発のみに注力することができます。
Google Cloud の他のサービスとも連携が取りやすく、広く使われているプロダクトです。
Gemma モデルの動作確認
今回は、Google Colab では無料割り当ての GPU、Workbench および Dataflow では CPU を使用します。
モデルの起動する際のオーバーヘッドに大きな差があるため、本記事では Google Colab よりも Workbench および Dataflow のほうが実行時間が長くなっています。
しかし、Workbench および Dataflow でも GPU を利用することで、より高速に実行することが可能です。
Google Colab で推論
Google Colab を使えば、環境構築の手間なく簡単に Gemma モデルを実行できます。
API キーを設定
コードを実行するには、以下の手順でKaggleの同意フォームに同意し、APIキーを取得する必要があります。
- 同意フォームにアクセスして、利用規約に同意します
- Kaggleの画面右上の自分のアイコンをクリックし、「Settings」を選択します
- 「Account」タブから「API」の中の、「Create New Token」を選択します

- kaggle.jsonをダウンロードします
- Google Colabのサンプルコードにアクセスし、画面左の鍵のアイコンをクリックします
- kaggle.jsonに記載の「username」と「key」をそれぞれ、「KAGGLE_USERNAME」「KAGGLE_KEY」としてシークレットに設定します

これでkaggleのAPIキーを設定し、アクセスする準備が整いました。
コード実行
Google Colab で Gemma モデルの挙動を確認します。
API キーを設定で開いた Google Colab のサンプルコードを実行するだけで確認できます。

コードを実行すると、入力した質問の回答を生成して出力していることがわかります。
Google Colab では無料で GPU が利用できるため、モデルの読み込みも推論も高速に行えます。
Keras 形式で保存
Dataflow で Gemma モデルを動かすためには、.keras 形式である必要があります。
そのため、Google Colab を Google Drive にマウントし、Gemma モデルを .keras 形式で出力しておくとよいでしょう。
サンプルコードに以下の行を追加すれば、.keras 形式でモデルを出力できます。
# Google Driveをマウントする
from google.colab import drive
drive.mount('/content/drive')
# Gemma モデルをGoogle Driveのマイドライブに保存する
gemma_lm.save('/content/drive/MyDrive/gemma.keras')
モデルが約9GBあるので、出力まで少し時間がかかります。
Workbench で推論
実行のために環境構築が必要ですが、OS やバージョンにより必要な手順が異なるので、本記事では Vertex AI Workbench(以下 Workbench)のインスタンスを利用します。
Workbench をApache Beam の DirectRunner の実行環境として使う(ローカル代わりにする)ことで、Keras 形式で保存で出力した gemma.keras で推論します。
そのため、Notebook は登場しないことをご承知おきください。
ノートブックの作成
以下のノートブックを作成します。
-
Workbench を開き、「新規作成」を押します

-
「詳細オプション」を押します

インスタンスの詳細設定が開きます。
必要に応じてインスタンスの名前を変更します。 -
「マシンタイプ」の中から「e2-standard-8」を選択します
今回は keras モデルの読み込みにメモリが必要なので、「e2-standard-8」を使用します。
マシンタイプごとの料金の詳細については公式ドキュメントをご確認ください。 -
「作成」を押します
少し待つとインスタンスが作成されます。

環境構築
作成したインスタンスの環境で、推論のための環境構築をします。
デフォルトの Python3.10 を利用し、以下のコマンドで必要なライブラリをインストールします。
pip install apache-beam[gcp]==2.53.0 tensorflow-text==2.16.1 tensorflow-hub keras-nlp
しばらくするとインストールが完了します。
コードについて
公式ドキュメントに記載されているサンプルコードをベースに、文章生成コードを作成しました。
全文は以下です。
*利用の際は、{BUCKET} を利用する Cloud Storage バケットに変更してください。
import argparse
import apache_beam as beam
import numpy as np
import logging
from apache_beam.ml.inference.tensorflow_inference import TFModelHandlerNumpy
from apache_beam.ml.inference.base import RunInference
from apache_beam.ml.inference import utils
from apache_beam.options.pipeline_options import PipelineOptions, SetupOptions

model_path = "gs://{BUCKET}/gemma.keras"

class MyOptions():
    """Setup options for the pipeline."""
    def setup_options(self, argv) -> None:
        self.parser = argparse.ArgumentParser()
        self._add_argparse_args()
        known_args, pipeline_args = self.parser.parse_known_args(argv)
        pipeline_options = PipelineOptions(pipeline_args)
        pipeline_options.view_as(SetupOptions).save_main_session = True
        return known_args, pipeline_options

    def _add_argparse_args(self):
        """Add custom options for the pipeline."""
        self.parser.add_argument(
            "--input",
            default="How does the brain work?",
            help="Input string for the pipeline",
        )

        self.parser.add_argument(
            "--output",
            default="gs://{BUCKET}/gemma_output_dataflow.txt",
            help="Output gcs path for the pipeline",
        )


def gemma_inference_function(model, batch, inference_args, model_id):
    vectorized_batch = np.stack(batch, axis=0)
    # The only inference_arg expected here is a max_length parameter to
    # determine how many words are included in the output.
    predictions = model.generate(vectorized_batch, **inference_args)
    return utils._convert_to_result(batch, predictions, model_id)


class FormatOutput(beam.DoFn):
    def process(self, element, *args, **kwargs):
        yield "Input: {input}, Output: {output}".format(
            input=element.example, output=element.inference
        )


def run(argv=None):
    """Main entry point; defines and runs the wordcount pipeline."""
    my_options = MyOptions()
    known_args, pipeline_options = my_options.setup_options(argv)
    examples = [known_args.input]
    # Specify the model handler, providing a path and the custom inference function.
    model_handler = TFModelHandlerNumpy(
        model_path, inference_fn=gemma_inference_function
    )
    with beam.Pipeline(options=pipeline_options) as p:
        _ = (
            p
            | beam.Create(examples)  # Create a PCollection of the prompts.
            | RunInference(
                model_handler, inference_args={"max_length": 32}
            )  # Send the prompts to the model and get responses.
            | beam.ParDo(FormatOutput())  # Format the output.
            | "Write to csv" >> beam.io.WriteToText(known_args.output)
        )


if __name__ == "__main__":
    logging.getLogger().setLevel(logging.INFO)
    run()
コードを分解して重要な部分だけ解説します。
- 文章生成
モデルによる文章生成のメソッドです。
Gemma モデルの Keras 実装では、generate() 関数でテキストを生成できます。
受け取った入力を generate() に渡して文章の続きを生成しています。
def gemma_inference_function(model, batch, inference_args, model_id):
  vectorized_batch = np.stack(batch, axis=0)
  # The only inference_arg expected here is a max_length parameter to
  # determine how many words are included in the output.
  predictions = model.generate(vectorized_batch, **inference_args)
  return utils._convert_to_result(batch, predictions, model_id)
- パイプライン
推論パイプラインのメソッドです。
example に記載の文章を Gemma モデルに渡して続きの文章を生成し、フォーマットを整えた後に出力します。
長い文章を生成したい場合は、RunInference の inference_args の max_length オプションを変更してください。
def run(argv=None):
    """Main entry point; defines and runs the wordcount pipeline."""
    my_options = MyOptions()
    known_args, pipeline_options = my_options.setup_options(argv)
    examples = [known_args.input]
    # Specify the model handler, providing a path and the custom inference function.
    model_handler = TFModelHandlerNumpy(
        model_path, inference_fn=gemma_inference_function
    )
    with beam.Pipeline(options=pipeline_options) as p:
        _ = (
            p
            | beam.Create(examples)  # Create a PCollection of the prompts.
            | RunInference(
                model_handler, inference_args={"max_length": 32}
            )  # Send the prompts to the model and get responses.
            | beam.ParDo(FormatOutput())  # Format the output.
            | "Write to csv" >> beam.io.WriteToText(known_args.output)
        )
コードの実行
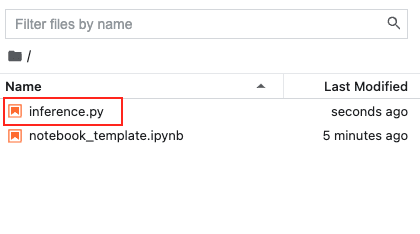
サンプルコードを Workbench インスタンスにコピーします。

Terminal で以下のコマンドを実行し、コードを実行します。
python ./inference.py --input="How does the brain work?" --output=gs://{BUCKET}/gemma_local.txt
CPUを利用しているため、実行には1時間程度かかります。
実行結果の確認
実行が終わったら output 引数で指定した指定のバケットにファイルが保存され、生成した文章が確認できます。

Input: How does the brain work?, Output: How does the brain work?
The brain is the most complex organ in the human body. It is responsible for controlling all of the body’s functions
Input には引数から入力した質問、Output には質問と生成した回答が出力されます。
*出力した文章に/n/nが含まれているため、改行して出力されています。
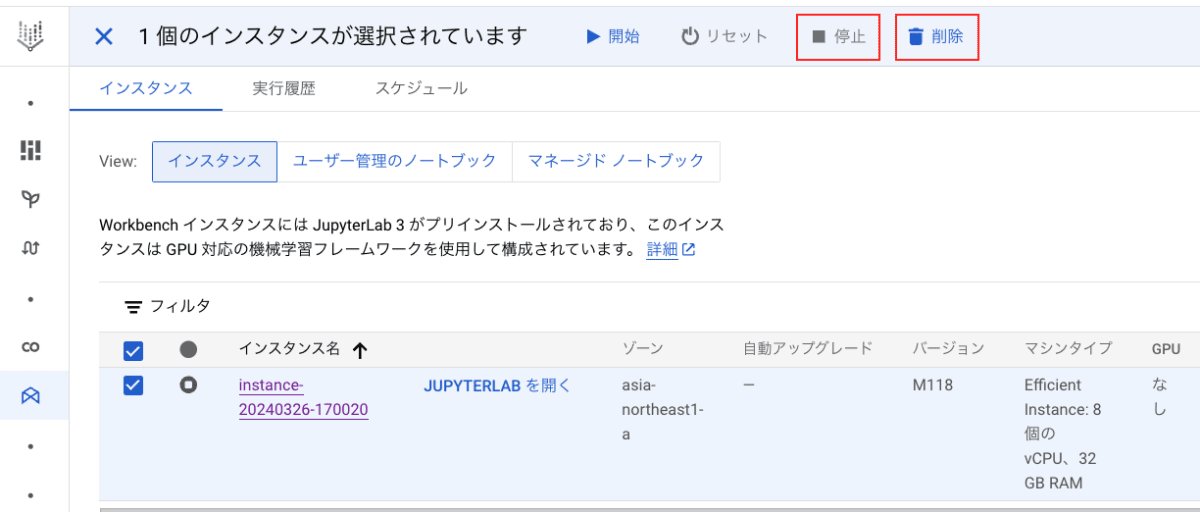
Workbench はインスタンスが稼働している間は課金されるため、使い終わったらインスタンス停止もしくは削除をおすすめします。

Dataflow で推論
Dataflow で、モデルをkeras形式で保存で出力した gemma.keras を使って推論します。
実行時に利用するためのコンテナを作成してから、ジョブをデプロイする流れになります。
リポジトリを作成
Dataflow で利用するコンテナをデプロイするためのリポジトリを作成します。
-
Artifact Registry を開き、「新規作成」を選択します

-
リポジトリの作成
「名前」「リージョン」を記載後、画面下部の「作成」を押します。 -
結果の確認
リポジトリ一覧に、作成したリポジトリがあることを確認します。

コンテナをデプロイ
以下の Dockerfile を使用して、コンテナを作成します。
このコンテナの目的はあくまで Dataflow の実行に使用するベースイメージを作成することです。
そのため、コンテナ内に Gemma モデルの推論コードは含めません。
実行するコードの指定は、Dataflow ジョブのデプロイ時に行います。
FROM ubuntu22.04
RUN ln -sf /usr/share/zoneinfo/Asia/Tokyo /etc/localtime
RUN \
apt-get update \
&& apt-get install -y wget \
&& wget http://archive.ubuntu.com/ubuntu/pool/main/o/openssl/libssl1.1_1.1.1f-1ubuntu2_amd64.deb \
&& dpkg -i libssl1.1_1.1.1f-1ubuntu2_amd64.deb \
&& apt-get install -y liblzma-dev \
&& apt-get install -y curl \
g++ \
python3.10 \
python3.10-venv \
python3-distutils \
&& rm -rf /var/lib/apt/lists/* \
&& update-alternatives --install /usr/bin/python python /usr/bin/python3.10 10 \
&& curl https://bootstrap.pypa.io/get-pip.py | python \
&& pip install --upgrade pip \
&& pip install --no-cache-dir apache-beam[gcp]==2.53.0 tensorflow-text==2.16.1 tensorflow-hub numpy \
&& pip install -q -U keras-nlp\
# Verify that there are no conflicting dependencies.
&& pip check
COPY /opt/apache/beam /opt/apache/beam
# Set the entrypoint to Apache Beam SDK worker launcher.
ENTRYPOINT [ "/opt/apache/beam/boot" ]
Dockerfileのあるディレクトリで、以下のコマンドを実行するとイメージがデプロイできます。
*{}の箇所は、環境に合わせて変更してください。
gcloud builds submit --region={REGION} --tag {REGION}-docker.pkg.dev/{PROJECT_ID}/{REPO_NAME}/{IMAGE_NAME}:latest .
しばらくすれば、指定したリポジトリにイメージが作成されます。
より詳しく Dataflow でコンテナを使用する方法が知りたい方は、こちらの公式ドキュメントをご参照ください。
コードを実行
コードを Dataflow で実行します。
実行環境は、ノートブックの作成および環境構築で作成した Workbench インスタンスを使用します。
以下のコマンドの{}を自分の環境に置き換えて実行すると、Dataflowへジョブをデプロイします。
python ./inference.py \
  --project={PROJECT_ID} \
  --job_name=inference \
  --temp_location=gs://{BUCKET}/tmp \
  --runner=DataflowRunner \
  --region={REGION} \
  --experiments use_runner_v2 \
  --worker_harness_container_image={REGION}-docker.pkg.dev/{PROJECT_ID}/{REPO_NAME}/{IMAGE_NAME}:latest \
  --disk_size_gb=50 \
  --machine_type=e2-standard-8 \
  --input="How does the brain work?" \
  --output=gs://{BUCKET}/gemma_dataflow.txt
モデルの読み込みにメモリが必要なので、マシンタイプはローカルと同様「e2-standard-8」(32GB)を指定します。
CPUを利用しているため、1 時間程度実行が終わるのを待ちます。
実行結果の確認
Dataflow ジョブが完了したことを確認します。
モデルを起動する際のオーバーヘッドが大きく、実行時間に大きく影響していることが全体の実行時間とスループットから読み取れます。


拡大して見てみると、推論処理(RunInference)は約 3 分程度 と CPU でもほどほどの速さで実行できています。
推論したいデータが増えた場合でも、Dataflow を使えば分散処理できるため、処理時間は大きく変わらないことが推測されます。

メモリは 12 Gib くらい使用されています。

実行時の output 引数で指定したバケットにファイルが保存され、生成した文章が確認できます。

Input: What is the meaning of life?, Output: What is the meaning of life?
The question is one of the most important questions in the world.
It’s the question that has been asked
Input には引数から入力した質問、Output には質問と生成した回答が出力されます。
*出力した文章に/n/nが含まれているため、改行して出力されています。
再度になりますが、使い終わった Workbench インスタンスは停止もしくは削除をおすすめします。

補足
Dataflow は様々な Google Cloud のプロダクトと連携がしやすいという特徴があります。
そのため、Gemma モデルと他の Google Cloud のサービスを組み合わせて使うことも可能です。
参考までに、Dataflow を使って LLM のストリーミング処理を実装した記事がありますので、興味のある方はご覧ください。
参考URL
まとめ
今回は Google のオープンモデルである Gemma モデルを Google Colab、Workbench および Dataflow の3つの環境で推論する方法についてご紹介しました。
Gemma モデルを活用すれば、文章生成のみならず文章の要約や Q&A にも応用できます。
さらに、Dataflow を使って Google Cloud の他のプロダクトと連携すれば、より様々な用途で利用できるでしょう。
本記事では CPU を利用して Workbench および Dataflow を実行しましたが、GPU を利用すればより高速に利用できます。
最後まで読んでいただきありがとうございました。
Gemma モデルの利用の参考になれば幸いです。
Discussion