Macから、terraformを使ってAzureのVirtual Networkを構築するときまでのメモ


Azure環境をterraformで構築する際、AWSに比べて、認証情報を取得する手順が少し複雑だったのと、ドキュメントと作業がうまくマッピングしづらかったので、Mac上からAzure環境を構築するときの個人メモを残しておく
1.前提
Azureのアカウント開設およびサブスクリプションの有効化と、Macへのterraformインストールについては完了しているものとする
2.最低限のterraform環境準備
terraform {
  required_providers {
    azurerm = {
      source  = "hashicorp/azurerm"
      version = "2.98.0"
    }
  }
}
provider "azurerm" {
  features {}
}
provider.tfで指定できる項目は、下記のドキュメントにある。
3.terraform環境の初期化
上記ファイルを配置したディレクトリで、$ terraform initを実行
作成されるもの
- .terraformディレクトリ
- .terraform.lock.hcl
4.Azure認証情報取得
このあたりがAWSでのterraform実行環境整備と異なる方法になる。下記の手順は、下記のドキュメントを参考にする。
4-1.Mac上で実行するのであれば、不要な手順
2. Cloud Shell を開く
3. 最新バージョンの Terraform を Azure Cloud Shell にインストールする
ここの手順はMac上で環境を準備するのでスキップしてよい
各コマンドを実行したときの実行結果イメージは、以下に記載
4-2.az login実行
実行結果
ブラウザ上での挙動
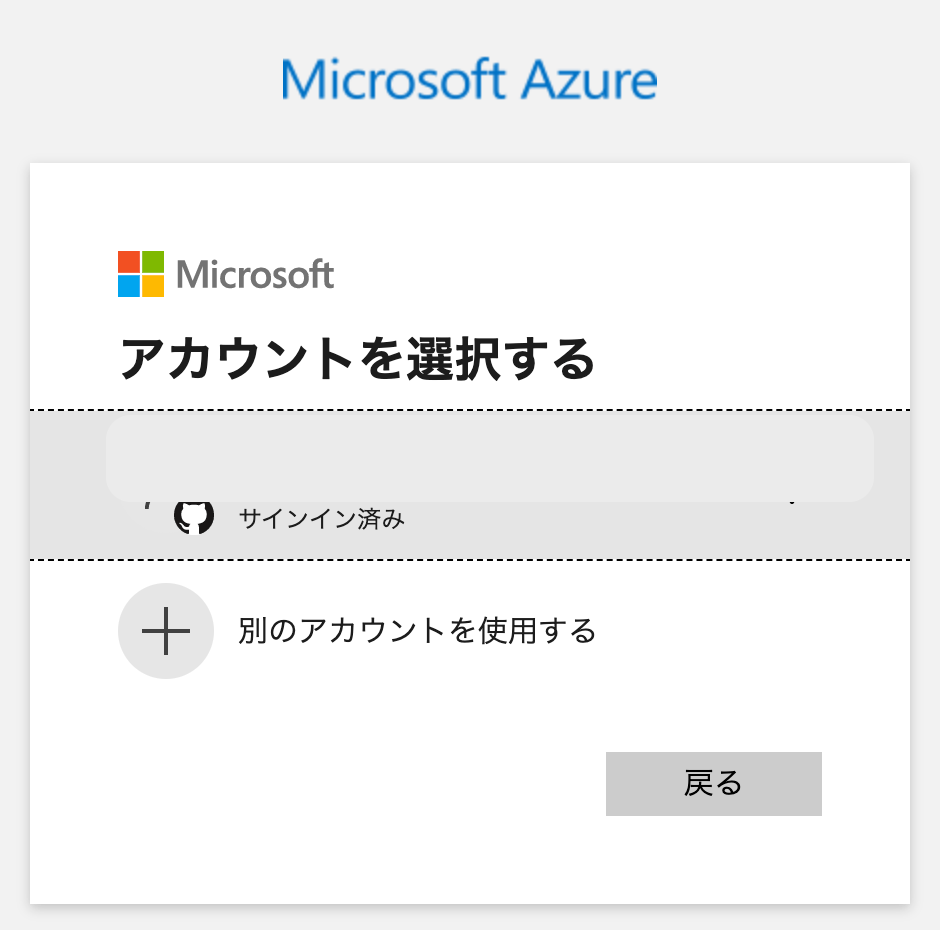
上記の認証を行うと、

ブラウザ上に上記のメッセージが表示される
ターミナル上の挙動
$ az login
The default web browser has been opened at https://login.microsoftonline.com/organizations/oauth2/v2.0/authorize. Please continue the login in the web browser. If no web browser is available or if the web browser fails to open, use device code flow with `az login --use-device-code`.
The following tenants don't contain accessible subscriptions. Use 'az login --allow-no-subscriptions' to have tenant level access.
********-****-****-****-************ '既定のディレクトリ'
[
  {
    "cloudName": "AzureCloud",
    "homeTenantId": "YYYYYYYY-YYYY-YYYY-YYYY-YYYYYYYYYYYY",
    "id": "XXXXXXXX-XXXX-XXXX-XXXX-XXXXXXXXXXXX",
    "isDefault": true,
    "managedByTenants": [],
    "name": "sample_subscription",
    "state": "Enabled",
    "tenantId": "YYYYYYYY-YYYY-YYYY-YYYY-YYYYYYYYYYYY",
    "user": {
      "name": "user@example.com",
      "type": "user"
    }
  }
]
環境によってスキップできる手順
サブスクリプションやユーザーが単一のみであれば、不要なコマンド
$ az account show
$ az account list --query "[?user.name=='<microsoft_account_email>'].{Name:name, ID:id, Default:isDefault}" --output Table
$ az account set --subscription "<subscription_id_or_subscription_name>"
4-3.サービス プリンシパルの作成
ここの手順が、AWSのアクセスキー,シークレットキーやIAM Roleの概念とは違うと感じた部分
az ad sp create-for-rbac --name <service_principal_name> --role Contributor
上記コマンドが何を実施しているのは、下記の記事で解説されている
環境によってスキップできる手順
Mac上でコマンドを実行するときには、不要なコマンド
$ export MSYS_NO_PATHCONV=1
実行結果
$ az ad sp create-for-rbac --name 'sample_subscription'  --role Contributor In a future release, --scopes argument will become required for creating a role assignment. Please explicitly specify --scopes.
Creating 'Contributor' role assignment under scope '/subscriptions/********-****-****-****-************'
The output includes credentials that you must protect. Be sure that you do not include these credentials in your code or check the credentials into your source control. For more information, see https://aka.ms/azadsp-cli
{
  "appId": "ZZZZZZZZ-ZZZZ-ZZZZ-ZZZZ-ZZZZZZZZZZZZ",
  "displayName": "sample_subscription",
  "password": "*************************************",
  "tenant": "YYYYYYYY-YYYY-YYYY-YYYY-YYYYYYYYYYYY"
}
上記のコマンドで得られたpasswordを使うので控えておく
5.環境変数設定
ターミナル上で、下記の環境変数を設定する
export ARM_SUBSCRIPTION_ID="XXXXXXXX-XXXX-XXXX-XXXX-XXXXXXXXXXXX"
export ARM_TENANT_ID="YYYYYYYY-YYYY-YYYY-YYYY-YYYYYYYYYYYY"
export ARM_CLIENT_ID="ZZZZZZZZ-ZZZZ-ZZZZ-ZZZZ-ZZZZZZZZZZZZ"
export ARM_CLIENT_SECRET="*************************************"
著者の場合は、direnvを使っているので、.envrcを作成し、direnv allowを実行した
6.リソースグループ作成
Azureは各種リソースを作成する前に、リソースグループを作成してあげる必要がある
resource "azurerm_resource_group" "example" {
  name     = "example"
  location = "West Europe"
}
locationに指定する値は、ドキュメントを見る限りaz account list-locationsコマンドで取得できるdisplayNameを指定するように見えるが、存在しないlocationを指定してplanをかけると、下記のようなエラーメッセージが出るので、nameに記載のlocationも指定できることが確認できる
Error: "hoge" was not found in the list of supported Azure Locations: "westus,westus2,eastus,centralus,centraluseuap,southcentralus,northcentralus,westcentralus,eastus2,eastus2euap,brazilsouth,brazilus,northeurope,westeurope,eastasia,southeastasia,japanwest,japaneast,koreacentral,koreasouth,southindia,westindia,centralindia,australiaeast,australiasoutheast,canadacentral,canadaeast,uksouth,ukwest,francecentral,francesouth,australiacentral,australiacentral2,uaecentral,uaenorth,southafricanorth,southafricawest,switzerlandnorth,switzerlandwest,germanynorth,germanywestcentral,norwayeast,norwaywest,brazilsoutheast,westus3,swedencentral,swedensouth"
エラーメッセージを整形したlocationのリストは、以下になる
- westus
- westus2
- eastus
- centralus
- centraluseuap
- southcentralus
- northcentralus
- westcentralus
- eastus2
- eastus2euap
- brazilsouth
- brazilus
- northeurope
- westeurope
- eastasia
- southeastasia
- japanwest
- japaneast
- koreacentral
- koreasouth
- southindia
- westindia
- centralindia
- australiaeast
- australiasoutheast
- canadacentral
- canadaeast
- uksouth
- ukwest
- francecentral
- francesouth
- australiacentral
- australiacentral2
- uaecentral
- uaenorth
- southafricanorth
- southafricawest
- switzerlandnorth
- switzerlandwest
- germanynorth
- germanywestcentral
- norwayeast
- norwaywest
- brazilsoutheast
- westus3
- swedencentral
- swedensouth
terraformを実行したときの結果
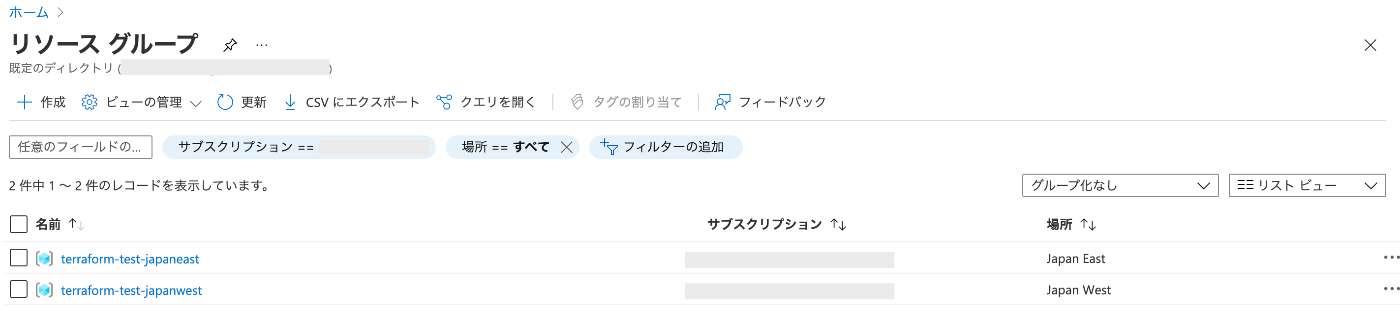
resource "azurerm_resource_group" "japaneast" {
  name     = "terraform-test-japaneast"
  location = "japaneast"
}

resource "azurerm_resource_group" "japanwest" {
  name     = "terraform-test-japanwest"
  location = "Japan West"
}
上記のリソースをterraform applyで実行すると、下記のようにリソースグループが作成される
7.Virtual network作成
AWSと違って、Azure関連のリソースは、resource_group_name がRequiredになっていることに注意。今回、リソースグループは、先程指定したjapaneastのものを指定してあげることにする。
terraformを実行したときの結果
resource "azurerm_virtual_network" "example" {
  name                = "example-network"
  location            = azurerm_resource_group.japaneast.location
  resource_group_name = azurerm_resource_group.japaneast.name
  address_space       = ["10.0.0.0/16"]

  subnet {
    name           = "public-subnet"
    address_prefix = "10.0.1.0/24"
  }

  subnet {
    name           = "private-subnet"
    address_prefix = "10.0.2.0/24"
  }

  tags = {
    created_by = "terraform"
  }
}
上記のリソースをterraform applyで実行すると、下記のようにVirtual network(日本語表記は仮想ネットワーク)が作成される
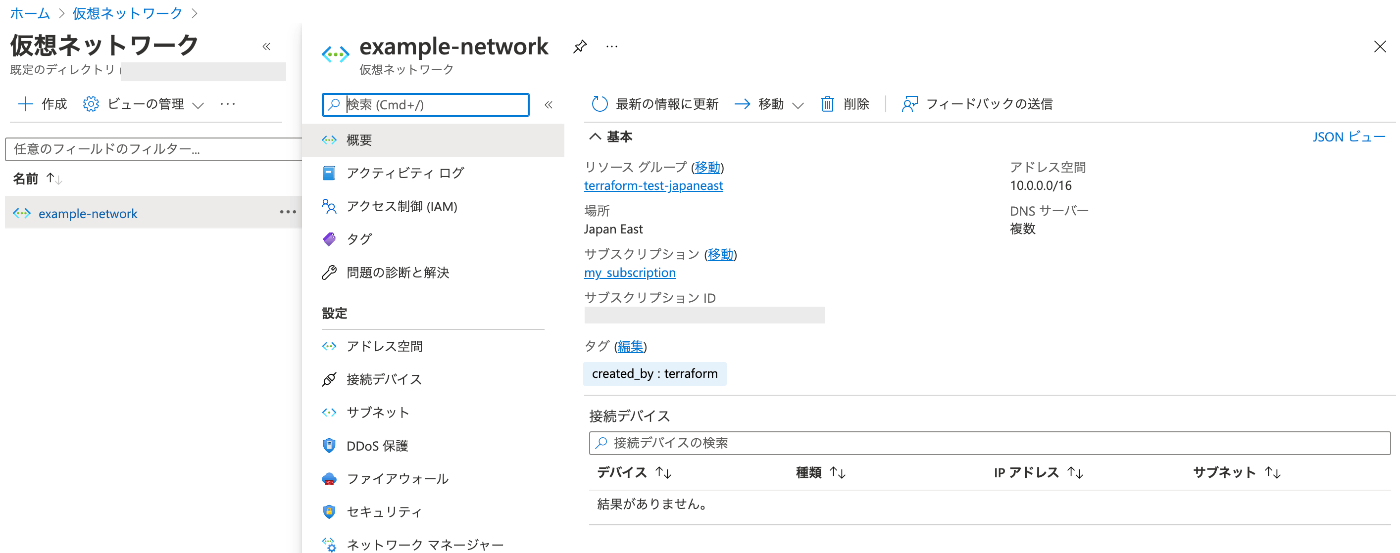
AWSと同じように、各リソースにtagを作成することができる。Azureの場合は、リソース作成時にリソースグループを指定するので、運用を考慮するとterraformで構築したtagとかを記載しておくとよさそう
8.まとめ
Azureをterraformで構築する記事は他にもありますが、自分が触ったときにリソースグループのlocationを指定するところは、terraformのドキュメントだけではわからなかったので何かの参考になれば
Discussion