HAMWORKSのサイトをブロックテーマに変えていく
実はブロックテーマではないので変えます。
とりあえず npm init から。
{
  "name": "@hamworks/wordpress",
  "private": true,
  "version": "1.0.0",
  "description": "WordPress local environment for HAMWORKS Co., Ltd.",
  "main": "index.js",
  "scripts": {},
  "author": "HAMWORKS Co., Ltd.",
  "license": "GPL-2.0-or-later",
  "homepage": "https://ham.works/",
  "volta": {
    "node": "18.19.0"
  }
}
ズッ友wp-envとwp-scripts関連をいれる
npm i -D @wordpress/env @wordpress/scripts
6.5の開発ブランチのwp-scriptsのバージョンが27.2.6だから一応あわせておこうかな。
自動整形したいから次はそれ関連を。prettierとか.editorconfigを用意。
prettierに関してはWordPress側でconfigがあります
が、
npm ERR! code ERESOLVE
npm ERR! ERESOLVE unable to resolve dependency tree
npm ERR!
npm ERR! While resolving: @hamworks/wordpress@1.0.0
npm ERR! Found: prettier@2.6.2
npm ERR! node_modules/prettier
npm ERR!   dev prettier@"npm:wp-prettier@2.6.2" from the root project
npm ERR!
npm ERR! Could not resolve dependency:
npm ERR! peer prettier@">=3" from @wordpress/prettier-config@3.8.1
npm ERR! node_modules/@wordpress/prettier-config
npm ERR!   dev @wordpress/prettier-config@"3.8.1" from the root project
npm ERR!
npm ERR! Fix the upstream dependency conflict, or retry
npm ERR! this command with --force or --legacy-peer-deps
npm ERR! to accept an incorrect (and potentially broken) dependency resolution.
npm ERR!
prettierのバージョン3以上が求められる。まあこの辺は整形のあれこれなのでそこまで気にしなくてもいいかなあ。大人しく3にします。
ところで wp-scripts packages-update --dist-tag=wp-6.5.4 を実行すると wp-scriptsのバージョンとかもあがるなあ
ザクザクインストールしていってあとからこれ実行してバージョン合わせるほうが楽かも?
.editorconfig もWordPressと同じものをつかう
lint系はwp-scriptsに内蔵されてるから、パッケージとしてのインストールはないけどファイルは用意する
.eslintignore はいつもこんな感じ。
node_modules
vendor
build
wp-content/plugins/*
!wp-content/plugins/[original-plugin-name]
wp-content/themes/[original-theme-name]
自分で作ったテーマやプラグインに関するものだけeslintをかけたいので、対象をしぼる
今回はすくなくとも初期構築においてプラグインを作る予定がないので、eslint対象はテーマのみになるかな
.eslintrc の中身はこれ
{
	"extends": [
		"plugin:@wordpress/eslint-plugin/recommended"
	]
}
.gitignore はビルドしたものやnode_modulesを除外するとか基本的なものを。
# Directories/files that may be generated by this project
build
node_modules
vendor

# Operating system specific files
.DS_Store
Thumbs.db

# The /.cache folder is needed for phpcs to cache results between runs, while other .cache folders must be ignored
# It is not possible to re-include a file if a parent directory of that file is excluded
# So, both /.cache and /.cache./.gitkeep must be re-included
.cache
!/.cache/
/.cache/**
!/.cache/.gitkeep

# Local overrides
.wp-env.override.json
phpcs.xml
phpunit.xml
phpunit-watcher.yml
とりあえずこんな感じで用意。
.stylelintrc.json も一旦これで用意
{
	"extends": "@wordpress/stylelint-config"
}
個人的にrules足したりしてたけどそもそもこれで事足りるのでは?疑惑があって。
rules足したりして緩めたりはできるけど、複数人でやる以上最初はギッチギチでやってた方がコードの質が担保できるんじゃないみたいなことを前いわれたので。不要だと思ったら書かずにいきたい。
次はwp-envで環境をつくる。
{
	"plugins": [
		"https://downloads.wordpress.org/plugin/create-block-theme.zip",
		"https://downloads.wordpress.org/plugin/wordpress-importer.zip"
	],
	"port": 12342,
	"testsPort": 23452
}
ズッ友Create Block ThemeとWordPress Importer。後者はTheme Unit Test使うからいれておく。

エクスポートしたzipを .wp-env.json の themes に追記。
一旦 wp-env start --update でenv環境を再起動
再起動したら重複しちゃう(実体ファイルとして存在してるのは1ファイルだけ)ので、ローカルにある方を有効化する。(これはわかりやすくするためにテーマ名かえた)
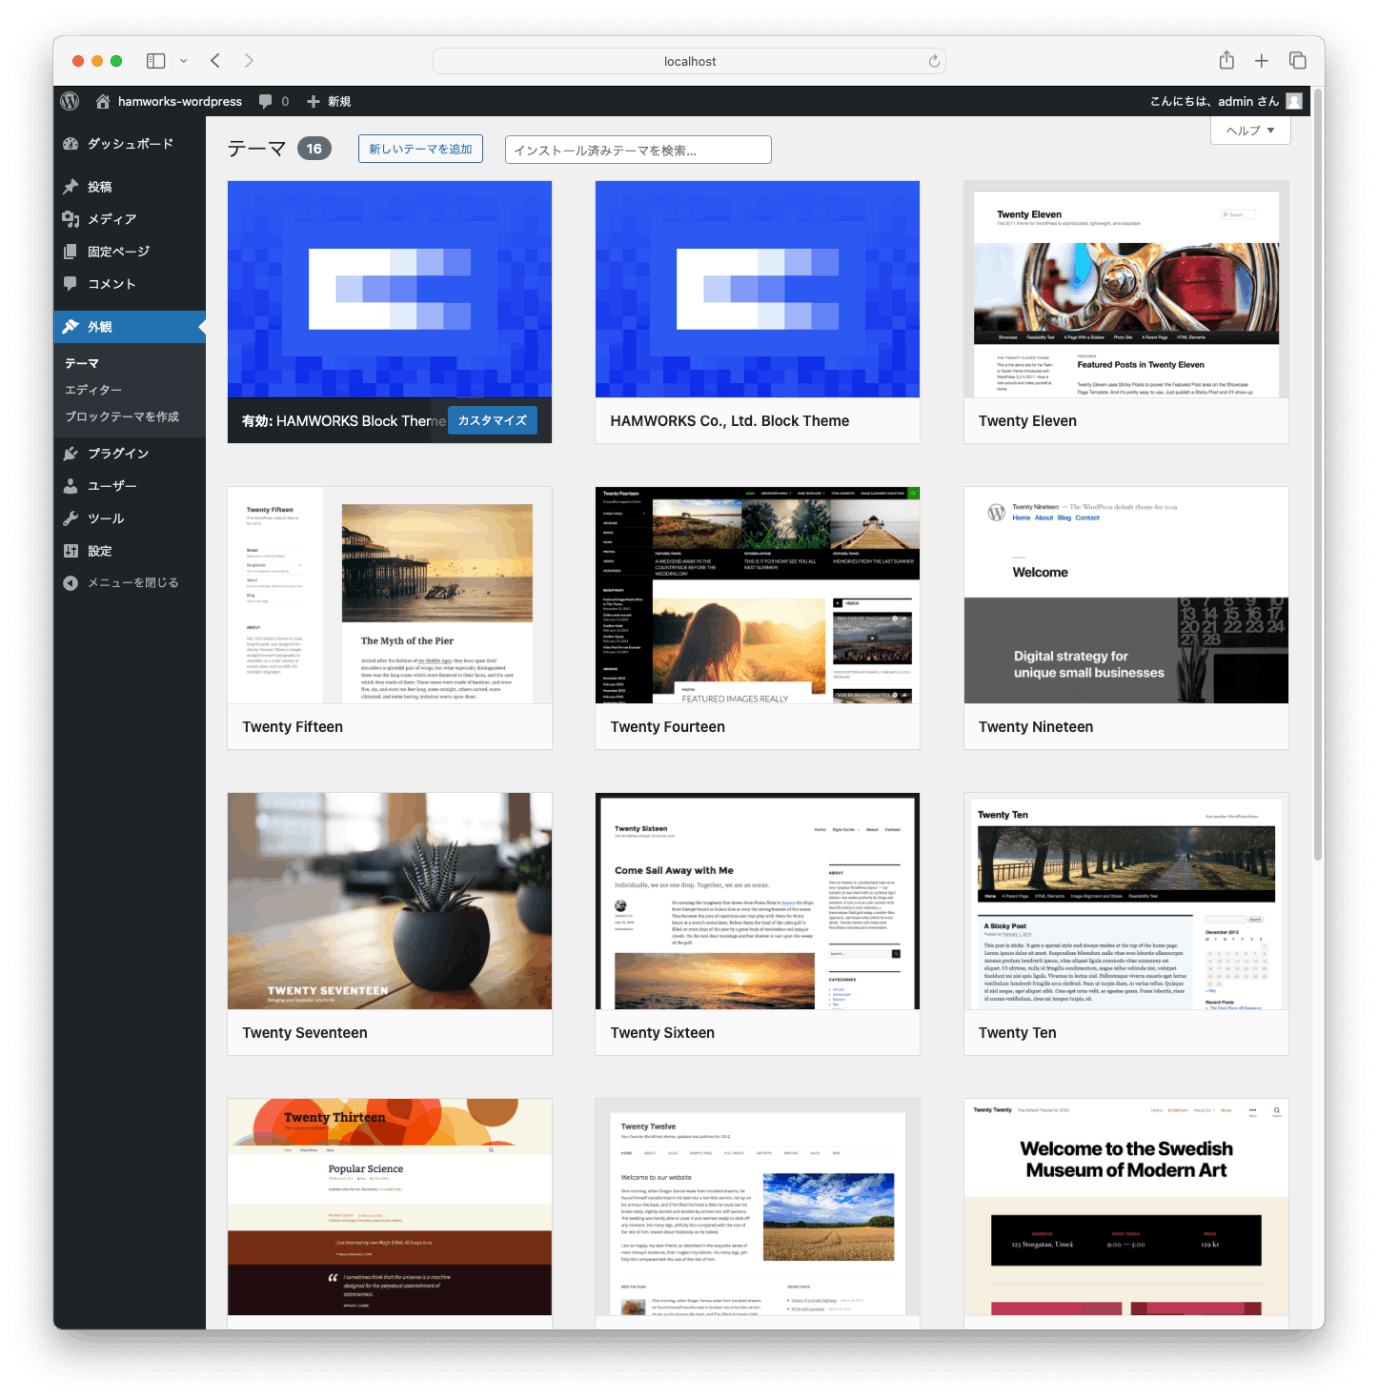
外観にアクセスしたときに有効になってないほうがローカルに存在するテーマ
書き出しがうまくいくかテストしてみる。
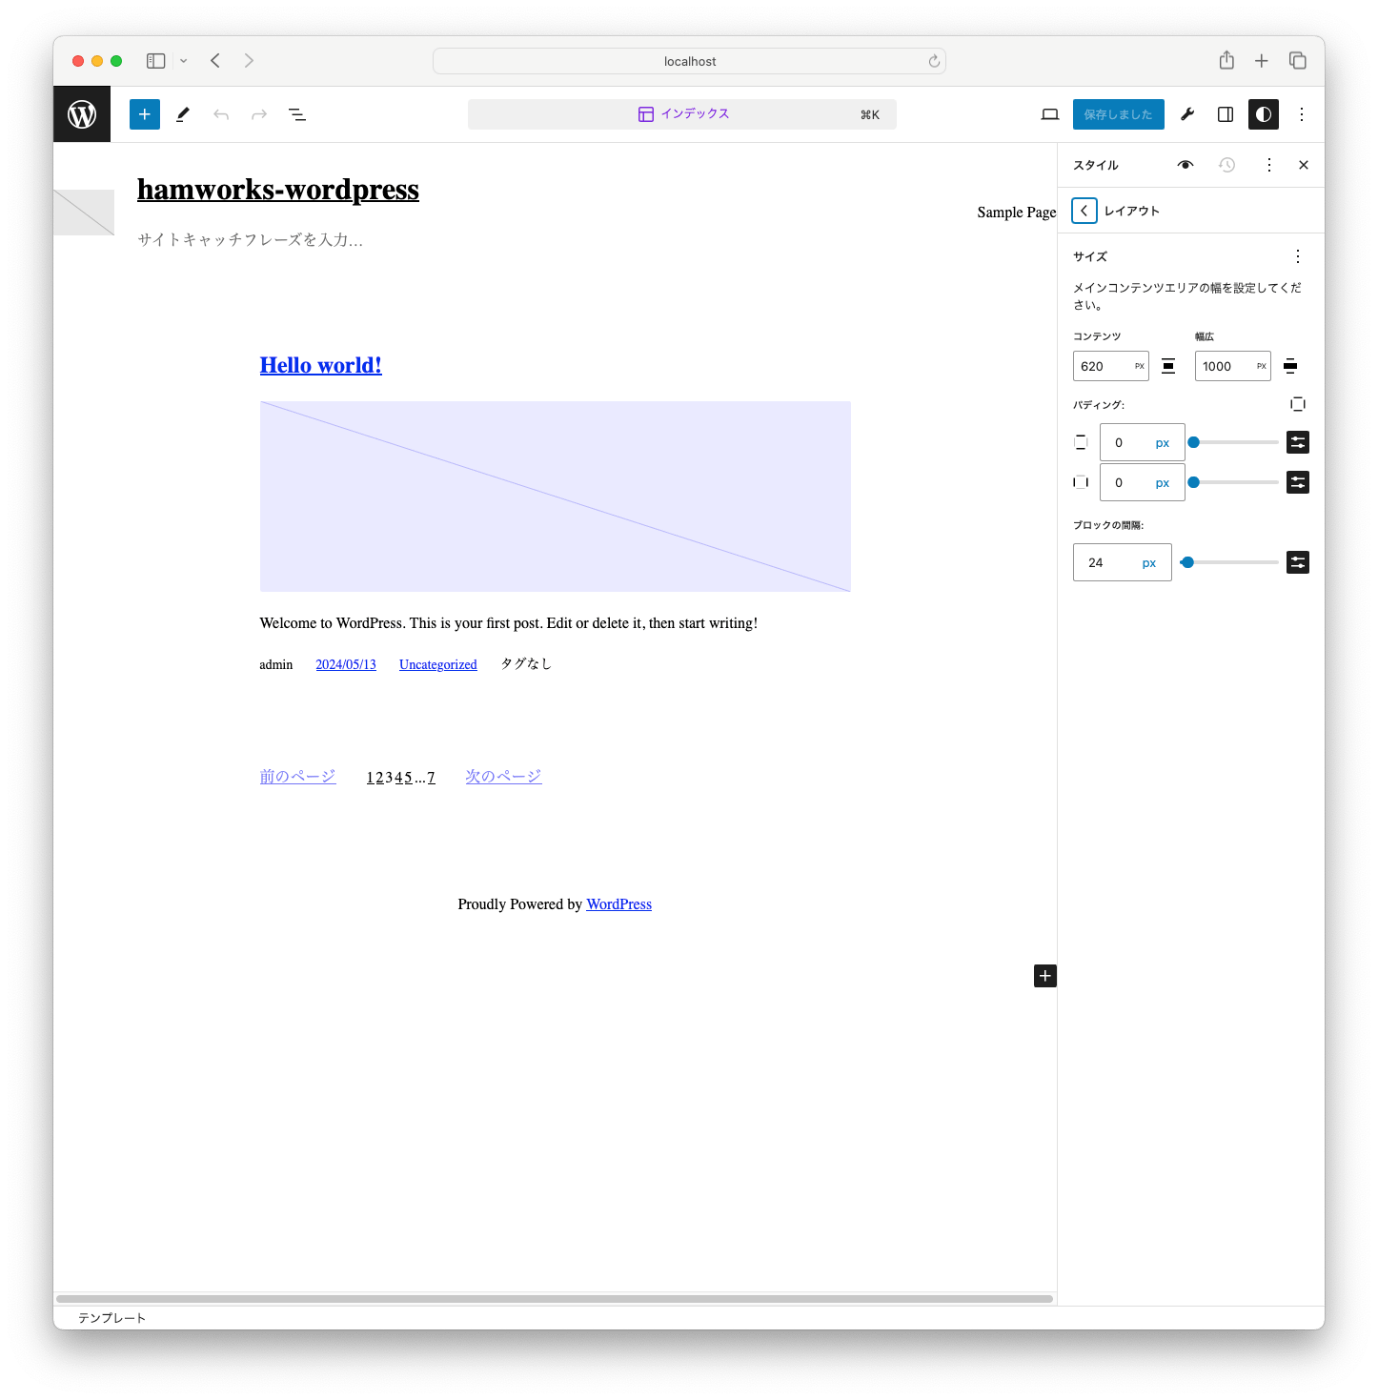
コンテンツ幅を800px にかえて保存。
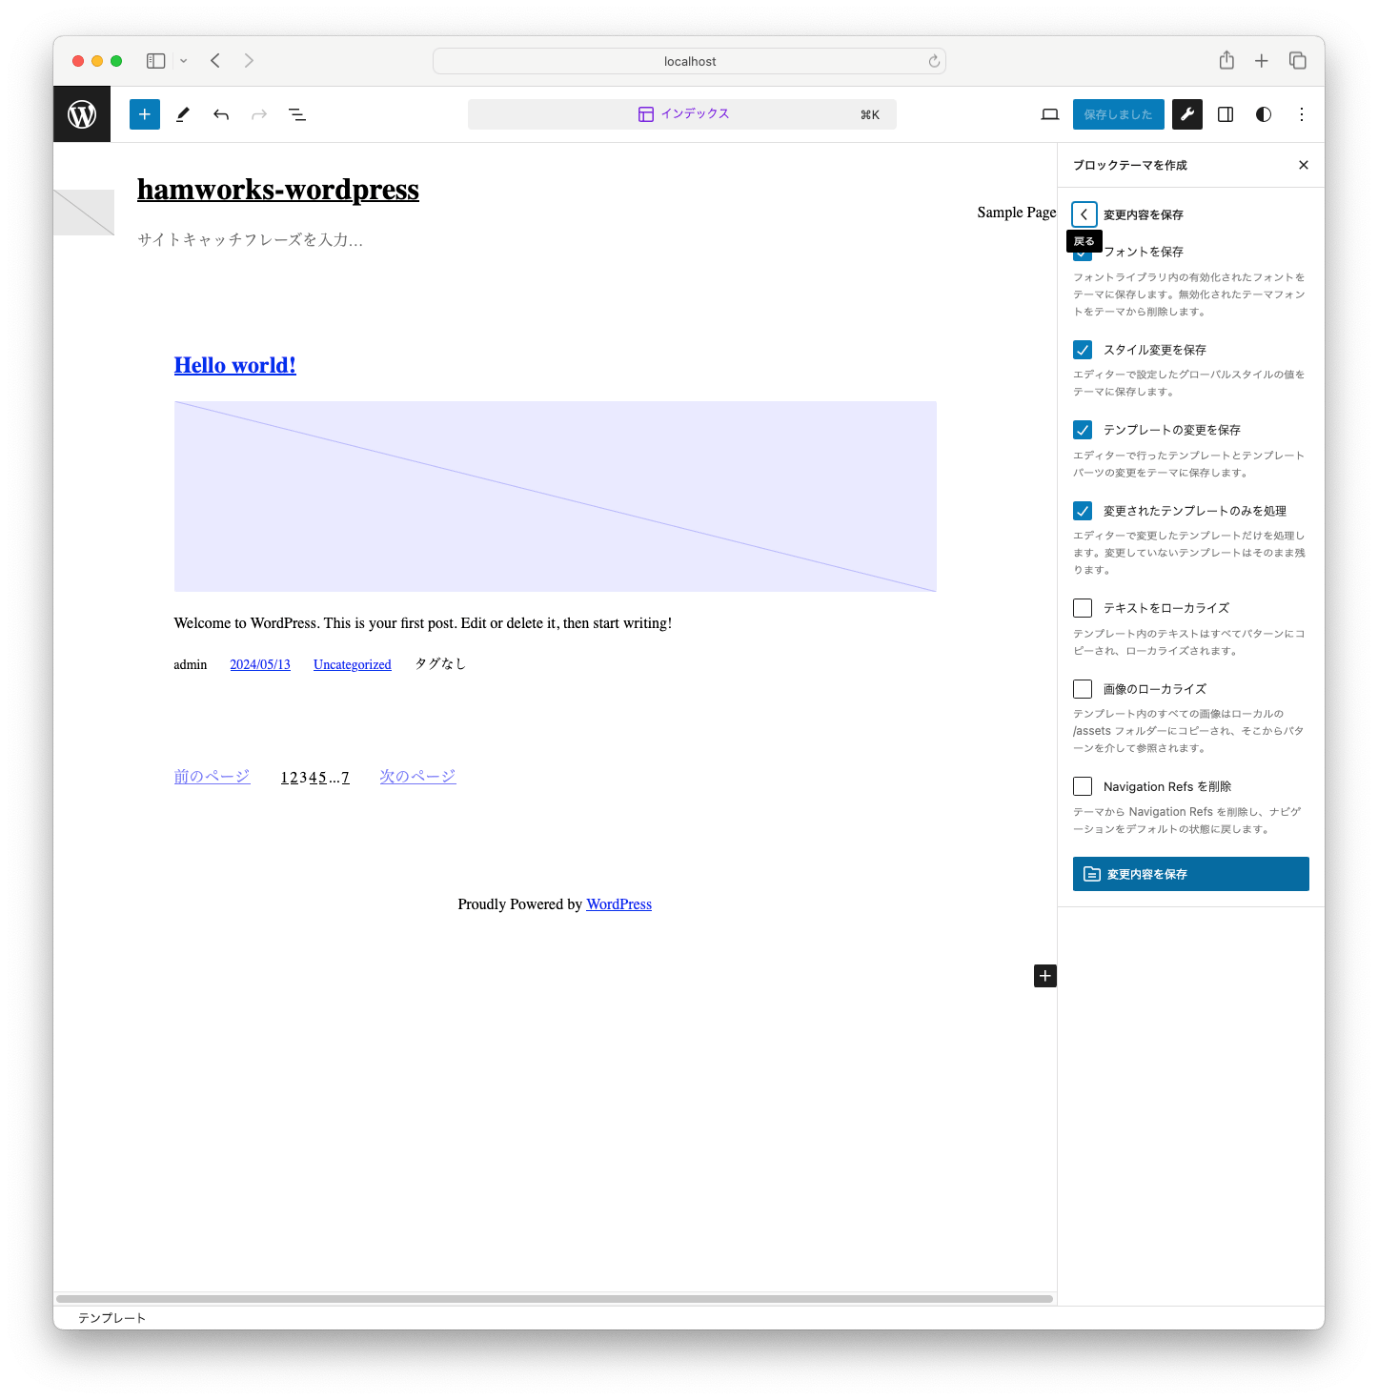
で、テーマへの変更を保存をクリック

変更内容を保存。
あとはローカルにあるテーマファイルの theme.json を確認!

ちゃんと反映されてる!
php用のlintを用意するのでcomposer initする。
{
    "name": "hamworks/hamworks",
    "license": "GPL-2.0-or-later",
    "authors": [
        {
            "name": "HAMWORKS Co., Ltd."
        }
    ],
    "require": {
        "php": ">=8.0"
    },
    "config": {
        "allow-plugins": {
            "dealerdirect/phpcodesniffer-composer-installer": true
        }
    },
    "require-dev": {
		"phpcompatibility/phpcompatibility-wp": "*",
        "wp-coding-standards/wpcs": "^3.0",
        "squizlabs/php_codesniffer": "^3.9.0",
        "dealerdirect/phpcodesniffer-composer-installer": "^1.0"
    },
	"scripts": {
		"format": "phpcbf --standard=./phpcs.xml.dist --report-summary --report-source",
		"lint": "phpcs --standard=./phpcs.xml.dist"
	}
}
ここを見てphpcs.xml.distを用意してみる
huskyとlint-staged入れ忘れてたのでいれる
npm i -D husky lint-staged
{
	"lint-staged": {
		"*.{js,json,ts,tsx}": [
			"npm run format"
		],
		"*.{js,ts,tsx}": [
			"npm run lint-js:fix"
		],
		"{*.css,*.scss}": [
			"npm run lint-css:fix"
		],
		"*.php": [
			"composer format",
			"npm run lint-php"
		]
	}
}
あ、instaWP設定忘れてた
確認環境はinstaWPを使っているのでこちらでも導入
Add Newで立ち上げ
サイト名を入れて保護しておく(保護しておかないと日数経過で消える)
これでステージング環境はできたから次はテンプレートつくる
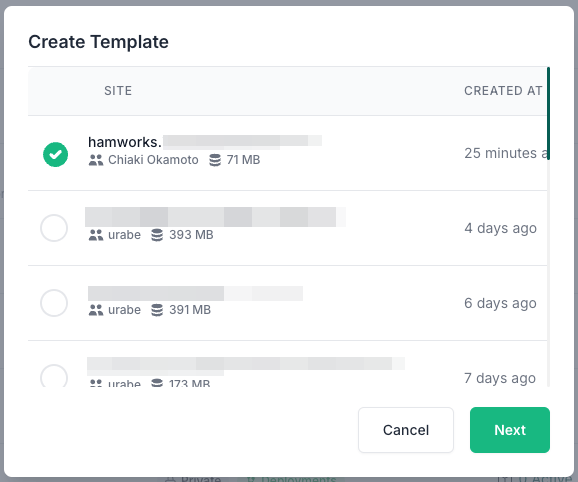
さっきつくったステージングを選択して

Template Nameをいれる
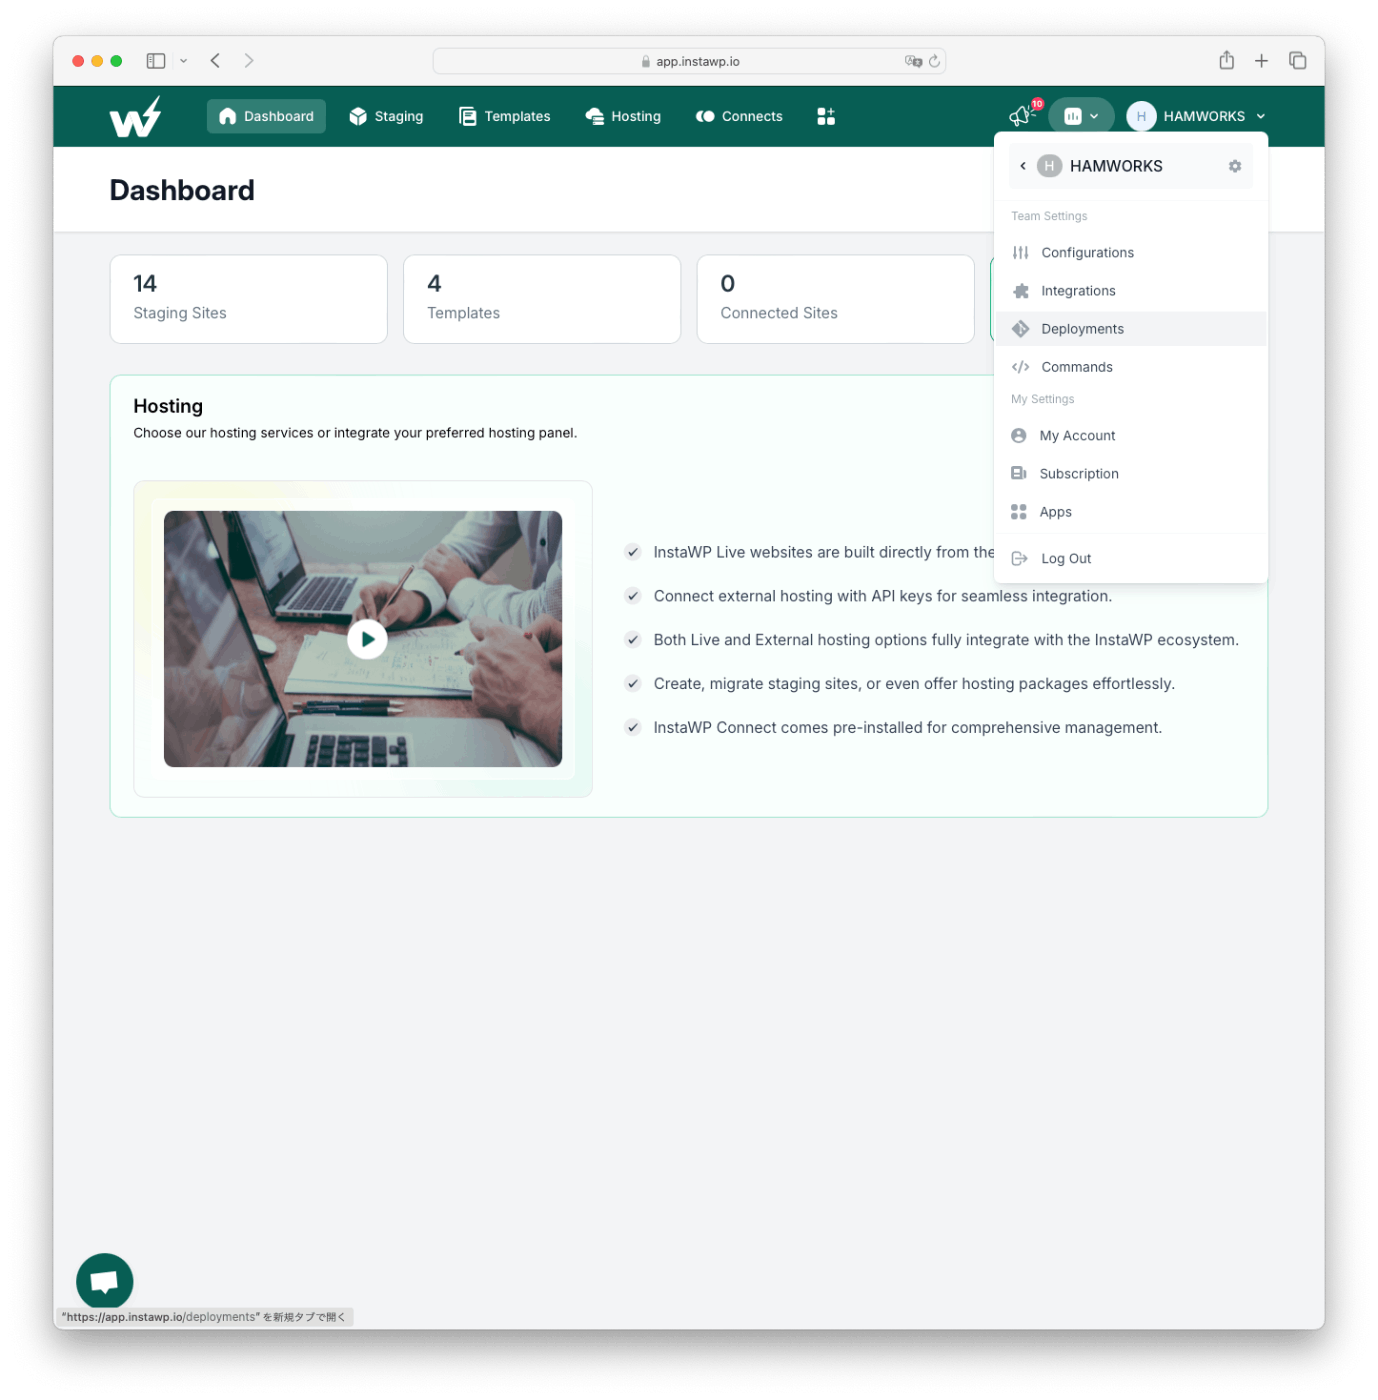
GitHubでPRつくったらインスタンス立ち上がるようにしたいので、デプロイまわりの設定をする
メニュー内のDeploymentsでまずはGitHubのリポジトリを追加する
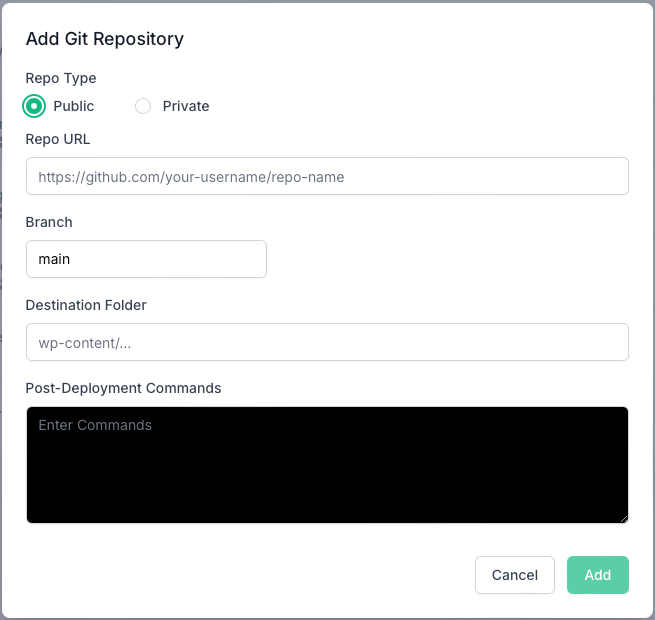
- Repo SSH LinkはGitHubのsshリンク
- Branchはmainのまま
- Destination Folderは「repo」にする(repo内にpushしたデータが展開されるイメージ)
- Post-Deployment Commandsは以下を。
composerとかnpmを実行するのと、repo内に展開したうちのテーマとかプラグインをinstaWPの環境にもっていくコマンド
echo "Install Composer"
php -r "copy('https://getcomposer.org/installer', 'composer-setup.php');"

php composer-setup.php --quiet
rm composer-setup.php

echo "composer install"
./composer.phar install --optimize-autoloader --prefer-dist --no-dev

echo "npm install"
npm ci --silent
npm run build

rsync -rltgoDzvO --delete ./wp-content/mu-plugins/ ./../wp-content/mu-plugins/
rsync -rltgoDzvO --delete ./wp-content/plugins/[original-plugin-name]-* ./../wp-content/plugins/
rsync -rltgoDzvO --delete ./wp-content/themes/[original-theme-name]/ ./../wp-content/themes/[original-theme-name]/
rm -rf node_modules
./wp-content/plugins/[original-plugin-name]-* ってなってるのは、案件やるときにつくるプラグインは接頭辞的に案件名を使ったりしているので。例えばhamworks-blocksとかhamworks-post-typesとか。
今回プラグイン作らない予定だけど、今後はわからないのでまあいつも通りいれておきます
- SSH Key Pairは
Generate Newをして、生成されたものをGitHubのリポジトリのSettingsからDeploy Keysにいれる。Read-OnlyでOK
あとはステージングとテンプレートそれぞれのデプロイ設定で選択。
テンプレートでデプロイ設定するとActions yml Fileがコピーできるようになるので、GitHub Actionsに追加します。
ymlの中身はこれ
name: InstaWP WordPress Testing

on:
  pull_request:
    types: [opened]

jobs:
  create-wp-for-testing:
    runs-on: ubuntu-latest
    steps:
      - uses: instawp/wordpress-testing-automation@main
        with:
          GITHUB_TOKEN: ${{secrets.GITHUB_TOKEN}}
          INSTAWP_TOKEN: ${{secrets.INSTAWP_TOKEN}}
          INSTAWP_TEMPLATE_SLUG: hamworks
          REPO_ID: [REPO_ID_NUMBER]
          INSTAWP_ACTION: create-site-template
このままだとPRつくったときに立ち上がるだけなので、reopened, synchronize, closedアクションも足します。あと、stepの中にif: github.event.action != 'closed' && github.event.action != 'merged'のif文を足してclosedとmergedのとき以外処理をはしらせる。
それから、closed、mergedのあと作った環境をdestroyしときたいのでそのアクションも足します。
結果的にymlはこう
name: InstaWP WordPress Testing

on:
  pull_request:
    types: [opened, reopened, synchronize, closed]

jobs:
  create-wp-for-testing:
    runs-on: ubuntu-latest
    steps:
      - uses: instawp/wordpress-testing-automation@main
        if: github.event.action != 'closed' && github.event.action != 'merged'
        with:
          GITHUB_TOKEN: ${{secrets.GITHUB_TOKEN}}
          INSTAWP_TOKEN: ${{secrets.INSTAWP_TOKEN}}
          INSTAWP_TEMPLATE_SLUG: hamworks
          REPO_ID: [REPO_ID_NUMBER]
          INSTAWP_ACTION: create-site-template

  destroy-wp-after-testing:
    runs-on: ubuntu-latest
    steps:
      - uses: instawp/wordpress-testing-automation@main
        if: github.event.action == 'closed' || github.event.action == 'merged'
        id: destroy-wp
        with:
          GITHUB_TOKEN: ${{secrets.GITHUB_TOKEN}}
          INSTAWP_TOKEN: ${{secrets.INSTAWP_TOKEN}}
          INSTAWP_TEMPLATE_SLUG: hamworks
          REPO_ID: [REPO_ID_NUMBER]
          INSTAWP_ACTION: destroy-site
やっと開発環境のもろもろ終わったからブロックテーマやっていくぞ!!
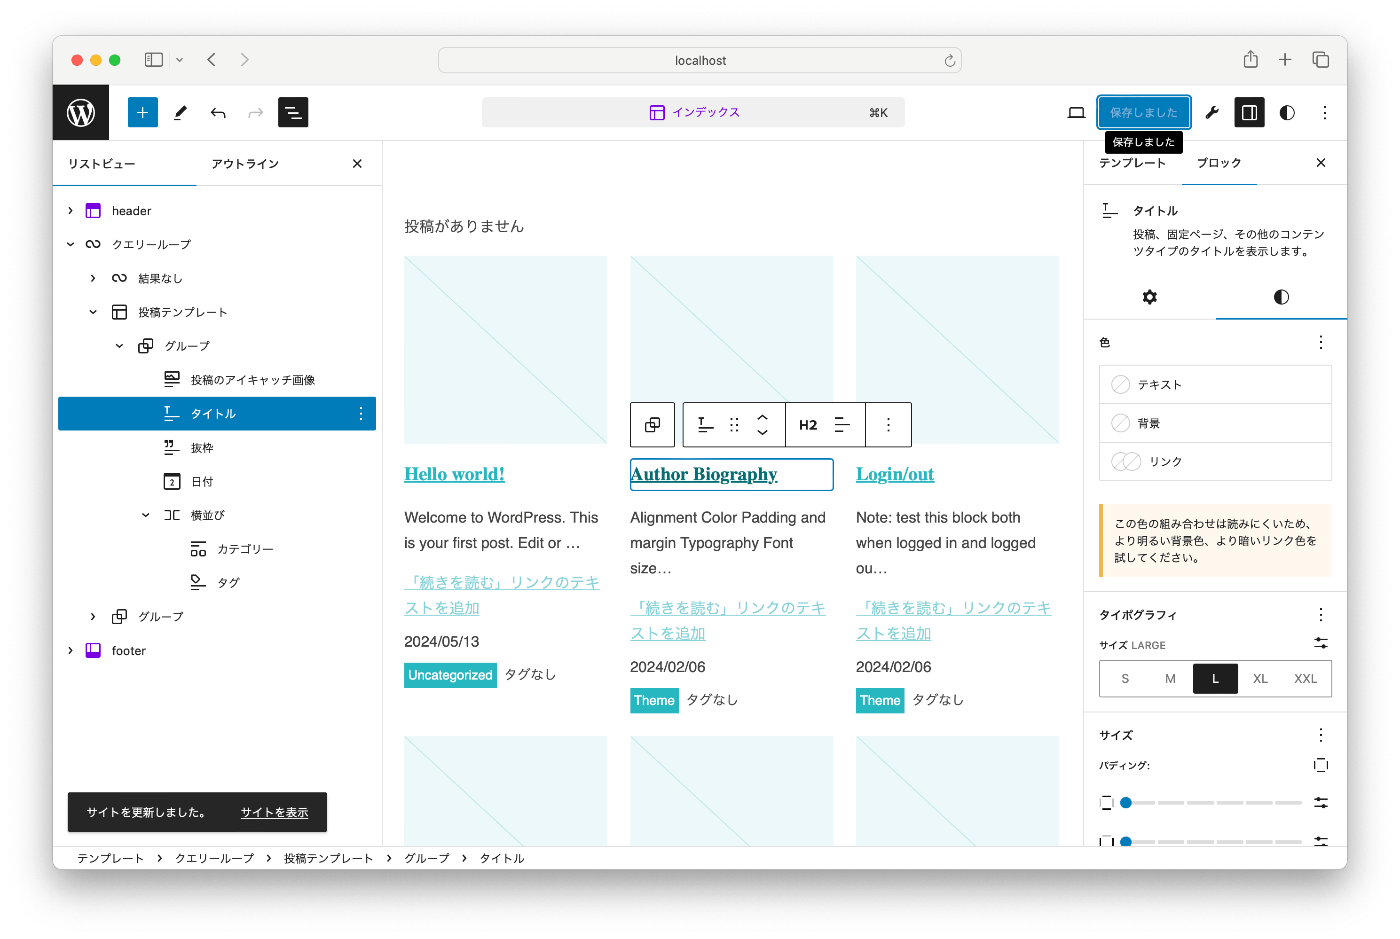
ひとまずカラーパレットをつくる。今回特にデザインデータないからサイトから色ひっぱってくる
サイトエディターのスタイルパネル→色→パレットから設定。
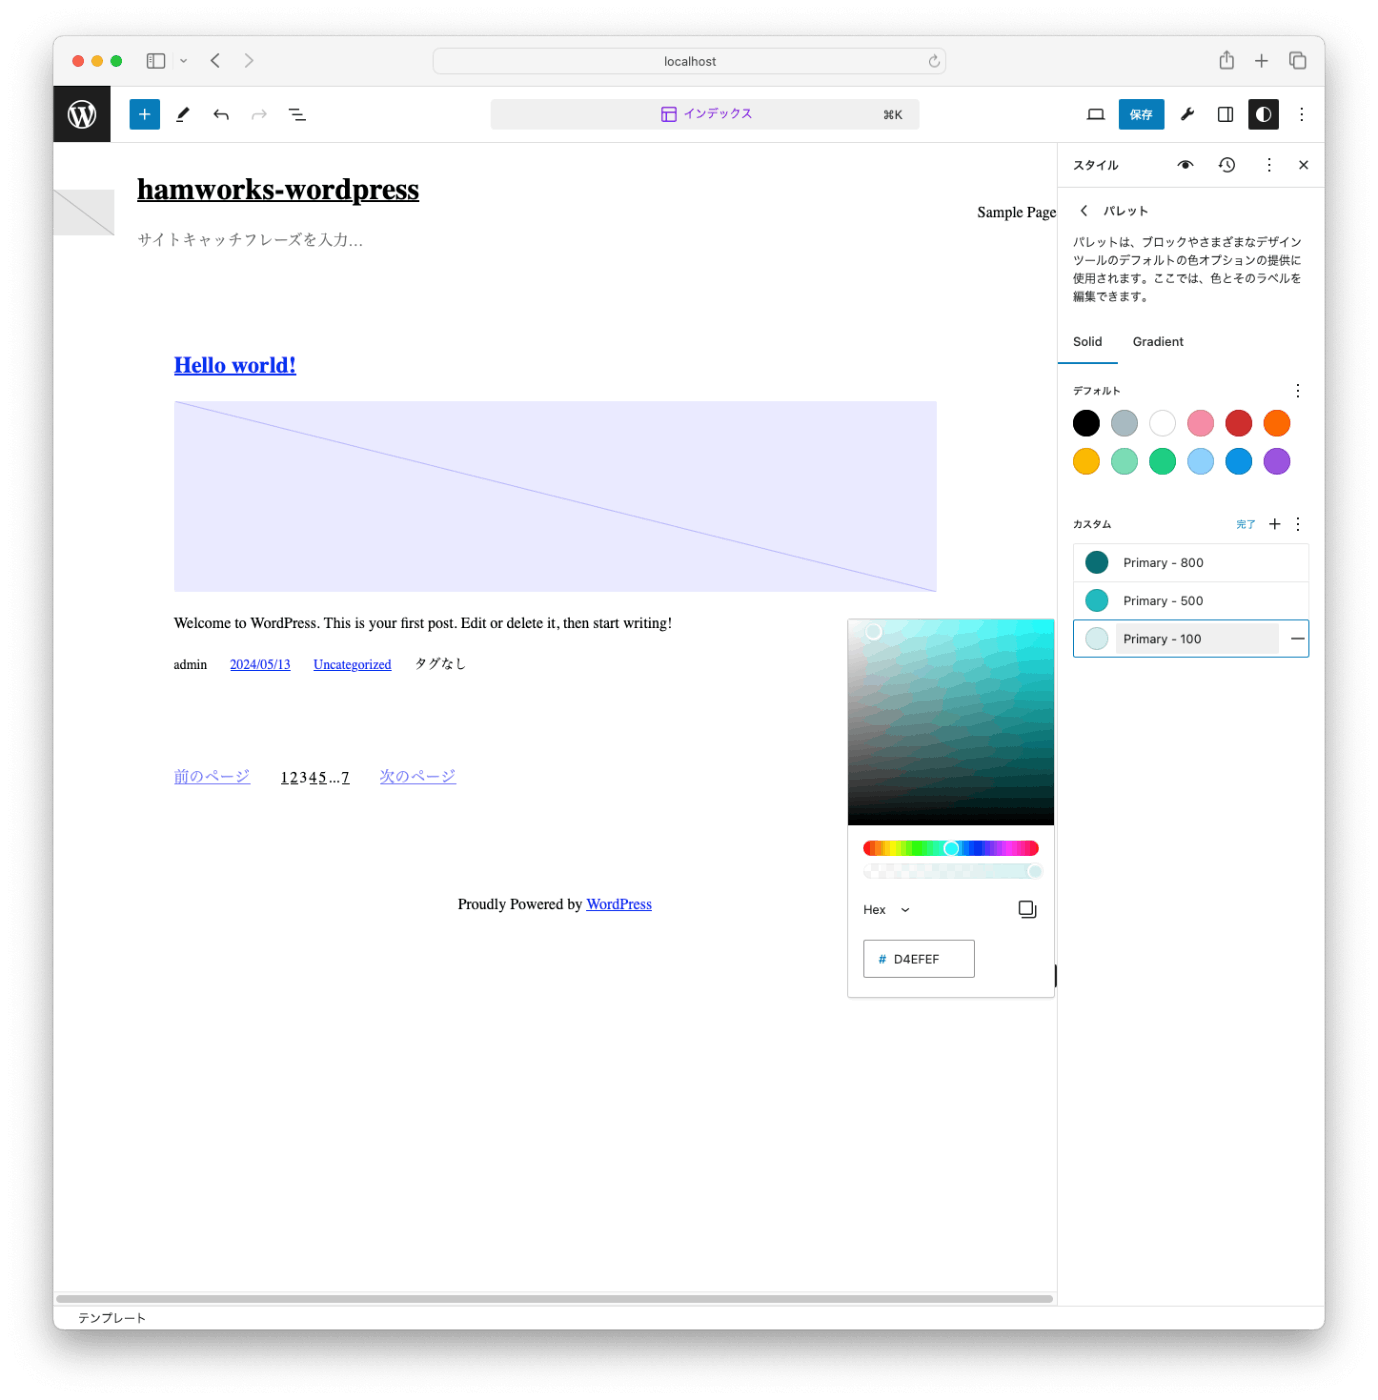
パレット入れ終わったら「保存」をクリックする。パレット入れたときの「完了」で保存できたと思っちゃうけど実は完了押しただけじゃtheme.jsonに反映されてないから、ページ遷移すると消えるんだよね。(何回かやってる)
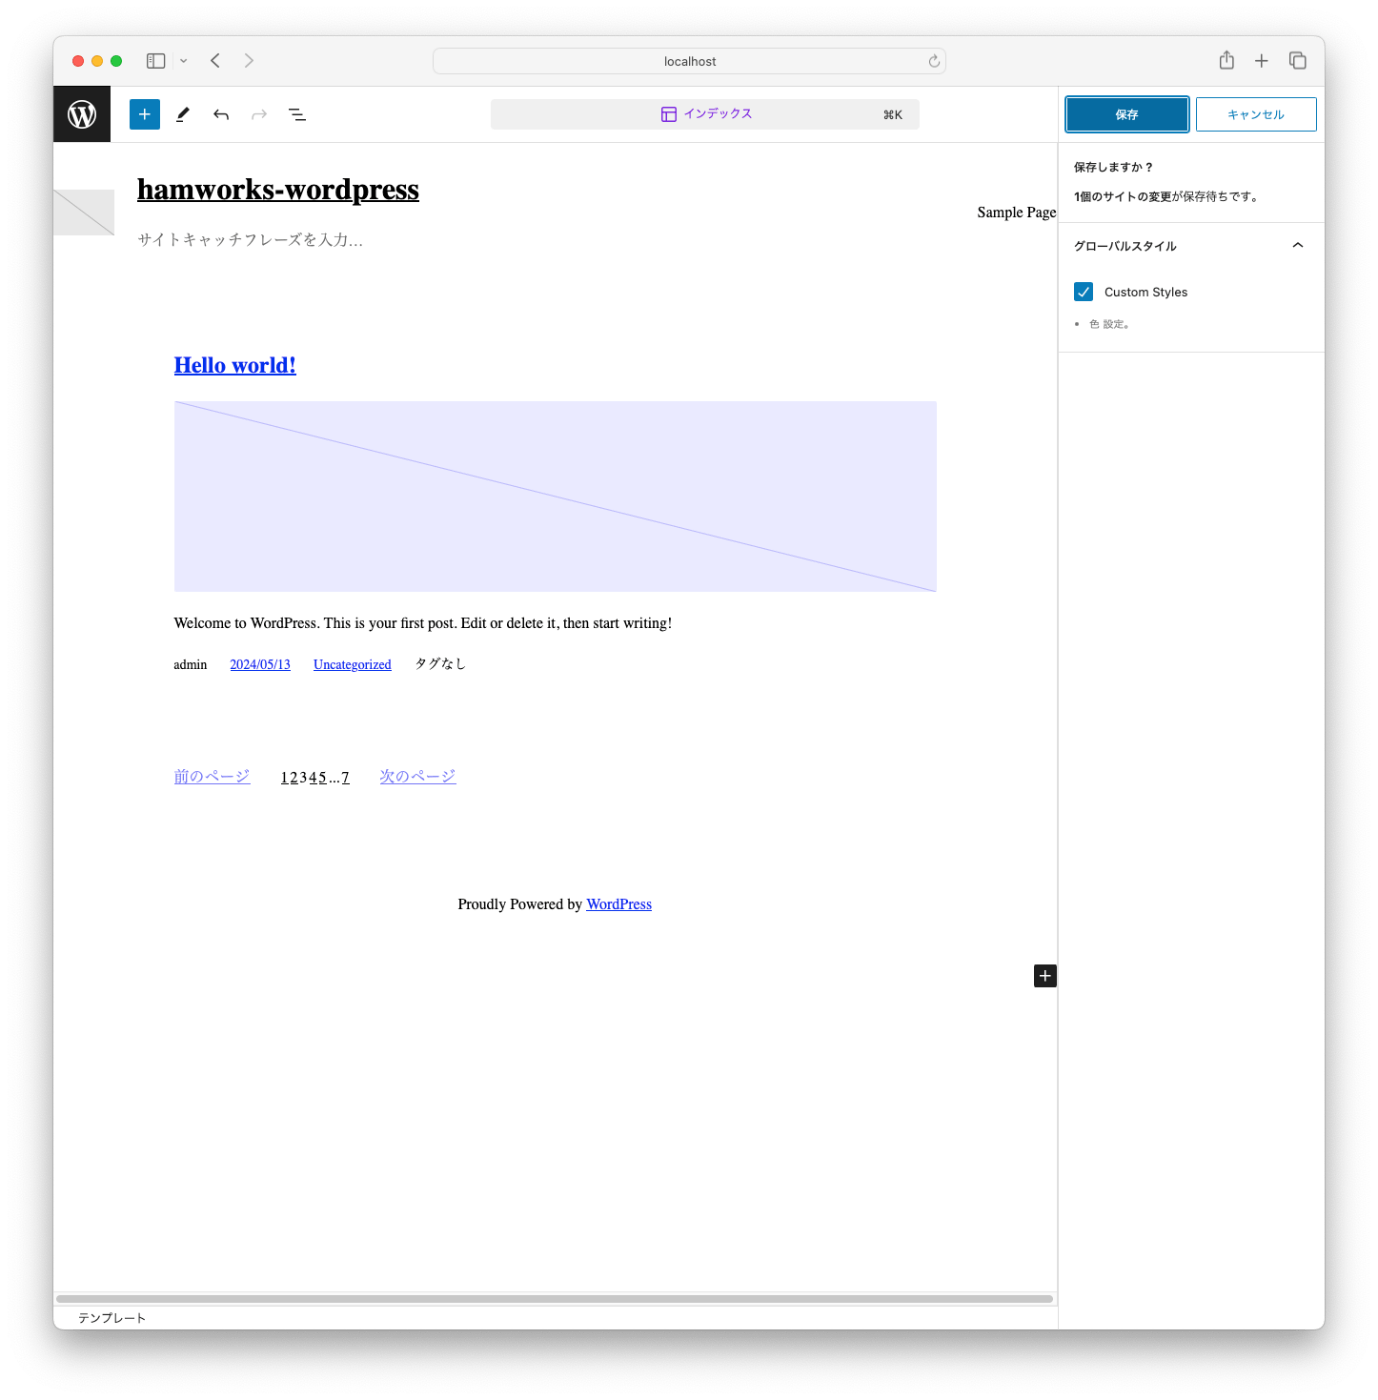
パレットができたら一旦書き出し。デフォルトパレットは使わないので消す。
ついでに各パレットのslugからcustom-も消しました。これは好みかな。
{
	"settings": {
		"appearanceTools": true,
		"color": {
+			"defaultDuotone": false,
+			"defaultGradients": false,
+			"defaultPalette": false,
			"palette": [
				{
					"color": "#056e76",
					"name": "Primary - 800",
					"slug": "primary-800"
				},
				{
					"color": "#25b7c0",
					"name": "Primary - 500",
					"slug": "primary-500"
				},
				{
					"color": "#d4efef",
					"name": "Primary - 100",
					"slug": "primary-100"
				},
				{
					"color": "#444444",
					"name": "Text",
					"slug": "text"
				},
				{
					"color": "#ffffff",
					"name": "White",
					"slug": "white"
				},
				{
					"color": "#e5e5e5",
					"name": "Neutral - 200",
					"slug": "neutral-200"
				}
			]
		},
		"layout": {
			"contentSize": "800px",
			"wideSize": "1000px"
		},
		"spacing": {
			"units": [
				"%",
				"px",
				"em",
				"rem",
				"vh",
				"vw"
			]
		},
		"typography": {
			"fontFamilies": [
				{
					"fontFamily": "-apple-system, BlinkMacSystemFont, 'Segoe UI', Roboto, Oxygen-Sans, Ubuntu, Cantarell, 'Helvetica Neue', sans-serif",
					"name": "System Font",
					"slug": "system-font"
				}
			]
		},
		"useRootPaddingAwareAlignments": true
	},
	"templateParts": [
		{
			"area": "header",
			"name": "header"
		},
		{
			"area": "footer",
			"name": "footer"
		}
	],
	"version": 2,
	"$schema": "https://schemas.wp.org/wp/6.5/theme.json"
}

デフォルトパレットが消えた
カラーパレットの設定ができたら、サイトの諸々のデフォルトカラーを設定していく

見出しとかキャプションはテキストのカラーになればいいから空っぽのまま。設定が終わったら保存。(まじでこれはクセをつけておく。油断したらまじで保存押し忘れる)

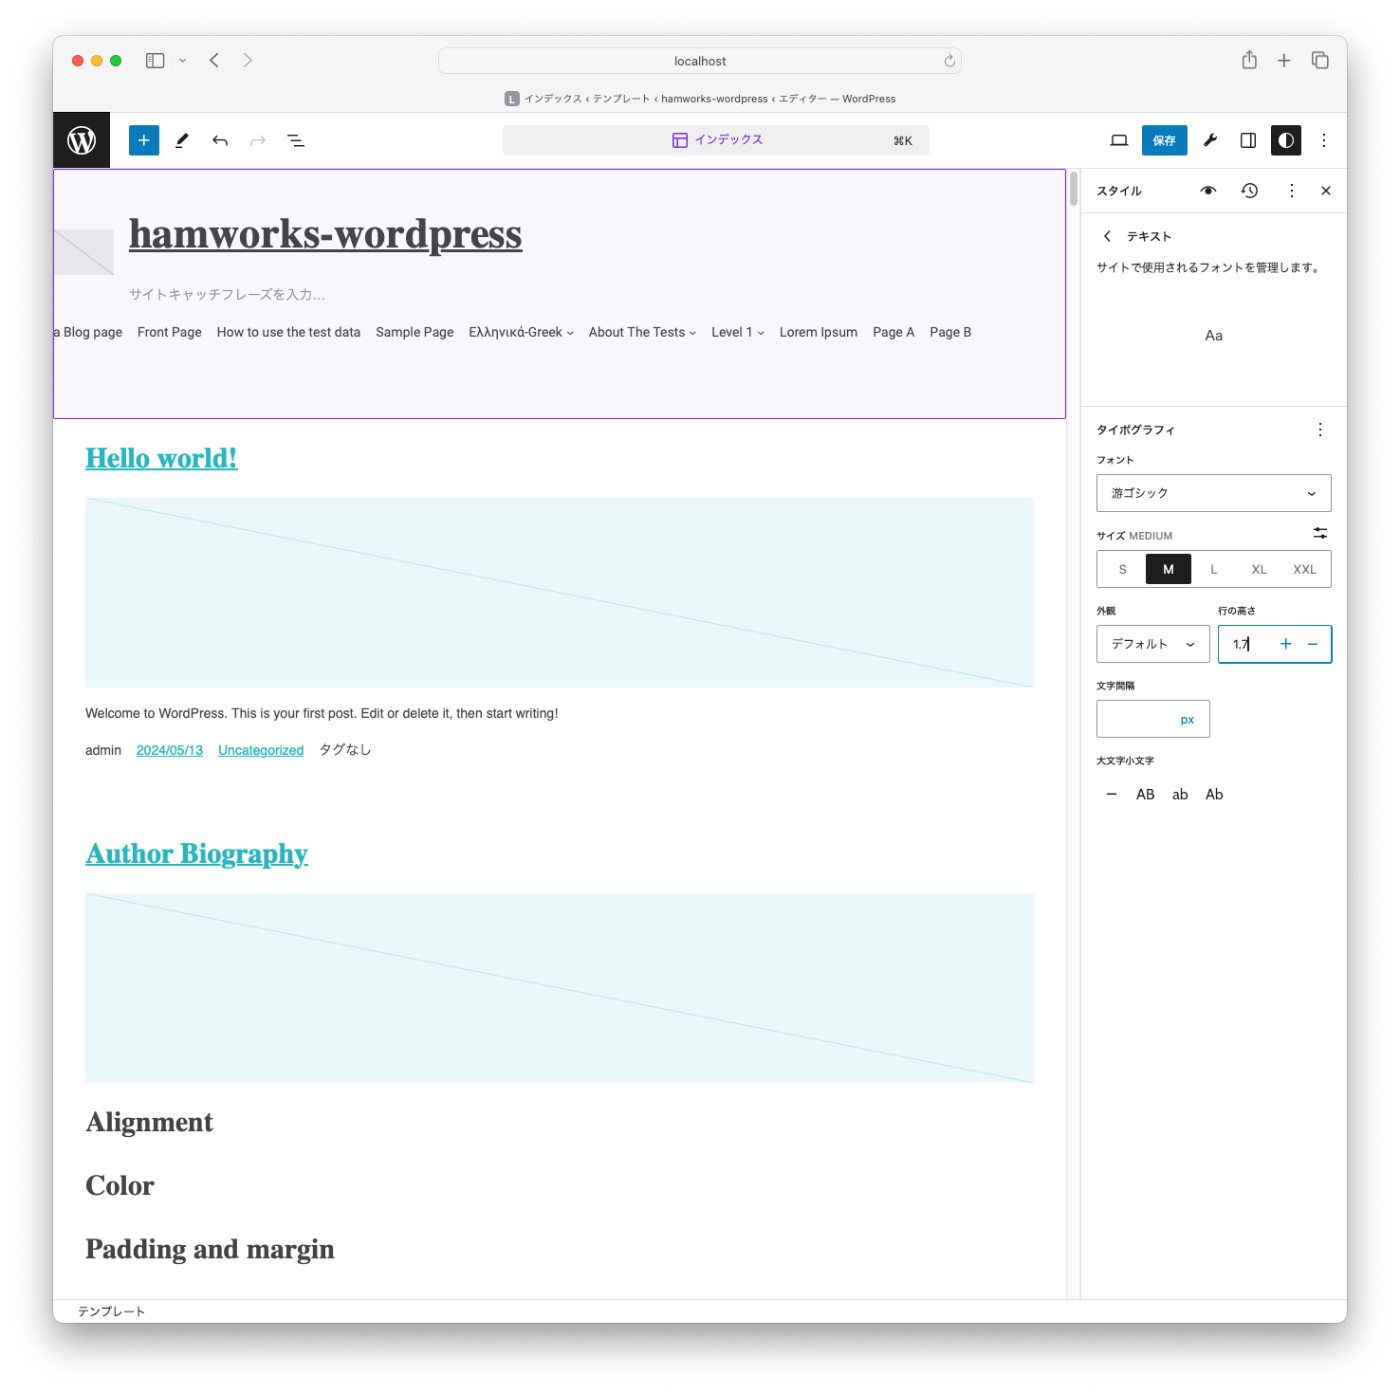
次はタイポグラフィ。サイト見ると一部フォントサイズがPCとSPで設定されてるのがあったりするので、"fluid": trueを入れる
minViewportWidth は最小サイズ。よくあるのはSPサイズとしてデザインもらうサイズなので、おおむね375px。
{
	"settings": {
		"typography": {
			"fluid": {
				"minViewportWidth": "375px",
				"maxViewportWidth": "1000px"
			},
			"fontFamilies": [
				{
					"fontFamily": "-apple-system, BlinkMacSystemFont, 'Segoe UI', Roboto, Oxygen-Sans, Ubuntu, Cantarell, 'Helvetica Neue', sans-serif",
					"name": "System Font",
					"slug": "system-font"
				}
			],
			"fontSizes": [
				{
					"fluid": false,
					"name": "Small",
					"size": "0.875rem",
					"slug": "small"
				},
				{
					"fluid": false,
					"name": "Medium",
					"size": "1rem",
					"slug": "medium"
				},
				{
					"fluid": false,
					"name": "Large",
					"size": "1.25rem",
					"slug": "large"
				},
				{
					"fluid": false,
					"name": "Extra Large",
					"size": "1.5rem",
					"slug": "x-large"
				},
				{
					"fluid": {
						"max": "1.875rem",
						"min": "1.5rem"
					},
					"name": "Extra Extra Large",
					"size": "1.875rem",
					"slug": "xx-large"
				}
			]
		},
		"useRootPaddingAwareAlignments": true
	}
}
フォントもいれる。Googleフォントにあるものを使うときはここからアクセス許可して選べる
今回HAMWORKSサイトではGoogleフォントは使ってないので、theme.jsonに直接書きます
サイトのfont-familyはこれなので
font-family: "游ゴシック Medium", "Yu Gothic Medium", "游ゴシック体", YuGothic, sans-serif
theme.jsonに足します。
"fontFamilies": [
    {
        "fontFamily": "-apple-system, BlinkMacSystemFont, 'Segoe UI', Roboto, Oxygen-Sans, Ubuntu, Cantarell, 'Helvetica Neue', sans-serif",
        "name": "System Font",
        "slug": "system-font"
    },
+    {
+        "fontFamily": "'游ゴシック Medium', 'Yu Gothic Medium', '游ゴシック体', YuGothic, sans-serif",
+        "name": "游ゴシック",
+        "slug": "yu-gothic-font"
+    }
]
筑紫A丸ゴシック Stdも一部で使われてるので使う。これもfontFamiliesにいれる
これはFONTPLUSを使ってるので、JSをエンキューします
add_action( 'wp_enqueue_scripts', function () {
	wp_enqueue_script( 'hamworks-fontplus', [FONTPLUS_URL], array(), wp_get_theme()->get( 'Version' ), false );
} );
見出しは筑紫A丸ゴシック Std指定しておこうと思って見出しのパネル開いたら、なんかすごい柔軟になってた

前までh1とかなかったぞ…!いやーこれでjsonいちいち書かなくていいのは助かる〜
エンキューしたフォントは残念ながら管理画面で見れないので一旦サイト表示で確認。
うむ。見出しにちゃんとあたっている
デザインシステムがあるわけじゃないから、既存の見出しサイズをもとにざっくり設定
サイト見たらRobotoもあったから入れておくか…RobotoはGoogleフォントのなかにいるので選択

まあ400と700があればいいでしょう。
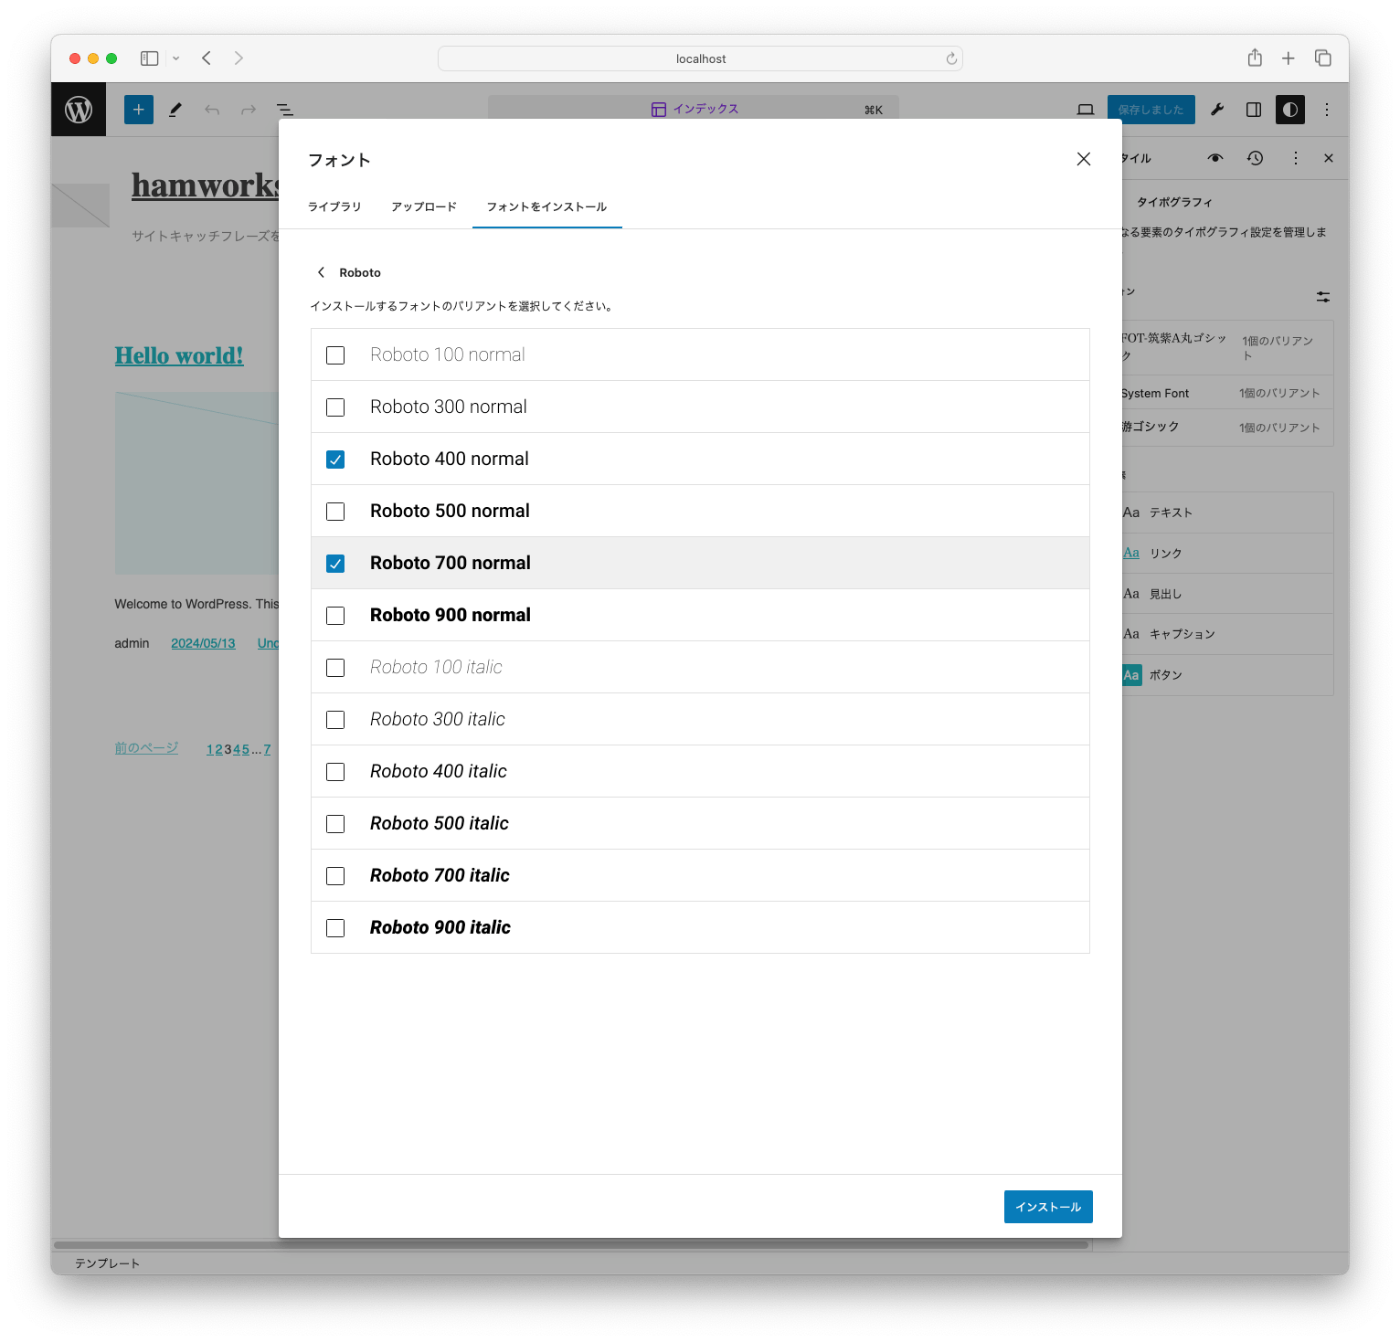
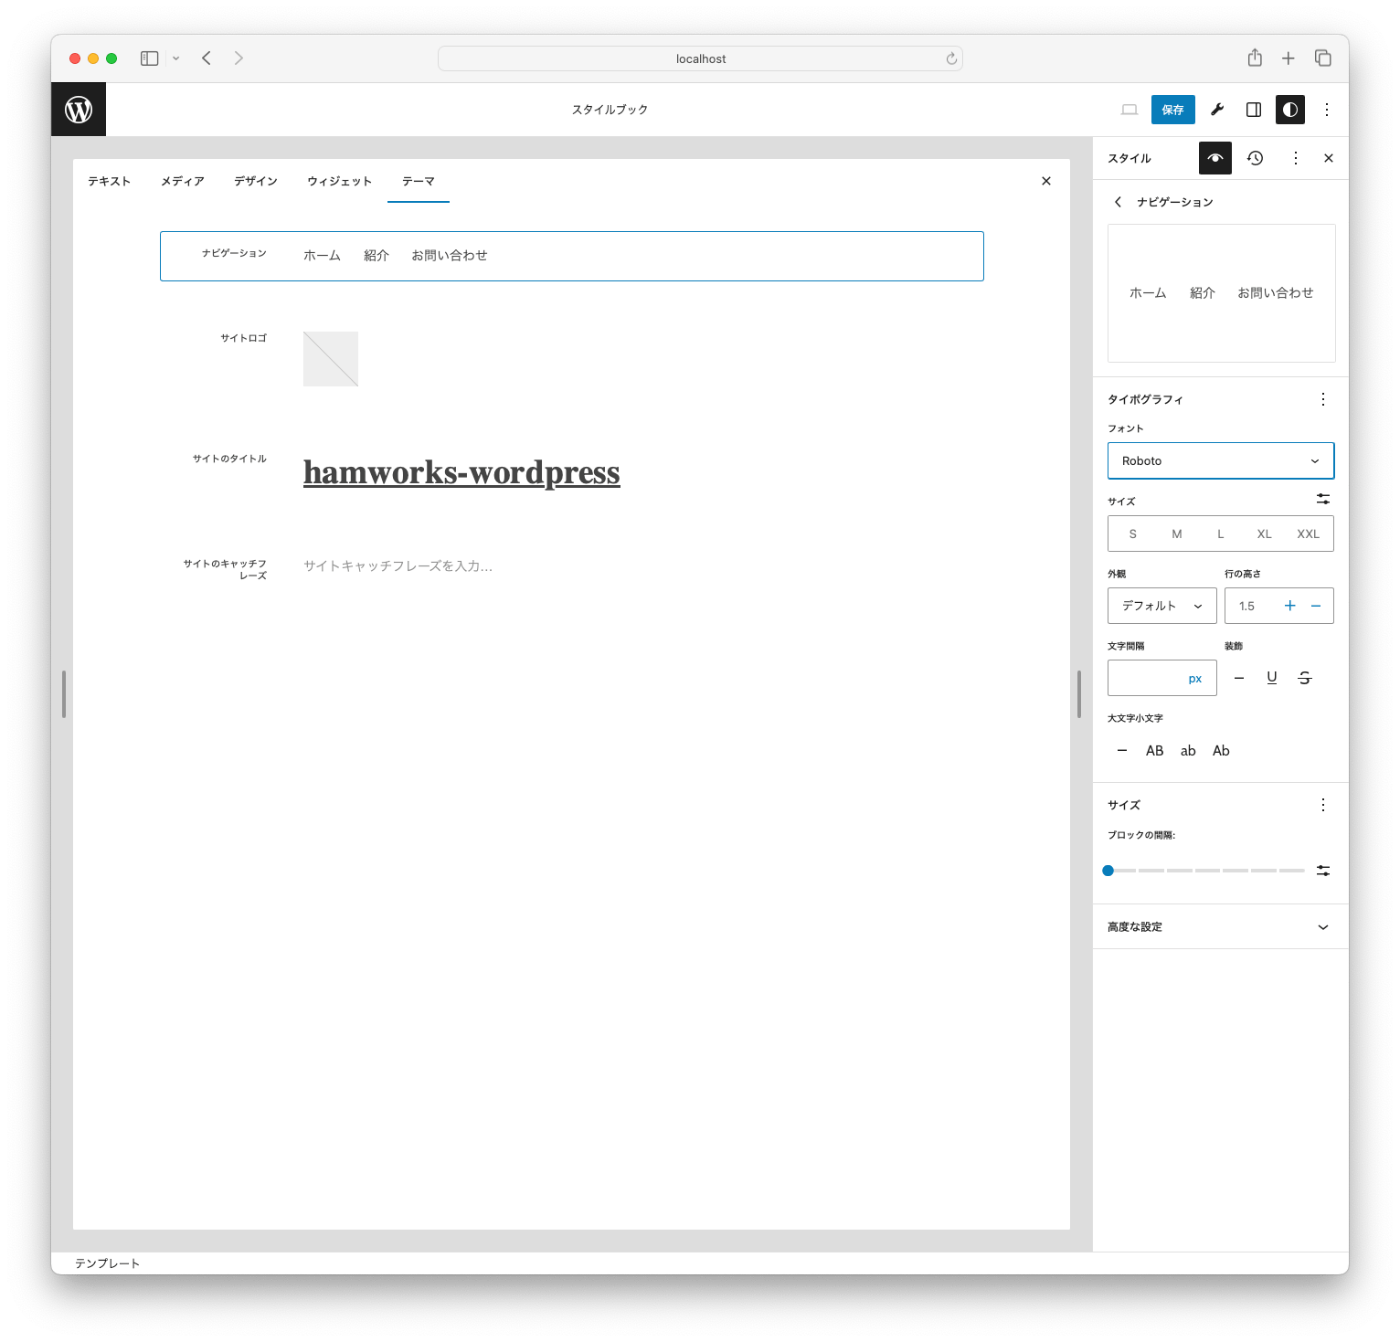
Roboto使われてるのはメニューかな。ナビゲーションブロックのデフォルトとして設定しておく。
Googleフォント使ってインストールしたフォントはデフォルトだとテーマ内のassets/fontsに保存される
次は余白の設定。余白は整理していいよって言われたので、8の倍数で整理。
{
	"settings": {
		"spacing": {
+			"spacingScale": {
+				"steps": 0
+			},
+			"spacingSizes": [
+				{
+					"name": "1",
+					"size": "0.5rem",
+					"slug": "10"
+				},
+				{
+					"name": "2",
+					"size": "1rem",
+					"slug": "20"
+				},
+				{
+					"name": "3",
+					"size": "1.5rem",
+					"slug": "30"
+				},
+				{
+					"name": "4",
+					"size": "2rem",
+					"slug": "40"
+				},
+				{
+					"name": "5",
+					"size": "2.5rem",
+					"slug": "50"
+				},
+				{
+					"name": "6",
+					"size": "3rem",
+					"slug": "60"
+				}
+			],
			"units": [
				"%",
				"px",
				"em",
				"rem",
				"vh",
				"vw"
			]
		},
        ...
}
今回はリキッドにしなくてよさそうかなと思ったので素直にremで書いた。
リキッドにする場合はclampで指定してる。
{
    "name": "MAX: 120px",
    "size": "clamp(3.75rem, 1.556rem + 9.36vw, 7.5rem)",
    "slug": "90"
}
計算はサイト使ってやる。

minにスマホ、maxにコンテンツ幅で計算
spacingSizesいれたらメインエリアの余白とブロックのデフォルトのgapサイズを設定

ボタンは角丸にしないのでデフォルトで設定
リストのマーカーの色を変えたいから、ブロックの追加CSSに書きます。
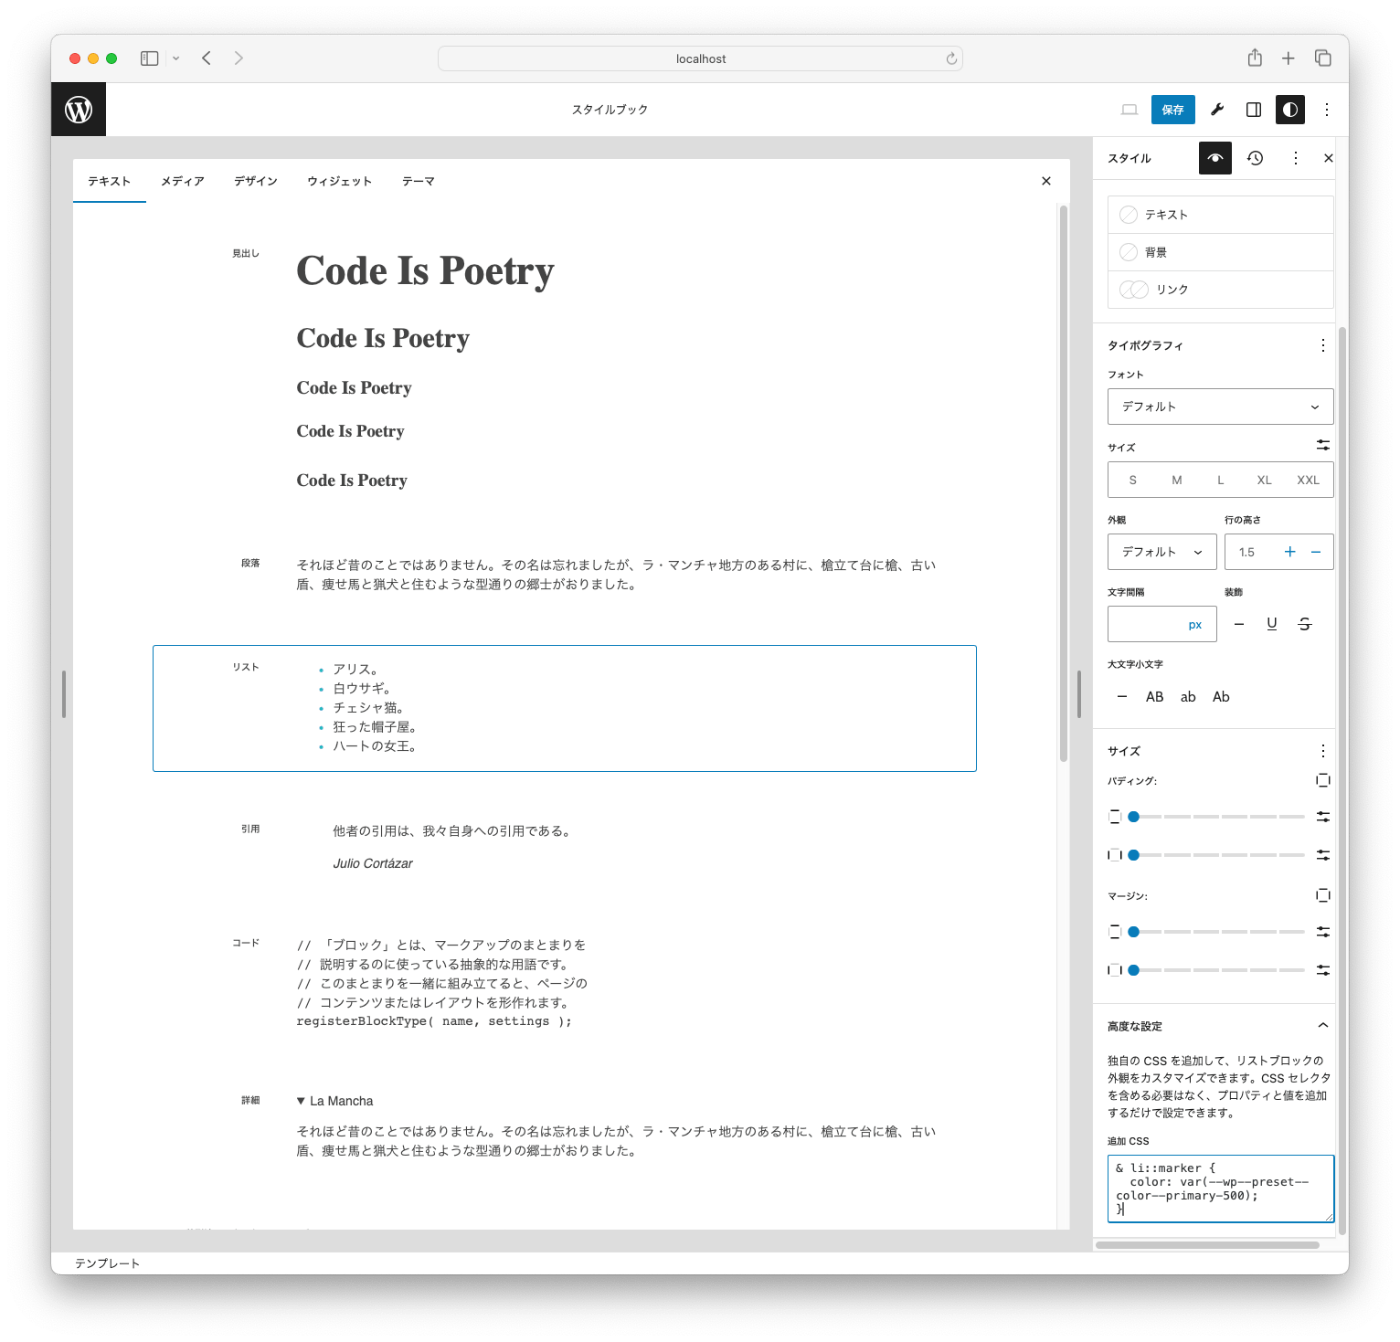
リストのマーカーの色はtheme.css作ってそっちに書いてるけど、今回は検証も兼ねてこっちに書いてみる。
正直追加CSSはCSSファイルに書いたほうがわかりやすいんでないかと思ってる。ここのテキストエリアだと補完もないし書きにくいしね…。
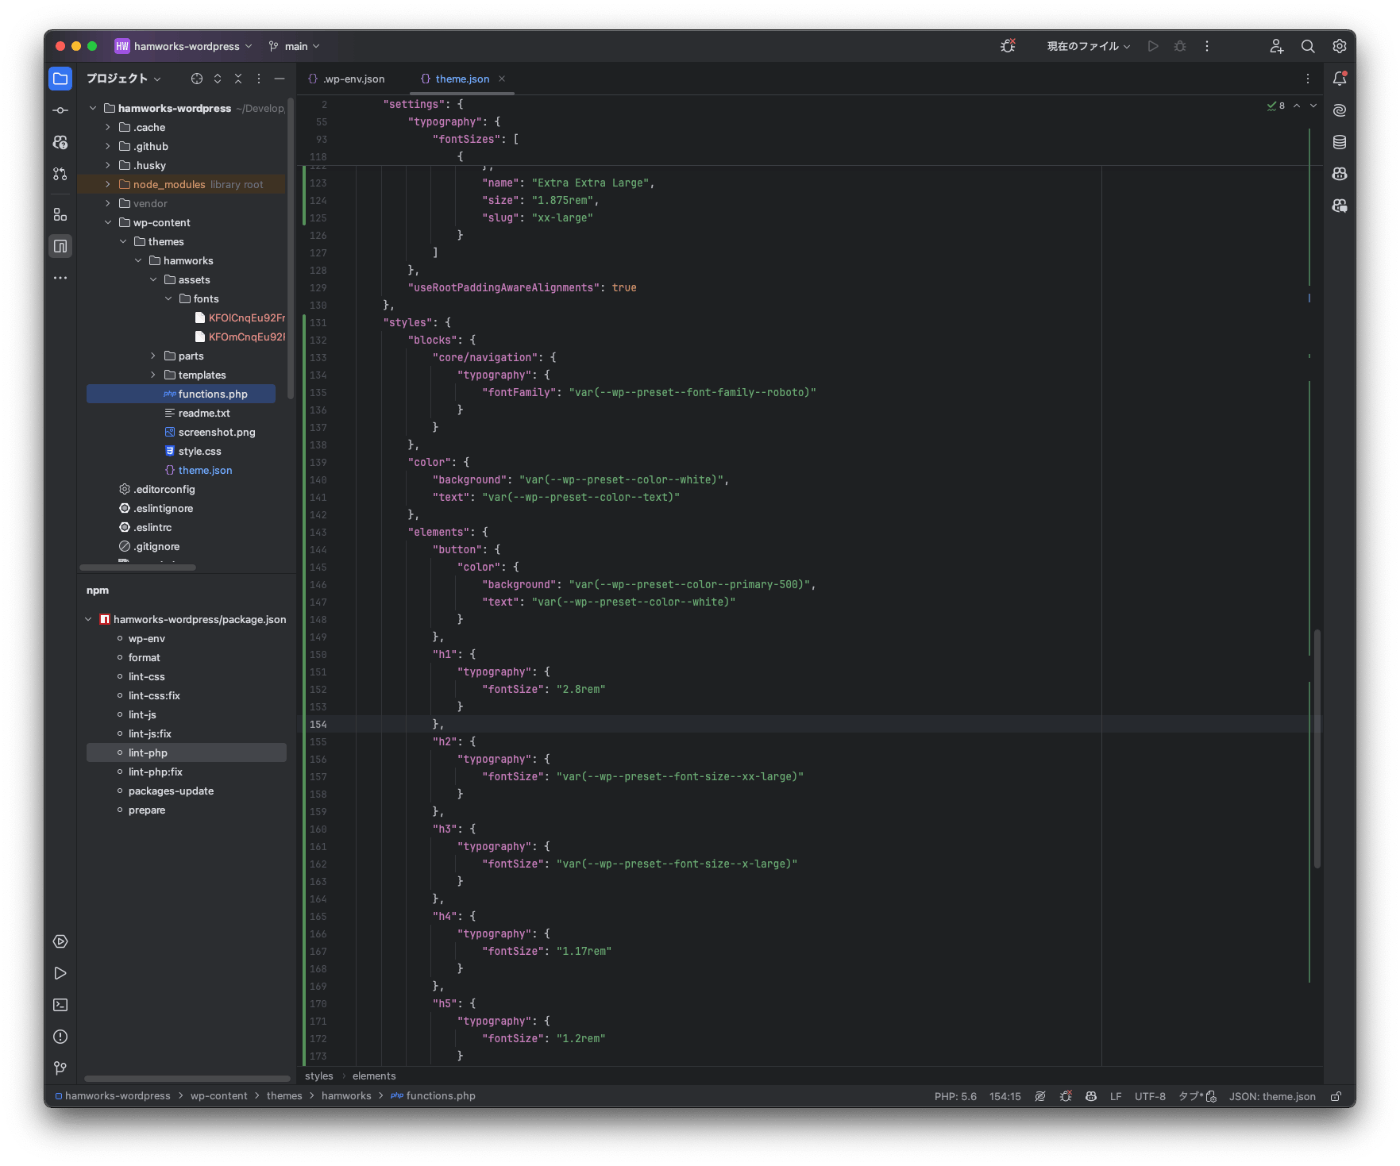
これでtheme.jsonは一旦おしまいでいいかな。
完成形はこれ
{
	"settings": {
		"appearanceTools": true,
		"color": {
			"defaultDuotone": false,
			"defaultGradients": false,
			"defaultPalette": false,
			"palette": [
				{
					"color": "#056e76",
					"name": "Primary - 800",
					"slug": "primary-800"
				},
				{
					"color": "#25b7c0",
					"name": "Primary - 500",
					"slug": "primary-500"
				},
				{
					"color": "#d4efef",
					"name": "Primary - 100",
					"slug": "primary-100"
				},
				{
					"color": "#444444",
					"name": "Gray - 500",
					"slug": "gray-500"
				},
				{
					"color": "#ffffff",
					"name": "White",
					"slug": "white"
				},
				{
					"color": "#e5e5e5",
					"name": "Neutral - 200",
					"slug": "neutral-200"
				}
			]
		},
		"layout": {
			"contentSize": "1000px",
			"wideSize": "1600px"
		},
		"spacing": {
			"spacingScale": {
				"steps": 0
			},
			"spacingSizes": [
				{
					"name": "1",
					"size": "0.5rem",
					"slug": "10"
				},
				{
					"name": "2",
					"size": "1rem",
					"slug": "20"
				},
				{
					"name": "3",
					"size": "1.5rem",
					"slug": "30"
				},
				{
					"name": "4",
					"size": "2rem",
					"slug": "40"
				},
				{
					"name": "5",
					"size": "2.5rem",
					"slug": "50"
				},
				{
					"name": "6",
					"size": "3rem",
					"slug": "60"
				}
			],
			"units": [ "%", "px", "em", "rem", "vh", "vw" ]
		},
		"typography": {
			"fluid": {
				"maxViewportWidth": "1000px",
				"minViewportWidth": "375px"
			},
			"fontFamilies": [
				{
					"fontFamily": "-apple-system, BlinkMacSystemFont, 'Segoe UI', Roboto, Oxygen-Sans, Ubuntu, Cantarell, 'Helvetica Neue', sans-serif",
					"name": "System Font",
					"slug": "system-font"
				},
				{
					"fontFamily": "'游ゴシック Medium', 'Yu Gothic Medium', '游ゴシック体', YuGothic, sans-serif",
					"name": "游ゴシック",
					"slug": "yu-gothic-font"
				},
				{
					"fontFamily": "'FOT-筑紫A丸ゴシック Std E'",
					"name": "FOT-筑紫A丸ゴシック",
					"slug": "tsukushi-a-maru-gothic-font"
				},
				{
					"fontFace": [
						{
							"fontFamily": "Roboto",
							"fontStyle": "normal",
							"fontWeight": "700",
							"src": "file:./assets/fonts/KFOlCnqEu92Fr1MmWUlvBh05IsDqlA.woff2"
						},
						{
							"fontFamily": "Roboto",
							"fontStyle": "normal",
							"fontWeight": "400",
							"src": "file:./assets/fonts/KFOmCnqEu92Fr1Me4GZLCzYlKw.woff2"
						}
					],
					"fontFamily": "Roboto, sans-serif",
					"name": "Roboto",
					"slug": "roboto"
				}
			],
			"fontSizes": [
				{
					"fluid": false,
					"name": "Small",
					"size": "0.875rem",
					"slug": "small"
				},
				{
					"fluid": false,
					"name": "Medium",
					"size": "1rem",
					"slug": "medium"
				},
				{
					"fluid": false,
					"name": "Large",
					"size": "1.25rem",
					"slug": "large"
				},
				{
					"fluid": false,
					"name": "Extra Large",
					"size": "1.5rem",
					"slug": "x-large"
				},
				{
					"fluid": {
						"max": "1.875rem",
						"min": "1.5rem"
					},
					"name": "Extra Extra Large",
					"size": "1.875rem",
					"slug": "xx-large"
				}
			]
		},
		"useRootPaddingAwareAlignments": true
	},
	"styles": {
		"blocks": {
			"core/button": {
				"border": {
					"radius": "0px"
				}
			},
			"core/list": {
				"css": "& li::marker { color: var(--wp--preset--color--primary-500); }",
				"spacing": {
					"padding": {
						"left": "1.5em"
					}
				}
			},
			"core/navigation": {
				"typography": {
					"fontFamily": "var(--wp--preset--font-family--roboto)"
				}
			}
		},
		"color": {
			"background": "var(--wp--preset--color--white)",
			"text": "var(--wp--preset--color--gray-500)"
		},
		"elements": {
			"button": {
				"color": {
					"background": "var(--wp--preset--color--primary-500)",
					"text": "var(--wp--preset--color--white)"
				}
			},
			"h1": {
				"typography": {
					"fontSize": "2.25rem"
				}
			},
			"h2": {
				"typography": {
					"fontSize": "var(--wp--preset--font-size--xx-large)"
				}
			},
			"h3": {
				"typography": {
					"fontSize": "var(--wp--preset--font-size--x-large)"
				}
			},
			"h4": {
				"typography": {
					"fontSize": "var(--wp--preset--font-size--large)"
				}
			},
			"h5": {
				"typography": {
					"fontSize": "1.125rem"
				}
			},
			"h6": {
				"typography": {
					"fontSize": "1.125rem"
				}
			},
			"heading": {
				"typography": {
					"fontFamily": "var(--wp--preset--font-family--tsukushi-a-maru-gothic-font)"
				}
			},
			"link": {
				":hover": {
					"color": {
						"text": "var(--wp--preset--color--primary-800)"
					}
				},
				"color": {
					"text": "var(--wp--preset--color--primary-500)"
				}
			}
		},
		"spacing": {
			"blockGap": "var(--wp--preset--spacing--20)",
			"padding": {
				"bottom": "0px",
				"left": "var(--wp--preset--spacing--30)",
				"right": "var(--wp--preset--spacing--30)",
				"top": "0px"
			}
		},
		"typography": {
			"fontFamily": "var(--wp--preset--font-family--yu-gothic-font)",
			"fontSize": "var(--wp--preset--font-size--medium)",
			"lineHeight": "1.7"
		}
	},
	"templateParts": [
		{
			"area": "header",
			"name": "header"
		},
		{
			"area": "footer",
			"name": "footer"
		}
	],
	"version": 2,
	"$schema": "https://schemas.wp.org/wp/6.5/theme.json"
}
いつもの手順だと次はコンテンツつくっていく。そのためにTheme Unit Testを入れてブロックのスタイルを調整したりするので、今回もいれておく。
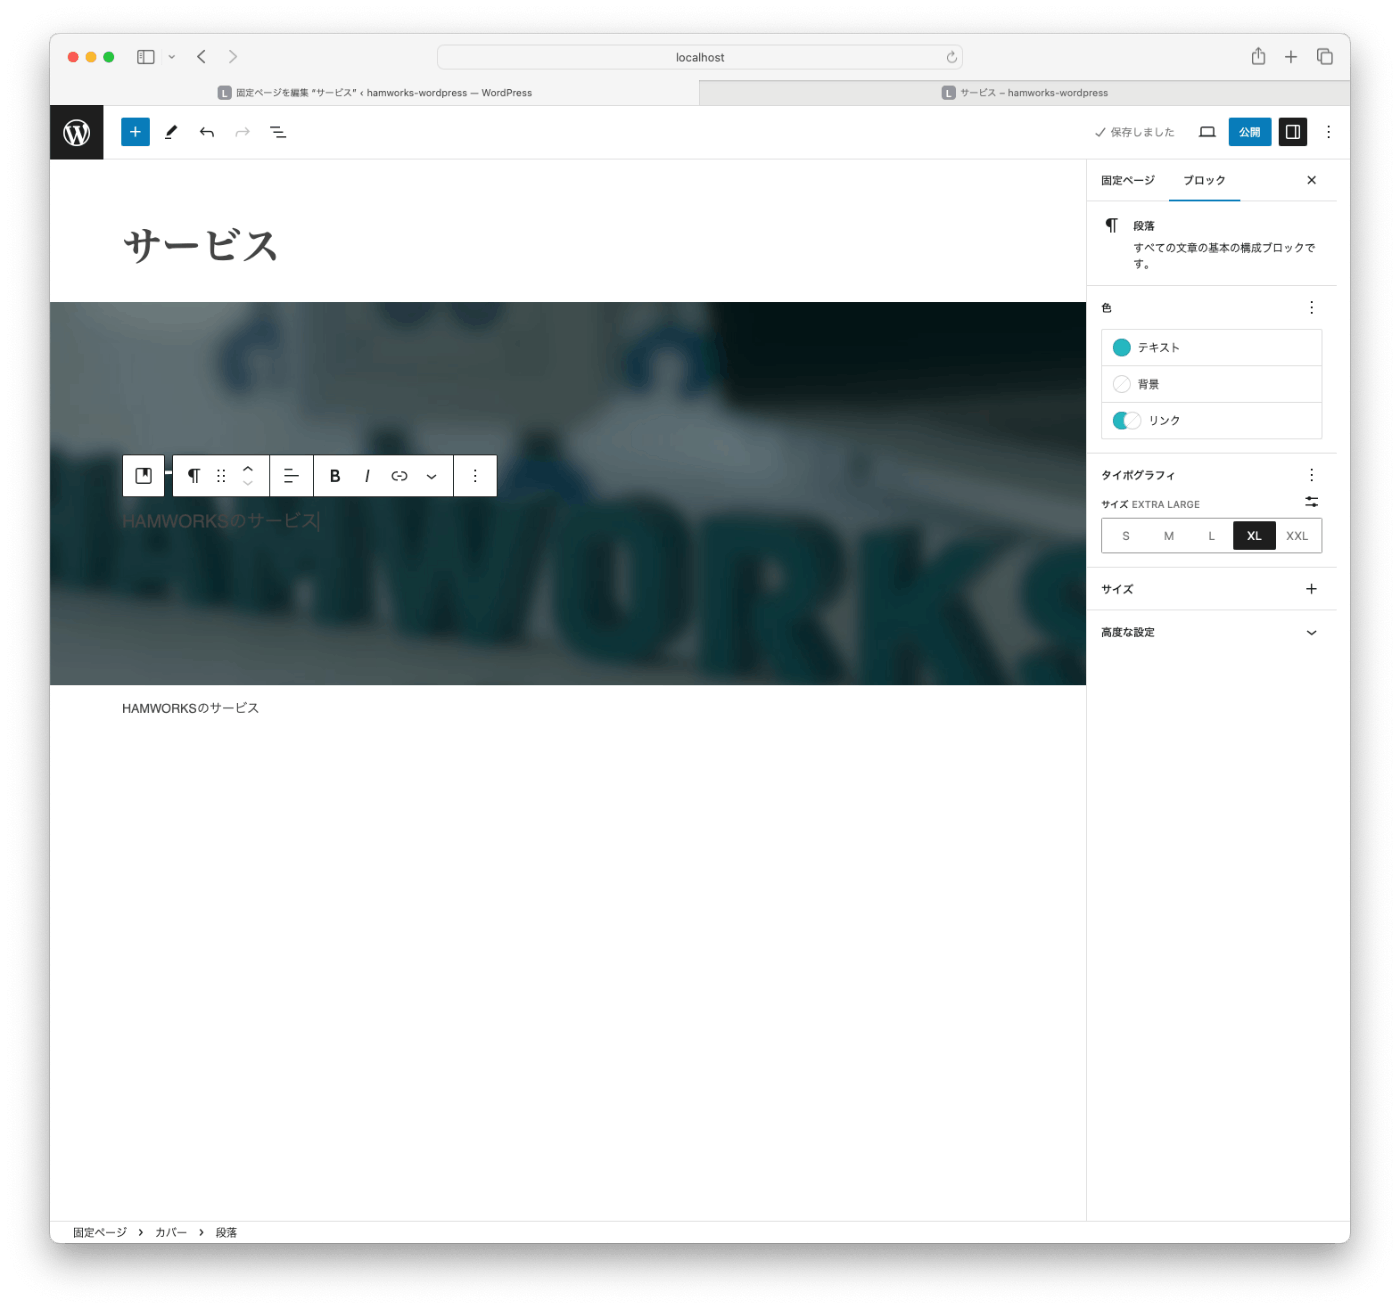
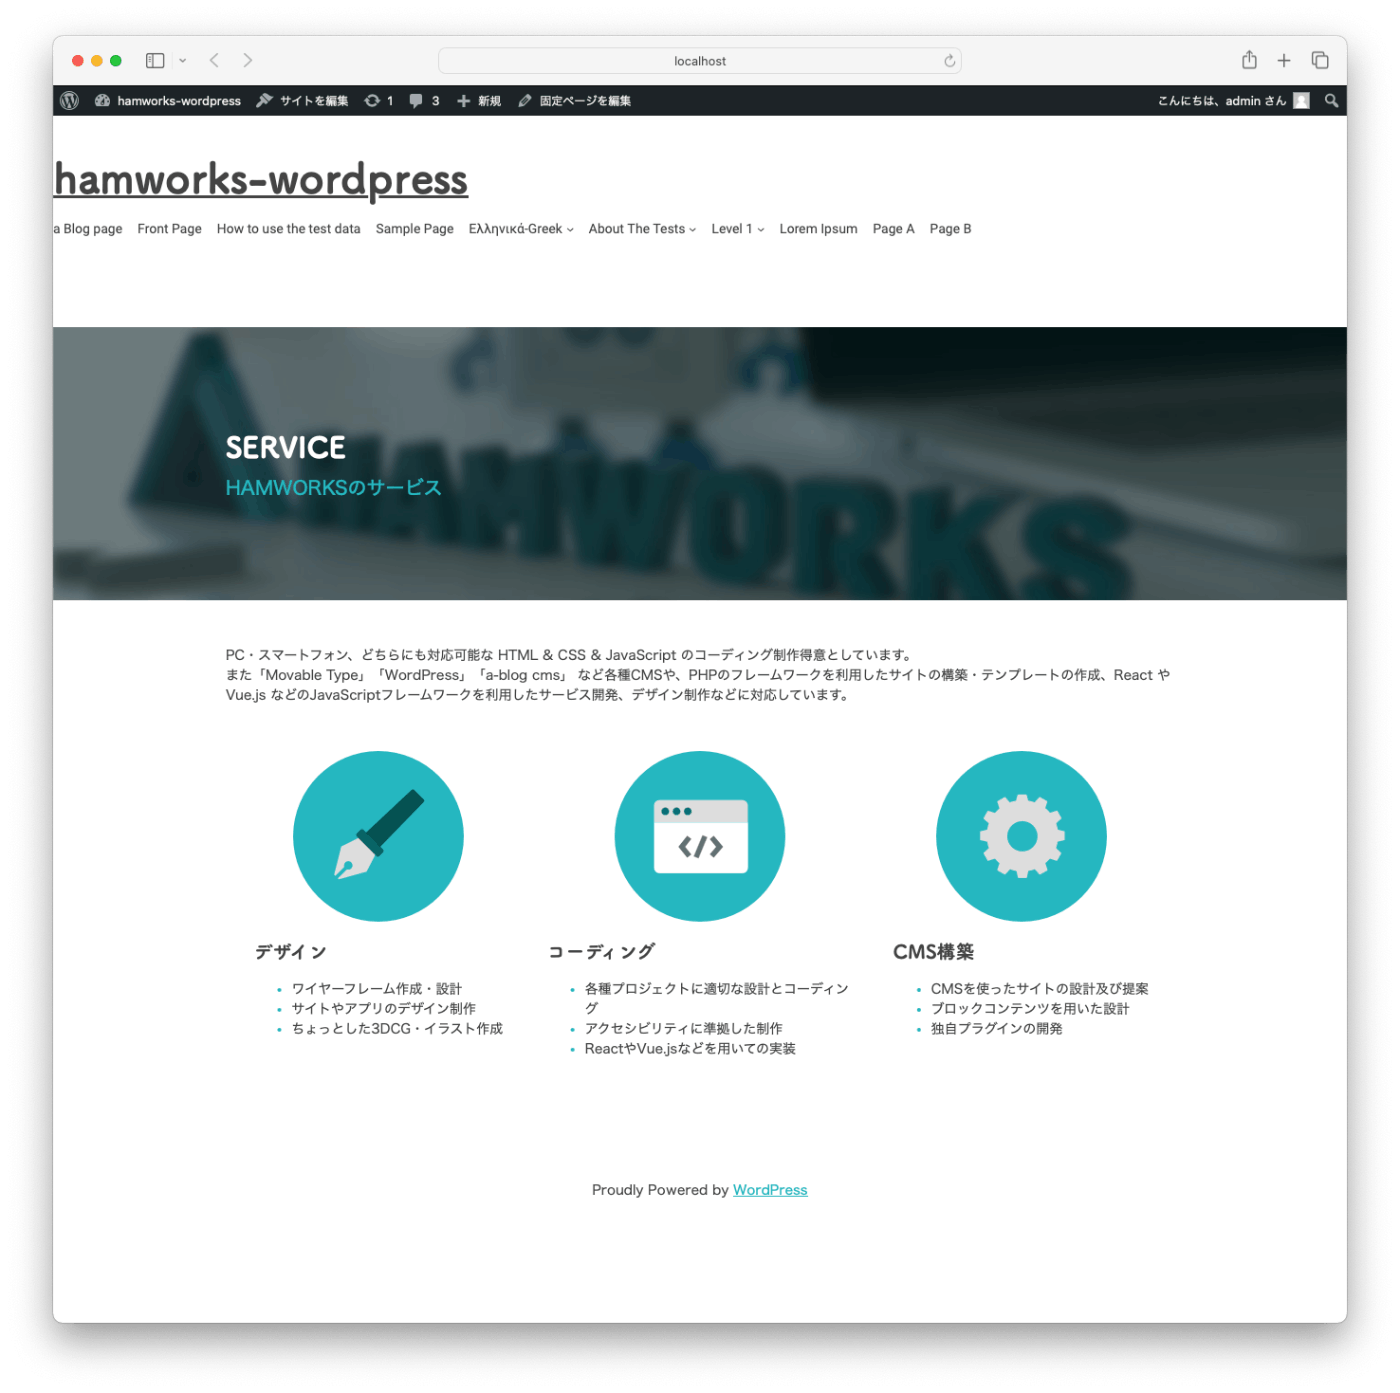
サービスのコンテンツをつくっていく
全幅指定したのに、表示側ではならない。

こいつのせいか
body .is-layout-constrained > :where(:not(.alignleft):not(.alignright):not(.alignfull)) {
    max-width: var(--wp--style--global--content-size);
    margin-left: auto !important;
    margin-right: auto !important;
}
こういうときはtt-4を参考にする
ふむ。親のグループブロックの「コンテント幅を使用するインナーブロック」がオフになってる
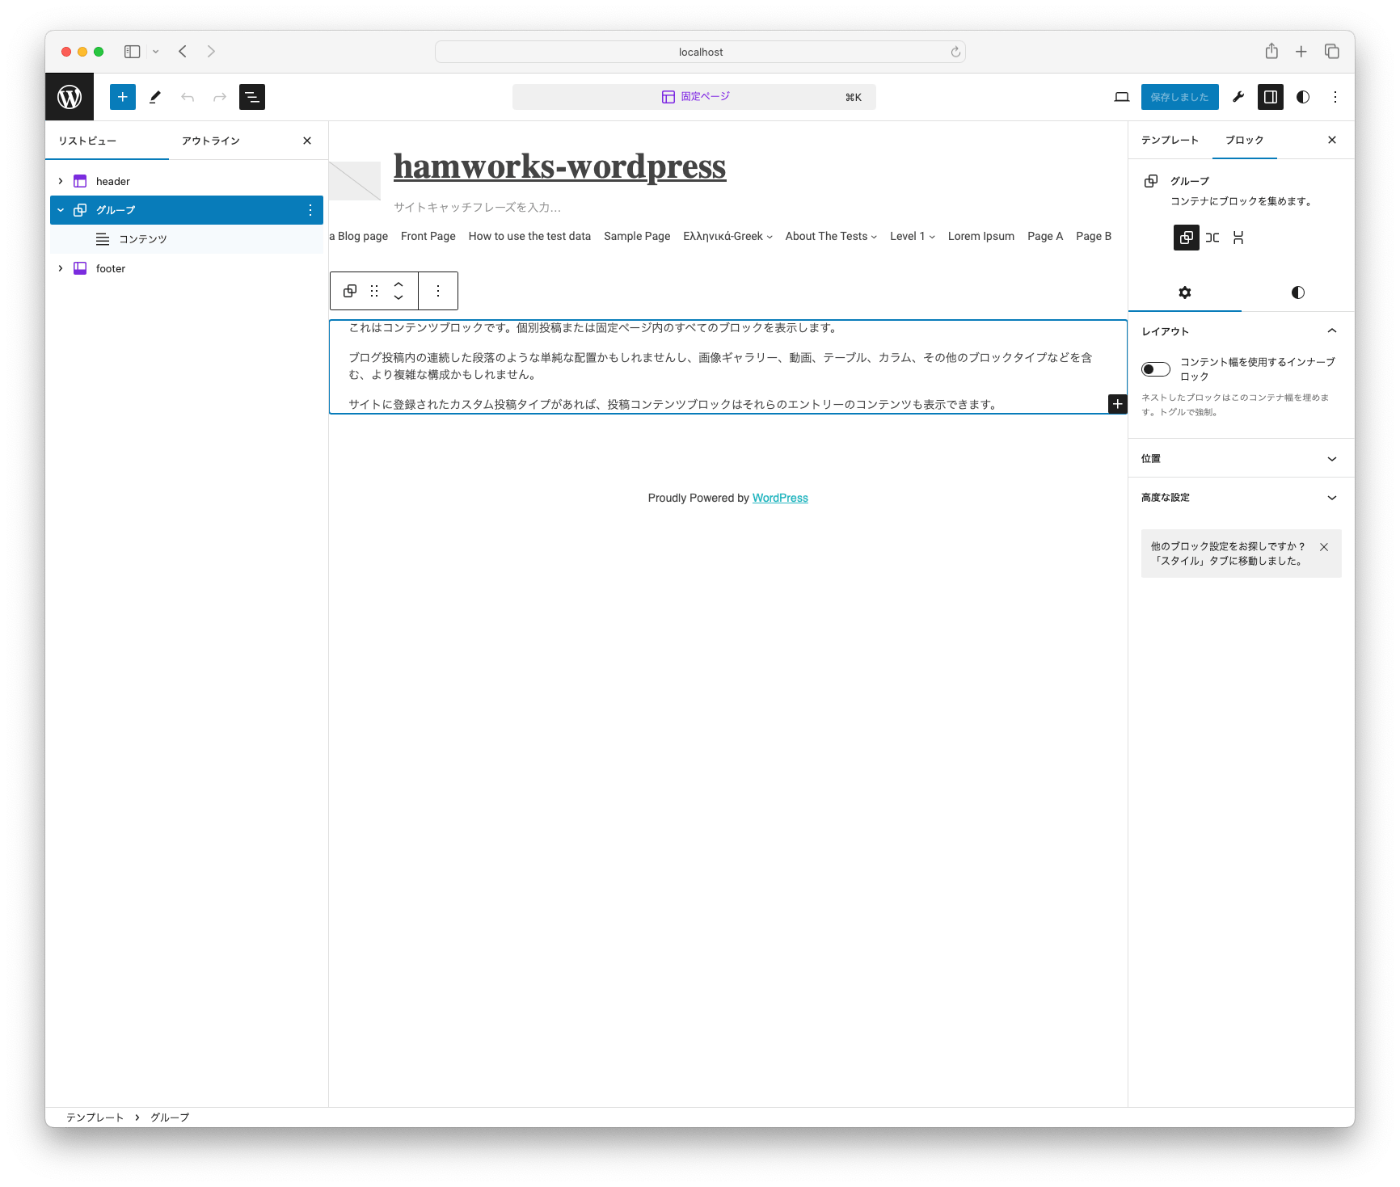
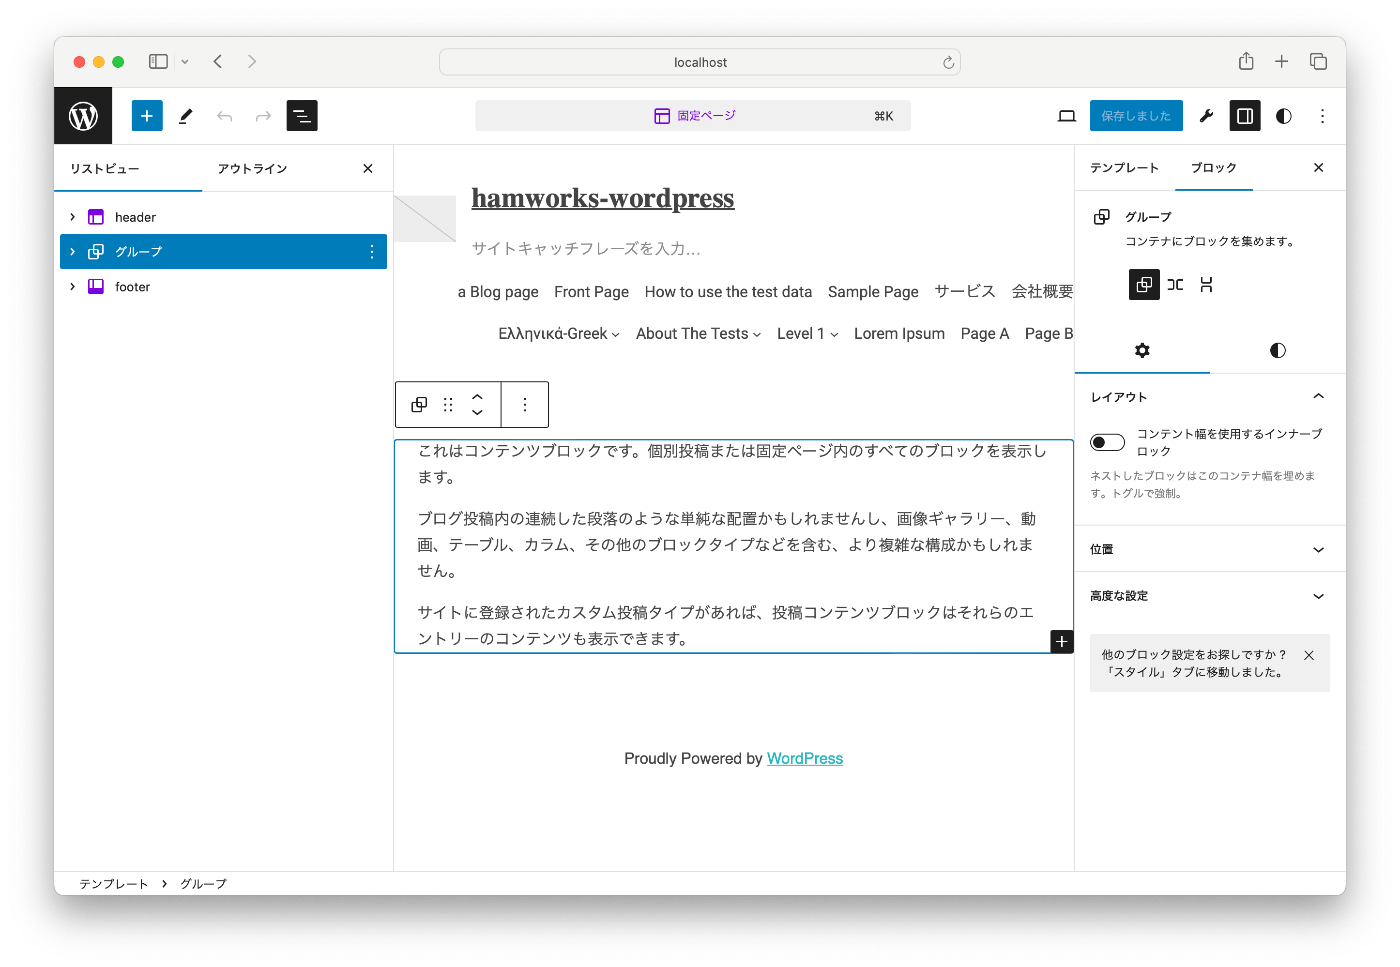
とりあえず固定ページ用のテンプレートを用意するだけしておくかー

固定ページ全部に適用するから一覧を選択

これはスキップ

内容はヘッダーフッターに加えてグループブロック+コンテンツブロックな構成。
「コンテント幅を使用するインナーブロック」をオフにしておく
やったぜぶい

もともとのサイトでは、このカバーブロックにあたるところはPCが高さ300px、SPが高さ160pxの指定がある
どっちにするかは検討するとして、tailwindは入れます。
npm install -D tailwindcss
tailwind.base.config.jsも用意
/** @type {import('tailwindcss').Config} */
module.exports = {
	content: [ './**/*.{html,php,js,tsx}' ],
	theme: {
		screens: {
			sm: '600px',
			md: '782px',
			lg: '960px',
			xl: '1280px',
		},
	},
	corePlugins: {
		preflight: false,
	},
};
ブレークポイントをおおよそWPにあわせます
よく見るかなーってやつだけ
テーマをworkspaceにする
ここにbaseとして用意してるのは、プラグインつくったときにも同じ設定を有効にするため
テーマ内にpackage.jsonを追加
{
	"private": true,
	"scripts": {
		"build": "wp-scripts build --webpack-copy-php",
		"dev": "wp-scripts start --webpack-copy-php"
	},
	"devDependencies": {
		"@wordpress/scripts": "^27.8.0",
		"glob": "^10.3.15",
		"path": "^0.12.7",
		"tailwindcss": "^3.4.3",
		"webpack-remove-empty-scripts": "^1.0.4"
	}
}
ビルド用のファイルを用意していきます
/** @type {import('tailwindcss').Config} */
const config = require( '../../../tailwind.base.config' );
module.exports = {
	...config,
	content: [
		'./{404,home,front-page,index,archive,page,single,sidebar,header,footer,search}.php',
		'./template-parts/**/*.php',
		'./inc/**/*.php',
		'./parts/**/*.{html,php}',
		'./templates/**/*.{html,php}',
		'./patterns/**/*.{html,php}',
	],
};
tailwind使ってビルドする対象をここで指定します。
なので、追加クラスつけたときはパターンなりテンプレートパーツなりに入れる。(じゃないとビルドされない)
tailwindを入れる理由はあくまでこういうパーツに使ったりするため。お客さんにtailwindのこのCSSつかってーみたいな案内はしない。使うならパターンを用意して、使いたいパターンをぽちってするだけでOK!な状態で出す
module.exports = {
	plugins: {
		'tailwindcss/nesting': {},
		tailwindcss: {},
		autoprefixer: {},
	},
};
const defaultConfig = require( '@wordpress/scripts/config/webpack.config' );
const RemoveEmptyScriptsPlugin = require( 'webpack-remove-empty-scripts' );
const path = require( 'path' );
const glob = require( 'glob' );

/**
 * 各ブロックのCSSファイルをentryに追加するためのオブジェクトを作成
 */
const blockStyleDir = 'src/styles';
const blockEntries = glob
	.sync( 'blocks/**/*.css', {
		cwd: blockStyleDir,
	} )
	.map( ( key ) => [
		`styles/${ key.replace( '.css', '' ) }`,
		path.resolve( process.cwd(), blockStyleDir, key ),
	] );
const blockEntriesObj = Object.fromEntries( blockEntries );

module.exports = {
	...defaultConfig,
	entry: {
		...defaultConfig.entry,
		'styles/theme/theme': path.resolve(
			process.cwd(),
			'src/styles/theme/theme.css'
		),
		...blockEntriesObj,
	},
	plugins: [
		// Include WP's plugin config.
		...defaultConfig.plugins,

		// Removes the empty `.js` files generated by webpack but
		// sets it after WP has generated its `*.asset.php` file.
		new RemoveEmptyScriptsPlugin( {
			stage: RemoveEmptyScriptsPlugin.STAGE_AFTER_PROCESS_PLUGINS,
		} ),
	],
};
ページ内でブロックが使われてるときだけCSSをエンキューする、というつくりなのでwp_enqueue_block_style用にブロック単位でCSSファイルを分けます。いちいち追加するのが面倒なので、特定のディレクトリ配下のCSSファイル(私が書いてるのだとsrc/styles/blocks/**/*.css)をビルドしてねーって書いておく。
styles/theme/theme は、ブロックではなくテーマ全体に関わるようなCSSを書くところ。正直ブロックテーマになってめちゃ減った。
@tailwind base;
@tailwind components;
@tailwind utilities;
これを置く。
コミットしようとしたら
 1:1  ✖  Unexpected unknown at-rule "@tailwind"  at-rule-no-unknown
 2:1  ✖  Unexpected unknown at-rule "@tailwind"  at-rule-no-unknown
 3:1  ✖  Unexpected unknown at-rule "@tailwind"  at-rule-no-unknown
ってエラーが。
これはstylelintの設定なので、.stylelintrc.jsonを変えます
{
	"extends": "@wordpress/stylelint-config",
	"rules": {
		"at-rule-no-unknown": null
	}
}
theme.cssを入れたのでfunctions.phpにエンキュー足すのを忘れないように。忘れたら追加クラス入れたところでなんもでない
add_action( 'init', 'hamworks_styles' );
function hamworks_styles(): void {
	wp_register_style( 'hamworks-style', get_parent_theme_file_uri( 'build/styles/theme/theme.css' ), array(), '1.0.0' );
	add_editor_style( 'build/styles/theme/theme.css' );
}

add_action( 'wp_enqueue_scripts', function () {
	wp_enqueue_style( 'hamworks-style' );
	...
} );
よし本筋にもどる。カバーをvhにするか追加CSS入れるか
追加CSSクラスでやるなら
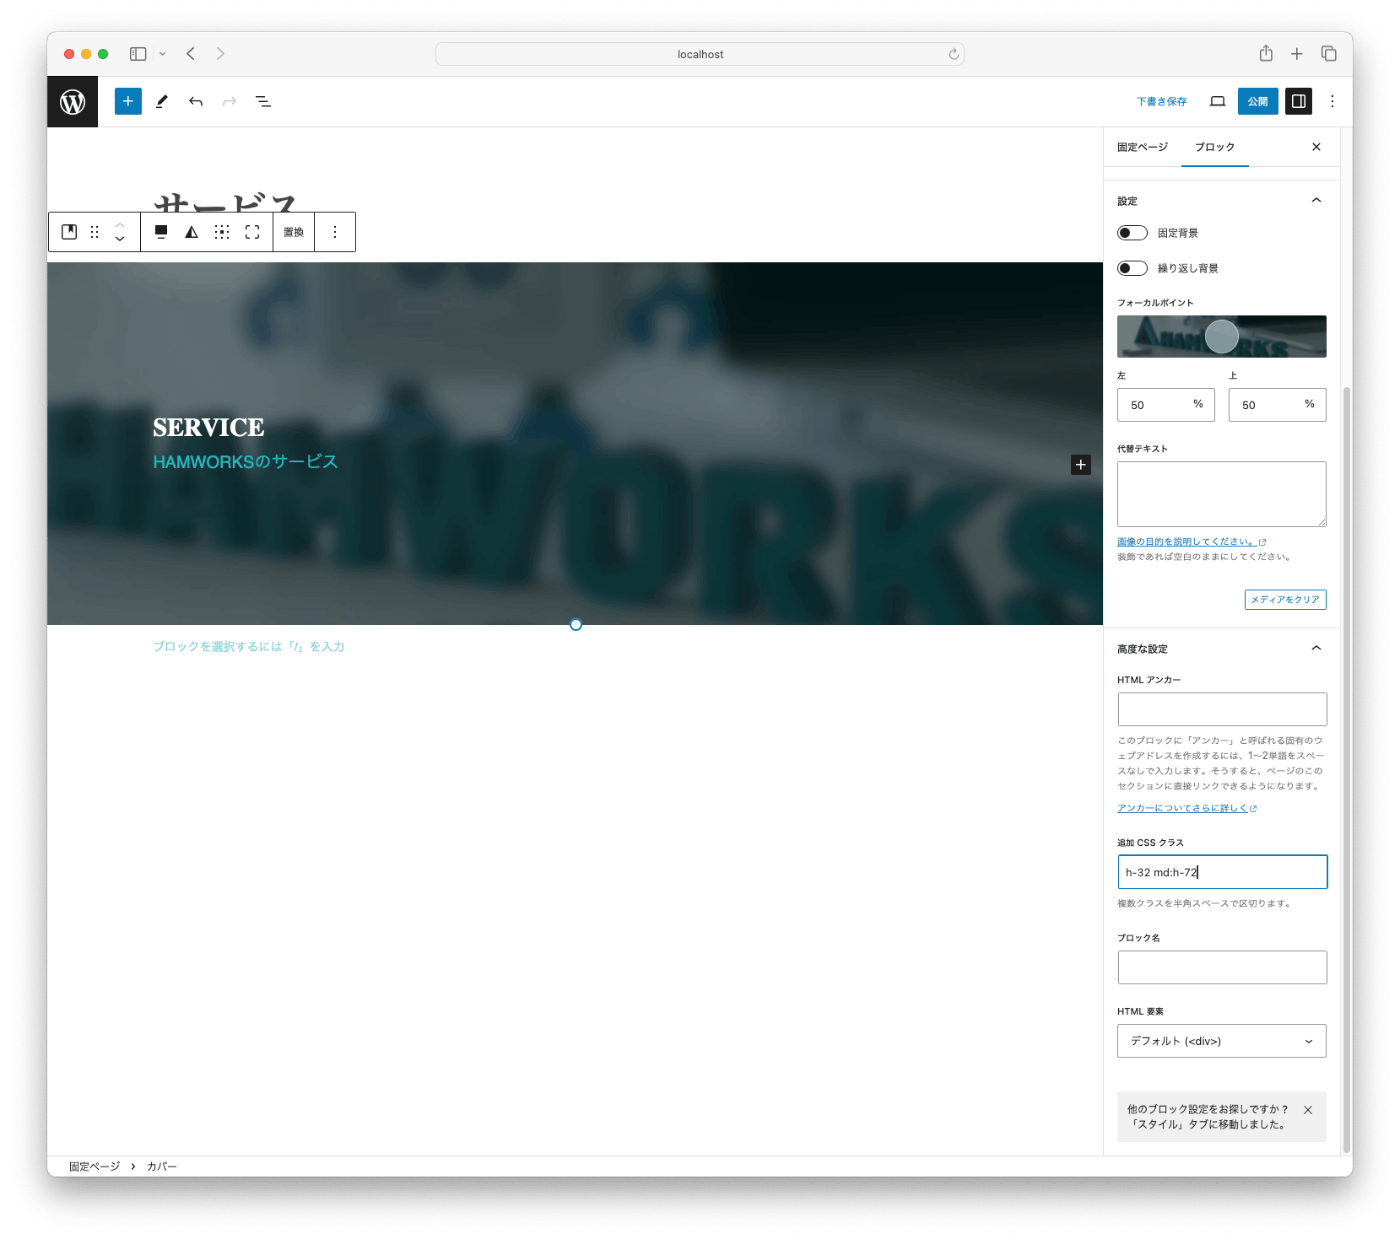
追加CSSクラスにh-32 md:h-72 を入れる(厳密にSP160px/PC300pxではないけどこの辺の値はよしなにしていいと許可もらってるのでtailwindで提供されてるものに合わせる)
このままだとビルドされずに使えないので、パターンにもっていきます
テーマの中にpatternsディレクトリを作り、page-title.phpをつくります。
エクスポートできたら楽だけどこれはできないので……
カバーブロックを選択してからスタイルをコピーして
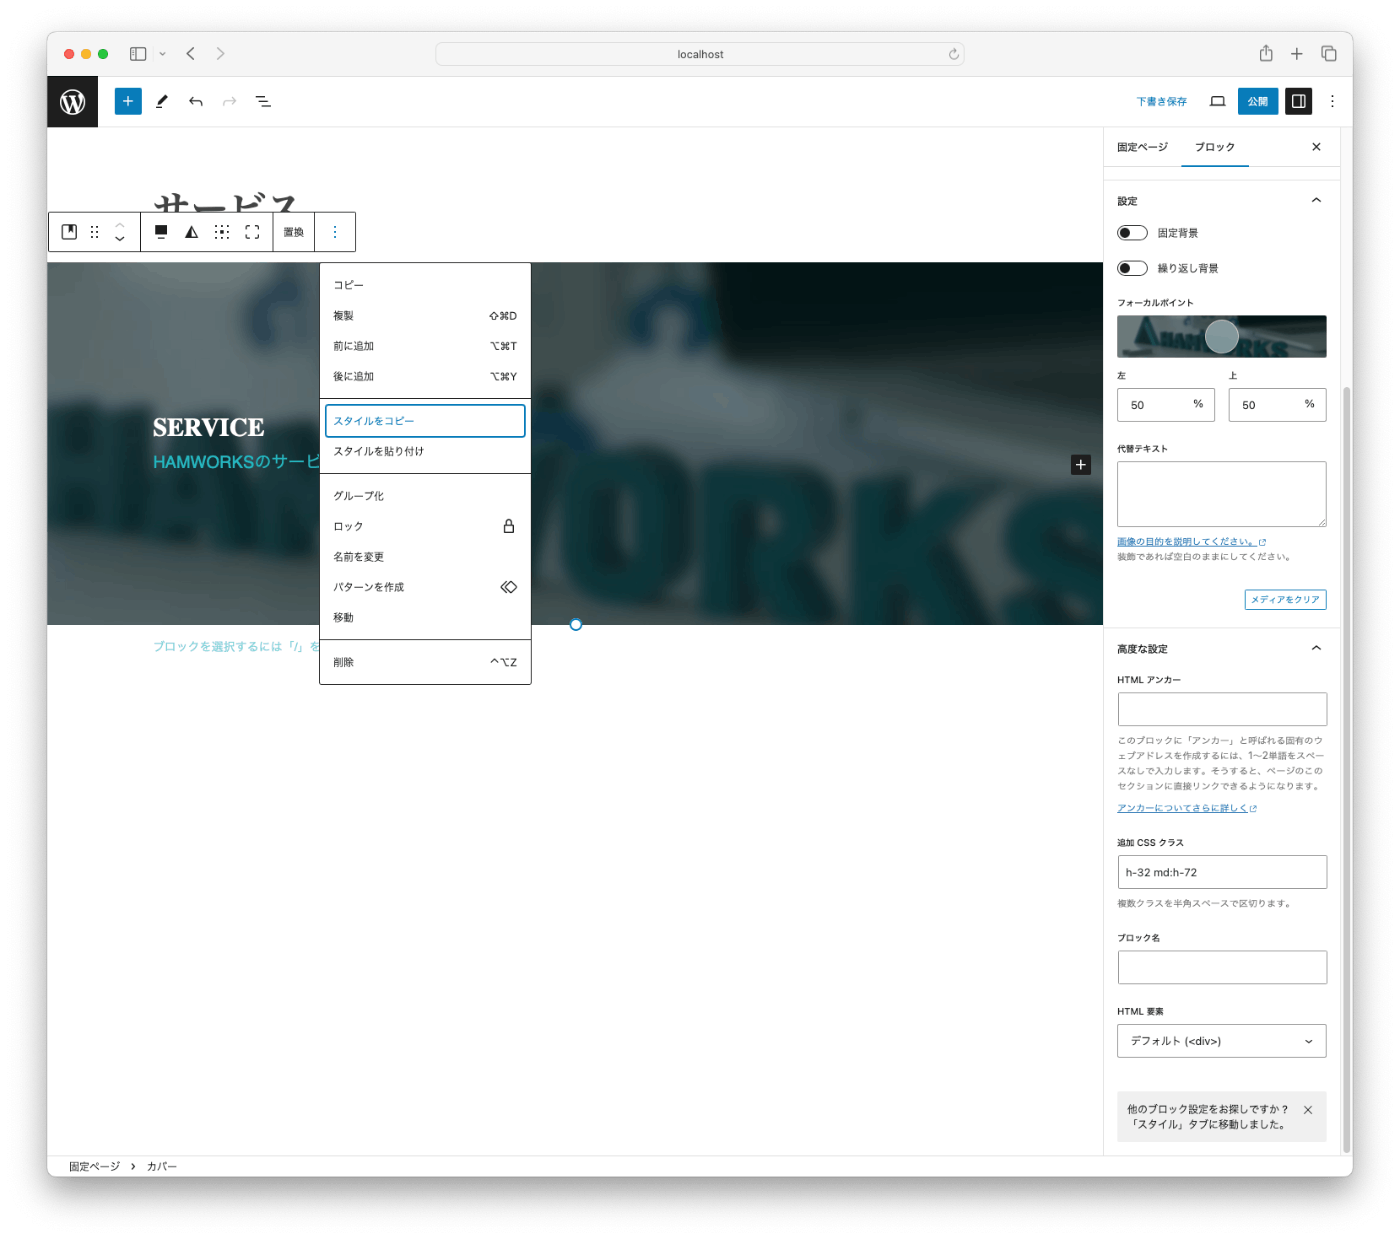
page-title.phpにペースト。
<!-- wp:cover {"url":"http://localhost:12342/wp-content/uploads/2024/05/subvisual.jpg","id":1833,"dimRatio":0,"customOverlayColor":"#3b4b4e","isUserOverlayColor":true,"minHeight":160,"minHeightUnit":"px","align":"full","className":"h-40 md:h-72","layout":{"type":"constrained"}} -->
<div class="wp-block-cover alignfull h-40 md:h-72" style="min-height:160px"><span aria-hidden="true" class="wp-block-cover__background has-background-dim-0 has-background-dim" style="background-color:#3b4b4e"></span><img class="wp-block-cover__image-background wp-image-1833" alt="" src="http://localhost:12342/wp-content/uploads/2024/05/subvisual.jpg" data-object-fit="cover"/><div class="wp-block-cover__inner-container"><!-- wp:group {"style":{"spacing":{"blockGap":"var:preset|spacing|10"}},"layout":{"type":"flex","orientation":"vertical"}} -->
		<div class="wp-block-group"><!-- wp:heading {"level":1,"fontSize":"xx-large"} -->
			<h1 class="wp-block-heading has-xx-large-font-size">SERVICE</h1>
			<!-- /wp:heading -->

			<!-- wp:paragraph {"style":{"elements":{"link":{"color":{"text":"var:preset|color|primary-500"}}}},"textColor":"primary-500","fontSize":"x-large"} -->
			<p class="has-primary-500-color has-text-color has-link-color has-x-large-font-size">HAMWORKSのサービス</p>
			<!-- /wp:paragraph --></div>
		<!-- /wp:group --></div></div>
<!-- /wp:cover -->
これだけだとパターンとして認識されないので、ファイルヘッダーをつくります。
パターンのドキュメント
パターンの登録について
<?php
/**
 * Title: Hero
 * Slug: themeslug/hero
 * Categories: featured
 */
?>
<!-- Pattern code goes here. -->
最低限これがあればいいと書いてるので、これを参考にpage-title.phpを書きます
<?php
/**
 * Title: 固定ページのタイトル
 * Slug: hamworks/page-title
 * Categories: featured
 */
?>
<!-- wp:cover {"url":"http://localhost:12342/wp-content/uploads/2024/05/subvisual.jpg","id":1833,"dimRatio":0,"customOverlayColor":"#3b4b4e","isUserOverlayColor":true,"minHeight":160,"minHeightUnit":"px","align":"full","className":"h-40 md:h-72","layout":{"type":"constrained"}} -->
<div class="wp-block-cover alignfull h-40 md:h-72" style="min-height:160px"><span aria-hidden="true" class="wp-block-cover__background has-background-dim-0 has-background-dim" style="background-color:#3b4b4e"></span><img class="wp-block-cover__image-background wp-image-1833" alt="" src="http://localhost:12342/wp-content/uploads/2024/05/subvisual.jpg" data-object-fit="cover"/><div class="wp-block-cover__inner-container"><!-- wp:group {"style":{"spacing":{"blockGap":"var:preset|spacing|10"}},"layout":{"type":"flex","orientation":"vertical"}} -->
		<div class="wp-block-group"><!-- wp:heading {"level":1,"fontSize":"xx-large"} -->
			<h1 class="wp-block-heading has-xx-large-font-size">SERVICE</h1>
			<!-- /wp:heading -->

			<!-- wp:paragraph {"style":{"elements":{"link":{"color":{"text":"var:preset|color|primary-500"}}}},"textColor":"primary-500","fontSize":"x-large"} -->
			<p class="has-primary-500-color has-text-color has-link-color has-x-large-font-size">HAMWORKSのサービス</p>
			<!-- /wp:paragraph --></div>
		<!-- /wp:group --></div></div>
<!-- /wp:cover -->
Categoriesはアーカイブされたドキュメントの方にしかまとめられてないのかな?
とりあえず前のドキュメント
Pattern categories
WordPress has several block pattern categories that it registers by default:
- featured
- about
- audio (added in WordPress 6.4)
- banner
- buttons
- call-to-action
- columns
- contact
- footer
- gallery
- header
- media
- portfolio
- posts
- query (use posts instead)
- services
- team
- testimonials
- text
- video (added in WordPress 6.4)
個人的によく使うのはfeaturedとかtextかな
パターンに http://localhost:12342 って入ってるのはよろしくないので、パターンに使う画像はテーマに含めます
<?php echo esc_url( get_template_directory_uri() ); ?>/assets/images/ 内で管理していくので書き換え。ついでにidも1にする。
<?php
/**
 * Title: 固定ページのタイトル
 * Slug: hamworks/page-title
 * Categories: featured
 */
?>
<!-- wp:cover {"url":"<?php echo esc_url( get_template_directory_uri() ); ?>/assets/images/subvisual.jpg","id":1,"dimRatio":0,"customOverlayColor":"#3b4b4e","isUserOverlayColor":true,"minHeight":160,"minHeightUnit":"px","align":"full","className":"h-40 md:h-72","layout":{"type":"constrained"}} -->
<div class="wp-block-cover alignfull h-40 md:h-72" style="min-height:160px"><span aria-hidden="true" class="wp-block-cover__background has-background-dim-0 has-background-dim" style="background-color:#3b4b4e"></span><img class="wp-block-cover__image-background wp-image-1" alt="" src="<?php echo esc_url( get_template_directory_uri() ); ?>/assets/images/subvisual.jpg" data-object-fit="cover"/><div class="wp-block-cover__inner-container"><!-- wp:group {"style":{"spacing":{"blockGap":"var:preset|spacing|10"}},"layout":{"type":"flex","orientation":"vertical"}} -->
		<div class="wp-block-group"><!-- wp:heading {"level":1,"fontSize":"xx-large"} -->
			<h1 class="wp-block-heading has-xx-large-font-size">SERVICE</h1>
			<!-- /wp:heading -->

			<!-- wp:paragraph {"style":{"elements":{"link":{"color":{"text":"var:preset|color|primary-500"}}}},"textColor":"primary-500","fontSize":"x-large"} -->
			<p class="has-primary-500-color has-text-color has-link-color has-x-large-font-size">HAMWORKSのサービス</p>
			<!-- /wp:paragraph --></div>
		<!-- /wp:group --></div></div>
<!-- /wp:cover -->
コンテンツ内にsvgを発見。Safe SVGを導入

いっぱいあって面倒だから一旦デフォルトのパターンを消す。
add_action(
	'after_setup_theme',
	function () {
		remove_theme_support( 'core-block-patterns' );
	}
);
すっきり
会社概要の一見テーブルっぽいところはカラムを使う
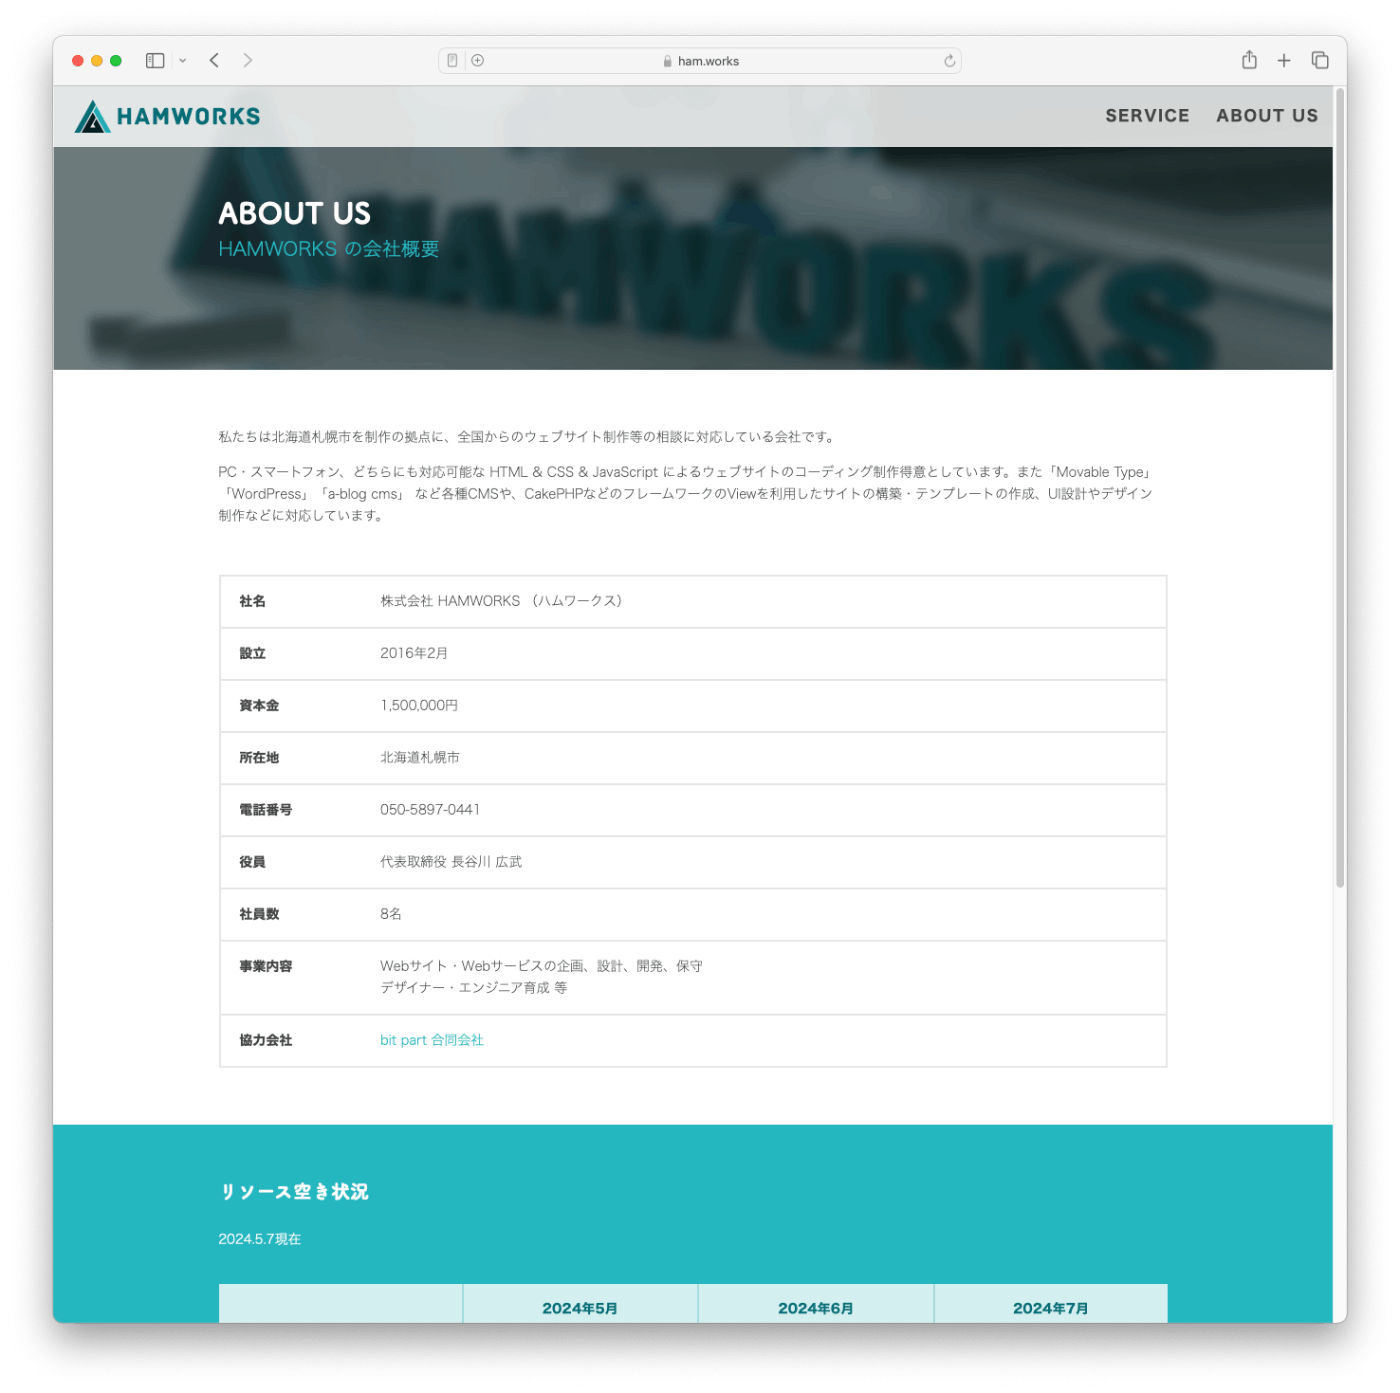
私はこういうセルっぽいスタイルを柔軟に触りたいってときはカラムを使います。
テーブルはまじでテーブルっぽい(セルごとにボーダーがあるとかそういう)ので使うかな
初期時点でページすくないので次はテンプレート作成。
- 固定ページ用テンプレート
- 投稿ページ用テンプレート
- 投稿一覧用テンプレート
- フロントページテンプレート
- インデックステンプレート(初期時点で存在するので新規作成というより編集)
- ヘッダー
- フッター
- リリース情報用のブロックパーツ
あたりかな
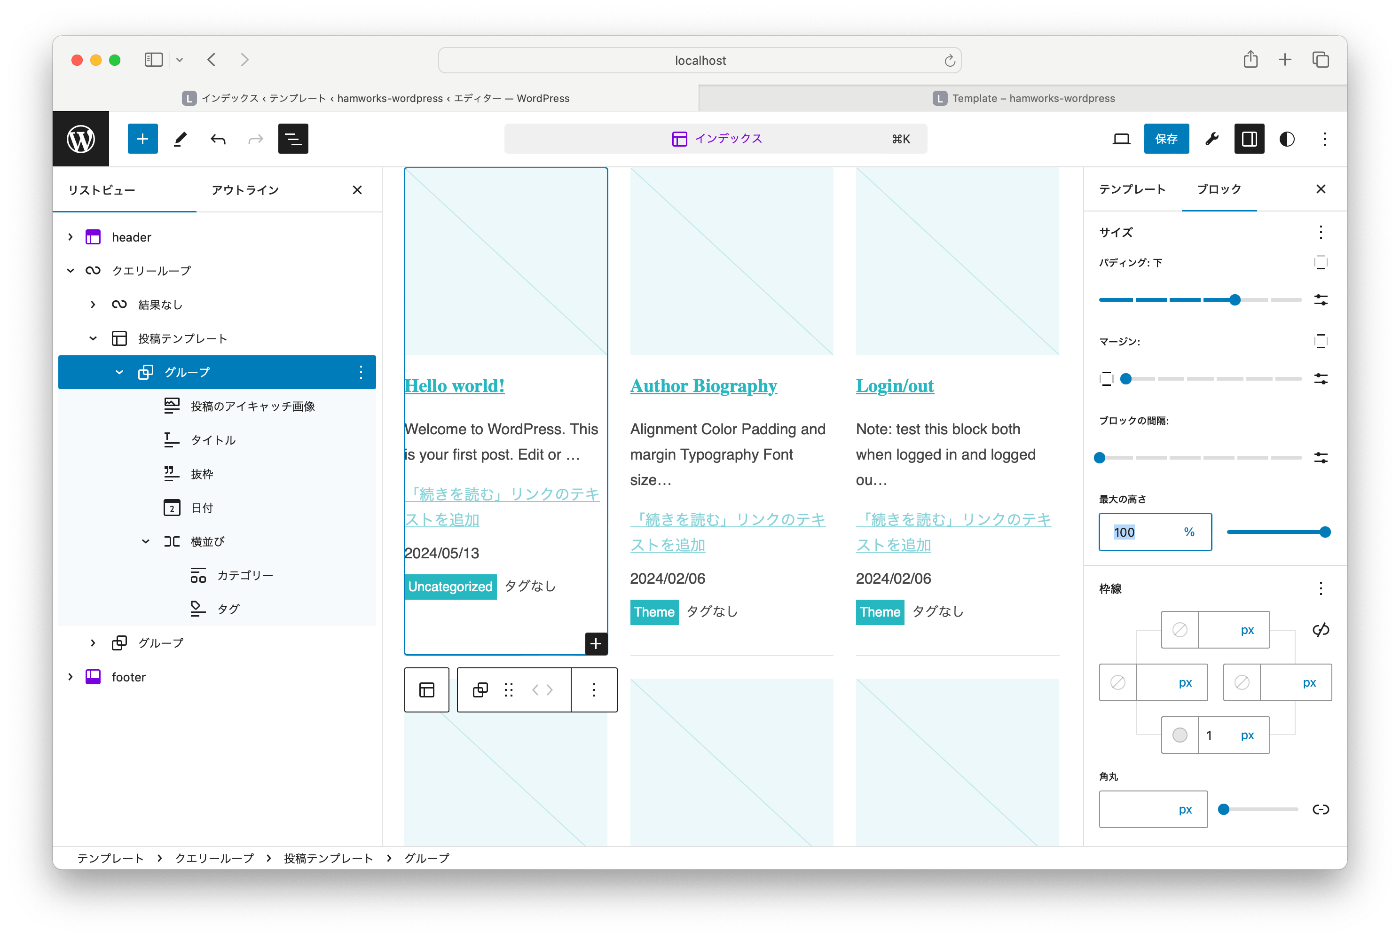
コンテンツで全幅を正しく使いたかったら親グループの「コンテント幅を使用するインナーブロック」のチェックを外すのを忘れないようにする。
固定ページテンプレートは用意済みだったけど投稿詳細テンプレートがまだなので同様につくる。
デザインがない(現行サイトにそもそも投稿用のコンテンツがない)ので自分でよしなに調整

カテゴリーとかタグが味気なさすぎなのでCSSつける
とりあえずカテゴリーは背景色+白文字、タグはボーダー+緑文字にします
ブロックとしてはpost-termsなので、テーマのCSSディレクトリの中にファイル用意。
また、ブロック用の追加CSSとしてエンキューする必要があるので、functions.phpに以下を追記します
wp_enqueue_block_style(
	'core/post-terms',
	array(
		'handle' => 'hamworks-core-post-terms',
		'src'    => get_parent_theme_file_uri( 'build/styles/blocks/core/post-terms.css' ),
		'path'   => get_parent_theme_file_path( 'build/styles/blocks/core/post-terms.css' ),
	)
);
CSSはTailwindで@applyしていく
.wp-block-post-terms {
	@apply flex flex-wrap gap-1;
}

.wp-block-post-terms a {
	@apply text-white bg-primary-500 transition-colors py-0.5 px-1 no-underline;

	&:hover {
		@apply text-white bg-primary-800;
	}
}

.wp-block-post-terms__separator {
	@apply hidden;
}
なんとなくよく見るカテゴリーのデザインてきなやつ。
.wp-block-post-terms__separator をhiddenにしてるのは地味にできる余白が気に入らなかったから………
タグのほうは .wp-block-post-terms.taxonomy-post_tag aで書く
はい
コミットしようとしたらstylelintのエラー
  2:2   ✖  Expected empty line before at-rule                             at-rule-empty-line-before
  6:2   ✖  Expected empty line before at-rule                             at-rule-empty-line-before
 14:1   ✖  Selector should use lowercase and separate words with hyphens  selector-class-pattern
 15:2   ✖  Expected empty line before at-rule                             at-rule-empty-line-before
 18:21  ✖  Selector should use lowercase and separate words with hyphens  selector-class-pattern
 19:2   ✖  Expected empty line before at-rule                             at-rule-empty-line-before
 22:3   ✖  Expected empty line before at-rule                             at-rule-empty-line-before
あーね
Expected empty line before at-rule:@ルールの前に空行を追加
Selector should use lowercase and separate words with hyphens:CSSのセレクタの命名規則に関するルール違反
前者は@mediaとかは有用だけど、@applyにはつけてほしくない。
後者はWPが吐いてる命名規則に従ってるから、stylelint自体のルールを無効にする
今回は検証も兼ねてextendsに@wordpress/stylelint-configを指定するだけで進め始めたのであとからこうやってぽこぽこ足してるのは例外ではあるけどあんまよくないネ
@applyのときは無視する書き方はこうらしい(by ChatGPT)
{
	"extends": "@wordpress/stylelint-config",
	"rules": {
		"at-rule-no-unknown": null,
		"at-rule-empty-line-before": ["always", {
			"except": ["first-nested"],
			"ignore": ["after-comment"],
			"ignoreAtRules": ["apply"]
		}]
	}
}
あとtailwindも無視したいから [ "apply", "tailwind" ]こうかな。
もう一個の方、selector-class-pattern: nullが怒られるんだが……
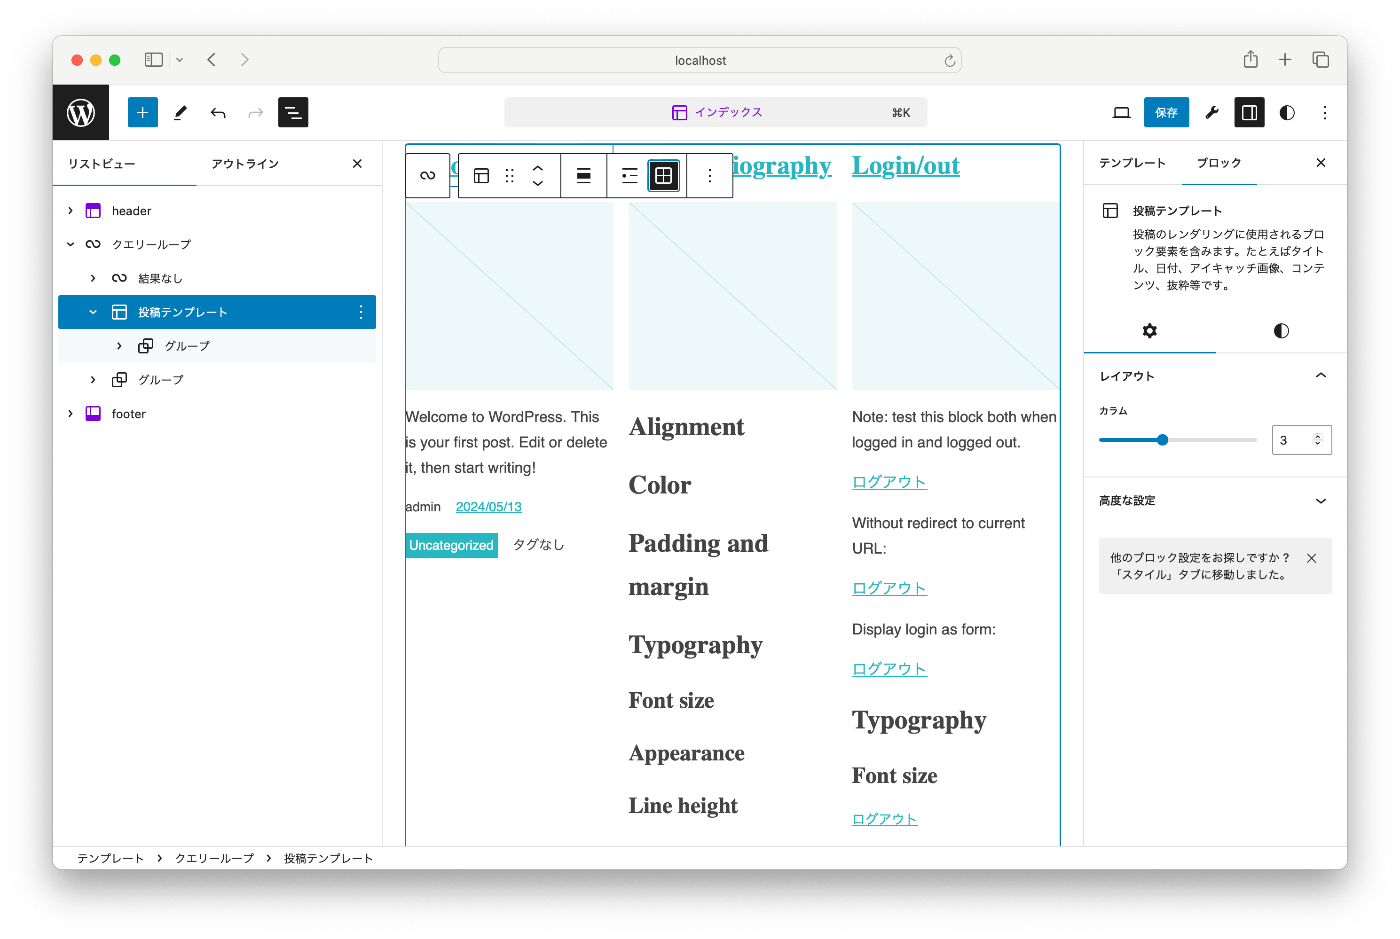
次は投稿一覧。グリッドっぽく並べたいときは投稿テンプレートでグリッドを選択
ページ送りも最初に管理画面から設定できるものを設定する

アイコンつきのボタンブロックはブロックスタイルをつくる
ほんとは矢印アイコンの後ろの背景色ブロックで選べるようにしたいけどさすがに無理だからここは固定に
デフォルトでブロックに背景色が入ってるせいでbeforeとかafterの色制御がむずかしいかも
そんなことねえや
.wp-block-button .wp-block-button__link {
	@apply transition-colors;
}

.wp-block-button.is-style-arrow .wp-block-button__link {
	@apply relative pl-14 bg-transparent;
	z-index: 1;

	&::after {
		content: '';
		width: 7px;
		height: 11px;
		background-image: url(../../../../assets/images/arrow.svg);
		@apply bg-no-repeat block absolute top-1/2 left-5 bg-primary-500 -translate-y-1/2;
	}

	&::before {
		content: '';
		z-index: -1;
		transition: width 0.4s ease-in-out;
		@apply bg-primary-500 absolute top-0 left-0 block w-11 h-full;
	}

	&:hover {
		@apply !text-white;

		&::before {
			@apply w-full;
		}
	}
}
ボタンは共通で色のアニメーション使おうかなと思って @apply transition-colors; いれた
テーブルのスタイルつくる。theadとthの色を変える
フッターのメニューはナビゲーションブロックとソーシャルアイコンブロックを横並び
「新北海道スタイル」安心宣言は横に画像が入ってる。これはインライン画像を使ってやることにします

そこなぴょこぴょこ動いているハムロボ……かわいいんだけどどうしよっかな。
画像ブロックにスタイルつけるか…。
追加CSSクラスに「hamrobo」をつけて、こいつにCSSつけていく。直接追加クラスにTailwind書いてもいいんだけど、個人的に入れ子とかで書きたいとき(.hamrobo > imgみたいなとき)はCSSファイルに@applyで書いてます。
Tailwindマスターってわけでもないので…。書けるのは知ってるけど、個人的に読みにくくてあんまり好きじゃないというだけ。
画像ブロックに中央指定だと display: table; が入って邪魔なので、縦積みグループの中に画像を入れて、グループに中央指定を入れる
<!-- wp:group {"layout":{"type":"flex","orientation":"vertical","justifyContent":"center"}} -->
<div class="wp-block-group"><!-- wp:image {"sizeSlug":"large","linkDestination":"none","className":"hamrobo"} -->
<figure class="wp-block-image size-large hamrobo"><img src="http://localhost:12342/wp-content/themes/hamworks/assets/images/hamrobo.svg" alt=""/></figure>
<!-- /wp:image --></div>
<!-- /wp:group -->
.wp-block-image.hamrobo {
	@apply transition-transform duration-300;
	height: 80px;

	&:hover {
		@apply -translate-y-4;
	}
}
親(濃いグリーン背景のグループ)にoverflow-hiddenいれてはみ出し制御する
ページトップのボタンつくる
ブラウザの上にはりつきはできるけど、下にはりつきはできない
fixed bottom-4 right-4 を画像ブロックの追加クラスに入れる。
fixedとかabsoluteとかはブロックの編集画面と相性が悪いので多用はしないほうがいい。

fixed になってないし、なってたとしてもちょろちょろ動いて結構目障りかと
ある程度スクロールしたらふわっとでてくるから、これはJS書かないとネ。
とりあえずtheme.jsを用意
…これtsで書けるのかなあ
いけた。tsconfig.jsonの用意はわすれずに。
あとデフォルト状態が消えてるのはよろしくない。なぜなら管理画面で非表示になって編集できなくなるから。
こういうスクロールしたら表示させるのとかは、JSで非表示用のクラスを付与してあげる
// ページトップへ戻るボタンの処理
document.addEventListener( 'DOMContentLoaded', function () {
	const pageTopButton: Element | null = document.querySelector( '.pagetop' );
	if ( pageTopButton ) {
		pageTopButton.classList.add( 'is-hidden' );

		window.addEventListener( 'scroll', function () {
			if ( window.scrollY > 150 ) {
				pageTopButton.classList.remove( 'is-hidden' );
			} else {
				pageTopButton.classList.add( 'is-hidden' );
			}
		} );
	}
} );
追加クラスに入れてたけど.pagetopつけたしまとめた
.wp-block-image.pagetop {
	@apply fixed bottom-4 right-4 transition-opacity duration-300 opacity-100;

	&.is-hidden {
		@apply opacity-0;
	}
}

.editor-styles-wrapper .wp-block-image.pagetop {
	@apply relative;
}
.editor-styles-wrapper を頭につけると管理画面用のCSSになる
位置の張り付き使うときはルートに使わないとだから、ヘッダーをstickyにしたければテンプレートパーツの外に置かないとダメ
現行のホバースタイルの調整のためにヘッダーのナビゲーションブロックにheader-navをつける
404もデザインないので一旦簡単なものを。
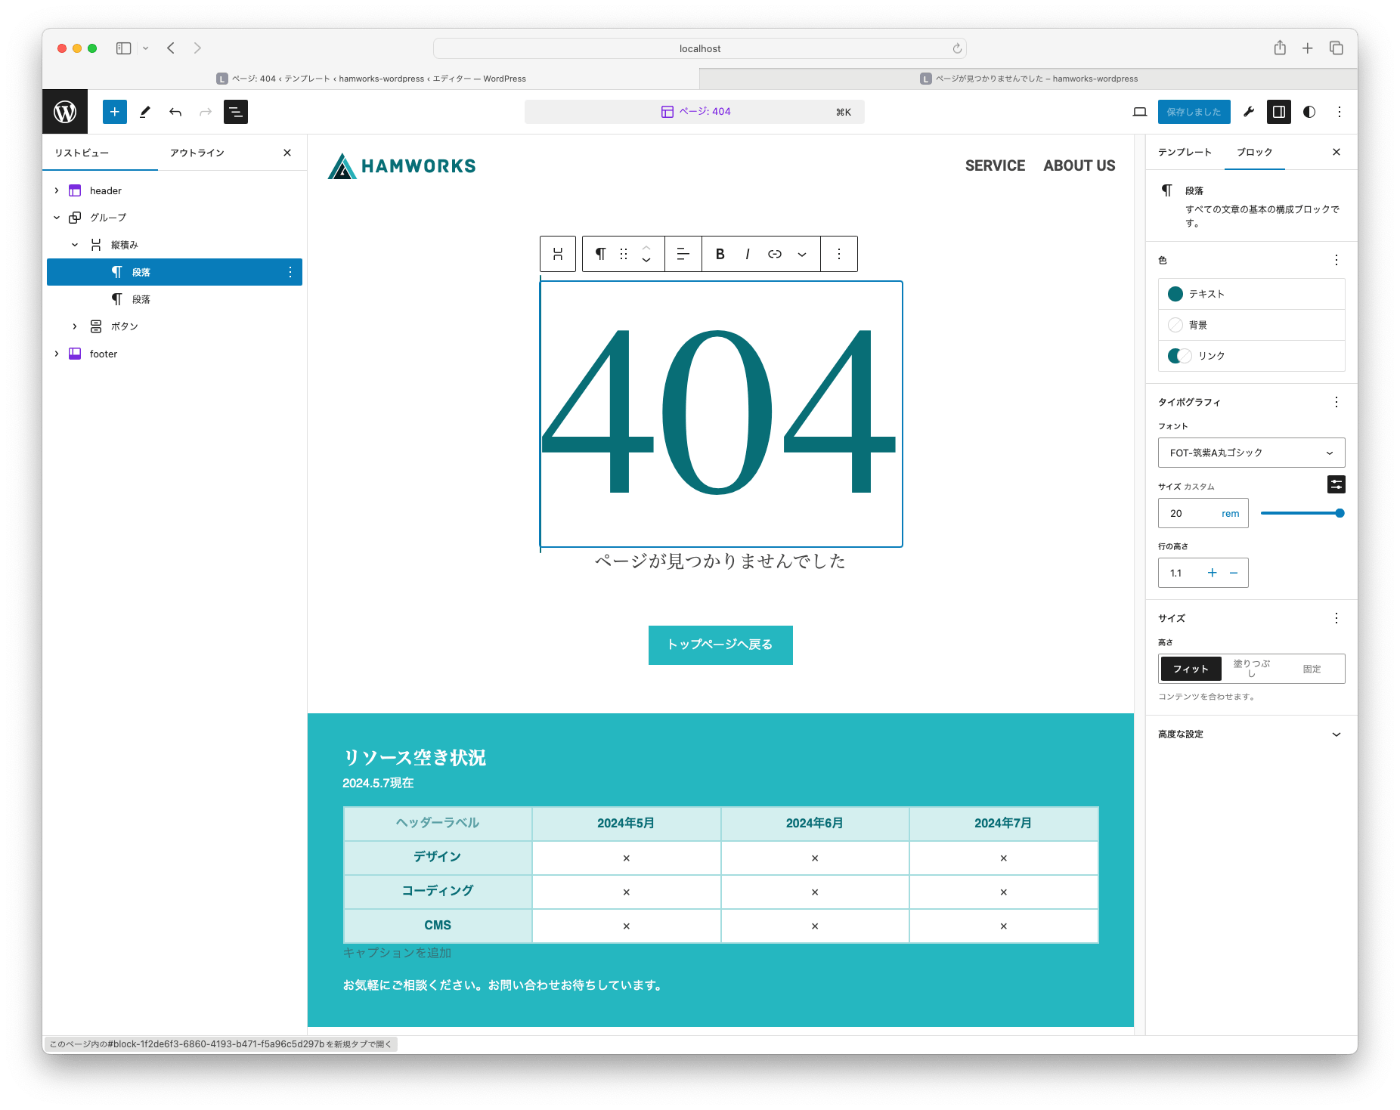
文字はタイポグラフィを設定して筑紫A丸ゴシックにかえます


ボタンのホバー設定したいなー。デフォルトでないからCSSつけないといけない
ボタンのカラー自体は変えられるのにホバーは変えれないんだよなー
issue自体はあるなあ
元になるサイトでは暗い緑になってるから、ホバーしたら暗い色になるようにしよう。
というわけでbrightness-75を設定。
.wp-block-button:not([class*="is-style-"]) .wp-block-button__link {
	transition: filter 300ms ease-in-out;
}

.wp-block-button:not([class*="is-style-"]) .wp-block-button__link:hover {
	@apply brightness-75;
}
なんらかのブロックスタイルが入っているときはやらない。
つまり、今回作った矢印つきのスタイルとデフォルトで入ってる輪郭スタイルのときはホバーの挙動は走らない。
輪郭は同じにするか…
instaWP自動デプロイは別途GitHubアクション追加する
name: Deploy to Test Server

on:
  push:
    branches:
      - main

jobs:
  call-instawp-webhook:
    runs-on: ubuntu-latest
    steps:
      - name: Invoke deployment hook
        uses: distributhor/workflow-webhook@v3
        env:
          webhook_url: "WEBHOOK_URL"