Flutter で最初の iOS アプリを作る
Flutter で iOS アプリを作りたい
まずは Hello World なアプリを作成し、実機転送をするまでをゴールにする
環境は Intel Mac
以下はインストール済み
- VSCode v1.84.2
- XCode v15.0.1
https://docs.flutter.dev/get-started/ をみる
どうやら SDK を含むツールのインストールが必要っぽい
flutter_macos_3.16.0-stable.zip をダウンロードした
$ mkdir ~/development/ && cd $_
$ unzip ~/Downloads/flutter_macos_3.16.0-stable.zip
$ ls

flutter/
「flutter」というディレクトリが展開された
パスを通す
一旦は現在のシェルに渡すだけ
export PATH="$PATH:`pwd`/flutter/bin"
$ flutter doctor
しばらく待つと結果が出てくる
Doctor summary (to see all details, run flutter doctor -v):
[!] Flutter (Channel stable, 3.16.0, on macOS 13.6 22G120 darwin-x64, locale ja-JP)
    ! Warning: `dart` on your path resolves to /usr/local/Cellar/dart/3.0.5/libexec/bin/dart, which is not inside your
      current Flutter SDK checkout at /Users/chick-p/development/flutter. Consider adding
      /Users/chick-p/development/flutter/bin to the front of your path.
[✗] Android toolchain - develop for Android devices
    ✗ Unable to locate Android SDK.
      Install Android Studio from: https://developer.android.com/studio/index.html
      On first launch it will assist you in installing the Android SDK components.
      (or visit https://flutter.dev/docs/get-started/install/macos#android-setup for detailed instructions).
      If the Android SDK has been installed to a custom location, please use
      `flutter config --android-sdk` to update to that location.

[!] Xcode - develop for iOS and macOS (Xcode 15.0.1)
    ✗ Xcode end user license agreement not signed; open Xcode or run the command 'sudo xcodebuild -license'.
    ✗ Xcode requires additional components to be installed in order to run.
      Launch Xcode and install additional required components when prompted or run:
        sudo xcodebuild -runFirstLaunch
    ✗ CocoaPods not installed.
        CocoaPods is used to retrieve the iOS and macOS platform side's plugin code that responds to your plugin usage on
        the Dart side.
        Without CocoaPods, plugins will not work on iOS or macOS.
        For more info, see https://flutter.dev/platform-plugins
      To install see https://guides.cocoapods.org/using/getting-started.html#installation for instructions.
[✓] Chrome - develop for the web
[!] Android Studio (not installed)
[✓] VS Code (version 1.84.2)
Error executing simctl: 69
You have not agreed to the Xcode license agreements. Please run 'sudo xcodebuild -license' from within a Terminal window
to review and agree to the Xcode and Apple SDKs license.


[✓] Connected device (2 available)
[✓] Network resources

! Doctor found issues in 4 categories.
The Flutter CLI developer tool uses Google Analytics to report usage and diagnostic data
along with package dependencies, and crash reporting to send basic crash reports.
This data is used to help improve the Dart platform, Flutter framework, and related tools.

Telemetry is not sent on the very first run.
To disable reporting of telemetry, run this terminal command:

flutter --disable-analytics.
If you opt out of telemetry, an opt-out event will be sent,
and then no further information will be sent.
This data is collected in accordance with the
Google Privacy Policy (https://policies.google.com/privacy).
色々怒られた…!
上から順に解決する
まず最初に XCode 周りのエラーを解決しよう
$ sudo xcodebuild -license

You have not agreed to the Xcode and Apple SDKs license. You must agree to the license below in order to use Xcode.
Press enter to display the license:
Enter するとライセンス規約が表示される
By typing 'agree' you are agreeing to the terms of the software license agreements. Any other response will cancel. [agree, cancel]

agree
agree しろと言われたので agree と入力する
次のコマンドを実行する
$ sudo xcodebuild -runFirstLaunch

Install Started
1%.........20.........40.........60.........80.........Install Succeeded
「CocoaPods がインストールされていない」というエラーなので
メッセージに書かれている https://guides.cocoapods.org/using/getting-started.html#installation をみる
以下のコマンドでインストールしろと出てくる
Ruby の環境はあるのでそのまま実行
$ sudo gem install cocoapods
XCode 周りはこれで対処したはず?もう一度以下を実行しておく
$ flutter doctor
新たなエラー!!
Doctor summary (to see all details, run flutter doctor -v):
[!] Flutter (Channel stable, 3.16.0, on macOS 13.6 22G120 darwin-x64, locale ja-JP)
    ! Warning: `dart` on your path resolves to /usr/local/Cellar/dart/3.0.5/libexec/bin/dart, which is not inside your
      current Flutter SDK checkout at /Users/chick-p/development/flutter. Consider adding
      /Users/chick-p/development/flutter/bin to the front of your path.
[✗] Android toolchain - develop for Android devices
    ✗ Unable to locate Android SDK.
      Install Android Studio from: https://developer.android.com/studio/index.html
      On first launch it will assist you in installing the Android SDK components.
      (or visit https://flutter.dev/docs/get-started/install/macos#android-setup for detailed instructions).
      If the Android SDK has been installed to a custom location, please use
      `flutter config --android-sdk` to update to that location.

[!] Xcode - develop for iOS and macOS (Xcode 15.0.1)
    ✗ Unable to get list of installed Simulator runtimes.
[✓] Chrome - develop for the web
[!] Android Studio (not installed)
[✓] VS Code (version 1.84.2)
[✓] Connected device (2 available)
[✓] Network resources
✗ Unable to get list of installed Simulator runtimes
調べてみると XCode のバージョンが 15 以上の場合、iOS Simulater を起動できなくなるらしい
調べてみると、自分の XCode のバージョンは 15.0.1 だった
iOS Simulater の設定は Flutter のドキュメントにも書かれているので、この手順に沿って対処する
以下のコマンドを実行する
$ xcodebuild -downloadPlatform iOS

Finding content...2023-11-26 19:18:55.556 xcodebuild[9775:156732]  DVTDownloadable: Observed finish. Stop observing simulator updates. error: (null)
Downloading iOS 17.0.1 Simulator (21A342): Done.
XCode が green になった!
$ flutter doctor

...
[✓] Xcode - develop for iOS and macOS (Xcode 15.0.1)
Android Toolchain のエラーは、Android SDK をインストールしてライセンスに同意すると解決できるらしい
今回は Android アプリは作らないので、skip して進めてみる
環境構築は一旦ここで終わり
Hello World アプリを作ってみるぞ!
アプリを作る
$ cd ~/Desktop
$ flutter create my_app
$ cd my_app
いざ起動
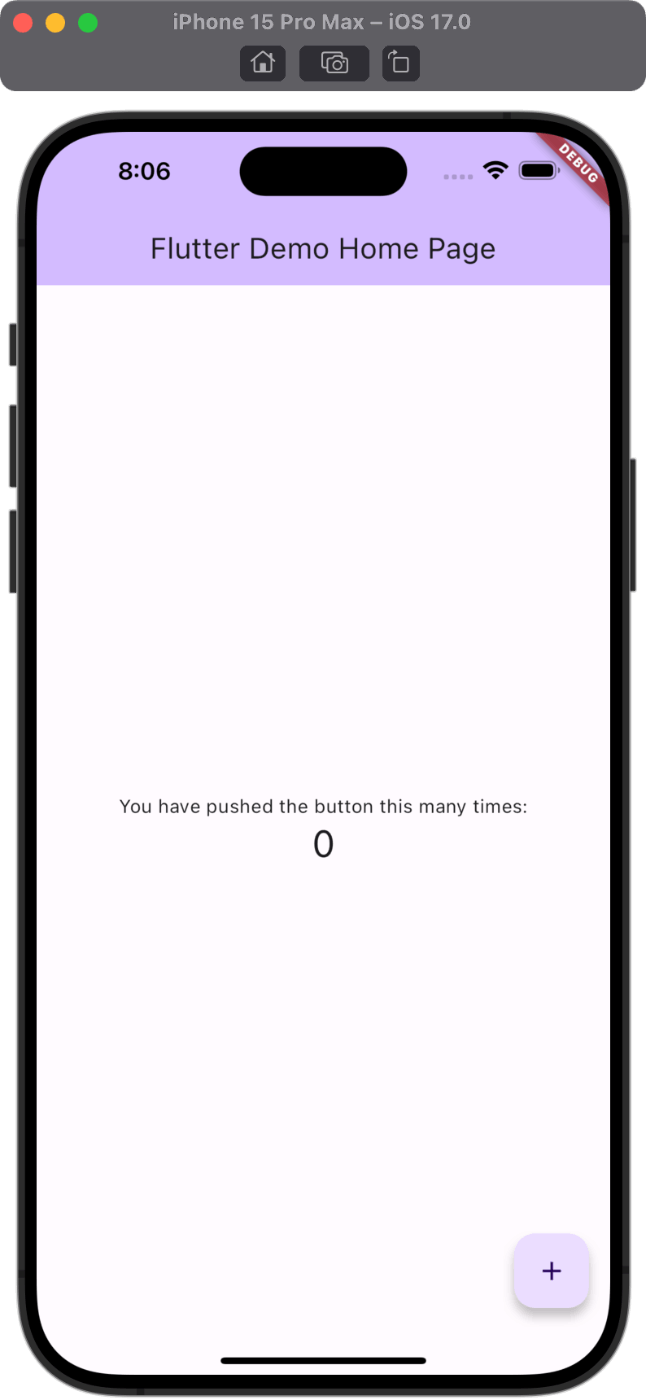
$ flutter run

Connected devices:
macOS (desktop) • macos  • darwin-x64     • macOS 13.6 22G120 darwin-x64
Chrome (web)    • chrome • web-javascript • Google Chrome 119.0.6045.159
iOS 出てこないなー
Simulator を起動していなかったので、起動してから再トライ
$ open -a Simulator
$ flutter run

Launching lib/main.dart on iPhone 15 Pro Max in debug mode...
XCode でのビルドが終わってアタッチされたら Simulator にアプリが表示される
わーい!!
次はホットリロードに挑戦!
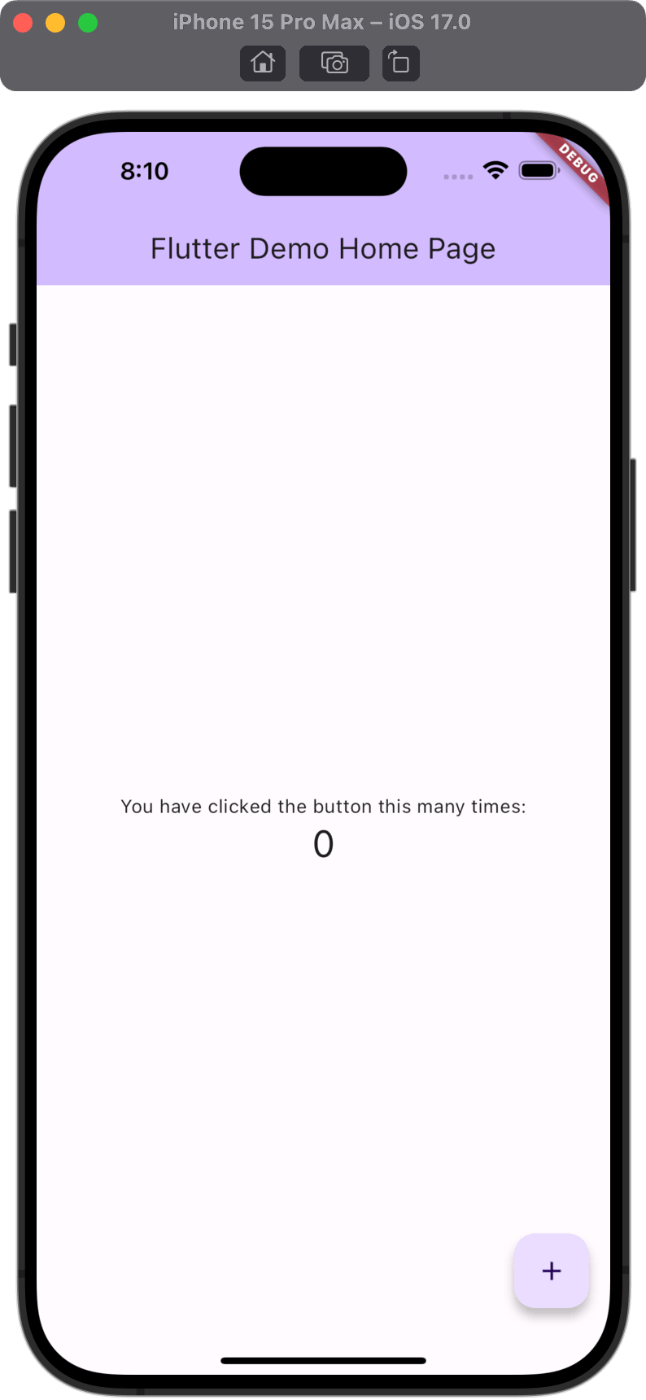
lib/main.dart を開いてメッセージを変更する
flutter run しているターミナルで「r」を入力するとホットリロードされた!
次は実機転送
iPhone と mac をつなげた
「このコンピュータを信頼しますか?」のメッセージが iPhone に出てくるので [信頼する]をタップする
iOS16 以上の場合は、[設定] > [プライバシーとセキュリティ] で「ディベロッパモード」を ON にする
と書いてあったけど、「ディベロッパモード」が表示されない
mac と iPhone を接続し直すと出てくるという記事を見つけたので再接続
「ディベロッパモード」が表示されたので ON したら iPhone の再起動を求められた
再起動したら本当にディベロッパモードにするのか?と再確認されたので、念押しの Yes
XCode を起動して、[Xcode] > [Settings]で設定を開く
[Accounts] の [+] から Apple ID を追加する
XCode で my_apps プロジェクトを開く
このとき選択すべきは my_apps/ios/Runner.xcworkspace というファイル(「my_apps」ではない)
ヘッダーの [Runner] > [ここ]で iOS Devices の iPhone のデバイス名を選択する
左サイドメニューの [Runner](一番ルート)を選択して、表示されるパネルの [Signing & Capabilities] タブを選択する
[All] タブの「Team」で先ほど追加した Apple ID を選択する
「Bundle Identifier」にはユニークな名前をつけるので、自分のドメインの逆にしたやつをつけて Enter キーを押す

ここまでやっていざ実行
$ flutter run
「codesign がキーチェーンに含まれる"Apple Development: YOUR_NAME"へアクセスしようとしています」というダイアログが表示されたら、mac のログインパスワードを入力して [常に許可]をクリックする
iPhone の画面に、信頼されていないディベロッパのアプリですのメッセージが出てくるので以下で対処する
- iPhone の [設定] > [一般] > [VPN とデバイス管理]を開く
- 「ディベロッパアプリ」の自分のアカウントを選択する
- 「Apple Development <YOUR_EMAIL_ADDRESS> を信頼」をタップする
- ダイアログの[信頼]をタップする
以下のエラーメッセージが表示されるけど、転送はできている状態
$ flutter run

Launching lib/main.dart on <YOUR_NAME> Phone in debug mode...
Automatically signing iOS for device deployment using specified development team in Xcode project: 69D9G4HCHL
Running Xcode build...
 └─Compiling, linking and signing...                         4.7s
Xcode build done.                                           13.4s
You may be prompted to give access to control Xcode. Flutter uses Xcode to run your app. If access is not allowed, you can
change this through your Settings > Privacy & Security > Automation.
Installing and launching...                                      1,306ms
Error launching application on <YOUR_NAME> Phone
転送したアプリを開いたら、iOS 14 以上のデバッグモードのアプリは、Flutter や XCode などでしか起動できないよというメッセージが出ている
In iOS 14+, debug mode Flutter apps can only be launched from Flutter tooling, IDEs plugin or from Xcode.

Alternatively, build in profile or release modes to enable calunching from the home screen.
Release モードにして、Build & Deploy する
エラーが出ているけど、実機転送およびアプリの起動ができた
エラーメッセージは、引き続き mac 側からアプリを起動できないというメッセージっぽい?
$ flutter run --release

Launching lib/main.dart on <YOUR_NAME> Phone in release mode...
Automatically signing iOS for device deployment using specified development team in Xcode project: 69D9G4HCHL
Running Xcode build...
 └─Compiling, linking and signing...                         4.1s
Xcode build done.                                           13.5s
Error executing devicectl: ProcessException: Process exited abnormally:
21:58:46  Acquired tunnel connection to device.
21:58:46  Enabling developer disk image services.
21:58:46  Acquired usage assertion.

ERROR: The application failed to launch. (com.apple.dt.CoreDeviceError error 10002.)
         BundleIdentifier = work.chick-p.myapps
       ----------------------------------------
       The request to open "work.chick-p.myapps" failed. (FBSOpenApplicationServiceErrorDomain error 1.)
         BSErrorCodeDescription = RequestDenied
         NSLocalizedFailureReason = The request was denied by service delegate (SBMainWorkspace) for reason: Security
         ("Unable to launch work.chick-p.myapps because it has an invalid code signature, inadequate entitlements or its
         profile has not been explicitly trusted by the user").
         FBSOpenApplicationRequestID = 0x15a9
       ----------------------------------------
       The operation couldn’t be completed. Unable to launch work.chick-p.myapps because it has an invalid code signature,
       inadequate entitlements or its profile has not been explicitly trusted by the user. (FBSOpenApplicationErrorDomain
       error 3.)
         NSLocalizedFailureReason = Unable to launch work.chick-p.myapps because it has an invalid code signature,
         inadequate entitlements or its profile has not been explicitly trusted by the user.
         BSErrorCodeDescription = Security
  Command: xcrun devicectl device process launch --device 00008101-000648391A04001E work.chick-p.myapps
  --enable-dart-profiling --json-output
  /var/folders/vk/qp8976695zg6c3py5xdlfyh40000gn/T/flutter_tools.kxvrLQ/core_devices.I47r63/launch_results.json
Could not run build/ios/iphoneos/Runner.app on 00008101-000648391A04001E.
Try launching Xcode and selecting "Product > Run" to fix the problem:
  open ios/Runner.xcworkspace

Installing and launching...                                      2,538ms
Error running application on <YOUR_NAME> Phone.
TODO: automation のエラーの解決方法
実機転送までできたので、今日はここまで
後日、First App を作ってみるところをやる
この codelab のページに基づいて、First app を作る
my_app を編集していくので「3. Create a project」のプロジェクトの作成までは終わってることする
pubspec.yaml を眺める
プロジェクトの名前だったり依存関係が書かれているファイル
package.json みたいなものっぽい
最初に名前を変えろと出てきたので変えてみる
どこが変わるのかな
- name: my_app
+ name: hello_world
flutter run すると、以下のエラーが出た
$ flutter run

Launching lib/main.dart on iPhone 15 Pro Max in debug mode...
Running Xcode build...
Xcode build done.                                           16.5s
Failed to build iOS app
Error (Xcode): Sandbox: rsync(26194) deny(1) file-write-create
/Users/chick-p/Desktop/my_app/build/ios/Debug-iphonesimulator/Flutter.framework


Error (Xcode): Flutter failed to write to a file at
"/Users/chick-p/Desktop/my_app/build/ios/Debug-iphonesimulator/.last_build_id".


Could not build the application for the simulator.
Error launching application on iPhone 15 Pro Max.
この人と同じ症状っぽい?
flutter clean しても同じエラーが出る
このコメントの方法を試したら Simulator でアプリを起動できた

プロジェクト名を変えたけど、アプリの表示には影響なさそうだった
内部的なものなのかなー
次は analysis_options.yaml を開いて、linter の設定をする
ドキュメントの通りに追記する
  rules:
-    # avoid_print: false  # Uncomment to disable the `avoid_print` rule
+    avoid_print: false  # Uncomment to disable the `avoid_print` rule
    # prefer_single_quotes: true  # Uncomment to enable the `prefer_single_quotes` rule
+    prefer_const_constructors_in_immutables: false
+    prefer_const_constructors: false
+    prefer_const_literals_to_create_immutables: false
+    prefer_final_fields: false
+    unnecessary_breaks: true
+    use_key_in_widget_constructors: false
lib/main.dart を開いて、以下の内容でまるっと置き換える…
ここで必要なパッケージを追加していないことに気づいたので、pubspec.yaml を修正する
dependencies:
  flutter:
    sdk: flutter


  # The following adds the Cupertino Icons font to your application.
  # Use with the CupertinoIcons class for iOS style icons.
-  cupertino_icons: ^1.0.2
+  english_words: ^4.0.0
+  provider: ^6.0.0
この状態で flutter run する
サイズが Web App 用なので、めっちゃ上の方にいるw

iPhone の大きさにするのは後でやるか
まずはドキュメントの通りボタンの追加
Column の要素にボタン要素を追加していくのか
     return Scaffold(
       body: Column(
         children: [
-          Text('A random idea:'),
+          Text('A random AWESOME idea:'),
           Text(appState.current.asLowerCase),
+          ElevatedButton(
+            onPressed: () {
+              print('button pressed!');
+            },
+            child: Text('Next'),
+          ),
         ],
       ),
ボタンを押すとターミナルに「button pressed!」が表示される
print() はそういう関数なのか
ドキュメントは、コードの解説に続いている
なるほど
void main() {
  runApp(MyApp());
}
main 関数の runApp() に MyApp クラスを渡すとアプリが実行される
MyApp は StatelessWidget を継承したクラス
class MyApp extends StatelessWidget {
「StatelessWidget はあとで説明するね」
MyAppState は、アプリの状態を管理するクラス
class MyAppState extends ChangeNotifier {
  var current = WordPair.random();
}
状態には、現在のランダムな単語のペアを持つ変数が1つだけ入っている
ChangeNotifierProvider を使って状態が作成され、アプリ全体に提供される(どのウィジェットからも状態が取得できるようになる)
class MyApp extends StatelessWidget {
const MyApp({super.key});
return ChangeNotifierProvider(
create: (context) => MyAppState(), // <=== ここ
child: MaterialApp(...),
)
)
}
状態が変わるメソッドを追加する
class MyAppState extends ChangeNotifier {
  var current = WordPair.random();
+  void getNext() {
+    current = WordPair.random();
+    notifyListeners();
+  }
}
呼び出す側
          ElevatedButton(
            onPressed: () {
+              appState.getNext();
              print('button pressed!');
            },
ボタンを押すと、画面に表示されるランダムの英単語の文字列が変わった
すべてのウィジェットで build() メソッドを定義する
- ウィジェットの状況が変わるたびに自動的に呼び出される(
build()がってこと?) - ウィジェットは常に最新の状態になる
MyHomePage は、watch メソッドを使用して、アプリの現在の状態の変更を追跡している
class MyHomePage extends StatelessWidget {
Widget build(BuildContext context) {
var appState = context.watch<MyAppState>();
// ...
}
}
自分でウィジェットを定義する
class BigCard extends StatelessWidget {
const BigCard({
super.key,
required this.pair,
});
final WordPair pair;
Widget build(BuildContext context) {
final theme = Theme.of(context);
return Card(
color: theme.colorScheme.primary, // ← And also this.
child: Padding(
padding: const EdgeInsets.all(20),
child: Text(pair.asLowerCase),
),
);
}
}
呼び出す方
  Widget build(BuildContext context) {
    var appState = context.watch<MyAppState>();
+    var pair = appState.current;

   return Scaffold(
      body: Column(
        children: [
          Text('A random AWESOME idea:'),
+          BigCard(pair: pair),
          ElevatedButton(
アクセシビリティの対応
Flutter は VoiceOver のようなスクリーンリーダーに対して、アプリ内のすべてのテキストとインタラクティブ要素を正しく表示できるが、対処が必要な場合もある
今回のようなランダムな英単語を合成した文字列(複合語)は、スクリーンリーダーは別々の単語だとは認識してくれない(
なので pair.asLowerCaseを ${pair.first} ${pair.second} で置き換えると、単語の区切りが作られる(単語に分解される)
例:gymstair -> gym stair
分解した単語の文字列を semanticsLabel プロパティに渡すと、スクリーンリーダーは別の単語だと認識する
HTML の aria-* みたいなものかな
要素を垂直な水平揃えにするには mainAxisAlignment プロパティで行う
    return Scaffold(
      body: Column(
+        mainAxisAlignment: MainAxisAlignment.center,  // ← Add this.
        children: [
          Text('A random AWESOME idea:'),
          BigCard(pair: pair),
          ElevatedButton(
さらに中央に揃える場合は body を Center 要素にして、
その子要素にColumnを指定する
    return Scaffold(
-      body: Column(
+      body: Center(
+        child: Column(
             mainAxisAlignment: MainAxisAlignment.center,
             children: [
               Text('A random AWESOME idea:'),
                ...
             ],
          ), // Column
+      ),  // Center
  ); // Scaffold
お気に入り機能を作る
class MyAppState extends ChangeNotifier {
  var current = WordPair.random();

  void getNext() {
    current = WordPair.random();
    notifyListeners();
  }

+  var favorites = <WordPair>[];
+  void toggleFavorite() {
+    if (favorites.contains(current)) {
+      favorites.remove(current);
+    } else {
+      favorites.add(current);
+    }
+    notifyListeners();
+  }
}
favorites というプロパティを用意して、List 型にする
Set 型の場合は {} を使う(Set の方が良さそうに見えるが、ここは簡単のために List にしているそう)
toggleFavorite() でお気に入り登録と解除をする
notifyListeners() で変更があったことを MyAppState を監視しているオブジェクトに伝える
Like ボタンを追加する
Like ボタンと Next ボタンを横並びにしたいので、 Row を追加する
     return Scaffold(
       body: Center(
         child: Column(
           mainAxisAlignment: MainAxisAlignment.center,
           children: [
            Text('A random AWESOME idea:'),
             BigCard(pair: pair),
-            ElevatedButton(
-              onPressed: () {
-                appState.getNext();
-                print('button pressed!');
-              },
-              child: Text('Next'),
+            SizedBox(height: 10),
+            Row(
+              mainAxisSize: MainAxisSize.min, // ← Add this.
+              children: [
+                ElevatedButton(
+                  onPressed: () {
+                    appState.getNext();
+                  },
+                  child: Text('Next'),
+                ),
+              ],
             ),
           ],
         ),
Like ボタンを追加する
     var appState = context.watch<MyAppState>();
     var pair = appState.current;

+    IconData icon;
+    if (appState.favorites.contains(pair)) {
+      icon = Icons.favorite;
+    } else {
+      icon = Icons.favorite_border;
+    }

     return Scaffold(
       body: Center(
         child: Column(
           mainAxisAlignment: MainAxisAlignment.center,
           children: [
           ...
            SizedBox(height: 10),
            Row(
              mainAxisSize: MainAxisSize.min,
              children: [
+                ElevatedButton.icon(
+                  onPressed: () {
+                    appState.toggleFavorite();
+                  },
+                  icon: Icon(icon),
+                  label: Text('Like'),
+                ),
                ElevatedButton(
                  onPressed: () {
                    appState.getNext();
                  },
                  child: Text('Next'),
                ),
              ],
             ),
以下はとりあえずいいかな
1画面しか考えていないので
- Add navigation rail
- Add a new page
ということで大体理解した気がする?
XCode から Disconnect しても、実機のアプリを有効化する