Tauri+Next.js+TypeScript+ESLint+Prettierプロジェクト作成メモ
ゲーム展示会のイベントでお客さんからのアンケート収集に使うデスクトップアプリを作ろうと思い、まずは何を使って作るか考えた。
初めはC#で作ろうと思ったが、UWPで作ると配布しようと思った時に面倒くさそう、WinFormで作るとデザインが微妙そう(偏見)なので、仕事で多少使い慣れているReactを使えれば楽なのでよさそう。
それならElectronがよいかと思ったが、LinterやTypeScriptも全部込々でプロジェクトの構築をするのが面倒くさいのでもっと簡単に構築できるのがいい。
最小限の環境構築で使えそうなDenoでElectronのような位置づけのものがないか調べてみても、開発段階ではないものでそれらしいのは見つからなかった。が代わりにTauriというものを見つけた。
Rustで書かれたElectronの代替を目指すフレームワークらしい。
Chromiumを同梱しているElectronと違いOS内蔵のWebViewを使うから容量が小さいく軽い。
WebView上で動かすWebアプリのビルドシステムとしていろいろ対応している。仕事で使っているNext.jsも対応しているようなので、Tauri+Next.jsでいけそう。
Rustは触ったことがないが興味はあったので、これにきめた。
(興味だけで使う言語やフレームワークを決められるのは趣味開発の特権)
いい感じにTauri+Reactの導入方法を紹介してくれている記事があったので、まずはこれに従ってやってみる。
記事にリンクが張られていたTauriの公式リファレンスに導入法が載っていたのでそれに従う。
「Microsoft Visual Studio C++ Build Tools」はC++開発時に入れていたのでインストール不要だった。
「WebView2」もWindows11なのでインストール不要。「Rust」はドキュメントに書いてある通りwingetで簡単に入れられた。
winget install --id Rustlang.Rustup
Node.jsのインストールも必要。
元々入っているので改めてインストールすることは不要だと思ったが、入っているNode.jsのバージョンを確認すると古い(v14)。Node.jsのバージョン管理ソフトを介さずNode.jsが直接入っていたので、この機会にnvmを入れようと思った。
wingetでインストールできたりしないかとsearchしてみると普通にあった。がVoltaというのも検索に引っかかったのが気になって調べてみると、VoltaもNode.jsのバージョン管理システムで、しかもnvmと違ってプロジェクトごとに環境を切り替えられるらしい。
ということでVolta経由でNode.js v16を導入。
winget install Volta.Volta
volta install node@16
以下のコマンドでプロジェクトのNode.jsバージョンを固定できる。
と思ったが、ディレクトリがnpmプロジェクトとして初期化されていないとだめだったので後回し。
volta pin node@16
Node.jsの準備ができたので、またTauriの公式ドキュメントに従ってNext.js環境を準備。
npm create tauri-appで聞かれる質問に答えるだけでよいので楽。
npm create tauri-app
✔ Project name · tauri-project
✔ Choose your package manager · npm
✔ Choose your UI template · next-ts
パッケージマネージャーはpnpmとかyarnとかいろいろ選択肢があったが、初めて使うTauriでそれ自身以外の部分で時間を掛けたくなかったので、無難にnpmを選択。
npmプロジェクトが作られたら、そのディレクトリに移動して必要パッケージをインストール。
先ほどできなかったvolta pin node@16も忘れずにやっておく。
cd tauri-project
npm install

volta pin node@16
voltaはpackage.jsonにnodeのバージョンを記録するようで、volta pin node@16でpackage.jsonに以下の行が追加された。
  "volta": {
    "node": "16.17.1"
  }
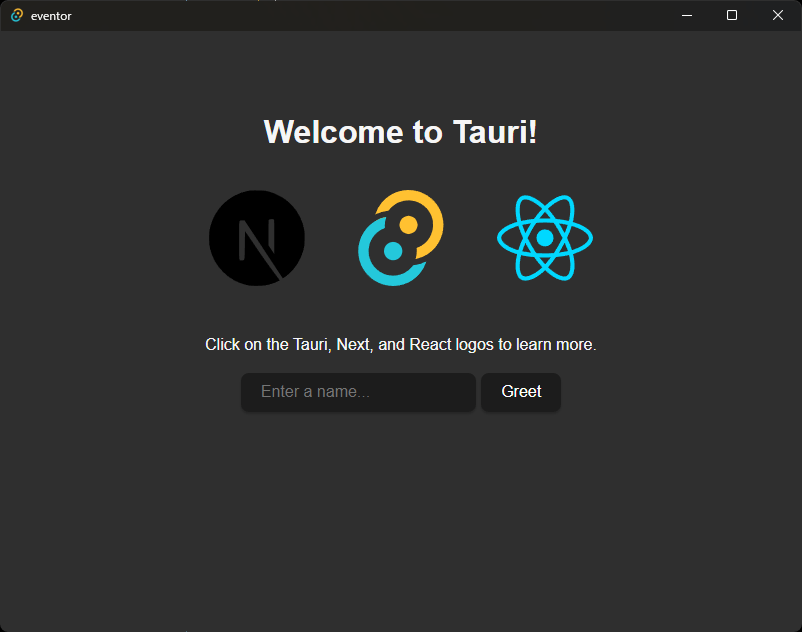
以下コマンドで初期画面が立ち上がった。
やったね😊
npm run tauri dev
VSCodeにTauriとRust向けの拡張も入れておく。
- tauri-apps.tauri-vscode
- rust-analyzer
次はエディタやLinter周りの設定をしよう。
Next.js周りの設定。
TypeScript設定.tsconfig.jsonまでは生成してくれている状態なので、ESLint設定から。
コーディング規約はAirbnbにする。
npm init @eslint/configで初期設定を行うが、TypeScriptを選択するとAirbnbが選べないので、JavaScript向けの設定でインストールしてからTypeScript向け設定を追加する。
npm init @eslint/config
√ How would you like to use ESLint? · style
√ What type of modules does your project use? · esm
√ Which framework does your project use? · react
√ Does your project use TypeScript? · No / Yes
√ Where does your code run? · browser
√ How would you like to define a style for your project? · guide
√ Which style guide do you want to follow? · airbnb
√ What format do you want your config file to be in? · JSON
√ Would you like to install them now? · No / Yes
√ Which package manager do you want to use? · npm
AirbnbのTypeScript設定は公式リポジトリに従う。
npm install eslint-config-airbnb-typescript @typescript-eslint/eslint-plugin@^5.13.0 @typescript-eslint/parser@^5.0.0 --save-dev
Next.js向けESLintパッケージ(ESLintでnext/core-web-vitalsとして参照する)がインストールされていなかったのでそれもインストール。また、importの自動整列、使っていないimportに対する警告も出してほしいので、そのためのパッケージもインストール。
npm install --save-dev eslint-config-next eslint-plugin-import eslint-plugin-unused-imports
ESLint設定はPrettierとJestの設定に依存するのでそのあとに完成系を張り付ける。
ESLint, Prettierの設定は以下のサイトを参考にしている。
Prettierの設定をする。
以下パッケージをインストール。
npm install --save-dev prettier eslint-config-prettier
以下の内容でPretter設定作成。
{
  "trailingComma": "all",
  "tabWidth": 2,
  "semi": true,
  "singleQuote": true,
  "jsxSingleQuote": true,
  "printWidth": 100
}
フロント側のテストフレームワークにはJestを使おうと思うので、その設定も行う。
必要パッケージをインストール。
npm install --save-dev eslint-plugin-jest
Jest向け設定ファイル作成。
// eslint-disable-next-line import/no-import-module-exports
import nextJest from 'next/jest';

const createJestConfig = nextJest({
  // next.config.jsとテスト環境用の.envファイルが配置されたディレクトリをセット。基本は"./"で良い。
  dir: './',
});

// Jestのカスタム設定を設置する場所。従来のプロパティはここで定義。
const customJestConfig = {
  // jest.setup.tsを作成する場合のみ定義。
  // setupFilesAfterEnv: ["<rootDir>/jest.setup.ts"],
  moduleNameMapper: {
    // aliasを定義 (tsconfig.jsonのcompilerOptions>pathsの定義に合わせる)
    '^@/components/(.*)$': '<rootDir>/components/$1',
    '^@/pages/(.*)$': '<rootDir>/pages/$1',
  },
  moduleDirectories: ['node_modules', '<rootDir>/'],
  testEnvironment: 'jest-environment-jsdom',
};

// createJestConfigを定義することによって、本ファイルで定義された設定がNext.jsの設定に反映される
module.exports = createJestConfig(customJestConfig);
以下参考。
PrettierやJest関連も含めて、最終的なESLint設定は以下のとおり。
{
    "env": {
      "browser": true,
      "es2021": true,
      "jest/globals": true
    },
    "extends": [
      "next/core-web-vitals",
      "airbnb",
      "airbnb-typescript",
      "airbnb/hooks",
      "plugin:@typescript-eslint/recommended",
      "plugin:@typescript-eslint/recommended-requiring-type-checking",
      "plugin:jest/recommended",
      "plugin:jest/style",
      "prettier"
    ],
    "parser": "@typescript-eslint/parser",
    "parserOptions": {
      "ecmaFeatures": {
        "jsx": true
      },
      "ecmaVersion": 13,
      "sourceType": "module",
      "tsconfigRootDir": ".",
      "project": "./tsconfig.eslint.json"
    },
    "plugins": ["react", "@typescript-eslint", "import", "unused-imports", "jest"],
    "rules": {
      "no-use-before-define": "off",
      "import/order": "error",
      "unused-imports/no-unused-imports": "error",
      "@typescript-eslint/no-use-before-define": "off",
      "@typescript-eslint/restrict-template-expressions": "off",
      "import/prefer-default-export": "off",
      "import/extensions": [
        "error",
        "always",
        {
          "js": "never",
          "jsx": "never",
          "ts": "never",
          "tsx": "never"
        }
      ],
      "react/jsx-filename-extension": [
        "error",
        {
          "extensions": [".jsx", ".tsx"]
        }
      ],
      "react/react-in-jsx-scope": "off",
      "no-void": [
        "error",
        {
          "allowAsStatement": true
        }
      ],
      "react/function-component-definition": [2, { "namedComponents": "arrow-function" }],
      "jest/consistent-test-it": ["error", {"fn": "it"}],
      "jest/require-top-level-describe": ["error"],
      // 厳しすぎるルールは無効化
      "arrow-body-style": ["error", "as-needed"],
      "react/require-default-props": "off",
      "react/jsx-props-no-spreading": "off"
    }
}
VSCode設定。
ESLintとPrettier向け拡張をインストール。
- dbaeumer.vscode-eslint
- esbenp.prettier-vscode
保存時の自動フォーマッティングとimportの自動追加を有効にするよ。
Markdownとか意図しないものに対して有効にならないように、言語ごとに個別指定している。
{
  "editor.defaultFormatter": "esbenp.prettier-vscode",
  "editor.maxTokenizationLineLength": 2500,
  "[javascript]": {
    "editor.formatOnSave": true,
    "editor.codeActionsOnSave": {
      "source.addMissingImports": true,
      "source.fixAll": true
    }
  },
  "[javascriptreact]": {
    "editor.formatOnSave": true,
    "editor.codeActionsOnSave": {
      "source.addMissingImports": true,
      "source.fixAll": true
    }
  },
  "[typescript]": {
    "editor.formatOnSave": true,
    "editor.codeActionsOnSave": {
      "source.addMissingImports": true,
      "source.fixAll": true
    }
  },
  "[typescriptreact]": {
    "editor.formatOnSave": true,
    "editor.codeActionsOnSave": {
      "source.addMissingImports": true,
      "source.fixAll": true
    }
  },
  "[json]": {
    "editor.formatOnSave": true,
    "editor.codeActionsOnSave": {
      "source.fixAll": true
    }
  },
  "[yaml]": {
    "editor.formatOnSave": true,
    "editor.codeActionsOnSave": {
      "source.fixAll": true
    }
  }
}
TypeScript設定は少し修正が必要だったので修正。
コンパイル時はsrcディレクトリ下のみを参照し、ESLintではプロジェクト直下まで参照してほしい。
このためにtsconfigを二つに分ける。
コンパイル時設定はtsconfig.jsonで、ESLint向け設定tsconfig.eslint.jsonにはコンパイル時設定をオーバーライドする形で差分のみ記載している。
.eslintrc.jsonのparserOptions.projectでESLintの設定を指定することでESLintに専用設定を使わせる。
- tsconfig.json
- tsconfig.eslint.json
{
  "compilerOptions": {
    "target": "es5",
    "lib": ["dom", "dom.iterable", "esnext"],
    "allowJs": true,
    "moduleResolution": "node",
    "skipLibCheck": true,
    "strict": false,
    "forceConsistentCasingInFileNames": true,
    "noEmit": true,
    "incremental": true,
    "esModuleInterop": true,
    "module": "esnext",
    "resolveJsonModule": true,
    "isolatedModules": true,
    "jsx": "preserve"
  },
  "include": ["next-env.d.ts", "src/**/*.ts", "src/**/*.tsx"],
  "exclude": ["node_modules"],
  "paths": {
    // 型定義の配置場所指定
    "*": ["src/types/*"]
  }
}
{
  "extends": "./tsconfig.json",
  "include": ["next-env.d.ts", "**/*.ts", "**/*.tsx"]
}
これでTauri+Next.js+TypeScript+ESLint+Prettierの環境構築完了😎