


はじめに
React Native の環境構築についてのお話です。
lerna が登場したあたりから、複数のパッケージを 1 つのリポジトリで管理するモノリシックリポジトリ(以下、モノレポ)運用も活発になってきました。
昨今の開発において、モノレポ運用をするには
- lerna
- npm workspaces
- yarn workspaces
- pnpm workspace
が選択肢に上がります。
さらにモノレポプロジェクトでは、依存モジュールを hoisting させることができます。
この記事では、yarn workspaces を使って React Native の環境を構築していいきます。
モノレポ運用や hoisting が何かについては、他の記事の解説に譲ることにします。
なお、yarn のバージョンは v1 系を前提にしています。
React Native プロジェクトで Berry の使用はおすすめしません
筆者は yarn v3(Berry)でも環境構築をしたことがありますが、安定しないのであまりおすすめはしません。
yarn ios または yarn android でネイティブのビルドを行うと、node_modules の中身が書き換わることがあるみたいです。
iOS で動作確認 => Android で動作確認 => Android のビルドがコケる
Android で動作確認 => iOS で動作確認 => iOS のビルドがコケる
違うネイティブのビルドをする時に、結構な確率でビルドが失敗します (同一 OS だとなぜかコケない)。
yarnしなおして依存モジュールを更新すると、正常に起動するようにはなります。
単純に面倒だし、ネイティブのビルドがコケることほど怖いことがないので、精神衛生的にも悪いです。
モノレポだから起こるのかはわかりませんが、こういう現象を確認してるので使用はおすすめしません。
yarn v1 だと上記のような現象は起きなかったです。
yarn workspaces と React Native の問題
yarn workspaces は依存モジュールがルートの node_modules に hoisting されるという性質が、React Native では色々と問題を起こします。
実際に環境構築をしようとすると、React Native 本体や Metro は勿論のこと、CocoaPods や Xcode などでエラーが起きます。
なんなら、react-native-cli のテンプレートの作成からいきなりエラーが起きて失敗します。
これは、react-native-cli が生成するテンプレートが、コマンドを実行したカレントディレクトリーを基準に作成されるからです。
また、React Native に関わるモジュール郡も、基本的に同一階層の node_modules に全ている前提で動くようになっています。
yarn workspaces 環境下で react-native-cli を実行した場合も、依存モジュールは hoisting されます。
つまり、依存モジュールは全てルートの node_modules にインストールされます(例外あり)。
そのため、node_modules の参照先が合わずにエラーが起きるというカラクリです。
なお、npm workspaces を使ってもこの現象は起きます。
たまたまうまくいく場合もある
この問題を更にややこしくするのが、必ずしもエラーが起きるわけではないということです。
先ほど、依存モジュールは全てルートの node_modules にインストールされると書きました。
既にモノレポ運用でパッケージを作成済みの場合、そのプロジェクト全体の依存解決の兼ね合いによっては、packages 配下の node_modules に React Native や Metro がインストールされることがあります。
この場合は、エラーが起きずにテンプレートの作成ができます。
ただし、これでは hoisting の恩恵にあやかれなくなるので注意しましょう。
開発を進めていく中で他のモジュールを追加したり、バージョンを上げたりしたタイミングで hoisting されると動かなくなるので、危ないです。
イチから環境構築する
それでは、まっさらな環境から yarn workspaces を使ったモノレポ運用で環境構築をしていきましょう。
今回、React を使ったウェブアプリと React Native を使ったモバイルアプリを 1 つのリポジトリで管理することを想定しています。
また、共通の関数や定数などを管理するモジュールのパッケージも作って読み込めるようにしていきましょう。
こんな感じのモノレポですね。
パッケージ名は、package.json の name フィールドに記載する名前のことを指しています。
| フォルダ名 | パッケージ名 | 説明 |
|---|---|---|
| web | @monorepo/web | React を使ったウェブアプリ |
| mobile | @monorepo/mobile | React Native を使ったモバイルアプリ |
| modules | @monorepo/modules | web と mobile で使う共通のモジュール |
ルートの pakcage.json の作成
モノレポ運用する適当なフォルダを作成し、無邪気に npm init を実行してテンプレートを作成しましょう。
npm init
package.json は以下のような感じで設定しましょう。
{
  "name": "monorepo",
  "version": "0.0.1",
  "license": "ISC",
  "description": "",
  "private": true,
  "scripts": {
    "test": "echo \"Error: no test specified\" && exit 1"
  },
  "workspaces": ["packages/*"],
  "devDependencies": {
    "@typescript-eslint/eslint-plugin": "^5.51.0",
    "@typescript-eslint/parser": "^5.51.0",
    "eslint": "^8.34.0",
    "eslint-config-prettier": "^8.6.0",
    "eslint-plugin-import": "^2.27.5",
    "eslint-plugin-react": "^7.32.2",
    "eslint-plugin-react-hooks": "^4.6.0",
    "eslint-plugin-react-native": "^4.0.0",
    "jest": "^29.4.2",
    "prettier": "^2.8.4",
    "typescript": "^4.9.5"
  }
}
ESLint や TypeScript は共通で利用するので、ルートの package.json に追加します。
yarn workspaces は package.json 内に workspaces プロパティに配列で記述します。
"workspaces": [
  "packages/*"
],
packages/*と書くことで、packages フォルダ配下が workspaces の対象となります。
TypeScript のプロジェクトなので tsconfig.json も作成します。
設定はお好みで。
{
  "compilerOptions": {
    "target": "ESNext",
    "module": "commonjs",
    "lib": ["ES2020"],
    "jsx": "react",
    "strict": true,
    "esModuleInterop": true
  }
}
ルートの設定は一旦完了です。
web パッケージの作成
React を使ったウェブアプリの環境を構築します。
この記事ではあまり関係ないので、Next.js でサクッと環境構築しちゃいましょう。
yarn create next-app --typescriptを叩くと、いくつか質問されるので、答えていきましょう。
ここではプロジェクト名をwebと答えて、他は全て Yes と答えることにします。
作成されたら、package.json の name を@monorepo/webにリネームするのを忘れないようにしましょう。
mkdir packages
cd ./packages
yarn create next-app --typescript

✔ What is your project named? … web
✔ Would you like to use TypeScript with this project? … No / Yes
✔ Would you like to use ESLint with this project? … No / Yes
✔ Would you like to use `src/` directory with this project? … No / Yes
✔ Would you like to use experimental `app/` directory with this project? … No / Yes
✔ What import alias would you like configured? … @/*
mobile パッケージの作成
さて、ここからが本題です。
react-native-cli を使って React Native の環境構築を行います。
環境構築はReact Native Setting up the development environmentをベースに行います。
ここでは Xcode や Android Studio のインストールは終わってるものとして話を進めます。
先ずは packages に移動して cli でテンプレートを作成します。
React Native は 0.71.0 から TypeScript を first class support しているので、このバージョンで作成しましょう。
cd packages
npx react-native init mobile --version 0.71.0
これで packages 直下に mobile フォルダが作成され、テンプレートの構築が始まります。
おそらく、CocoaPods のインストールで早速下記のようなエラーが発生します。
✔ Downloading template
✔ Copying template
✔ Processing template
✖ Installing CocoaPods dependencies (this may take a few minutes)
✖ Installing CocoaPods dependencies (this may take a few minutes)
error Error: Failed to install CocoaPods dependencies for iOS project, which is required by this template.
Please try again manually: "cd ./mobile/ios && pod install".
CocoaPods documentation: https://cocoapods.org/
hoisting が正しく行われていた場合は、react-native-cli でインストールされた依存モジュールはルートの node_modules に入っています。
そのため、CocoaPods が参照しようとしている mobile フォルダ配下の node_modules には何もないため、エラーが発生します。
それでは、iOS と Android をそれぞれビルドできるように修正していきましょう。
iOS の設定
まずは iOS のビルドが動くようにしていきます。
修正が必要なファイルは下記の 2 つです。
- ios/Podfile
- ios/mobile.xcodeproj/project.pbxproj
Podfile の修正
まずは、先ほど落ちた pod install が動くようにしていきましょう。
テンプレートが生成した Podfile は、react-native と@react-native-community の参照先が mobile 直下の node_modules を指しています。
これをルートの node_modules を参照するように変更します。
また、react_native_post_install の第 2 引数で実行時パスを変更します。
テンプレートが作成したものはデフォルト値で省略されていますが、このデフォルト値が../node_modules/react-nativeを指しています。
- require_relative '../node_modules/react-native/scripts/react_native_pods'
- require_relative '../node_modules/@react-native-community/cli-platform-ios/native_modules'
+ require_relative '../../../node_modules/react-native/scripts/react_native_pods'
+ require_relative '../../../node_modules/@react-native-community/cli-platform-ios/native_modules'

platform :ios, min_ios_version_supported
prepare_react_native_project!

flipper_config = ENV['NO_FLIPPER'] == "1" ? FlipperConfiguration.disabled : FlipperConfiguration.enabled

linkage = ENV['USE_FRAMEWORKS']
if linkage != nil
  Pod::UI.puts "Configuring Pod with #{linkage}ally linked Frameworks".green
  use_frameworks! :linkage => linkage.to_sym
end

target 'mobile' do
  config = use_native_modules!

  # Flags change depending on the env values.
  flags = get_default_flags()

  use_react_native!(
    :path => config[:reactNativePath],
    # Hermes is now enabled by default. Disable by setting this flag to false.
    # Upcoming versions of React Native may rely on get_default_flags(), but
    # we make it explicit here to aid in the React Native upgrade process.
    :hermes_enabled => flags[:hermes_enabled],
    :fabric_enabled => flags[:fabric_enabled],
    # Enables Flipper.
    #
    # Note that if you have use_frameworks! enabled, Flipper will not work and
    # you should disable the next line.
    :flipper_configuration => flipper_config,
    # An absolute path to your application root.
    :app_path => "#{Pod::Config.instance.installation_root}/.."
  )

  target 'mobileTests' do
    inherit! :complete
    # Pods for testing
  end

  post_install do |installer|
    react_native_post_install(
      installer,
+      "../../../node_modules/react-native",
      # Set `mac_catalyst_enabled` to `true` in order to apply patches
      # necessary for Mac Catalyst builds
      :mac_catalyst_enabled => false
    )
    __apply_Xcode_12_5_M1_post_install_workaround(installer)
  end
end
これで再度 pod install を実行すると、問題なくインストールが完了します(10 分以上かかります)。
もし、Podfile.lock や Pods フォルダが作成されていた場合は、念の為削除してから実行してください。
XCode の設定ファイルの修正
続いて XCode の設定ファイルである project.pbxproj を修正します。
mobile という名前で作成している場合、ios/mobile.xcodeproj/project.pbxprojとなっています。
project.pbxproj は人間が読めるものではないため、中に書かれてあるものは理解できなくて大丈夫です。
このファイルを node_modules で検索すると 4 件ヒットします。
こちらも参照先が mobile 直下の node_modules になっているので、全て../../を足してルートの node_modules を参照するように変更します。
以上で iOS の設定は完了です。
mobile パッケージの中で yarn ios を叩いて起動してみましょう。
Android の設定
続いて Android を動くように修正していきます。
基本的にやることは iOS と同じで、node_modules の参照先をルートに変えるだけです。
修正するファイルは以下の 2 つです。
- android/settings.gradle
- android/app/build.gradle
settings.gradle の修正
node_modules の参照先をルートに変更します。
rootProject.name = 'mobile'
- apply from: file("../node_modules/@react-native-community/cli-platform-android/native_modules.gradle");
+ apply from: file("../../../node_modules/@react-native-community/cli-platform-android/native_modules.gradle");
applyNativeModulesSettingsGradle(settings)
include ':app'
- includeBuild('../node_modules/react-native-gradle-plugin')
+ includeBuild('../../../node_modules/react-native-gradle-plugin')
android/app/build.gradle を修正する
続いて、app フォルダ配下の build.gradle を修正します。
android フォルダ配下にも build.gradle がいますが、そちらではないので気をつけてください。
こちらのファイルでは、2 箇所修正をします。
まずは、ファイルの 10 行目あたりにいる react という JavaScript のオブジェクトっぽい中身の root プロパティのコメントアウトを消して、ルートの node_modules を参照するように修正します。
この react の中は、コメントに書いてある通り、gradle に React Native の各種設定を渡す箇所になります。
基本的に変更する必要はありませんが、モノレポプロジェクトでパス参照が合わないようなエラーが出る場合、だいたいここを修正することになります。
/**
 * This is the configuration block to customize your React Native Android app.
 * By default you don't need to apply any configuration, just uncomment the lines you need.
 */
react {
    /* Folders */
    //   The root of your project, i.e. where "package.json" lives. Default is '..'
-    // root = file("../")
+    root = file("../../../../")
    //   The folder where the react-native NPM package is. Default is ../node_modules/react-native
    // reactNativeDir = file("../node-modules/react-native")
    //   The folder where the react-native Codegen package is. Default is ../node_modules/react-native-codegen
    // codegenDir = file("../node-modules/react-native-codegen")
    //   The cli.js file which is the React Native CLI entrypoint. Default is ../node_modules/react-native/cli.js
    // cliFile = file("../node_modules/react-native/cli.js")

    /* Variants */
    //   The list of variants to that are debuggable. For those we're going to
    //   skip the bundling of the JS bundle and the assets. By default is just 'debug'.
    //   If you add flavors like lite, prod, etc. you'll have to list your debuggableVariants.
    // debuggableVariants = ["liteDebug", "prodDebug"]

    /* Bundling */
    //   A list containing the node command and its flags. Default is just 'node'.
    // nodeExecutableAndArgs = ["node"]
    //
    //   The command to run when bundling. By default is 'bundle'
    // bundleCommand = "ram-bundle"
    //
    //   The path to the CLI configuration file. Default is empty.
    // bundleConfig = file(../rn-cli.config.js)
    //
    //   The name of the generated asset file containing your JS bundle
    // bundleAssetName = "MyApplication.android.bundle"
    //
    //   The entry file for bundle generation. Default is 'index.android.js' or 'index.js'
    // entryFile = file("../js/MyApplication.android.js")
    //
    //   A list of extra flags to pass to the 'bundle' commands.
    //   See https://github.com/react-native-community/cli/blob/main/docs/commands.md#bundle
    // extraPackagerArgs = []

    /* Hermes Commands */
    //   The hermes compiler command to run. By default it is 'hermesc'
    // hermesCommand = "$rootDir/my-custom-hermesc/bin/hermesc"
    //
    //   The list of flags to pass to the Hermes compiler. By default is "-O", "-output-source-map"
    // hermesFlags = ["-O", "-output-source-map"]
}
このファイルはまだ変更する箇所があります。
ファイルの 1 番下に node_modules を参照しているところがあるので、これを修正します。
- apply from: file("../../node_modules/@react-native-community/cli-platform-android/native_modules.gradle"); applyNativeModulesAppBuildGradle(project)
+ apply from: file("../../../../node_modules/@react-native-community/cli-platform-android/native_modules.gradle"); applyNativeModulesAppBuildGradle(project)
以上で iOS と Android がビルドできる環境が整いました。
metro の設定
最後に metro バンドラーの設定を修正します。
metro バンドラーは React Native(tsx ファイル)を iOS, Android それぞれの環境で動くようにビルドするモジュールバンドラーです。
webpack と同じものと思ってください。
metro.config.js をプロジェクトルートに移動
テンプレートが作成したものは mobile 直下にいますが、metro も他のモジュール同様に hoisting されています。
そのため、この設定ファイルをルートに移動します。
mobile 直下にいても一応動かすことはできますが、この記事で書いてる設定とは異なってくるので注意してください。
主にパスの参照先が変わります。
metro.config.js の修正
metor バンドラーは今までとは逆で、ルートにいるため、モバイルアプリのエントリーポイントが見つけられなくなっています。
修正する箇所が多いので、下記コードをそのままコピペしてください。
各設定が何をしているかは、コメントに記載しています。
何をやってるのかはコードを見ただけでは全然わからない(特に Android の画像周り)ので、このコメントごと持ってきてもいいかもしれません。
const path = require('path');

const exclusionList = require('metro-config/src/defaults/exclusionList');

/**
 * metroが監視するフォルダの一覧
 * 指定したフォルダ配下のファイルに変更が入ると、ホットリロードされる
 */
const watchFolders = [
  path.resolve(__dirname, 'node_modules'),
];

/**
 * metroが監視しないフォルダの一覧
 * 指定したフォルダ配下のファイルに変更が入っても、ホットリロードされなくなる
 * モノレポでは設定しないと、監視対象のファイルが多くなり、とても重くなる
 */
const blockList = exclusionList([
  /packages\web/,
  /node_modules\/@monorepo\/web/,
]);

module.exports = {
  projectRoot: path.join(__dirname, 'packages/mobile'),
  transformer: {
    /**
     * モノレポでAndroidが静的ファイルを読み込めるようにするための設定
     * Androidの画像のホスト先
     */
    publicPath: '/assets/dark/magic',
    getTransformOptions: async () => ({
      transform: {
        experimentalImportSupport: false,
        inlineRequires: false,
      },
    }),
  },
  resolver: {
    resolverMainFields: ['react-native', 'browser', 'module', 'main'],
    blockList,
  },
  watchFolders,
  /**
   * モノレポでAndroidが静的ファイルを読み込めるようにするための設定
   * metroはnodeサーバを起動してエミュレーターを動かしている
   * 画像のホスト先を変更し、特定のリクエストを書き換えることで読み込めるようになる
   * assets/dark/magicはmetroがAndroidをビルドする時の画像の出力先になっている
   */
  server: {
    enhanceMiddleware: (middleware) => {
      return (req, res, next) => {
        if (req.url.startsWith('/assets/dark/magic')) {
          req.url = req.url.replace('/assets/dark/magic', '/assets');
        } else if (req.url.startsWith('/assets/dark')) {
          req.url = req.url.replace('/assets/dark', '/assets/..');
        } else if (req.url.startsWith('/assets')) {
          req.url = req.url.replace('/assets', '/assets/../..');
        }
        return middleware(req, res, next);
      };
    },
  },
};
Android の画像について
コメントにも書いていますが、assets/dark/magic という魔法のような呪文は、Android をビルドするとその理由を知ることができます。
ここまでの設定でビルドはできるようになっている(とは思う)ので、ビルドしてみましょう。
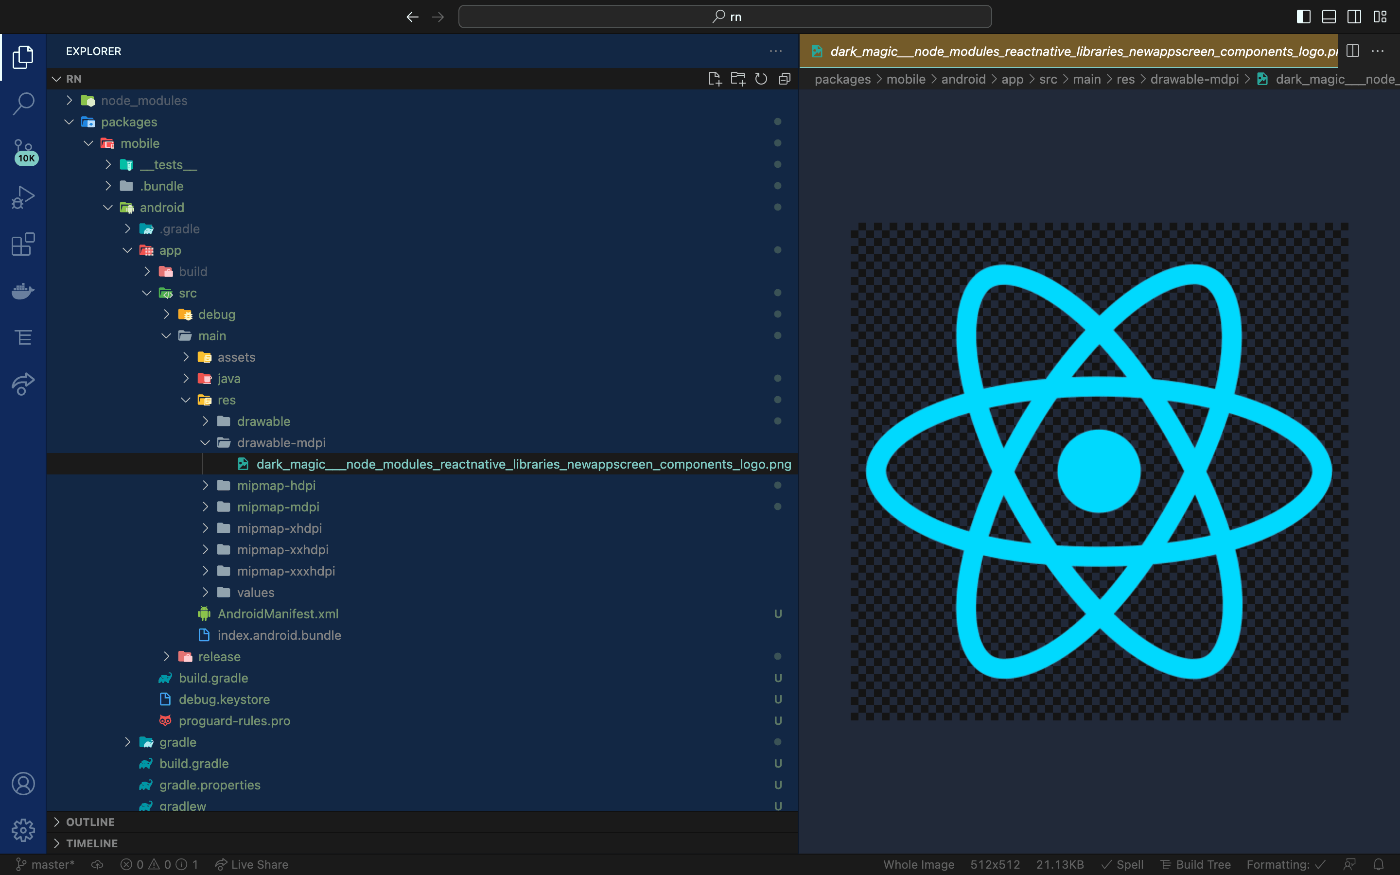
実行が完了すると、android/app/src/main/res 配下にいくつかフォルダが作成されています。
その中に、darkとmagicという単語を含む画像が出力されています。
yarn react-native bundle \
  --platform android \
  --dev false \
  --entry-file index.js \
  --bundle-output android/app/src/main/index.android.bundle \
  --assets-dest android/app/src/main/res
こんな感じに画像が出力されていることが確認できます。
筆者は Java には詳しくはないですが、この_はおそらくファイルの階層を表しています。
modules パッケージの作成
これで無事 iOS と Android が起動できるようになりました。
最後に web と mobile で使い回す共通のモジュールを作成して読み込めるようにしましょう。
packages 配下に modules フォルダを作って npm init をしましょう。
name フィールドは@monorepo/modulesとしておき、main にsrcを指定しておきましょう。
{
  "name": "@monorepo/modules",
  "version": "0.0.1",
  "description": "",
  "main": "src",
  "scripts": {
    "test": "echo \"Error: no test specified\" && exit 1"
  },
  "keywords": [],
  "author": "",
  "license": "ISC"
}
src フォルダにはカラーの定数ファイルでも作っておきましょう。
export const BLACK = "#000000";
export const WHITE = "#FFFFFF";
export * from './colors.ts'
web で modules パッケージを読み込めるようにする
React アプリの web で読み込む手順は通常のモノレポと変わりありません。
"dependencies": {
+  "@monorepo/modules": "*",
  "react": "17.0.1",
  "react-native": "0.64.1"
},
mobile で modules を読み込めるようにする
React Native アプリの mobile では違った設定が必要になります。
package.json と metro.config.js の両方を変更します。
package.json の変更は web と同じで、dependencies に追加するだけです。
"dependencies": {
+  "@monorepo/modules": "*",
  "react": "17.0.1",
  "react-native": "0.64.1"
},
続いて metro.config.js には watchFolders にパスを追加します。
const watchFolders = [
+  path.resolve(__dirname, "packages", "modules"),
  path.resolve(__dirname, "node_modules"),
];
以上で設定は終わりになります。
なお、metro.config.js 自体を変更した時は、サーバを再起動しないと結果が反映されないので注意してください。
読み込む時は、以下のように書けば大丈夫です。
これは普通のモノレポと同じだし、web と mobile とも共通です。
import { BLACK, WHITE } from "@monorepo/modules";

// { BLACK: "#000000", WHITE: "#FFFFFF" }
console.log({ BLACK, WHITE });
React と React Native のバージョンを固定する
最後に hoisting が極力崩れないようにするために、必ず指定したバージョンが入るように固定しておきましょう。
yarn には resolutions という機能があり、必ず指定したバージョンがインストールされるように強制することができます。
なお、現在最新の npm v9.4.2 時点では、resolutions 機能は提供されていません。
ですが、npm-force-resolutionsというものがあり、こちらで同じことができます。
{
  "name": "monorepo",
  "version": "0.0.1",
  "license": "ISC",
  "description": "",
  "private": true,
  "scripts": {
    "test": "echo \"Error: no test specified\" && exit 1"
  },
  "workspaces": ["packages/*"],
+  "resolutions": {
+    "react": "18.2.0",
+    "react-dom": "18.2.0",
+    "react-native": "0.71.0"
+  },
  "devDependencies": {
    "@typescript-eslint/eslint-plugin": "^5.51.0",
    "@typescript-eslint/parser": "^5.51.0",
    "eslint": "^8.34.0",
    "eslint-config-prettier": "^8.6.0",
    "eslint-plugin-react": "^7.32.2",
    "eslint-plugin-react-hooks": "^4.6.0",
    "eslint-plugin-react-native": "^4.0.0",
    "prettier": "^2.8.4",
    "typescript": "^4.9.5"
  }
}
終わりに
モノレポでかつ hoisting させたプロジェクトで React Native を使おうとすると、最初の環境構築でやることがとても多いです。
また、開発を進めていくうちに依存関係が壊れて hoisting されなくなって動かなくなることも起こったりする可能性もあります。
この記事ではやり方を紹介しましたが、React Native のパッケージだけあるいは React Native 系のモジュールだけ noHoist にするということも検討してもいいかもしれません。
・・・もしかしたらそっちの方が幸せなのかもしれない。

Discussion