🐕
Next.js13 + TypeScript + jestでコンポーネントの単体テストをする
環境
| ライブラリ | バージョン |
|---|---|
| next | 13.4.2 |
| react | 18.2.0 |
| react-dom | 18.2.0 |
| typescript | 5.1.6 |
| jest | 29.6.2 |
| jest-environment-jsdom | 29.6.2 |
| @testing-library/jest-dom | 5.17.0 |
| @testing-library/react | 14.0.0 |
| @testing-library/user-event | 14.4.3 |
手順
1. Next.jsの環境構築
公式を参照し、TypeScriptベースで構築してください。
2. コンポーネントの作成
components/Button/Button.tsxを作成します。
Button.tsx
import { FC, memo } from "react";

type Props = JSX.IntrinsicElements["button"];

const Button: FC<Props> = (props) => {
  const { children, ...buttonProps } = props;

  return <button {...buttonProps}>{children}</button>;
};

export default memo(Button);
3. 単体テストに必要なライブラリをインストール
下記5つをインストールします。
- jest
- jest-environment-jsdom
- @testing-library/jest-dom
- @testing-library/react
- @testing-library/user-event
npm install --save-dev jest jest-environment-jsdom @testing-library/jest-dom @testing-library/react @testing-library/user-event
4. jestの設定ファイルを作成
プロジェクトのルートにjest.config.jsを作成します
jest.config.js
const nextJest = require('next/jest')

const createJestConfig = nextJest({
  dir: './',
})

/** @type {import('jest').Config} */
const customJestConfig = {
  moduleDirectories: ['node_modules', '<rootDir>/'],
  testEnvironment: 'jest-environment-jsdom',
}

module.exports = createJestConfig(customJestConfig)
5. テストファイルの作成
↑で作成したButtonコンポーネントのテストファイルcomponents/Button/Button.test.tsxを作成します。
Button.test.tsx
import "@testing-library/jest-dom/extend-expect";
import { render, screen, fireEvent } from "@testing-library/react";
import Button from "./Button";

describe("Buttonコンポーネントのテスト", () => {
  it("正しくレンダリングされる", () => {
    render(<Button>Test</Button>);

    const buttonElement = screen.getByRole("button");
    expect(buttonElement).toBeInTheDocument();
  });

  it("children propsからのテキストが正しく表示される", () => {
    render(<Button>Click me</Button>);

    expect(screen.getByText("Click me")).toBeInTheDocument();
  });

  it("ボタン固有の属性(disabled)が正しく適用される", () => {
    render(<Button disabled={true}>Disabled Button</Button>);

    const buttonElement = screen.getByText("Disabled Button");
    expect(buttonElement).toBeDisabled();
  });

  it("クリック時にonClickイベントハンドラがトリガーされる", () => {
    const handleClick = jest.fn();

    render(<Button onClick={handleClick}>Click me</Button>);

    const buttonElement = screen.getByText("Click me");
    fireEvent.click(buttonElement);

    expect(handleClick).toHaveBeenCalled();
  });
});
6. package.jsonにテスト実行のscriptを追加
"scripts": {
    // 省略
    "test": "jest",
  },
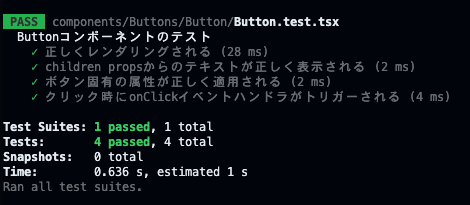
7. テストの実行
npm run test

正常にテストが通過すればOKです!
Discussion