【WeatherKit REST API】Appleの天気予報APIを使って現在の気象データを取得する
これはなに?
WWDC2022で発表されたWeatherKitの(Swiftではなく)REST APIを利用してみました。今回はNode.jsで検証してみます。
🍎 WeatherKit
WeathreKitとは
Appleが提供するグローバルな気象情報APIです。
iOSやmacOSなどのプラットフォームからはSwiftで、その他のプラットフォームからはREST APIを使用してアクセスすることが出来ます。
WWDC2022で発表され、現在はまだベータ版です(2022/08/02時点)
-
WeatherKitをSwiftから利用する場合
iOS16、iPadOS16、macOS13、tvOS16、watchOS9以上が必要 -
REST APIで使う場合
全てのプラットフォームでOK🙆♂️
Pricing
まず「Apple Developer Program Membership」へ登録していることが必要です。
無料枠
- 50万コール/月
無料枠を越えた分
- 100万コール/月 US$ 49.99
- 200万コール/月 US$ 99.99
- 500万コール/月 US$ 249.99
- 1000万コール/月 US$ 499.99
- 2000万コール/月 US$ 999.99
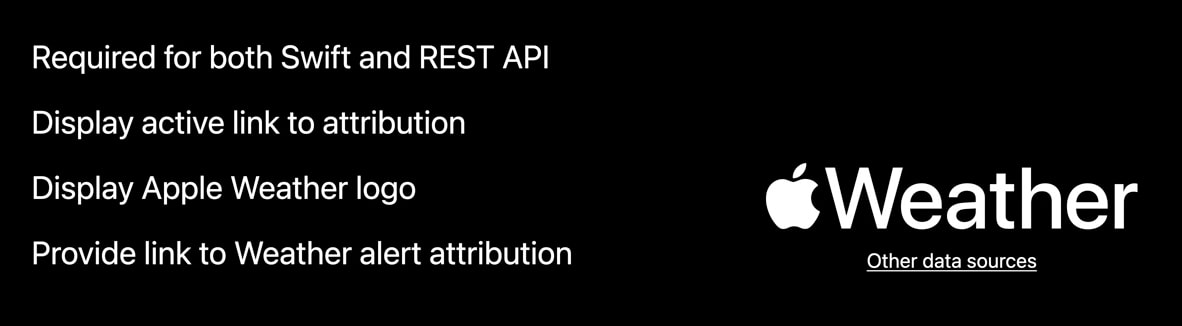
データソースの提示
使用する場合は、Apple Weatherのロゴとデータソース元リンクを表示する必要があります。
REST API利用準備
全てのREST APIリクエストのヘッダーには開発者トークンが必要となります。
トークンにはJSON Web Token(JWT)を使用します。

トークンの作成に必要なもの
- App ID
- Private Key ID
- Private Key
- Team ID
App ID
Developer Potal >「Certificates, Identifiers & Profiles」にアクセス。
任意のApp IDを登録します。(既存のIDでも○)
作成するApp IDの「Capability」と「App Services」からWeatherKitを紐付けます。

Private Key
ここでは以下の2点を作成します。
- Private Key ID
- Private Key File
同じく、Developer Potal >「Certificates, Identifiers & Profiles」 から、Keyを新規作成します。この時「WeatherKit」にチェックを入れて有効化します。

作成完了したら、表示されるPrivate Key IDを控えておき、Private Key Fileはダウンロードして保存しておきます。(DL出来るのはこの1回だけ)

Team ID
Team IDはDeveloper PortalのMembershipなどから確認出来るのでそれを控えるだけでOKです。
アカウントページ >「Membership」 > 「Team ID」欄
JSON Web Token(JWT)
前段で用意した
- App ID
- Private Key ID
- Private Key
- Team ID
を使ってトークンを作っていきます。
JWTの細かな仕様については割愛しますが、ざっくりと以下の形で指定していきます。
JWTヘッダ部
-
署名に使用するアルゴリズム(
alg) :ES256 -
Key ID :
Private Key -
オプション(Apple独自のパラメータ?)のID :
Team ID と App IDをドット「.」で連結
ペイロード部(クレームセット)
-
iss(issure / JWT発行者):
Team ID -
iat(Issued At / JWT発行日時):
トークンを作成したUNIX時刻 -
exp(Expiration Time / JWT失効日時):
トークンが執行するUNIX時刻 -
sub(Subject / JWTの用途):
App ID
Private Key Fileで署名
ヘッダ部とペイロード部をそれぞれBase64でエンコードし、それらをドットで結合したものをPrivate Key Fileで署名します。
トークン作成の実装
今回トークンの作成にはNode.jsの「jsonwebtoken」を利用してしまいます。
👇こんな感じで実装
const jwt = require('jsonwebtoken')

// ... 中略

private generateToken(): string {
    const token = jwt.sign(
        {
            "iss": `${publicEnv.teamId}`,
            "iat": Math.floor(Date.now() / 1000),
            "exp": Math.floor(Date.now() / 1000) + (60 * 60), // 1h
            "sub": `${publicEnv.appId}`,
        },
        this.readPrivateKey(),
        {
            algorithm: 'ES256',
            keyid: `${publicEnv.privateKeyId}`,
            header: {
                "id": `${publicEnv.teamId}.${publicEnv.appId}`,
            }
        }
    )
    return token
}
🌤️ 天気情報の取得
作成したトークンを使って現在の天気を取得してみます。
指定した場所の気象データはこちらのエンドポイントから取得出来ます。
https://weatherkit.apple.com/api/v1/weather/{language}/{latitude}/{longitude}
パスパラメータで
- 緯度、経度
- 言語
クエリパラメータで
- Datasets
- timezone
を指定します。
APIを叩いてみる
試しに
-
場所:東京スカイツリー(緯度: 35.710063 経度: 139.8107)
-
言語:日本語
-
Datasets:
currentWeather -
タイムゾーン:Asia/Tokyo
を指定して実行してみます。
curl -H GET 'https://weatherkit.apple.com/api/v1/weather/ja/35.7100/139.8107?dataSets=currentWeather&timezone=Asia%2FTokyo' \
-H 'Content-Type:application/json;charset=utf-8' \
-H "Authorization: Bearer $(cat jwt)" --output currentWeather.json
結果
currentWeather.json
{
    "currentWeather": {
        "name": "CurrentWeather",
        "metadata": {
            "attributionURL": "https://weather-data.apple.com/legal-attribution.html",
            "expireTime": "2022-07-27T11:52:49Z",
            "latitude": 35.71,
            "longitude": 139.811,
            "readTime": "2022-07-27T11:47:49Z",
            "reportedTime": "2022-07-27T10:11:44Z",
            "units": "m",
            "version": 1
        },
        "asOf": "2022-07-27T11:47:49Z",
        "cloudCover": 0.84,
        "conditionCode": "MostlyCloudy",
        "daylight": false,
        "humidity": 0.82,
        "precipitationIntensity": 0.03,
        "pressure": 1013.16,
        "pressureTrend": "rising",
        "temperature": 27.37,
        "temperatureApparent": 31.1,
        "temperatureDewPoint": 24.04,
        "uvIndex": 0,
        "visibility": 19851.62,
        "windDirection": 195,
        "windGust": 32.97,
        "windSpeed": 18.02
    }
}
各パラメータについて
詳細については各フィールドのマッピングが参考になります。
Node.jsで使ってみる
Node.jsで実装して検証してみました。
import axios, { AxiosInstance } from "axios";
import { WeatherKitRESTAPI } from "../types/weather";

export class Weather {

    private client: AxiosInstance

    constructor( authToken: string ){
        this.client = this.makeClient(authToken)
    }

    private makeClient( token: string ): AxiosInstance {
        const client = axios.create({
            baseURL: `https://weatherkit.apple.com`,
            headers: {
                "Authorization": `Bearer ${token}`,
                'Content-Type': 'application/json'
            },
            responseType: 'json'
         })
        return client
    }

    private buildEndpointUrl( params: WeatherKitRESTAPI.Requests.Params, weatherInfoType: WeatherKitRESTAPI.Requests.WeatherInformation ): string {
        return `/api/v1/weather/${params.language}/${params.location.latitude}/${params.location.longitude}?dataSets=${weatherInfoType}&timezone=${params.timezone}`
    }

    // Current Weather
    async fetchCurrentWeather( params: WeatherKitRESTAPI.Requests.Params ): Promise<WeatherKitRESTAPI.Responses.CurrentWeatherResponse>{
        try {
            const res = await this.client.get(this.buildEndpointUrl(params, 'currentWeather'))
            return res.data
        } catch (error) {
            console.log(JSON.stringify(error, null, 4));
            throw new Error("WeatherKit REST API Error Did Occurred / CurrentWeather");
        }
    }
}
Usage
const weather = new Weather(token)
// Current Weather
try {
    const result = await weather.fetchCurrentWeather({
        location: {
            latitude: 35.7100,
            longitude: 139.8107,
        },
        language: 'ja',
        timezone: 'Asia%2FTokyo'
    })
    console.log(`name: ${result.currentWeather.name}`);
    console.log(`asOf: ${result.currentWeather.asOf}`);
    console.log(`conditionCode: ${result.currentWeather.conditionCode}`);
    console.log(`temperature: ${result.currentWeather.temperature}`);
    console.log(`temperatureApparent(体感): ${result.currentWeather.temperatureApparent}`);
} catch (error) {
    // Has Error
    console.log(error);
}
結果
name: CurrentWeather
asOf: 2022-07-27T11:40:06Z
conditionCode: MostlyCloudy
temperature: 27.44
temperatureApparent(体感): 31.18
コード全体はGitHubで公開しています。
そちらでは10日間予報(forecastDaily)についても試しています。
👇この様な感じで緯度経度、言語、タイムゾーンを指定して天気情報を取得出来ます。
npm run forecast lat=35.7100 lon=139.8107 lang=ja tz=Asia%2FTokyo
参考リンク
-
WWDC2022 Session
https://developer.apple.com/videos/play/wwdc2022/10003/ -
WeatherKit Get Started
https://developer.apple.com/weatherkit/get-started/ -
WeatherKit Documentation
https://developer.apple.com/documentation/weatherkit -
WeatherKit REST API Documentation
https://developer.apple.com/documentation/weatherkitrestapi
Discussion