公式ドキュメントが古すぎて使い物にならないため、2024年1月現在最新のRaspiOS bookwormでbluezのBLE Meshを動かすまでの手順を紹介します。
前提条件
- Raspberry Pi 4 B
- Kernel 6.1.0-rpi7-rpi-v8
- Raspbian lite bookworm
- bluez 5.72
※ 本記事は最新版を動かしたかったため、 bluez 5.72 をターゲットとしました。しかし、ここにあるように不具合で動作しないため、 5.62 をセットアップする必要があります。バージョンの違いのみで手順は変わりません。不具合はこちらで起票しています。
ライブラリインストール
sudo apt update
sudo apt install git bc libusb-dev libdbus-1-dev libglib2.0-dev libudev-dev libical-dev libreadline-dev autoconf bison flex libssl-dev cmake python3-docutils
個人的な信念なのでemacsもインストールします。
sudo apt install emacs-nox
カーネルのリビルド
バージョンの確認
uname -a でRaspi OSのカーネルバージョンを調べます。
$ uname -a
Linux raspi-mesh01 6.1.0-rpi7-rpi-v8 #1 SMP PREEMPT Debian 1:6.1.63-1+rpt1 (2023-11-24) aarch64 GNU/Linux
ビルドされた日付のtagソースをダウンロードします。
上記は 2023年11月24日なので、2023-11-23のソースを以下のとおりダウンロードします。
wget https://github.com/raspberrypi/linux/archive/refs/tags/stable_20231123.tar.gz
tar -xf stable_20231123.tar.gz
カーネルの設定
cd linix-stable_20231123
KERNEL=kernel8
make bcm2711_defconfig
make menuconfig
ダイアログが開くため、以下を選択していきます。
<ENTER>で階層に入って、<ESC>2回で階層を上がれます。
各項目は<y>で選択できます。
> Cryptographic API > AEAD (authenticated encryption with associated data) ciphers > CCM (Counter with Cipher Block Chaining-MAC)
> Cryptographic API > Hashes, digests, and MACs > CMAC (Cipher-based MAC)
> Cryptographic API > Userspace interface > Hash algorithms
                                            Symmetric key cipher algorithms
                                            AEAD cipher algorithms


選択が終わったら一番上階層で<ESC>を2回押します。結果は.config に書き込まれます。
カーネルのビルド
make -j4 Image modules dtbs
4〜5時間待ちます…
カーネルのインストール
sudo make modules_install
sudo cp arch/arm64/boot/dts/broadcom/*.dtb /boot/firmware/
sudo cp arch/arm/boot/dts/overlays/*.dtb* /boot/overlays/
sudo cp arch/arm/boot/dts/overlays/README /boot/overlays/
sudo cp arch/arm64/boot/Image /boot/firmware/kernel8.img
sudo rebooot -n
カーネルインストールの確認
$ uname -a
Linux raspi-mesh01 6.1.63-v8 #1 SMP PREEMPT **Tue Feb 20 13:35:21 JST 2024** aarch64 GNU/Linux
コマンドの実行結果で、ビルド時刻が作業時刻に一致していることを確認します。
BlueZのインストール
json-c のインストール
cd ~
wget https://s3.amazonaws.com/json-c_releases/releases/json-c-0.17.tar.gz
tar -xvf json-c-0.17.tar.gz
cd json-c-0.17
mkdir build
cd build
../cmake-configure --prefix=usr --disable-static
make
sudo make install
bluezインストール
5.62 をセットアップする場合、 5.72 を 5.62 に変更するだけでセットアップ可能です。
cd ~
wget https://mirrors.edge.kernel.org/pub/linux/bluetooth/bluez-5.72.tar.xz
tar -vxf bluez-5.72.tar.xz
cd bluez-5.72
./configure --enable-mesh --enable-testing --enable-tools --prefix=/usr --mandir=/usr/share/man --sysconfdir=/etc --localstatedir=/var
sudo make
sudo make install
上記のインストールで bluetoothd は /usr/libexec/bluetooth/ へインストールされています。
公式の手順では、既存のbluetoothd が /usr/lib/bluetooth/ 以下にあるため退避させろとのこです。(今回はは存在しませんでした。)また、退避させたあとに libexec にある bluetoothd をlib 以下へリンクします。
cd /usr/lib/bluetooth
cp bluetoothd bluetoothd.orig
sudo ln -s ../../libexec/bluetooth/bluetoothd bluetoothd
それに合わせ、サービスファイルが正しい記述になっているか確認します。
ファイル:/lib/systemd/system/bluetooth.service
特に、ExecStart が/usr/lib/bluetooth/bluetoothd になっているか確認します。
[Unit]
Description=Bluetooth service
Documentation=man:bluetoothd(8)
ConditionPathIsDirectory=/sys/class/bluetooth

[Service]
Type=dbus
BusName=org.bluez
ExecStart=/usr/lib/bluetooth/bluetoothd
NotifyAccess=main
#WatchdogSec=10
#Restart=on-failure
CapabilityBoundingSet=CAP_NET_ADMIN CAP_NET_BIND_SERVICE
LimitNPROC=1

# Filesystem lockdown
ProtectHome=true
ProtectSystem=strict
PrivateTmp=true
ProtectKernelTunables=true
ProtectControlGroups=true
StateDirectory=bluetooth
StateDirectoryMode=0700
ConfigurationDirectory=bluetooth
ConfigurationDirectoryMode=0555

# Execute Mappings
MemoryDenyWriteExecute=true

# Privilege escalation
NoNewPrivileges=true

# Real-time
RestrictRealtime=true

[Install]
WantedBy=bluetooth.target
Alias=dbus-org.bluez.service
仕上げと確認
sudo systemctl daemon-reload

sudo service bluetooth start
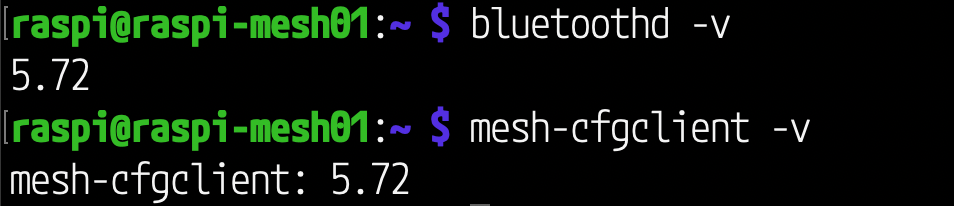
バージョン確認
プロビジョニングしてみる
今回は Nordic Nrf52 DK に対して Nordic Connect SDK の meshサンプル、 light を動作させたものをプロビジョニングし、点灯・消灯を行う例です。
DKの準備はここでは割愛しますが、標準のLED BLINKによるOOB Authenticationがうまく動作しない(Timeoutしてから光りだす)ため、prj.confに以下を追記します。sampleのデフォルトではBT_MESH_BLINKとボタンでのinputが有効になっているため、BT_MESH_BLINKを無効にすることでボタン押下だけで済ませます。
CONFIG_BT_MESH_DK_PROV_OOB_BLINK=n
bluetooth の停止と meshデーモン の起動
sudo service bluetooth stop

sudo /usr/libexec/bluetooth/bluetooth-meshd -nd
meshデーモンを起動させたターミナルはそのまま放置します。
optionの
-
n: フォアグラウンドでの実行 -
b: デバッグログの表示 -
d: D-BUSデバッグログの表示
です。
プロビジョナ起動
新しいターミナルで接続し、プロビジョニングを行います。
プロビジョナである、mesh-cfgclientを起動します。
mesh-cfgclient

Warning: config file "/home/raspi/.config/meshcfg/config_db.json" not found
[mesh-cfgclient]#
初回起動はネットワークの設定ファイルが存在しないため怒られます。
create 0で作成します。
[mesh-cfgclient]# create 0
Created new node with token 8da42ea3032a5937
Proxy added: org.bluez.mesh.Node1 (/org/bluez/mesh/node2c2b3454eee44561b65bf91ba36a1cbe)
Proxy added: org.bluez.mesh.Management1 (/org/bluez/mesh/node2c2b3454eee44561b65bf91ba36a1cbe)
Attached with path /org/bluez/mesh/node2c2b3454eee44561b65bf91ba36a1cbe
ノード探索
続いて、プロビジョニングされていないノードを探します。
[mesh-cfgclient]# discover-unprovisioned on 10
Unprovisioned scan started
Scan result:
	rssi = -53
	UUID = 5323720FEE5048548000000000000000
	OOB = 0000
	URI Hash = 00000000
[mesh-cfgclient]#
on で探し始め、 off でストップします。プロセスはCLIとは非同期で実行されます。
10 はタイムアウトです。省略すると30秒くらい探していると思います。
完了すると Scan resultが表示されます。ここで表示される UUID はプロビジョニングの際に使用します。
いざ、プロビジョニング
provision 上記のUUID でプロビジョニングを行います。OOB Authenticationの指定によって何をすべきか表示されます。今回はボタン押下なのでDKのボタンを指定回数押します。(1がハードコーディングされているので毎回1ですが)
[mesh-cfgclient]# provision 5323720FEE5048548000000000000000
Provisioning started
Push remote button 1 times
Assign addresses for 4 elements
Provisioning done:
Mesh node:
	UUID = 5323720FEE5048548000000000000000
	primary = 00aa

	elements (4):
[mesh-cfgclient]#
すると、プロビジョニングが完了しアドレスが表示されます。00aaがアドレスで、このノードの1番目のエレメントに対するアドレスです。この例ではエレメントが4つあるため、00aa〜00adが割り振られているはずです。
エレメントの設定
エレメントを操作できるように設定します。まずはアプリケーションキーを作成します。
[mesh-cfgclient]# appkey-create 0 0
[mesh-cfgclient]#
なにも応答がないですがOKです。
次は操作する対象を選択し、モデルを指定してアプリケーションキーを設定します。
[mesh-cfgclient]# menu config
Menu config:
Available commands:
-------------------
target <unicast>                                  Set target node to configure
...

[mesh-cfgclient]# target 00aa
Configuring node 00aa
[config: Target = 00aa]#
menu config で設定のメニューに入ります。抜ける場合は back で戻れます。
(戻った場合でも [config: Target = 00aa] は [mesh-cfgclient] の表示に戻りません…)
ノードの情報を取得します。
[config: Target = 00aa]# composition-get
Received DeviceCompositionStatus (len 39)
Received composion:
	Feature support:
		relay: yes
		proxy: yes
		friend: yes
		lpn: no
	 Element 0:
		location: 0001
		SIG defined models:
		  Model ID	0000 "Configuration Server"
		  Model ID	0002 "Health Server"
		  Model ID	1000 "Generic OnOff Server"
	 Element 1:
		location: 0002
		SIG defined models:
		  Model ID	1000 "Generic OnOff Server"
	 Element 2:
		location: 0003
		SIG defined models:
		  Model ID	1000 "Generic OnOff Server"
	 Element 3:
		location: 0004
		SIG defined models:
		  Model ID	1000 "Generic OnOff Server"
[config: Target = 00aa]#
アプリケーションキーを設定し、エレメントのモデルをバインドします。
[config: Target = 00aa]# appkey-add 0
Received AppKeyStatus (len 4)
Node 00aa AppKey status Success
NetKey	0 (0x000)
AppKey	0 (0x000)
[config: Target = 00aa]# bind 00aa 0 1000
Received ModelAppStatus (len 7)
Node 00aa: Model App status Success
Element Addr	00aa
Model ID	1000 "Generic OnOff Server"
AppIdx		0 (0x000)
bind アドレス Appkey_ID モデル で指定します。
4つあるのでそれぞれ指定していきます。
[config: Target = 00aa]# bind 00ab 0 1000
Received ModelAppStatus (len 7)
Node 00aa: Model App status Success
Element Addr	00ab
Model ID	1000 "Generic OnOff Server"
AppIdx		0 (0x000)
 [config: Target = 00aa]# bind 00ac 0 1000
Received ModelAppStatus (len 7)
Node 00aa: Model App status Success
Element Addr	00ac
Model ID	1000 "Generic OnOff Server"
AppIdx		0 (0x000)
[config: Target = 00aa]# bind 00ad 0 1000
Received ModelAppStatus (len 7)
Node 00aa: Model App status Success
Element Addr	00ad
Model ID	1000 "Generic OnOff Server"
AppIdx		0 (0x000)
 [config: Target = 00aa]#
念のため状況確認
[config: Target = 00aa]# back
[config: Target = 00aa]# list-nodes
Mesh node:
	UUID = 2C2B3454EEE44561B65BF91BA36A1CBE
	primary = 0001
	net_keys = 0 (0x000) ,
	elements (1):
Mesh node:
	UUID = 5323720FEE5048548000000000000000
	primary = 00aa
	net_keys = 0 (0x000) ,
	app_keys = 0 (0x000) ,
	elements (4):
		element 0:
			SIG model: 0000 "Configuration Server"
			SIG model: 0002 "Health Server"
			SIG model: 1000 "Generic OnOff Server"
		element 1:
			SIG model: 1000 "Generic OnOff Server"
		element 2:
			SIG model: 1000 "Generic OnOff Server"
		element 3:
			SIG model: 1000 "Generic OnOff Server"
[config: Target = 00aa]#
on/off clientのプロビジョニング
さらに新しいターミナルを開いてbluezのテスト用プログラムを起動し、プロビジョニングします。
raspi@raspi-mesh01:~/bluez-5.62/bluez-5.62/test $ ./test-mesh
Register OnOff Server model on element 0
OnOff Server
State is OFF
Register Vendor model on element 0
Register OnOff Client model on element 1
OnOff Client
*** MAIN MENU ***
token  - set node ID (token)
join  - join mesh network
attach  - attach mesh node
remove  - delete node
dest  - set destination address
uuid  - set remote uuid
app-index  - set AppKey index
vendor-send  - send raw vendor message
client-menu  - On/Off client menu
quit  - exit the test

join
Joining with UUID 768385923bdf4d31a3115d1c45dd971b
Join procedure started
このUUIDを使ってプロビジョニングします。
[config: Target = 00aa]# provision 768385923bdf4d31a3115d1c45dd971b
Provisioning started
Request hexadecimal key (hex 16 octets)
[[mesh-agent]# ] Enter key (hex number):
キーの入力を求められるので、サンプルプログラム側のターミナルに表示されているキーを入力します。
PromptStatic ( static-oob )
Enter 16 octet key on remote device:  c5a7e312192ffac9579a45fbbbe07fe8
[[mesh-agent]# ] Enter key (hex number): c5a7e312192ffac9579a45fbbbe07fe8
Assign addresses for 2 elements
Provisioning done:
Mesh node:
	UUID = 768385923BDF4D31A3115D1C45DD971B
	primary = 00ae

	elements (2):
[config: Target = 00aa]#
あとは先程のDKと同じようにアプリケーションキーを設定し、エレメントをバインドします。
[config: Target = 00aa]# menu config
Menu config:
Available commands:
-------------------
target <unicast>                                  Set target node to
...

[config: Target = 00aa]# target 00ae
Configuring node 00ae
[config: Target = 00ae]# appkey-add 0
Received AppKeyStatus (len 4)
Node 00ae AppKey status Success
NetKey	0 (0x000)
AppKey	0 (0x000)
[config: Target = 00ae]# composition-get
Received DeviceCompositionStatus (len 29)
Received composion:
	Feature support:
		relay: yes
		proxy: no
		friend: yes
		lpn: no
	 Element 0:
		location: 0000
		SIG defined models:
		  Model ID	0000 "Configuration Server"
		  Model ID	1000 "Generic OnOff Server"
		 Vendor defined models:
		  Model ID	05f1 0001
	 Element 1:
		location: 0000
		SIG defined models:
		  Model ID	1001 "Generic OnOff Client"
[config: Target = 00ae]# bind 00af 0 1001
Received ModelAppStatus (len 7)
Node 00ae: Model App status Success
Element Addr	00af
Model ID	1001 "Generic OnOff Client"
AppIdx		0 (0x000)
 [config: Target = 00ae]#
サンプルプログラムのノードをアタッチします。
attach
Attach mesh node to bluetooth-meshd daemon
Mesh app registered: /org/bluez/mesh/node768385923bdf4d31a3115d1c45dd971b
Update Model Config 1001
Bindings: [0]
動かしてみる
今回はDKがサーバー(ライトのスイッチ と ライト)、サンプルプログラムがクライアント(OnOffのコマンドを投げる方)のため、サンプルプログラムから操作します。
dest
Enter 4-digit hex destination address:
00aa
Destination address: 00aa
client-menu
*** ON/OFF CLIENT MENU ***
get-state  - get server state
off  - set state OFF
on  - set state ON
repeat  - repeat last command
back  - back to main menu
quit  - exit the test
on
Set state: 1
OnOffClient send command
Message Received on Element 01, src= 00aa, dst=00af
OnOffClient process message len = 3
Got state ON from 00aa
off
Set state: 0
OnOffClient send command
Message Received on Element 01, src= 00aa, dst=00af
OnOffClient process message len = 3
Got state OFF from 00aa
destで送信先アドレスを入力します。これまでの手順で 00aa〜00ad のアドレスそれぞれに設定されてます。
そのあと client-menu に入って on または off で操作できます。
ノードの削除
DKのsampleはプロビジョニングされた結果を電源が切れても保持するように作られているため、あんプロビジョニングします。
[config: Target = 00ae]# menu config
...
[config: Target = 00ae]# target 00aa
Configuring node 00aa
[config: Target = 00aa]# node-reset
Received NodeResetStatus (len 0)
Node 00aa is reset
Remote removed (primary 00aa)
[config: Target = 00aa]# back
...
[config: Target = 00aa]# list-nodes
Mesh node:
	UUID = 2C2B3454EEE44561B65BF91BA36A1CBE
	primary = 0001
	net_keys = 0 (0x000) ,
	elements (1):
Mesh node:
	UUID = 768385923BDF4D31A3115D1C45DD971B
	primary = 00ae
	net_keys = 0 (0x000) ,
	app_keys = 0 (0x000) ,
	elements (2):
		element 0:
			SIG model: 0000 "Configuration Server"
			SIG model: 1000 "Generic OnOff Server"
			Vendor model: 05f10001
		element 1:
			SIG model: 1001 "Generic OnOff Client"
問題なく消えていることがわかると思います。

Discussion