【Flutter】AnimatedBuilderでアニメーションの連続再生


当記事を書いたきっかけ
「Flutter好きが集まる朝もく会(無料)」の
質問タイムで、アニメーションの連続再生について
ご質問を頂き、自分にアニメーションの知見が
不足している事に気が付きました。
そのため、今回は「Staggered animations」を
参考にして、学んでみようと思います。
ゴール
今回は、灰色の領域をタップすると
アニメーションが連続再生されるようにします。

STEP1:単一のアニメーションを再生する
まずは、単一のアニメーションを
再生できるようにします。
1. タップ領域付きの画面を作成する
アニメーションを再生するためには
AnimationControllerの初期化が必要です。
AnimationControllerの第一引数には
TickerProvider[1]を渡す必要があります。
TickerProviderを取得するためには
TickerProviderStateMixinを
StatefulWidgetのStateにwithで
関連付ける必要があります。
import 'package:flutter/material.dart';
import 'package:staggered_animations_sample/stagger_single_page/children/stagger_single_animations.dart';
class StaggerSinglePage extends StatefulWidget {
_StaggerSinglePageState createState() => _StaggerSinglePageState();
}
class _StaggerSinglePageState extends State<StaggerSinglePage>
with TickerProviderStateMixin {
late AnimationController _controller;
void initState() {
super.initState();
_controller = AnimationController(
vsync: this, // ← TickerProviderを渡しています
duration: const Duration(milliseconds: 1000),
);
}
void dispose() {
// 別の画面に遷移して`StaggerSinglePage`が破棄された場合
// アニメーションコントローラーも破棄されるようにしています
_controller.dispose();
super.dispose();
}
Future<void> _playAnimation() async {
// アニメーションを最初から最後まで再生してます
await _controller.forward();
// アニメーションを最後から最初まで再生してます
await _controller.reverse();
}
Widget build(BuildContext context) {
return Scaffold(
appBar: AppBar(title: const Text('Staggered Single Animation')),
body: GestureDetector(
onTap: () => _playAnimation(),
child: Center(
child: Container(
width: 300.0,
height: 300.0,
decoration: BoxDecoration(
color: Colors.black.withOpacity(0.1),
border: Border.all(color: Colors.black.withOpacity(0.5)),
),
// 次の見出し(2番)でアニメーションの中身を実装します
child: StaggerSingleAnimation(_controller),
),
),
),
);
}
}
2. アニメーションの中身を実装する
「Staggered animations 」のタイムラインを
参考にしてアニメーションを実装していきます。

アニメーション用のコントローラーと変数を定義する
StaggerSinglePageで初期化した
AnimationControllerを受け取り
当クラスでも使用できるようにします。
class StaggerSingleAnimation extends StatelessWidget {
  StaggerSingleAnimation(this.controller)

final AnimationController controller;
Animation<T>で変数を定義し
各アニメーションの値を変更可能にします。
(以下、アニメーション変数と呼びます)
final Animation<double> opacity;
final Animation<double> width;
final Animation<double> height;
final Animation<EdgeInsets> padding;
final Animation<BorderRadius?> borderRadius;
final Animation<Color?> color;
アニメーション変数に設定を追加する
Tweenというクラスを使用すると
アニメーション変数に対して
様々な設定を追加する事ができます。
Tweenの種類
TweenにはTween<T>をextendして
実装されている専用クラスが存在する
場合があるので、代入先の型に合わせて
使い分ける必要があります。
| Tweenの種類 | 代入先の型 |
|---|---|
| Tween<double> | Animation<double> |
| EdgeInsetsTween | Animation<EdgeInsets> |
| BorderRadiusTween | Animation<BorderRadius?> |
| ColorTween | Animation<Color?> |
開始値・終了値
Tweenの引数(beginとend)で
アニメーションの開始値と終了値が設定できます。
// 例:開始値を不透明度0%、終了値を不透明度100%
opacity = Tween<double>(begin: 0.0, end: 1.0);
コントローラー・インターバル・カーブ
Tweenにはアニメーションの
コントローラーとインターバルと
カーブを設定する引数がありません。
そのため、Tweenに実装されている
animateメソッドを呼び出して
追加で設定する必要があります。
animateメソッドの中身は以下のように
なっており、新しいアニメーションを
追加して、ブレンドする事ができます。
Animation<T> animate(Animation<double> parent) {
  return _AnimatedEvaluation<T>(parent, this);
}
CurvedAnimationをブレンドすると
このような書き方になります。
opacity = Tween<double>(begin: 0.0, end: 1.0).animate(
  CurvedAnimation(
    parent: controller,
    // インターバルはアニメーションの実行タイミングで、カーブはアニメーションの滑らかさ
    curve: Interval(0.0, 0.100, curve: Curves.ease),
  ),
);
全てのアニメーション変数にTweenを代入する
コンストラクターを使用して
全てのアニメーション変数に対して
Tweenを代入していきます。
class StaggerSingleAnimation extends StatelessWidget {
  StaggerSingleAnimation(this.controller)
      : opacity = Tween<double>(begin: 0.0, end: 1.0).animate(
          CurvedAnimation(
            parent: controller,
            curve: Interval(0.0, 0.100, curve: Curves.ease),
          ),
        ),
        width = Tween<double>(begin: 50.0, end: 150.0).animate(
          CurvedAnimation(
            parent: controller,
            curve: Interval(0.125, 0.250, curve: Curves.ease),
          ),
        ),
        height = Tween<double>(begin: 50.0, end: 150.0).animate(
          CurvedAnimation(
            parent: controller,
            curve: Interval(0.250, 0.375, curve: Curves.ease),
          ),
        ),
        padding = EdgeInsetsTween(
          begin: EdgeInsets.only(bottom: 0),
          end: EdgeInsets.only(bottom: 75),
        ).animate(
          CurvedAnimation(
            parent: controller,
            curve: Interval(0.250, 0.375, curve: Curves.ease),
          ),
        ),
        borderRadius = BorderRadiusTween(
          begin: BorderRadius.circular(4.0),
          end: BorderRadius.circular(75.0),
        ).animate(
          CurvedAnimation(
            parent: controller,
            curve: Interval(0.375, 0.500, curve: Curves.ease),
          ),
        ),
        color = ColorTween(begin: Colors.blue, end: Colors.orange).animate(
          CurvedAnimation(
            parent: controller,
            curve: Interval(0.500, 0.750, curve: Curves.ease),
          ),
        );
3. アニメーション変数をWidgetに流し込む
先ほど実装したアニメーション変数を
Widgetに流し込んでいきます。
アニメーション変数は
そのままでは値として扱えないので
.valueで値を呼び出します。
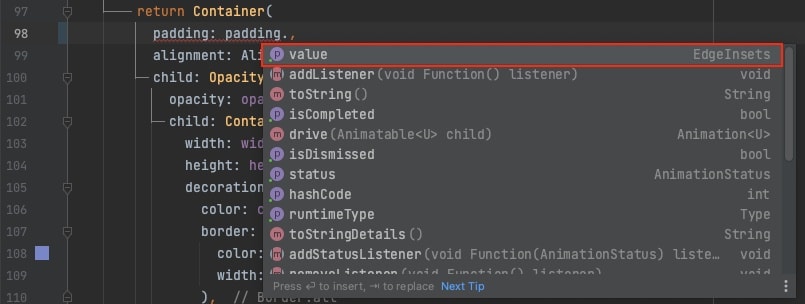
以下のように各Widgetに
各アニメーション変数を代入すれば
アニメーションの設定は完了です。
Widget build(BuildContext context) {
return AnimatedBuilder(
animation: controller,
builder: (BuildContext context, _) {
return Container(
padding: padding.value,
alignment: Alignment.bottomCenter,
child: Opacity(
opacity: opacity.value,
child: Container(
width: width.value,
height: height.value,
decoration: BoxDecoration(
color: color.value,
border: Border.all(
color: Colors.indigo.shade300,
width: 3.0,
),
borderRadius: borderRadius.value,
),
),
),
);
},
);
}
灰色の領域をタップすると
アニメーションが再生されます。

STEP2:アニメーションを連続再生する
GridView.builderを使用して
STEP1で作成した単一のアニメーションを
4つ複製してグリッドで並べます。
単純に4つ並べただけだと
4つのアニメーションが同時に
再生されてしまいます。
そのため、AnimationControllerも
4つ作成して、Listで保持するようにし
タップすると順番にアニメーションが
再生するようにループ処理を実装します。
import 'dart:async';
import 'package:flutter/material.dart';
import 'package:staggered_animations_sample/stagger_grid_page/children/stagger_grid_animations.dart';
class StaggerGridPage extends StatefulWidget {
_StaggerGridPageState createState() => _StaggerGridPageState();
}
class _StaggerGridPageState extends State<StaggerGridPage>
with TickerProviderStateMixin {
final int _dummyItemCount = 4;
late List<AnimationController> _controllers;
void initState() {
super.initState();
_controllers = List.generate(
_dummyItemCount,
(i) => AnimationController(
vsync: this,
duration: const Duration(milliseconds: 1000),
),
);
}
void dispose() {
for (final _controller in _controllers) {
_controller.dispose();
}
super.dispose();
}
Future<void> _playAnimations() async {
for (final _controller in _controllers) {
await _controller.forward();
await _controller.reverse();
}
}
Widget build(BuildContext context) {
return Scaffold(
appBar: AppBar(title: const Text('Staggered Grid Animation')),
body: Center(
child: GestureDetector(
onTap: () => _playAnimations(),
child: Container(
width: 300.0,
height: 300.0,
decoration: BoxDecoration(
color: Colors.black.withOpacity(0.1),
border: Border.all(color: Colors.black.withOpacity(0.5)),
),
child: GridView.builder(
gridDelegate: const SliverGridDelegateWithFixedCrossAxisCount(
crossAxisCount: 2,
mainAxisSpacing: 4,
crossAxisSpacing: 4,
),
itemCount: _dummyItemCount,
itemBuilder: (BuildContext context, int index) {
return StaggerGridAnimations(_controllers[index]);
},
),
),
),
),
);
}
}
灰色の領域をタップすると
アニメーションが連続再生されました!
最後に
GitHubにサンプルコードを上げています。
必要な方は参考にして下さい🙋🏻♂️
Flutter好きが集まる朝もく会(無料)を
平日朝5時〜7時に毎日開催しております!
ご質問がある方 や 黙々と作業したい方は
参加してみて頂けると嬉しいです♫
-
TickerProviderのソースコードに書かれた説明によると「ティッカーはフレームがトリガーされるたびに通知を受けたいあらゆるオブジェクトで使用できる。AnimationControllerを介して間接的に使用されるのが一般的」だそうです。 ↩︎
Discussion