🐷
Nuxt + TypeScript構築手順メモ
ここのところ、Nuxt+TypeScript をきちんとやり始めてある程度形ができてきたので、初期構築部分をメモします。気分で追記していきます。
テンプレートを作っておくと半年くらいすると使えなくなるので、手順を書いておく方が少し時間はかかりますが役に立つ気がします。
Nuxt 初期インストール
さくっとインストールします。細かい部分は、プロジェクトにあわせてですが、後で手間が省けます。
$ yarn create nuxt-app <project-name>
create-nuxt-app v3.6.0

? Project name: (app)
? Programming language: TypeScript
? Package manager: Yarn
? UI framework: Element
? Nuxt.js modules: Axios
? Linting tools: ESLint, Prettier
? Testing framework: Jest
? Rendering mode: Universal (SSR / SSG)
? Deployment target: Server (Node.js hosting)
? Development tools: None
? Continuous integration: None
? Version control system: Git
モジュール追加等
nuxt-property-decorator
記事によって TypeScript の書き方が異なりコピペすると動くので混乱していたのですが、Vue.extend、vue-class-component、vue-property-decorator
の 3 系等あるのに気づきました(遅い。ここを読んで理解できました。感謝。
いろいろ試した結果、個人的には property-decorator に落ち着きました。
インストール
yarn add nuxt-property-decorator
基本書式
<script lang="ts">
import { Component, Vue } from 'vue-property-decorator';

@Component({
  asyncData() {
    return {}
  },
})
export default class SampleComponent extends Vue {}
</script>
参考
↓ 毎回見ています
TailwindCSS
あまりガッツリした物を作らないので、基本は Elemets などのコンポーネントを利用するのですが、細かい部分などでカスタマイズが必要な場合に CSS を書くより html の中に混ぜれるので個人的には手早くて好きになりました。
インストール
基本はここの通りです。
yarn add -D @nuxtjs/tailwindcss tailwindcss@latest postcss@latest autoprefixer@latest
npx tailwindcss init
設定
nuxt.config.js
export default {
  buildModules: ['@nuxtjs/tailwindcss'],
  ...
}
tailwind.config.js
 module.exports = {
   ....
   purge: [
     './components/**/*.{vue,js}',
     './layouts/**/*.vue',
     './pages/**/*.vue',
     './plugins/**/*.{js,ts}',
     './nuxt.config.{js,ts}',
   ],
   ...
  }
dayjs
日付処理は最近は dayjs をつかっています。いろいろなところで日付操作は出てくるのでモジュールとして入れています。
インストール
yarn add @nuxtjs/dayjs
設定
export default {
  ...
  modules: [
    '@nuxtjs/dayjs',
  ],
  ...
}
使い方
モジュールなので$dayjs()で使えます。
nuxt-firebase
firebase を使うのは最近はこれが一番簡単な気がします。
インストール
yarn add firebase
yarn add @nuxtjs/firebase
設定
nuxt.config.js
modules: ['@nuxtjs/firebase'],

firebase: {
  config: {
    apiKey: '<apiKey>',
    authDomain: '<authDomain>',
    projectId: '<projectId>',
    storageBucket: '<storageBucket>',
    messagingSenderId: '<messagingSenderId>',
    appId: '<appId>',
    measurementId: '<measurementId>'
  },
  services: {
    auth: true // Just as example. Can be any other service.
  }
}
使い方
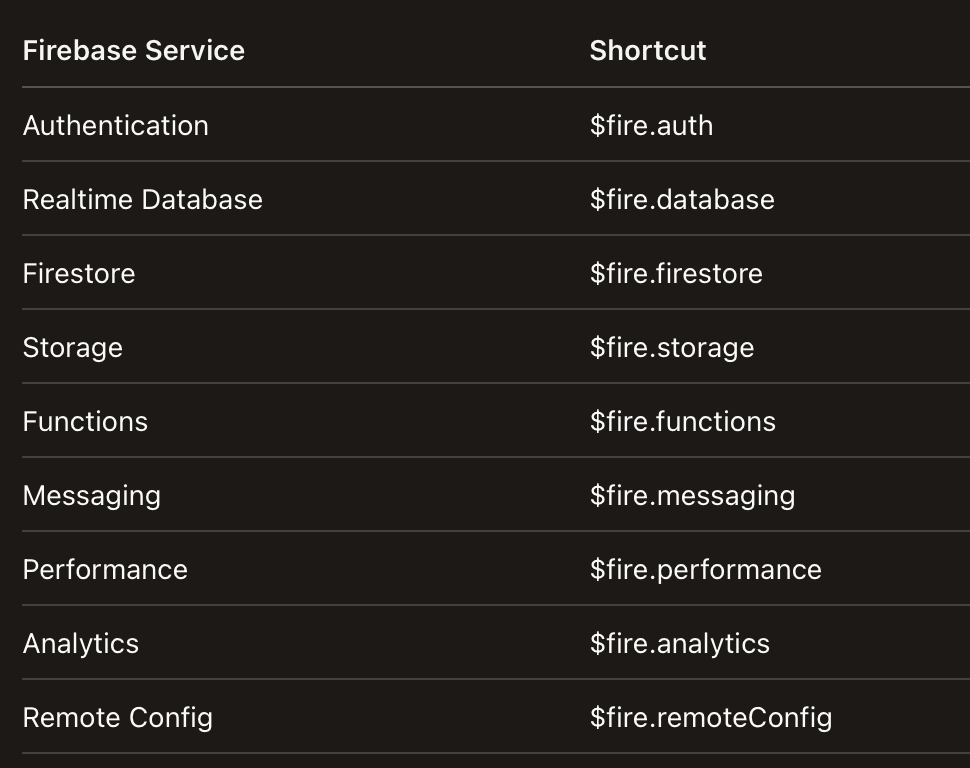
$fireか、static のものは$fireModuleを使います。

element
さっくり作れるので個人的に好き。でもどちらかというと文字薄めで綺麗なんだけど、見にくいという人もいますね。


Discussion