Gmail API + NodeJS | Gmail を Node で取得する
目的
Gmail API に Node.js でアクセスし、自分の Gmail を取得する.
手順
- Gmail API の有効化
- [APIとサービス] 認証情報と OAuth 同意画面の設定
- コード(gmail-api.js)作成
1, 2 の参考
第1項, 第2項 は以下のサイトを参考に.
1. Gmail API の有効化
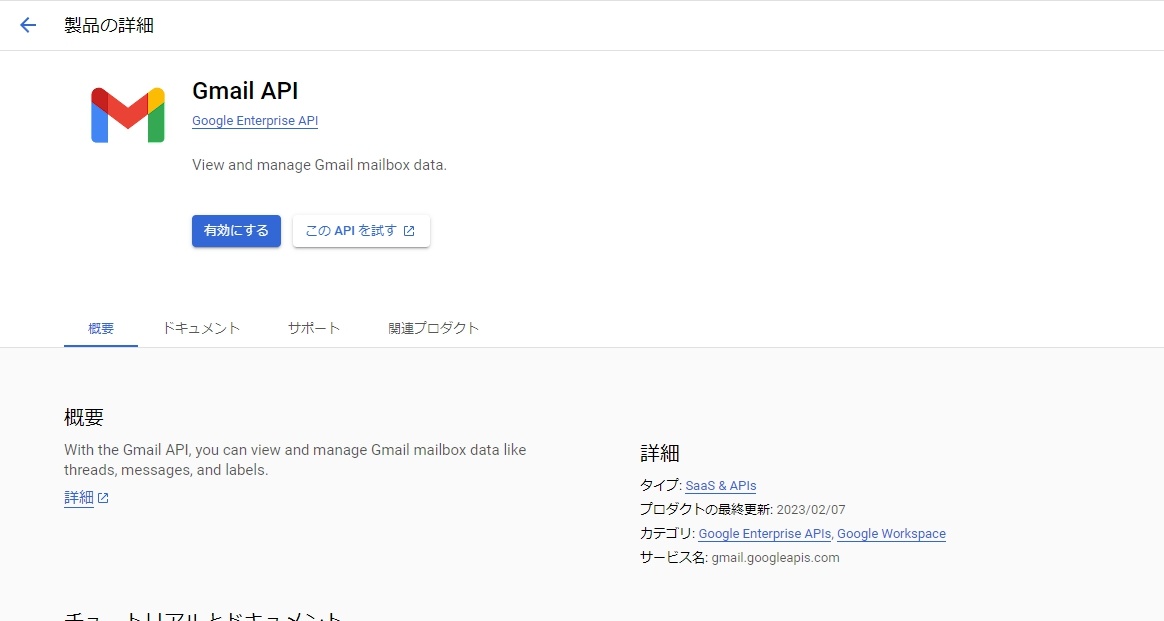
Google Cloud から "Gmail API" を検索して有効化する.

2. [APIとサービス] 認証情報と OAuth 同意画面の設定
Gmail API に自分の PC の NodeJS からアクセスするための認証設定
Google Cloud から "APIとサービス" を検索.
- OAuth 同意画面作成
- User Type は"外部" → 作成
- スコープは "https://mail.google.com/auth/gmail.modify"
- "テストユーザー" は空欄
- "本番環境にpushしますか?" → "確認"
- 認証情報作成
- 認証情報を作成 → "OAuthクライアントID"
- アプリケーションの種類は "デスクトップアプリ"
- 作成 → "JSONをダウンロード"
- ダウンロードされた JSON ファイルのファイル名を "credentials.json" に変更
3. コード作成
コード本体
Gmail API へのアクセスには、公式モジュール googleapis@105 および @google-cloud/local-auth@2.1.0 を使用する.
また、HTML メールの解析のために、html-to-text を使用する.
npm i googleapis@105 @google-cloud/local-auth@2.1.0 --save
npm i html-to-text
長いのでコードはアコーディオンになってます
const fs = require('fs').promises;
const path = require('path');
const process = require('process');
const {authenticate} = require('@google-cloud/local-auth');
const {google} = require('googleapis');

// If modifying these scopes, delete token.json.
const SCOPES = ['https://www.googleapis.com/auth/gmail.readonly'];

// The file token.json stores the user's access and refresh tokens, and is
// created automatically when the authorization flow completes for the first
// time.
const TOKEN_PATH = path.join(process.cwd(), 'token.json');
const CREDENTIALS_PATH = path.join(process.cwd(),
    'credentials.json'); // 作成した認証情報の JSON ファイル
    // ここでは、gmail-api.js と同じフォルダに credentials.json がある

/**
 * Reads previously authorized credentials from the save file.
 *
 * @return {Promise<OAuth2Client|null>}
 */
async function loadSavedCredentialsIfExist() {
  try {
    const content = await fs.readFile(TOKEN_PATH);
    const credentials = JSON.parse(content);
    return google.auth.fromJSON(credentials);
  } catch (err) {
    return null;
  }
}

/**
 * Serializes credentials to a file compatible with GoogleAUth.fromJSON.
 *
 * @param {OAuth2Client} client
 * @return {Promise<void>}
 */
async function saveCredentials(client) {
  const content = await fs.readFile(CREDENTIALS_PATH);
  const keys = JSON.parse(content);
  const key = keys.installed || keys.web;
  const payload = JSON.stringify({
    type: 'authorized_user',
    client_id: key.client_id,
    client_secret: key.client_secret,
    refresh_token: client.credentials.refresh_token,
  });
  await fs.writeFile(TOKEN_PATH, payload);
}

/**
 * Load or request or authorization to call APIs.
 *
 */
async function authorize() {
  let client = await loadSavedCredentialsIfExist();
  if (client) {
    return client;
  }
  client = await authenticate({
    scopes: SCOPES,
    keyfilePath: CREDENTIALS_PATH,
  });
  if (client.credentials) {
    await saveCredentials(client);
  }
  return client;
}

/**
 * 新着メールを取得
 * @param {Object<OAuth2Client>} auth
 * @return {Object} 取得したメールの ID 等が格納された配列
 */
async function getRecentEmails(auth) {
    const gmail = google.gmail({ version: 'v1', auth });
    const res = await gmail.users.messages.list({
      userId: 'me',
      labelIds: ['INBOX'],
      maxResults: 10 // 取得するメールの最大数
    });
    return res.data.messages;
}

/**
 * Message ID より、 Message の詳細データを取得
 * @param {Object<OAuth2Client>} auth
 * @param {String} messageId getRecentEmails で取得した message の ID
 * @returns {Object} Message ID で取得したメッセージの詳細データ
 */
async function getEmailDataByMessageId(auth, messageId) {
    const gmail = google.gmail({ version: 'v1', auth });
    const res = await gmail.users.messages.get({
      userId: 'me',
      id: messageId
    });
    return res.data;
}

// input の html/text 文字列からタグ情報などを取り除く
const htmlConvert = (input) => {
    // import
    const { convert } = require('html-to-text');
    // config
    const options = {
        ignoreHref: true,
        ignoreImage: true,
        noAnchorUrl: true,
        singleNewLineParagraphs: true,
    };

    return convert(input, options);
};

// payload 等の mimeType によって、適切な方法で本文を取り出す
const parseBody = (container) => new Promise((resolve, reject) => {
    // 空判定
    if (!(container.body) || container.body.size === 0) reject();
    try {
        // base64 デコード
        const body = Buffer.from(container.body.data, 'base64').toString();
        if (container.mimeType === 'text/plain') {
            resolve(body);
        }
        else if (container.mimeType === 'text/html') {
            resolve(htmlConvert(body));
        }
        else {
            reject();
        }
    } catch (error) {
        reject(error);
    }
});

async function main(auth) {
    // get recent emails
    const messages = await getRecentEmails(auth);
    // get message data
    const msgDatas = await Promise.all(
        messages.map(async (m) => await getEmailDataByMessageId(auth, m.id))
    );
    const textMessages = await Promise.all(
    msgDatas.map(async (md) => {
        const payload = md.payload;
        if (!payload || !('mimeType' in payload)) return;
        if (payload.mimeType === 'multipart/alternative') {
            // 内部の最初に解決された Promise が返される
            return await Promise.any(
                payload.parts.map((part) => parseBody(part))
            );
        } else {
          return parseBody(payload);
        }
    })); // End of map

    console.log(textMessages);
    // Output: [ '.......', '.....', ...]
}

authorize().then(main).catch(console.error);
// Output: [ '.......', '.....', ...]
- コードを実行すると、1回目は認証のためにブラウザが起動する.
- 成功すると gmail-api.js と同じフォルダに
token.jsonが作成される. - メールが HTML だったりすると、CSS 等いらない情報もついてくるため、メールが HTML の場合に、必要な情報だけ取り出す処理を書いた.
メールの種類
本文が HTML かどうかは、メッセージヘッダー の Content-Type を確認すればよい.
メールで使われる Content-Type には次のようなものがある
- text/plain (テキスト)
- text/html (HTML)
- multipart/alternative (HTML & テキスト)
モジュールで取得できるメールオブジェクトの構造 (結論)
const gmail = google.gmail({ version: 'v1', auth });
const res = await gmail.users.messages.get({
  userId: 'me',
  id: messageId
});
console.log(res.data);
これで取得できるデータは単純にすると以下のようになる.
res.data:
    payload:
        mimeType: '<MIME Type String>' # 例: 'multipart/alternative'
        headers: [<Header Object>, ...]
        body:
            size: (Int)<Body Data Length>,
            data: '<Base64 Encoded Message String>' # 例: 'PGh0bWw-DQo5bGU-DQoJ...'
        parts: [<Part Object>, ...]

Header Object:
    name: '<Header Name String>' # 例: 'Content-Type'
    value: '<MIME Type String>; <Option Args>' # Option Args 例: 'boundary="xxx";'

Part Object:
    mimeType: '<MIME Type String>'
    headers: [<Header Object>, ...]
    body:
        size: (Int)<Body Data Length>
        data: '<Encoded Message String>'
つまり、res.data.payload に MIME Type, header, body, parts が含まれており、MIME Type によっては、parts に HTML や Plain のメッセージがあり、それぞれが、MIME Type, header, body を持っている.
検証過程
本項は、前項の検証過程である.
以下は headers を表示した例
const headers = msgDatas.map((md) => md.payload.headers);
console.log(`Headers.Content-Type:`, headers[0]);
以下が結果のいち部
[
    ...
    name: 'Subject', value: 'Welcome to Google AI Studio' },
  {
    name: 'From',
    value: 'Google AI Studio <googleaistudio-noreply@google.com>'
  },
  { name: 'To', value: 'hogehoge@gmail.com' },
  {
    name: 'Content-Type',
    value: 'multipart/alternative; boundary="00000000000010f42c0610mecied"'
  }
]
上記の仕様を前提に payload.headers.name の Content-Type で場合分けして、内容を取得しようとした.
しかし、メッセージの内容が undefined になったり、multipart なのに text しかなかったりして、よくわからない状況に.
Body 取得でつまずいたので、オブジェクトの中身をきちんと確認
- gmail.users.messages.get で取得できるメッセージの詳細データ
/**
 * Message ID より、 Message の詳細データを取得
 * @param {Object<OAuth2Client>} auth
 * @param {String} messageId getRecentEmails で取得した message の ID
 * @returns {Object} Message ID で取得したメッセージの詳細データ
 */
async function getEmailDataByMessageId(auth, messageId) {
    const gmail = google.gmail({ version: 'v1', auth });
    const res = await gmail.users.messages.get({
      userId: 'me',
      id: messageId
    });
    return res.data;
}
取得結果
// res.data
{
  id: '42a9365f9142d129', threadId: '21x3456e9456f192',
  labelIds: [ 'UNREAD', 'INBOX' ], // Label ID
  snippet: '', // メッセージ概要 ない場合もある
  payload: {
    partId: '',
    mimeType: 'multipart/alternative',
    filename: '',
    headers: [
      [Object], [Object], [Object], ...
    ],
    body: {
        size: 2577,
        data: 'PGh0bWw-DQo5bGU-DQoJ...' // base 64 文字列 省略
    },
    parts: [ [Object], [Object] ]
  },
  sizeEstimate: 27549,
  historyId: '892346',
  internalDate: '1234123463000'
}
- さらに
partsの中身
// res.data.payload.parts
[
    {
        partId: '0',
        mimeType: 'text/plain',
        filename: '',
        headers: [ [Object], [Object] ],
        body: {
          size: 4095,
          data: 'Q44OX44Op4g5L44...' // base 64 文字列 省略
        }
    },
    ... // 省略
]
- 各 headers は、前項の headers 表示例だと推察
つまり、res.data 自体と res.data.payload.parts がそれぞれ header 情報を持っている.
こちらでいろいろしなくても、分割してくれている.
Discussion