📑
Nextjs + Material UI を試すほぼ最小の手順とコード (create-next-app / App Router を使用)
主旨
Nextjs で MATERIAL-UI をできるかぎり少ない手順とコードで試す方法についてのメモです。
特別なことはしていません。Nextjs と mui の公式記事の内容を、ほぼ単純合成しただけです。
NextJs のプロジェクト作成
前提
使用したツール類のバージョンは下記の通りです。
$ node -v
v20.11.1
$ yarn -v
1.22.21
$ npm -v
10.4.0
パッケージ管理は主に yarn を使用しています。npm でも基本は同じです。
作成
create-next-app@14.1.0 を使っています。下記では Javascript を選択していますが、Typescript でもほぼ同じです。
$ npx create-next-app@latest
Need to install the following packages:
create-next-app@14.1.0
Ok to proceed? (y) y
√ What is your project named? ... next-mui-sample-001
√ Would you like to use TypeScript? ... No / Yes
√ Would you like to use ESLint? ... No / Yes
√ Would you like to use Tailwind CSS? ... No / Yes
√ Would you like to use `src/` directory? ... No / Yes
√ Would you like to use App Router? (recommended) ... No / Yes
√ Would you like to customize the default import alias (@/*)? ... No / Yes
MUI 関連のパッケージインストール
$ cd next-mui-sample-001
$ yarn add @emotion/cache @emotion/react @emotion/styled @mui/material @mui/material-nextjs
react だけを使う時に加えて @mui/material-nextjs を追加する必要があります。
ファイル構成
下記のファイルとフォルダが最小限必要です (theme.js は Google Fonts 等を使う場合のみ)。node_modules 以下は省略しています。
$ tree -I node_modules
.
├── README.md
├── jsconfig.json
├── next.config.mjs
├── package-lock.json
├── package.json
├── node_modules
├── public
│   ├── next.svg
│   └── vercel.svg
├── app
│   ├── favicon.ico
│   ├── layout.js
│   └── page.js
├── theme.js
└── yarn.lock
app/layout.js
下記のように書き換えます。theme.js を使わない場合は、theme.js と ThemeProvider の import は不要です(ThemeProviderのタグを外す必要あり)。
import { AppRouterCacheProvider } from '@mui/material-nextjs/v14-appRouter';
import { ThemeProvider } from '@mui/material/styles';
import theme from '../theme';

export const metadata = {
  title: "Create Next App",
  description: "Generated by create next app",
};

export default function RootLayout({ children }) {
  return (
    <html lang="en">
      <body>
        <AppRouterCacheProvider>
          <ThemeProvider theme={theme}>
            {children}
          </ThemeProvider>
        </AppRouterCacheProvider>
      </body>
    </html>
  );
}
app/page.js
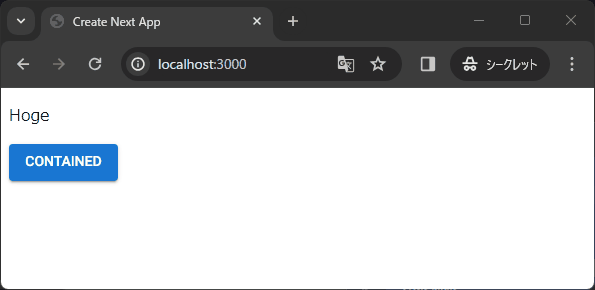
ボタンを押すと、"HOGE" と "Changed!" という文字が交互に切り替わるページを表示するコードになっています。
コードを下記のように書き換えます。
"use client"
import { Button } from '@mui/material';
import { useState } from "react";

export default function Home() {
  const [text, setText] = useState('Hoge');
  const pushButton = () => {
    if (text == "Hoge"){
      setText('Changed!');
    }else{
      setText('Hoge');
    }
  };

  return <>
    <main>
      <div>
        <p>{text}</p>
        <Button variant="contained" onClick={pushButton}>Contained</Button>
      </div>
    </main>
  </>;
}
useState を使用するために冒頭に "use client" を入れています。
theme.js
ThemeProvider で指定するテーマを定義します。テーマを使用しない場合は必要ありません。
下記では Google Fonts (Roboto font) をデフォルトのフォントとして使用するテーマを定義しています。
import { Roboto } from 'next/font/google';
import { createTheme } from '@mui/material/styles';

const roboto = Roboto({
  weight: ['300', '400', '500', '700'],
  subsets: ['latin'],
  display: 'swap',
});

const theme = createTheme({
  typography: {
    fontFamily: roboto.style.fontFamily,
  },
});

export default theme;
動作テスト
$ yarn dev
あとは MUI の components を import しまくれば好き放題できます(多分)。
Discussion