Deep dive into "RSC From Scratch. Part 1: Server Components"
シンプルなRSCをスクラッチで実装することで理解を深めようというもの。
今後Part2やPart3も続きそうだが、このスクラップでは現在(2023/7/2時点)公開されているPart1を対象とする。
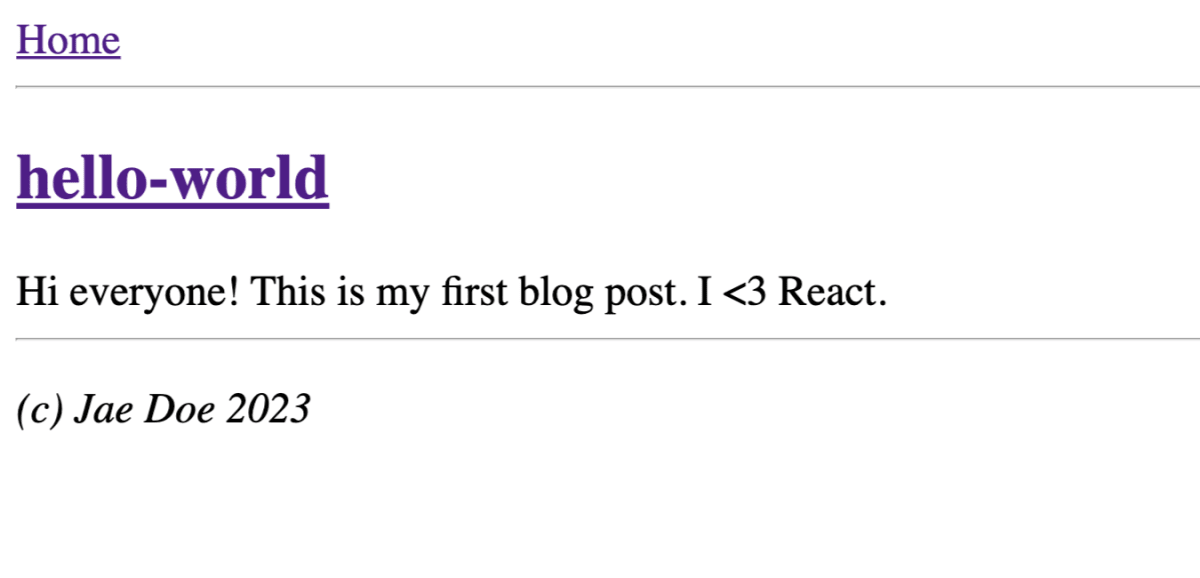
以下のような、テキストファイルをWebサイトで公開する場合を考える。
ブラウザで http://locahost:3000/hello-world を開くと、PHPスクリプトが ./posts/hello-world.txt のHTMLブログページを返す。
<?php
  $author = "Jae Doe";
  $post_content = @file_get_contents("./posts/hello-world.txt");
?>
<html>
  <head>
    <title>My blog</title>
  </head>
  <body>
    <nav>
      <a href="/">Home</a>
      <hr>
    </nav>
    <article>
      <?php echo htmlspecialchars($post_content); ?>
    </article>
    <footer>
      <hr>
      <p><i>(c) <?php echo htmlspecialchars($author); ?>, <?php echo date("Y"); ?></i></p>
    </footer>
  </body>
</html>
同様にNode.jsの場合を考えると以下のようなコードになる。
import { createServer } from 'http';
import { readFile } from 'fs/promises';
import escapeHtml from  'escape-html';

createServer(async (req, res) => {
  const author = "Jae Doe";
  const postContent = await readFile("./posts/hello-world.txt", "utf8");
  sendHTML(
    res,
    `<html>
      <head>
        <title>My blog</title>
      </head>
      <body>
        <nav>
          <a href="/">Home</a>
          <hr />
        </nav>
        <article>
          ${escapeHtml(postContent)}
        </article>
        <footer>
          <hr>
          <p><i>(c) ${escapeHtml(author)}, ${new Date().getFullYear()}</i></p>
        </footer>
      </body>
    </html>`
  );
}).listen(8080);

function sendHTML(res, html) {
  res.setHeader("Content-Type", "text/html");
  res.end(html);
}
Step 1: Let's invent JSX
上述のコードは、HTMLを文字列として直接操作してしまっている。
そこでJSXを導入する。
createServer(async (req, res) => {
  const author = "Jae Doe";
  const postContent = await readFile("./posts/hello-world.txt", "utf8");
  sendHTML(
    res,
    <html>
      <head>
        <title>My blog</title>
      </head>
      <body>
        <nav>
          <a href="/">Home</a>
          <hr />
        </nav>
        <article>
          {postContent}
        </article>
        <footer>
          <hr />
          <p><i>(c) {author}, {new Date().getFullYear()}</i></p>
        </footer>
      </body>
    </html>
  );
}).listen(8080);
JSXは次のようなオブジェクトのツリーを生成する。
// Slightly simplified
{
  $$typeof: Symbol.for("react.element"), // Tells React it's a JSX element (e.g. <html>)
  type: 'html',
  props: {
    children: [
      {
        $$typeof: Symbol.for("react.element"),
        type: 'head',
        props: {
          children: {
            $$typeof: Symbol.for("react.element"),
            type: 'title',
            props: { children: 'My blog' }
          }
        }
      },
      {
        $$typeof: Symbol.for("react.element"),
        type: 'body',
        props: {
          children: [
            {
              $$typeof: Symbol.for("react.element"),
              type: 'nav',
              props: {
                children: [{
                  $$typeof: Symbol.for("react.element"),
                  type: 'a',
                  props: { href: '/', children: 'Home' }
                }, {
                  $$typeof: Symbol.for("react.element"),
                  type: 'hr',
                  props: null
                }]
              }
            },
            {
              $$typeof: Symbol.for("react.element"),
              type: 'article',
              props: {
                children: postContent
              }
            },
            {
              $$typeof: Symbol.for("react.element"),
              type: 'footer',
              props: {
                /* ...And so on... */
              }
            }
          ]
        }
      }
    ]
  }
}
この時点では、最終的にブラウザに送りたいのはHTMLであってJSONツリーではない。
そこで、JSXをHTML文字列に変換する関数を用意する。
以下の関数は、さまざまな種類のJSX node(文字列、数値、配列、子ノードを持つJSX node)をHTMLに変換する。
function renderJSXToHTML(jsx) {
  if (typeof jsx === "string" || typeof jsx === "number") {
    // This is a string. Escape it and put it into HTML directly.
    return escapeHtml(jsx);
  } else if (jsx == null || typeof jsx === "boolean") {
    // This is an empty node. Don't emit anything in HTML for it.
    return "";
  } else if (Array.isArray(jsx)) {
    // This is an array of nodes. Render each into HTML and concatenate.
    return jsx.map((child) => renderJSXToHTML(child)).join("");
  } else if (typeof jsx === "object") {
    // Check if this object is a React JSX element (e.g. <div />).
    if (jsx.$$typeof === Symbol.for("react.element")) {
      // Turn it into an an HTML tag.
      let html = "<" + jsx.type;
      for (const propName in jsx.props) {
        if (jsx.props.hasOwnProperty(propName) && propName !== "children") {
          html += " ";
          html += propName;
          html += "=";
          html += escapeHtml(jsx.props[propName]);
        }
      }
      html += ">";
      html += renderJSXToHTML(jsx.props.children);
      html += "</" + jsx.type + ">";
      return html;
    } else throw new Error("Cannot render an object.");
  } else throw new Error("Not implemented.");
}
Turning JSX into an HTML string is usually known as "Server-Side Rendering" (SSR). It is important note that RSC and SSR are two very different things (that tend to be used together). In this guide, we're starting from SSR because it's a natural first thing you might try to do in a server environment. However, this is only the first step, and you will see significant differences later on.
RSCとSSRは一緒に使われがちだが、全く異なる概念だと言及されている。
Step 2: Let's invent components
次はコンポーネント分割。
先ほどの例を BlogPostPage と Footer という2つのコンポーネントに分割する。
function BlogPostPage({ postContent, author }) {
  return (
    <html>
      <head>
        <title>My blog</title>
      </head>
      <body>
        <nav>
          <a href="/">Home</a>
          <hr />
        </nav>
        <article>
          {postContent}
        </article>
        <Footer author={author} />
      </body>
    </html>
  );
}

function Footer({ author }) {
  return (
    <footer>
      <hr />
      <p>
        <i>
          (c) {author} {new Date().getFullYear()}
        </i>
      </p>
    </footer>
  );
}
インラインで指定していたJSXツリーを <BlogPostPage postContent={postContent} author={author} /> で置き換える。
createServer(async (req, res) => {
  const author = "Jae Doe";
  const postContent = await readFile("./posts/hello-world.txt", "utf8");
  sendHTML(
    res,
    <BlogPostPage
      postContent={postContent}
      author={author}
    />
  );
}).listen(8080);
renderJSXToHTML に何も変更を加えないままこのコードを実行しようとするとエラーになる。
<!-- This doesn't look like valid at HTML at all... -->
<function BlogPostPage({postContent,author}) {...}>
</function BlogPostPage({postContent,author}) {...}>
エラーの原因は renderJSXToHTML 関数が、jsx.typeは常にHTMLタグ名("html"、"footer"、"p "など)を持つ文字列だと期待しているから。
if (jsx.$$typeof === Symbol.for("react.element")) {
  // Existing code that handles HTML tags (like <p>).
  let html = "<" + jsx.type;
  // ...
  html += "</" + jsx.type + ">";
  return html;
}
しかし、BlogPostPage は関数なので、"<" + jsx.type + ">"とすると、そのソースコードが表示されてしまう。これでは正常に動作しないので、BlogPostPage が返すJSXをHTMLにシリアライズする。
if (jsx.$$typeof === Symbol.for("react.element")) {
  if (typeof jsx.type === "string") { // Is this a tag like <div>?
    // Existing code that handles HTML tags (like <p>).
    let html = "<" + jsx.type;
    // ...
    html += "</" + jsx.type + ">";
    return html;
  } else if (typeof jsx.type === "function") { // Is it a component like <BlogPostPage>?
    // Call the component with its props, and turn its returned JSX into HTML.
    const Component = jsx.type;
    const props = jsx.props;
    const returnedJsx = Component(props);
    return renderJSXToHTML(returnedJsx);
  } else throw new Error("Not implemented.");
}
これで、純粋なHTMLタグが返されるまでJSXを再帰的に要素を走査し、HTMLを生成できるようになった。
(例えば、<BlogPostPage author="Jae Doe" /> のようなJSXに遭遇したら、BlogPostPage を関数として呼び出し、その関数がさらにいくつかのJSXを返す、というような形で)
Step 3: Let's add some routing
基本的なコンポーネント分割ができるようになったので、ページを追加していく。
ブログ詳細画面とブログ一覧画面を実装していくが、先にページ間で共有されるUI部分を BlogLayout コンポーネントとして切り出す。
function BlogLayout({ children }) {
  const author = "Jae Doe";
  return (
    <html>
      <head>
        <title>My blog</title>
      </head>
      <body>
        <nav>
          <a href="/">Home</a>
          <hr />
        </nav>
        <main>
          {children}
        </main>
        <Footer author={author} />
      </body>
    </html>
  );
}
BlogPostPage コンポーネントを変更して、コンテンツ詳細を表示できるようにする。
function BlogPostPage({ postSlug, postContent }) {
  return (
    <section>
      <h2>
        <a href={"/" + postSlug}>{postSlug}</a>
      </h2>
      <article>{postContent}</article>
    </section>
  );
}
BlogLayout の内側にネストされた BlogPostPage は以下のように表示される。
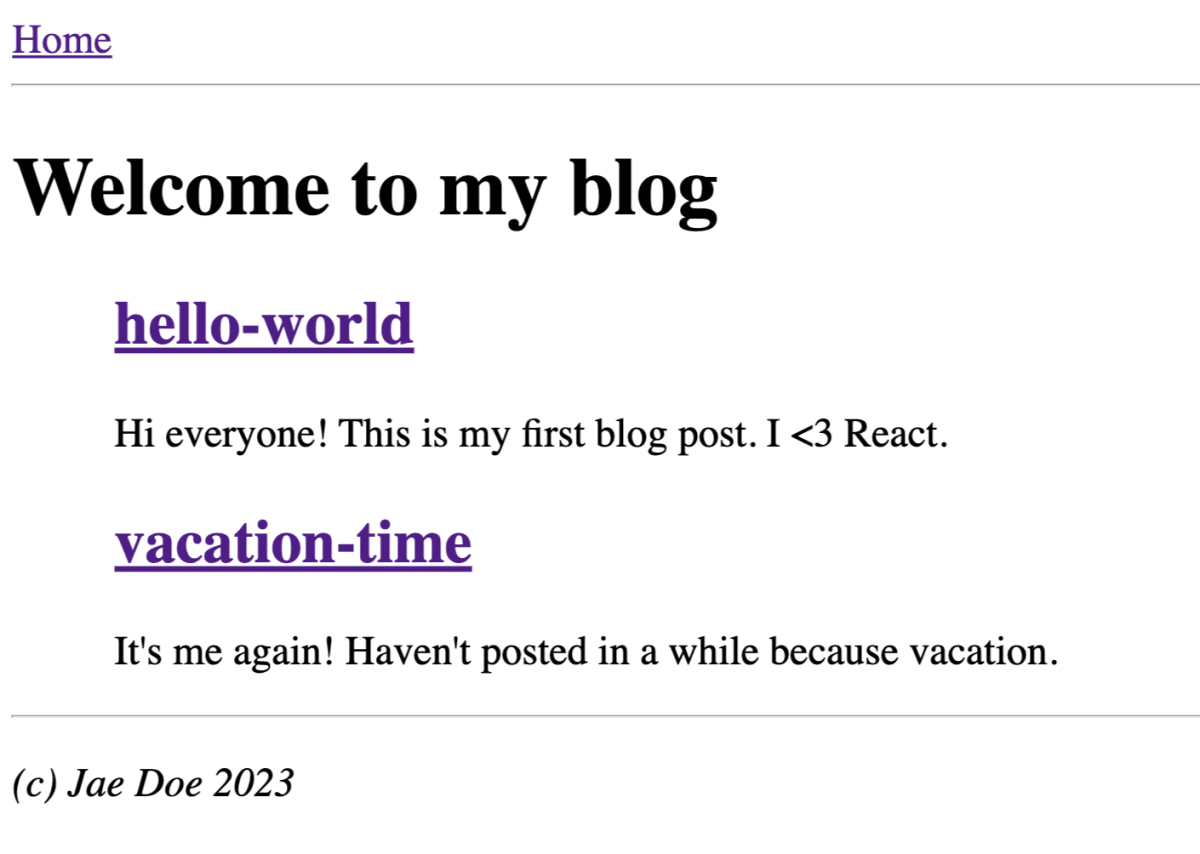
ブログ一覧を表示する BlogIndexPage コンポーネントを追加する。
function BlogIndexPage({ postSlugs, postContents }) {
  return (
    <section>
      <h1>Welcome to my blog</h1>
      <div>
        {postSlugs.map((postSlug, index) => (
          <section key={postSlug}>
            <h2>
              <a href={"/" + postSlug}>{postSlug}</a>
            </h2>
            <article>{postContents[index]}</article>
          </section>
        ))}
      </div>
    </section>
  );
}
BlogLayout の内側にネストさせているので、headerやfooterは同じものになる。
サーバーハンドラは、URLに基づいてページを選択し、そのデータをロードし、レイアウト内にそのページをレンダリングするように変更する。
createServer(async (req, res) => {
  try {
    const url = new URL(req.url, `http://${req.headers.host}`);
    // Match the URL to a page and load the data it needs.
    const page = await matchRoute(url);
    // Wrap the matched page into the shared layout.
    sendHTML(res, <BlogLayout>{page}</BlogLayout>);
  } catch (err) {
    console.error(err);
    res.statusCode = err.statusCode ?? 500;
    res.end();
  }
}).listen(8080);

async function matchRoute(url) {
  if (url.pathname === "/") {
    // We're on the index route which shows every blog post one by one.
    // Read all the files in the posts folder, and load their contents.
    const postFiles = await readdir("./posts");
    const postSlugs = postFiles.map((file) => file.slice(0, file.lastIndexOf(".")));
    const postContents = await Promise.all(
      postSlugs.map((postSlug) =>
        readFile("./posts/" + postSlug + ".txt", "utf8")
      )
    );
    return <BlogIndexPage postSlugs={postSlugs} postContents={postContents} />;
  } else {
    // We're showing an individual blog post.
    // Read the corresponding file from the posts folder.
    const postSlug = sanitizeFilename(url.pathname.slice(1));
    try {
      const postContent = await readFile("./posts/" + postSlug + ".txt", "utf8");
      return <BlogPostPage postSlug={postSlug} postContent={postContent} />;
    } catch (err) {
      throwNotFound(err);
    }
  }
}

function throwNotFound(cause) {
  const notFound = new Error("Not found.", { cause });
  notFound.statusCode = 404;
  throw notFound;
}
これで画面遷移できるようになった。
ただ、コードが冗長なのでここから整理していく。
Step 4: Let's invent async components
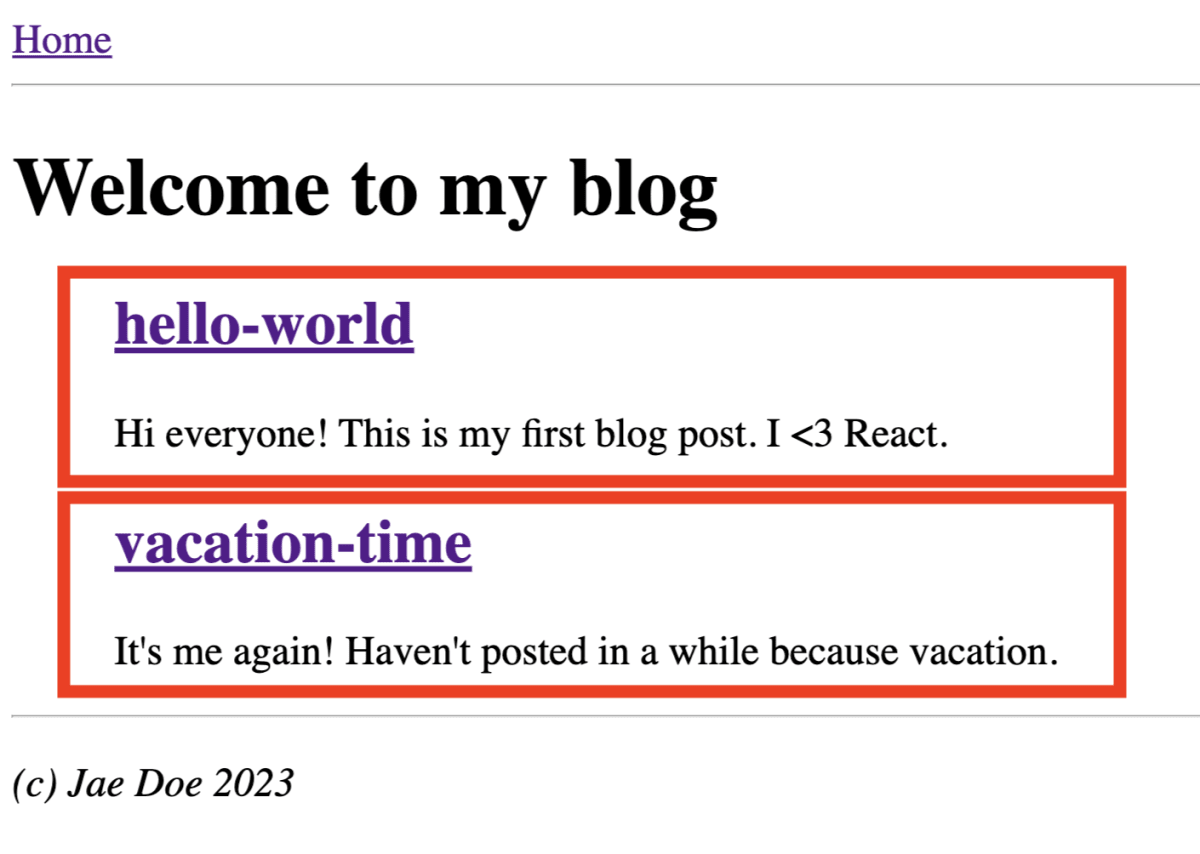
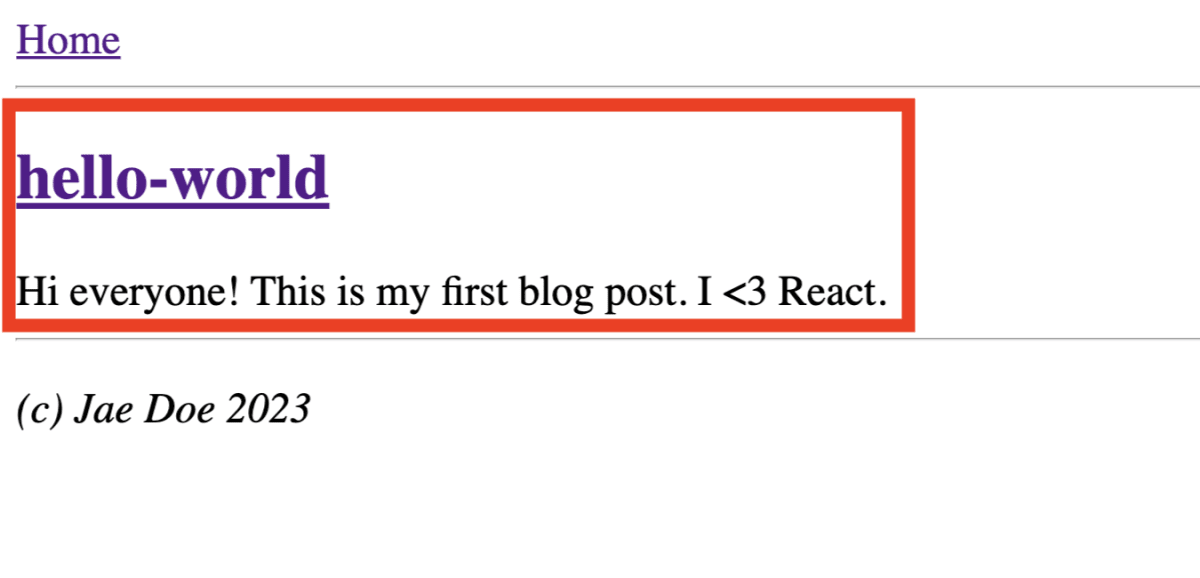
BlogIndexPage と BlogPostPage コンポーネントの赤枠部分が全く同じに見える。
| BlogIndexPage | BlogPostPage |
|---|---|
 |
 |
これを再利用可能なコンポーネントにしたいが、そのレンダリングロジックを別の Post コンポーネントに取り出したとしても、個々の投稿のコンテンツをどうにかして「掘り下げる」必要がある。
function Post({ slug, content }) {
  // Someone needs to pass down the `content` prop from the file :-(
  return (
    <section>
      <h2>
        <a href={"/" + slug}>{slug}</a>
      </h2>
      <article>{content}</article>
    </section>
  )
}
現在、投稿のコンテンツをロードするロジックは、この箇所 と この箇所 とで重複している。
readFile API は非同期なのでコンポーネント階層の外側で投稿コンテンツをロードする。そのため、コンポーネントツリーの中で直接それを扱うことはできない。 (ここではfsのAPIに同期バージョンがあることは無視する。これはデータベースからの読み込みになることもあり得るし、非同期のサードパーティ・ライブラリの呼び出しになることもあり得る)
クライアントサイドのReactに慣れていると、コンポーネントからfs.readFileのようなAPIを呼び出すことはできないと思ってしまうのは自然。従来のReactのSSR(サーバーレンダリング)でも、各コンポーネントはブラウザでも動作する必要があり、fs.readFile のようなサーバー専用のAPIは動作しないと思ってしまう。
しかし、冒頭の2003年の歴史に照らし合わせると、この制限はかなり奇妙に思える。
今のところ、サーバー環境だけを対象にしているので、コンポーネントをブラウザで動作するコードに限定する必要はない。また、コンポーネントが非同期であることはまったく問題ない。なぜなら、サーバーはデータがロードされて表示できるようになるまで、ただHTMLを発行して待っていればよいだけから。
content propを削除して、代わりに Post を非同期関数とし、await readFile() 呼び出しでファイルの内容をロードするように変更する。
async function Post({ slug }) {
  let content;
  try {
    content = await readFile("./posts/" + slug + ".txt", "utf8");
  } catch (err) {
    throwNotFound(err);
  }
  return (
    <section>
      <h2>
        <a href={"/" + slug}>{slug}</a>
      </h2>
      <article>{content}</article>
    </section>
  )
}
同様に、BlogIndexPage を非同期関数とし、await readdir() を使って投稿を列挙するようにする。
async function BlogIndexPage() {
  const postFiles = await readdir("./posts");
  const postSlugs = postFiles.map((file) =>
    file.slice(0, file.lastIndexOf("."))
  );
  return (
    <section>
      <h1>Welcome to my blog</h1>
      <div>
        {postSlugs.map((slug) => (
          <Post key={slug} slug={slug} />
        ))}
      </div>
    </section>
  );
}
Post と BlogIndexPage が自分自身でデータをロードするようになったので、matchRoute を
<Router> コンポーネントで置き換えることができる。
function Router({ url }) {
  let page;
  if (url.pathname === "/") {
    page = <BlogIndexPage />;
  } else {
    const postSlug = sanitizeFilename(url.pathname.slice(1));
    page = <BlogPostPage postSlug={postSlug} />;
  }
  return <BlogLayout>{page}</BlogLayout>;
}
トップレベルのサーバーハンドラは、すべてのレンダリングを<Router>に委譲する。
createServer(async (req, res) => {
  try {
    const url = new URL(req.url, `http://${req.headers.host}`);
    await sendHTML(res, <Router url={url} />);
  } catch (err) {
    console.error(err);
    res.statusCode = err.statusCode ?? 500;
    res.end();
  }
}).listen(8080);
コンポーネント内部で async/await を実際に動作させる必要がある。
renderJSXToHTML 実装の中で、コンポーネント関数を呼び出す場所を探してみる。
  } else if (typeof jsx.type === "function") {
    const Component = jsx.type;
    const props = jsx.props;
    const returnedJsx = Component(props); // <--- This is where we're calling components
    return renderJSXToHTML(returnedJsx);
  } else throw new Error("Not implemented.");
コンポーネント関数は非同期にできるようになったので、そこに await を追加する。
    // ...
    const returnedJsx = await Component(props);
    // ...
これは、renderJSXToHTML 自体を非同期関数にする必要があり、その呼び出しは待機する必要があることを意味する。
async function renderJSXToHTML(jsx)  {
  // ...
}
この変更により、ツリー内のどのコンポーネントも非同期にすることができ、結果のHTMLはそれらが解決するのを「待つ」ことができる。
新しいコードでは、BlogIndexPage のためにすべてのファイルの内容をループで「準備」する特別なロジックがない。BlogIndexPage はまだ Post コンポーネントの配列をレンダリングしているが、それぞれのPost は自分のファイルを読む方法を知っている。
この実装は、各
awaitが「ブロック」されるため、理想的ではない。例えば、HTMLがすべて生成されるまで、HTMLの送信を開始することができない。理想的には、サーバーのペイロードを生成しながらストリーミングしたい。これはより複雑なので、今回のウォークスルーでは行わない。しかし、コンポーネント自体に変更を加えることなく、後でストリーミングを追加できることに注意する。各コンポーネントは、自分自身のデータを待つためにawaitを使うだけだが(これは避けられない)、親コンポーネントは子を待つ必要がない。Reactが、子コンポーネントのレンダリングが終わる前に親コンポーネントの出力をストリーミングできるのはこのため。
Step 5: Let's preserve state on navigation
現時点のサーバーは route をHTML文字列にレンダリングすることしかできない。
async function sendHTML(res, jsx) {
  const html = await renderJSXToHTML(jsx);
  res.setHeader("Content-Type", "text/html");
  res.end(html);
}
ブラウザはHTMLをできるだけ早く表示するように最適化されているため、最初の読み込みには最適だが、理想的なナビゲーションではない。「変更された部分だけ」を更新し、その内部と周囲(入力、動画、ポップアップなど)の両方でクライアント側の状態を保持できるようにしたい。これによって、mutation(例えば、ブログ記事にコメントを追加する)も滑らかな挙動になる。
問題をより具体的に説明するために、BlogLayout コンポーネントJSX内の <nav> に <input /> を追加してみる。
<nav>
  <a href="/">Home</a>
  <hr />
  <input />
  <hr />
</nav>
ブログをナビゲートするたびに、入力状態が初期化される。
シンプルなブログであれば問題ないかもしれないが、よりインタラクティブなアプリを作りたいのであれば、この動作は問題になってくる。常にローカルの状態を失うことなく、ユーザーにアプリをナビゲートさせたい。
これを3つのステップで解決する。
- クライアント側のJSロジックをいくつか追加して、ナビゲーションをインターセプトする(ページをリロードすることなく、手動でコンテンツを再取得できるようにする)
- HTMLの代わりにJSXを送信するようにサーバーに教える
- クライアントに、DOMを破壊せずにJSXの更新を適用するように教える(ヒント:その部分にはReactを使う)
Step 5.1: Let's intercept navigations
クライアントサイドのロジックが必要なので、client.js という新しいファイルに <script> タグを追加する。このファイルでは、サイト内のナビゲーションのデフォルトの動作をオーバーライドして、navigate という独自の関数を呼び出すようにする。
async function navigate(pathname) {
  // TODO
}

window.addEventListener("click", (e) => {
  // Only listen to link clicks.
  if (e.target.tagName !== "A") {
    return;
  }
  // Ignore "open in a new tab".
  if (e.metaKey || e.ctrlKey || e.shiftKey || e.altKey) {
    return;
  }
  // Ignore external URLs.
  const href = e.target.getAttribute("href");
  if (!href.startsWith("/")) {
    return;
  }
  // Prevent the browser from reloading the page but update the URL.
  e.preventDefault();
  window.history.pushState(null, null, href);
  // Call our custom logic.
  navigate(href);
}, true);

window.addEventListener("popstate", () => {
  // When the user presses Back/Forward, call our custom logic too.
  navigate(window.location.pathname);
});
navigate 関数では、次の route のHTMLレスポンスを取得し、DOMを更新する。
let currentPathname = window.location.pathname;

async function navigate(pathname) {
  currentPathname = pathname;
  // Fetch HTML for the route we're navigating to.
  const response = await fetch(pathname);
  const html = await response.text();

  if (pathname === currentPathname) {
    // Get the part of HTML inside the <body> tag.
    const bodyStartIndex = html.indexOf("<body>") + "<body>".length;
    const bodyEndIndex = html.lastIndexOf("</body>");
    const bodyHTML = html.slice(bodyStartIndex, bodyEndIndex);

    // Replace the content on the page.
    document.body.innerHTML = bodyHTML;
  }
}
このコードはプロダクション向けではないが(例えば、document.title を変更したり、routeの変更をアナウンスしたりはできない)、ブラウザのナビゲーション動作をオーバーライドできている。現段階では次routeのHTMLを取得しているだけなので、<input> の状態は失われてしまう。次のステップで、ナビゲーションのためにサーバー側でHTMLの代わりにJSXを使うよう変更していく。
Step 5.2: Let's send JSX over the wire
このチュートリアルの序盤でJSXが生成するオブジェクト・ツリーに触れた。
{
  $$typeof: Symbol.for("react.element"),
  type: 'html',
  props: {
    children: [
      {
        $$typeof: Symbol.for("react.element"),
        type: 'head',
        props: {
          // ... And so on ...
新たなモードをサーバーに追加する。それは、リクエストが ?jsx で終わる場合に、HTMLの代わりにjsxツリーを送信する、というもの。これによってクライアントはどの部分が変更されたのかを検知することができ、必要な箇所のみ更新することができる。遷移の度に <input> の状態が失われるという問題はただちに解消できるが、jsxツリーを送信する理由はそれだけではない。これはHTMLだけでなく新たな情報をサーバーからクライアントに送信することを可能にする。
?jsx パラメータが存在する場合に sendJSX 関数を呼び出すロジックをサーバーコードに追加する。
createServer(async (req, res) => {
  try {
    const url = new URL(req.url, `http://${req.headers.host}`);
    if (url.pathname === "/client.js") {
      // ...
    } else if (url.searchParams.has("jsx")) {
      url.searchParams.delete("jsx"); // Keep the url passed to the <Router> clean
      await sendJSX(res, <Router url={url} />);
    } else {
      await sendHTML(res, <Router url={url} />);
    }
    // ...
sendJSX 関数の中では、ネットワークを通じて値を渡せるように、JSON.stringify(jsx) を利用している。(オブジェクトツリーをJOSN文字列に変換する)
async function sendJSX(res, jsx) {
  const jsxString = JSON.stringify(jsx, null, 2); // Indent with two spaces.
  res.setHeader("Content-Type", "application/json");
  res.end(jsxString);
}
これを "sending JSX" と呼ぶことにするが、JSXそのものを送信しているわけではなく、JSXから生成されるオブジェクトツリーをJSON文字列に変換しているだけである。しかし、正確な転送フォーマットは何度も変わり続けていく。(例えば、本来のRSC実装は今回掘り下げるものとは異なるフォーマットである)
ネットワークを通じて何が渡されるのかを確認するためにクライアントコードを変更する。
async function navigate(pathname) {
  currentPathname = pathname;
  const response = await fetch(pathname + "?jsx");
  const jsonString = await response.text();
  if (pathname === currentPathname) {
    alert(jsonString);
  }
}
これを試してみて。
index / ページを読み込み、リンクを押すと、以下のようなオブジェクトがアラート表示される。
{
  "key": null,
  "ref": null,
  "props": {
    "url": "http://localhost:3000/hello-world"
  },
  // ...
}
求めているのは <html>...</html> のようなJSXツリーだが、うまくいっていない。
最初に、JSXは以下のような見た目になる。
<Router url="http://localhost:3000/hello-world" />
// {
//   $$typeof: Symbol.for('react.element'),
//   type: Router,
//   props: { url: "http://localhost:3000/hello-world" } },
//    ...
// }
Router がレンダリングの時にどんなJSXを求めているのかを知らず、Router がサーバーにしか存在しないにも関わらず、このJSXをクライアントに向けてJSONに変換しようとするのは "早すぎる"。
クライアントに送信する必要があるJSXを判別するために、Router コンポーネントを呼び出す必要がある。
{ url: "http://localhost:3000/hello-world" } propsと共に Router 関数を呼び出すと、以下のようなJSXを得る。
<BlogLayout>
  <BlogIndexPage />
</BlogLayout>
改めて、BlogLayout が何をレンダリングするかを知らない、かつサーバーにしか存在しないため、クライアントのためにJSXをJSONに変換するのは早すぎる。
BlogLayout を呼び出し、どのようなJSXをクライアントに送信したいのか見極めなければならない。
最終的にserver-onlyなコードのみを参照しないJSXツリーが出来上がる。
<html>
  <head>...</head>
  <body>
    <nav>
      <a href="/">Home</a>
      <hr />
    </nav>
    <main>
    <section>
      <h1>Welcome to my blog</h1>
      <div>
        ...
      </div>
    </main>
    <footer>
      <hr />
      <p>
        <i>
          (c) Jae Doe 2003
        </i>
      </p>
    </footer>
  </body>
</html>
このツリーに JSON.stringify を渡せばクライアントに送信できる。
renderJSXToClientJSX 関数を書く。この関数はJSXを引数に取り、クライアントが認識できるJSXのみが残るようにserver-onlyな部分を解決していく。
構造的に、この関数は renderJSXToHTML と似ているが、HTMLの代わりにオブジェクトを返す。
async function renderJSXToClientJSX(jsx) {
  if (
    typeof jsx === "string" ||
    typeof jsx === "number" ||
    typeof jsx === "boolean" ||
    jsx == null
  ) {
    // Don't need to do anything special with these types.
    return jsx;
  } else if (Array.isArray(jsx)) {
    // Process each item in an array.
    return Promise.all(jsx.map((child) => renderJSXToClientJSX(child)));
  } else if (jsx != null && typeof jsx === "object") {
    if (jsx.$$typeof === Symbol.for("react.element")) {
      if (typeof jsx.type === "string") {
        // This is a component like <div />.
        // Go over its props to make sure they can be turned into JSON.
        return {
          ...jsx,
          props: await renderJSXToClientJSX(jsx.props),
        };
      } else if (typeof jsx.type === "function") {
        // This is a custom React component (like <Footer />).
        // Call its function, and repeat the procedure for the JSX it returns.
        const Component = jsx.type;
        const props = jsx.props;
        const returnedJsx = await Component(props);
        return renderJSXToClientJSX(returnedJsx);
      } else throw new Error("Not implemented.");
    } else {
      // This is an arbitrary object (for example, props, or something inside of them).
      // Go over every value inside, and process it too in case there's some JSX in it.
      return Object.fromEntries(
        await Promise.all(
          Object.entries(jsx).map(async ([propName, value]) => [
            propName,
            await renderJSXToClientJSX(value),
          ])
        )
      );
    }
  } else throw new Error("Not implemented");
}
stringifying する前に <Router /> のようなJSXを "client JSX" に変換するように手を加える。
async function sendJSX(res, jsx) {
  const clientJSX = await renderJSXToClientJSX(jsx);
  const clientJSXString = JSON.stringify(clientJSX, null, 2); // Indent with two spaces
  res.setHeader("Content-Type", "application/json");
  res.end(clientJSXString);
}
これでリンクをクリックすると、HTMLのようなツリーがalertで表示される。
注:今のところ、目標は何かを動作させることだが、その実装には望まれることがたくさん残っている。フォーマット自体が非常に冗長で繰り返しが多いので、実際のRSCはもっとコンパクトなフォーマットを使っている。先ほどのHTML生成と同様、レスポンス全体が一度に待たされるのはまずい。理想を言えば、JSXが利用可能になった時点でチャンク単位でストリーミングし、クライアント側でそれらをまとめられるようにしたい。また、共有レイアウトの一部(<html>や<nav>など)が変更されていないことがわかっているにもかかわらず、再送しているのも残念だ。画面全体をその場でリフレッシュする機能を持つことは重要だが、1つのレイアウト内のナビゲーションは、デフォルトでそのレイアウトをリフェッチしないことが理想的。本番用のRSC実装では、これらの欠点に悩まされることはないが、コードを消化しやすくするために、今のところはこれらの欠点を受け入れることにする。
Step 5.3: Let's apply JSX updates on the client
強く主張したいのが、JSXの差分を検知するために必ずしもReactを使う必要はない、ということ。現段階のJSX要素は <nav> や <footer> のようなビルトインのブラウザコンポーネントのみを含む。クライアントサイドコンポーネントのコンセプトを持たないライブラリを利用して、JSXの差分適用や更新を行うことも可能。しかし、リッチなインタラクティブ性が後々欲しくなるので、最初からReactを利用する。
途中...