💫
【Next.js】React Hook FormとYupを使って入力フォームのバリデーションを実装した話
はじめに
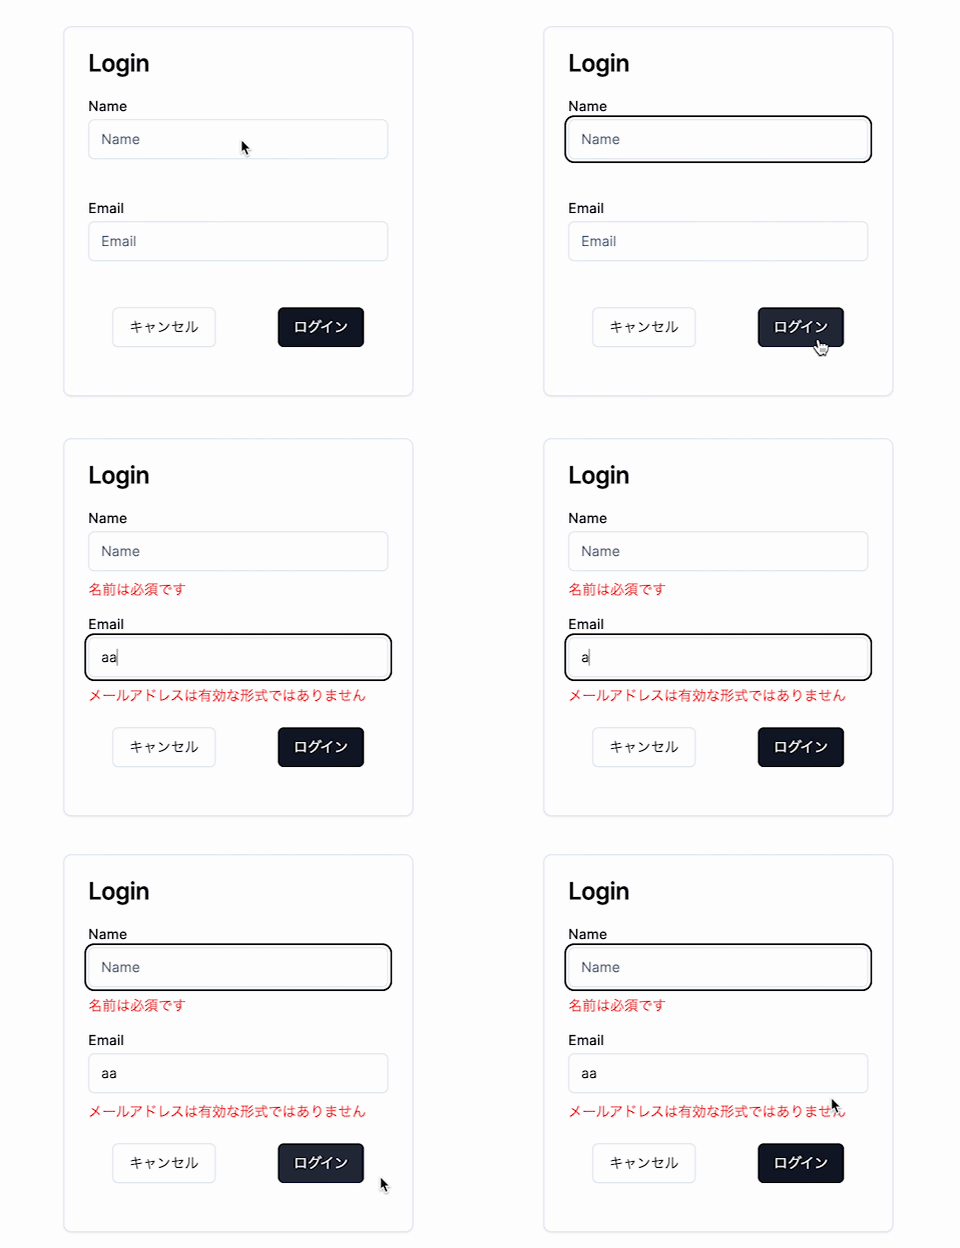
今回は、React Hook FormとYupを用いた入力フォームのバリデーションの実装方法についてまとめました。
フォームのデザインに関しては、shadcn/uiを使用しています。
1. 各種インストール
Next.jsのインストール
npx create-next-app@latest
React Hook Formのインストール
npm install react-hook-form
npm install @hookform/resolvers
yupのインストール
npm install yup
shadcn/uiのインストール
npx shadcn-ui@latest init
各種componentのインストール
npx shadcn-ui@latest add card
npx shadcn-ui@latest add input
npx shadcn-ui@latest add label
npx shadcn-ui@latest add button
2. View
src/app/page.tsx
'use client'

import * as React from "react"
import { yupResolver } from '@hookform/resolvers/yup'
import { useState } from 'react'
import { useForm } from 'react-hook-form'
import { loginSchema } from '@/validations/login'
import axios from 'axios'

import { Button } from "@/components/ui/button"
import {
  Card,
  CardContent,
  CardFooter,
  CardHeader,
  CardTitle,
} from "@/components/ui/card"
import { Input } from "@/components/ui/input"
import { Label } from "@/components/ui/label"


type Inputs = {
  name: string
  email: string
}

export default function Home() {
  const {
    register,
    handleSubmit,
    formState: { errors },
  } = useForm<Inputs>({ resolver: yupResolver(loginSchema) })

  const [response, setResponse] = useState('')

  const onSubmit = async (data: Inputs) => {
    try {
      setResponse('')
      // バックエンドをRailsを使用することを想定に記載しているのでフォームの送信先は適宜修正してください。
      const response = await axios.post(
        `${process.env.NEXT_PUBLIC_API_URL}/api/v1/web/login`,
        { review: data },
      )
      setResponse(response.data.response)
    } catch (error) {
      console.error('Error:', error)
      setResponse('エラーが発生しました。もう一度お試しください。')
    }
  }

  return (
    <div className="flex justify-center items-center h-screen">
      <Card className="w-[350px]">
        <CardHeader>
          <CardTitle>Login</CardTitle>
        </CardHeader>
        <CardContent>
          <form onSubmit={handleSubmit(onSubmit)}>
            <div className="grid w-full items-center gap-4">
              <div className="flex flex-col space-y-1.5">
                <Label htmlFor="name">Name</Label>
                <Input id="name" placeholder="Name" {...register("name")} />
                <div className="min-h-5">
                  {errors.name && <span className="text-red-500 text-sm">{errors.name.message}</span>}
                </div>
              </div>
              <div className="flex flex-col space-y-1.5">
                <Label htmlFor="email">Email</Label>
                <Input id="email" placeholder="Email" {...register("email")} />
                <div className="min-h-5">
                  {errors.email && <span className="text-red-500 text-sm">{errors.email.message}</span>}
                </div>
              </div>
            </div>
            <CardFooter className="flex justify-between mt-5">
              <Button type="button" variant="outline">キャンセル</Button>
              <Button type="submit">ログイン</Button>
            </CardFooter>
          </form>
        </CardContent>
      </Card>
    </div>
  )
}
解説
フォームの入力フィールドの型を定義しています。これにより、TypeScriptの型チェックが可能になります。
type Inputs = {
  name: string
  email: string
}
useFormフックを使用して、フォームの状態管理とバリデーションを設定しています。yupResolverを使用して、yupスキーマ(loginSchema)をreact-hook-formのバリデーションに統合しています。
const {
  register,
  handleSubmit,
  formState: { errors },
} = useForm<Inputs>({ resolver: yupResolver(loginSchema) })
register関数を使用して、各入力フィールドをreact-hook-formに登録しています。
<Input id="name" placeholder="Name" {...register("name")} />
errorsオブジェクトを使用して、バリデーションエラーがある場合にエラーメッセージを表示しています。
<div className="min-h-5">
  {errors.name && <span className="text-red-500 text-sm">{errors.name.message}</span>}
</div>
3. バリデーションの設定
src/validations/login.ts
import { object, string } from 'yup'

export const loginSchema = object({
  name: string()
    .required('名前は必須です'),
  email: string()
    .required('メールアドレスは必須です')
    .email('メールアドレスは有効な形式ではありません'),
})
他のバリデーションの種類
最大値・最小値
username: string()
    .required('ユーザー名は必須です')
    .min(3, 'ユーザー名は少なくとも3文字必要です')
    .max(20, 'ユーザー名は最大20文字までです'),
数値
age: number()
    .required('年齢は必須です')
    .positive('年齢は正の数である必要があります')
    .integer('年齢は整数である必要があります')
    .min(0, '年齢は0歳以上である必要があります')
    .max(120, '年齢は120歳以下である必要があります')
日付
appointmentDate: date()
    .required('日付は必須です')
    .typeError('正しい日付を入力してください')
    .min(new Date(), '予約日は今日以降である必要があります')
パスワード
password: string()
    .required('パスワードは必須です')
    .min(8, 'パスワードは8文字以上である必要があります'),
confirmPassword: string()
    .oneOf([ref('password'), null], 'パスワードが一致しません')
    .required('パスワードの確認は必須です')
動作確認
まとめ
とても簡単にバリデーションの実装が出来ました。
バリデーションのカスタマイズも柔軟に出来そうです。


Discussion