Sentry SourceMap Upload CI/CD
Sentryとは
アプリケーションのエラーの可視化、監視ツールです。
フロントエンドからサーバーレスまで複数のプラットフォームに対応しています。
用語解説
DSN : Sentry SDKにイベントの送信先を伝え、正しいプロジェクトに関連づける
環境構築
今回はReactとViteを使って、SourceMapのアップロードをしていきます。
React
1.Viteでプロジェクト作成
npm create vite@latest
Need to install the following packages:
  create-vite@5.0.0
Ok to proceed? (y)
✔ Project name: … sentry-test
✔ Select a framework: › React
✔ Select a variant: › TypeScript

Scaffolding project in /sentry-test...
2.パッケージのインストール
cd sentry-test
npm install
Sentry
1.アカウント作成
Sentryはアカウント作成後、2週間はトライアルプランとして使用することができます。
2.SentryのProject作成
Sentryにサインインした後にCreateProjectからProjectを作成してください。

今回はReactのプロジェクトを作成します

3.ReactのSDKとSentryのDSNをプロジェクトに追加
先ほどViteで作成したReactのプロジェクトにSentryのSDKをインストールします
npm install --save @sentry/react
SentrySDKの設定
dsn部分はプロジェクトを作成したときに発行される値を追加してください。
import React from 'react'
import ReactDOM from 'react-dom/client'
import App from './App.tsx'
import './index.css'
import * as Sentry from "@sentry/react";

Sentry.init({
  dsn: "https://public@sentry.example.com/1",
  integrations: [],
});

ReactDOM.createRoot(document.getElementById('root')!).render(
  <React.StrictMode>
    <App />
  </React.StrictMode>,
)
4.SourceMapのアップロード
Reactのプロジェクトをgitで管理する
  git init
  git add .
  git commit -m "first commit"
対話形式でSourceMapのアップロードの環境を作成できます
npx @sentry/wizard@latest -i sourcemaps

┌   Sentry Source Maps Upload Configuration Wizard
│
◇  Are you using Sentry SaaS or self-hosted Sentry?
│  Sentry SaaS (sentry.io)
│
◇  Do you already have a Sentry account?
│  Yes
│
●  If the browser window didn't open automatically, please open the following link to log into Sentry:
│
│  https://sentry.io/account/settings/wizard/****************************/
│
◇  Login complete.
│
◇  Select your Sentry project.
│  sentry-test/react-zenn
│
◇  Which framework, bundler or build tool are you using?
│  Vite
│
◇  Installed @sentry/vite-plugin with NPM.
│
◆  Added the Sentry Vite plugin to vite.config.ts and enabled source maps
│
●  We recommend checking the modified file after the wizard finished to ensure it works with your build setup.
│
◆  Created .env.sentry-build-plugin with auth token for you to test source map uploading locally.
│
◆  Added .env.sentry-build-plugin to .gitignore.
│
◇  Are you using a CI/CD tool to build and deploy your application?
│  Yes
│
◇  Add the Sentry authentication token as an environment variable to your CI setup:

SENTRY_AUTH_TOKEN=**************************************

│
▲  DO NOT commit this auth token to your repository!
│
◇  Did you configure CI as shown above?
│  Yes, continue!
│
└  That's it - everything is set up!

🎉  Successfully set up Sentry for your project 🎉
🎉こちらでローカル環境からSource Mapをアップロードする準備はできました
試しに以下のコマンドを叩いてみてください!!
npm run build
Github Actions で Source Mapをアップロード
1.Githubでプロジェクトを作成
GithubのリポジトリにReactのプロジェクトを追加
  git branch -M main
  git remote add origin git@github.com:user/sentry-test.git
  git push -u origin main
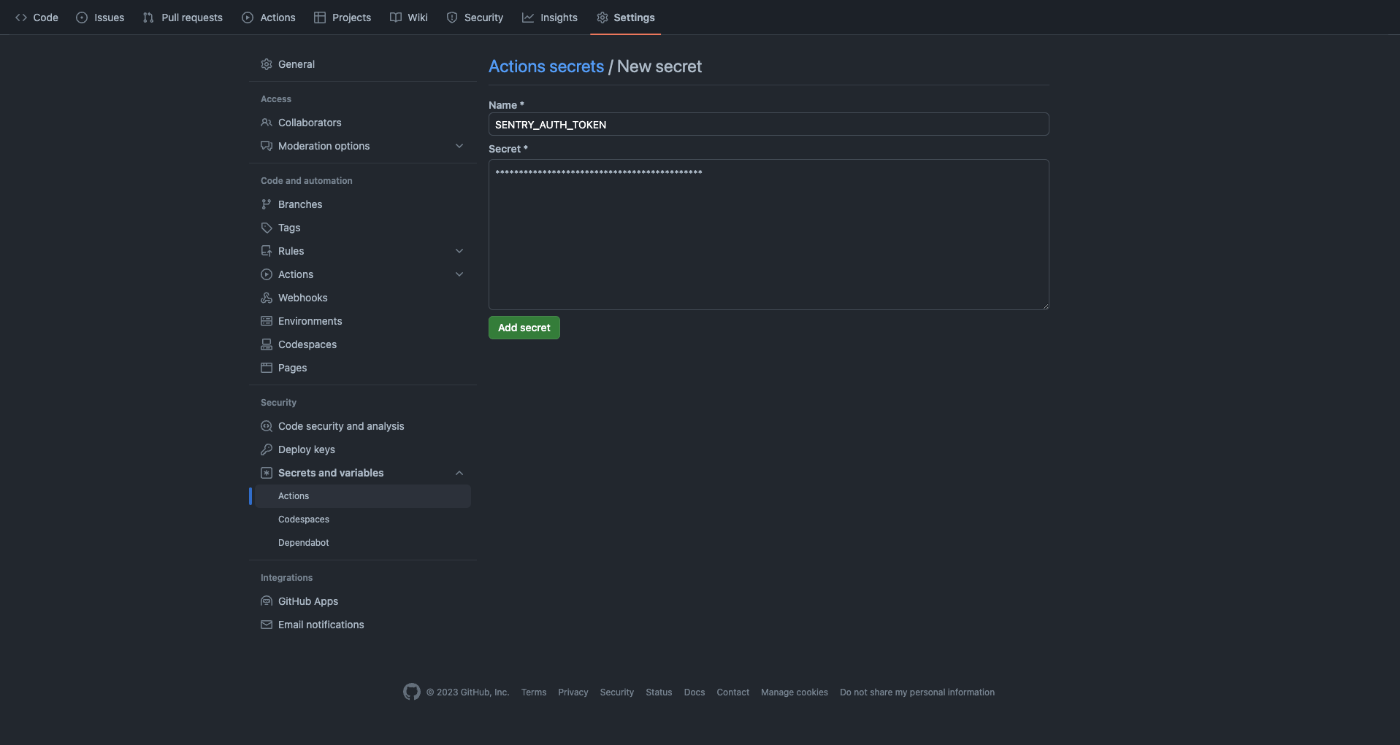
2.🔑SENTRY_AUTH_TOKENを追加
sentry-test > Settings > Secrets and variables > Actions > Repository secrets
SENTRY_AUTH_TOKENがわからない場合はReactのプロジェクトにある.env.sentry-build-pluginを確認してください。
3.Workflowを準備
name: upload-souce-map-workload
run-name: ${{ github.actor }}
on:
 push:
   branches:
    - main
jobs:
    source-map-upload:
        runs-on: ubuntu-latest #ワークフローを実行するサーバ
        timeout-minutes: 10
        steps:
            - name: Checkout
              uses: actions/checkout@v4

            - name: initialize
              run: npm install

            - name: soucemap
              run: npm run build
              env:
                SENTRY_AUTH_TOKEN: ${{ secrets.SENTRY_AUTH_TOKEN }}
こちらの手順でGithub ActionsでSentryにSource Mapをアップロードすることができます。
今後は開発、ステージング、本番の環境ごとに分けれるようにworkflowを改善していきたいと思います!!!
Discussion