📱
【Flutter】ログイン画面等でよくあるUIの作成


動作確認環境
Flutter 2.2.3 • channel stable • https://github.com/flutter/flutter.git
Framework • revision f4abaa0735 (5 weeks ago) • 2021-07-01 12:46:11 -0700
Engine • revision 241c87ad80
Tools • Dart 2.13.4
ログイン画面等でよくあるUI
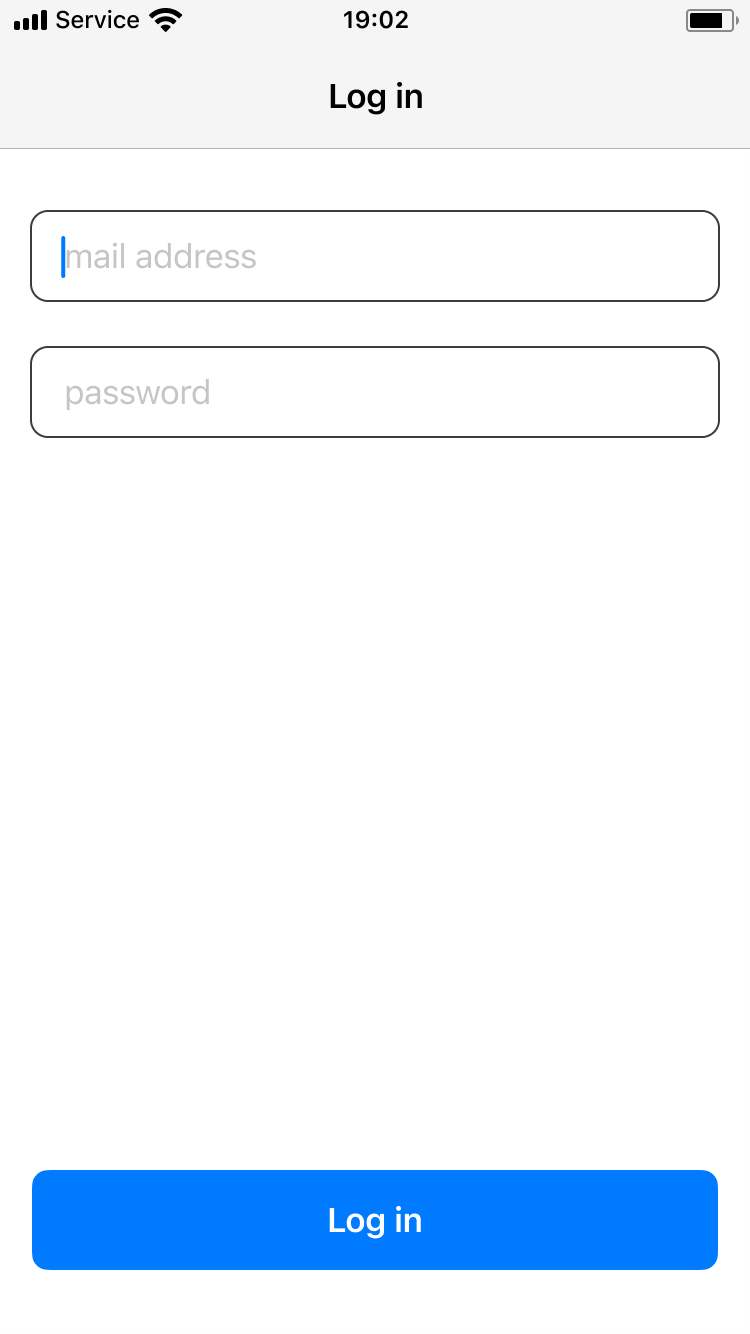
特徴
- 画面上部にTextField群がある
- 画面下部にButtonがある
- 中間は空白
細かい要件
- キーボード表示中、TextFieldが下に隠れて入力中の文字が見えないということがない
- キーボード表示中、TextFieldを上下にスクロールして別のTextFieldにアクセスできる
- キーボード表示中、下部のButton部分が中間の空白部分を詰めて、TextFieldの入力後にアクセスしやすいように考慮する
- 画面の縦幅に応じて、中間の空白部分が増減する
- 画面の縦幅に収まらない時、下部(Button部分)から画面外にあり、スクロールすることで見える
この構造を、Flutterで作る際に悩んだので書いておく。
コード
- あくまでUIの再現だけで、controller部分とう省略しているため、コードを使用する際は必要に応じて
StatelessWidgetを別のものに置き換えと追加の処理が必要 - わかりやすさ優先で一部重複処理の記載があるので、適宜処理をまとめた方が良い
log_in_screen.dart
class LogInScreen extends StatelessWidget {
Widget build(BuildContext context) {
return Scaffold(
appBar: AppBar(
title: const Text('Log in'),
),
body: SafeArea(
child: LayoutBuilder(
builder: (context, constraints) {
return SingleChildScrollView(
child: ConstrainedBox(
constraints: BoxConstraints(minHeight: constraints.maxHeight),
child: Padding(
padding: const EdgeInsets.all(32.0),
child: Column(
mainAxisAlignment: MainAxisAlignment.spaceBetween,
children: [
Column(
mainAxisAlignment: MainAxisAlignment.spaceBetween,
children: [
TextField(
controller: null,
decoration: InputDecoration(
border: OutlineInputBorder(
borderRadius: BorderRadius.circular(8.0),
),
labelText: 'mail address',
),
),
const SizedBox(height: 24.0),
TextField(
controller: null, // Controller実装必要
decoration: InputDecoration(
border: OutlineInputBorder(
borderRadius: BorderRadius.circular(8.0),
),
labelText: 'password',
),
),
],
),
Container(
width: double.infinity,
height: 54.0,
decoration: BoxDecoration(
borderRadius: BorderRadius.circular(8.0),
),
child: TextButton(
style: ButtonStyle(
backgroundColor:
MaterialStateProperty.all(Colors.blue),
foregroundColor:
MaterialStateProperty.all(Colors.white),
),
onPressed: () {
// ボタン処理
},
child: const Text('Log in'),
),
),
],
),
),
),
);
},
),
),
);
}
}
説明(08/10追記)
画面の高さから、StatusBar、NavigationBar、safeArea(bottom)の高さを引いた領域を計算して、bodyHeightとしている。
自前で描画領域を計算しているのであまりよくないやり方
final double bodyHeight = MediaQuery.of(context).size.height -
        (MediaQuery.of(context).padding.vertical + kToolbarHeight);
-
SafeAreaとLayoutBuilderを組み合わせ、SafeArea内の最大の高さの制約(constraints.maxHeight)を取得し、この制約を描画領域として高さ指定している
-
SingleChildScrollViewは、child要素の必要最低限の高さしか持たないため、先ほど計算して求めたconstraints.maxHeightを最低限の高さとしてConstrainedBoxで領域を確保している。 -
minHeightに指定しているため、constraints.maxHeightより大きくなる分には実行時にエラーにならず、SingleChildScrollViewで覆っているので、大きい場合はスクロールするようになる。
ConstrainedBox(
  constraints: BoxConstraints(minHeight: bodyHeight)
  child: ...
)
- 中間の余白は、
ColumnのmainAxisAlignment: MainAxisAlignment.spaceBetweenを指定して、余白が柔軟に開くようにしている - 中間の余白を必ず
n以上開けたい場合は、TextField下にSizedBox(height: n)を入れるなどしたら可能
代替案
UIの構造上、必ず1画面内に収まるのであれば、誤魔化したやり方が以下のようにある。
案1
-
ScaffoldのfloatingActionButtonにButtonを置く -
floatingActionButtonLocationは、FloatingActionButtonLocation.endFloatを指定
この場合、キーボードに隠れないようにButtonが動く。
案2
-
ScaffoldのbottomNavigationBarにButtonを置く。
この場合、Buttonは下部に固定されて一切動かない。
Discussion