【M5Stack】カメラに映った動画をリアルタイム表示(ATOMS3R + Camera Kit x ESPNowCam)
【待望のPSRAM有りAtomが09/20に発売されました!】
「せっかく活用方法を記述した M5 Unit-CamS3が生産停止で泣いていた」 ところに、M5 Stack社 からPSRAM有りAtom, Camera Kitが発売されました。ということで、この同時期に発売されたAtomS3RシリーズとESPNowCamライブラリ※を使ってリアルタイム画像を表示してみます
価格メモ:AtomS3R:¥3,113 / AtomS3R Camera Kit ¥3,388(2024/10/20現在)
※表示用のAtomS3Rをお持ちで無い方は、代わりにM5StackCore2/Core3でも可能です
※ESP-NOWという無線規格で、主に「Wi-Fiルーターを経由せず直接ESP32同士で通信でき、小さいデータを少ない電力でやり取りする用途に使う」イメージ
【AtomS3R x ESPNowCamを使ってみよう】
どんな感じ?
ということで、実際に映したのがこちら。変更は画像サイズQQVGA(160×120)※、向きの指定だけで、リアルタイム画像を20fpsぐらい出ています
※AtomS3R画面:128×128に表示できる大きさに合わせました
※AtomS3(PSRAMが無い)では実現できなかった「Atomだけでリアルタイムカメラ画像表示が可能」になりました!
【作り方(Arduino IDE環境※)】
ライブラリとサンプルソースが以下のページで公開されていますが、AtomS3R + Camera Kitでは動かしたことが無いようなので、私が試して動いた手順をシェアします。この後作者さんに対応依頼予定なので、もっと簡単になるハズですが、雑にまず公開します。パフォーマンスチューニングもしてないので、もし試したがいたら公開してくれると嬉しいです ※作者さんはPlatformIO環境推奨ですが、初心者でも設定が比較的簡単なこちらで公開します。
環境設定
1. Nanopb ライブラリをダウンロード&解凍し、Arduinoのライブラリ※にフォルダごとコピーします
※多くの場合「C:\Users\[ユーザ]\OneDrive\ドキュメント\Arduino\libraries」です。IDEのメニューのZipから取り込むではエラーが出ました。
2. ライブラリ マネージャーでESPNowCamを見つけてインストールします

※上記以外にM5Unifiedのインストールも必須です
プログラミング
3. 表示受信側:AtomS3R
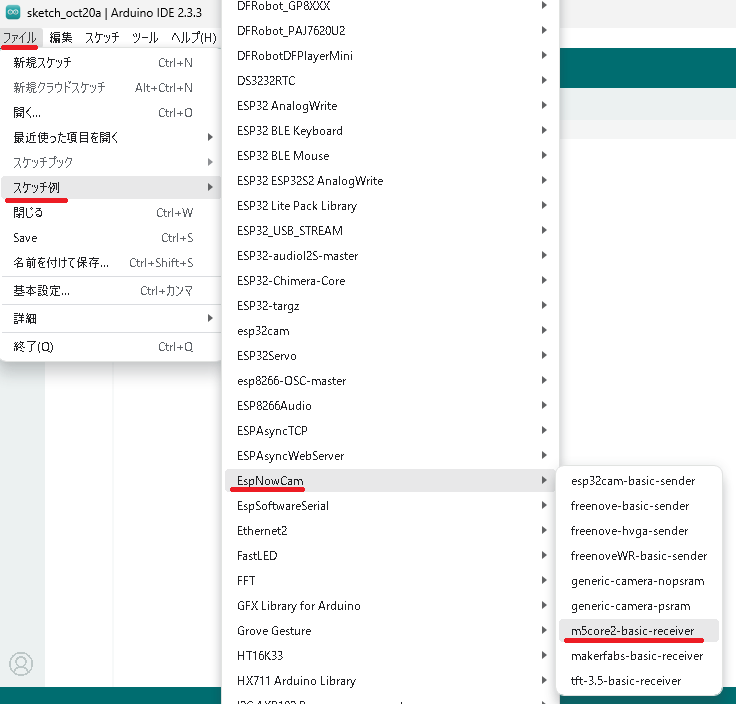
3-1. スケッチ例から”m5core2-basic-receiver”を選択
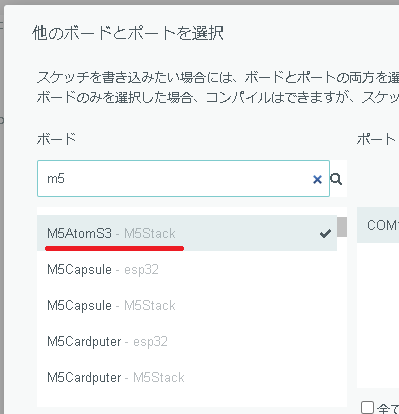
3-2. ボードは"M5AtomS3"を選択
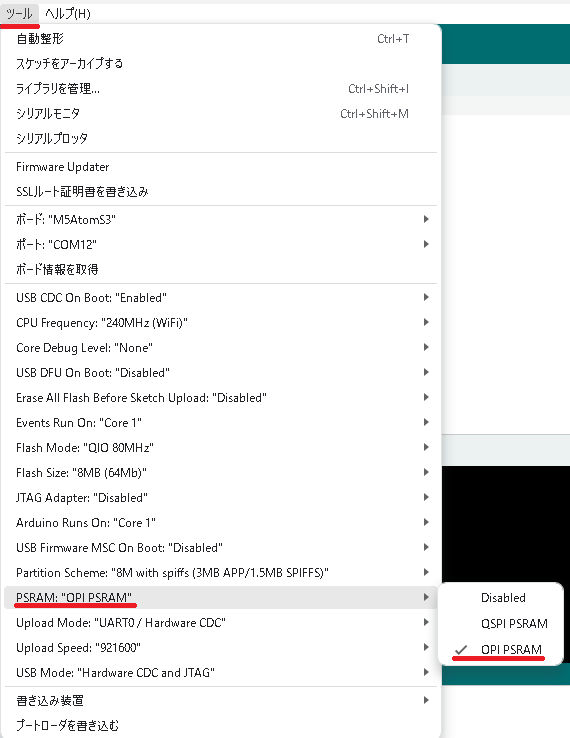
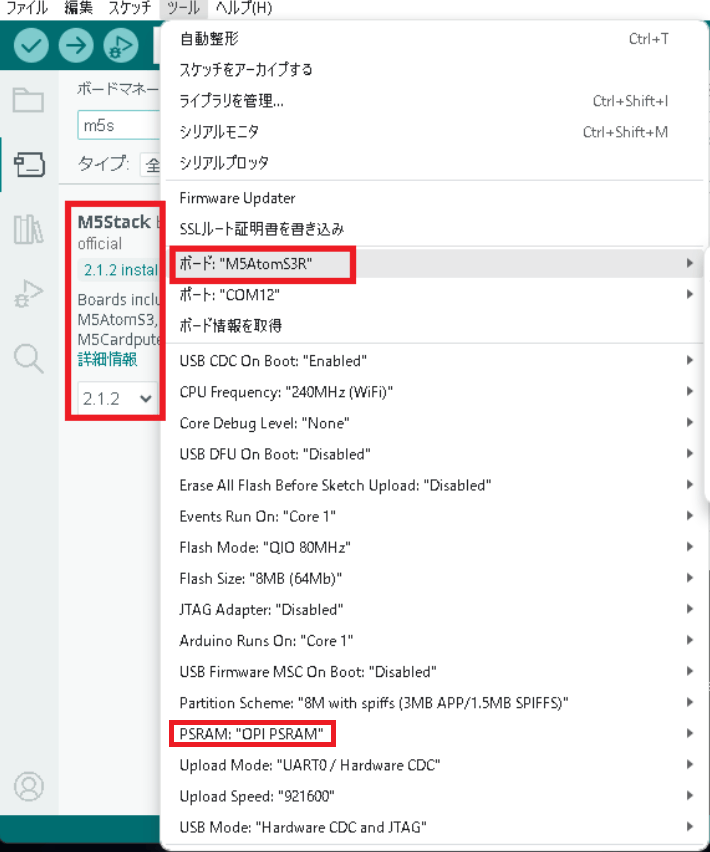
3-3. ツールのボードメニューでPSRAMを有効にします
※ボードマネージャ:M5Stack official 2.1.2から、AtomS3R が選択可能になりました
3-4. 書き込んで完成。初期画面はこんな表示です
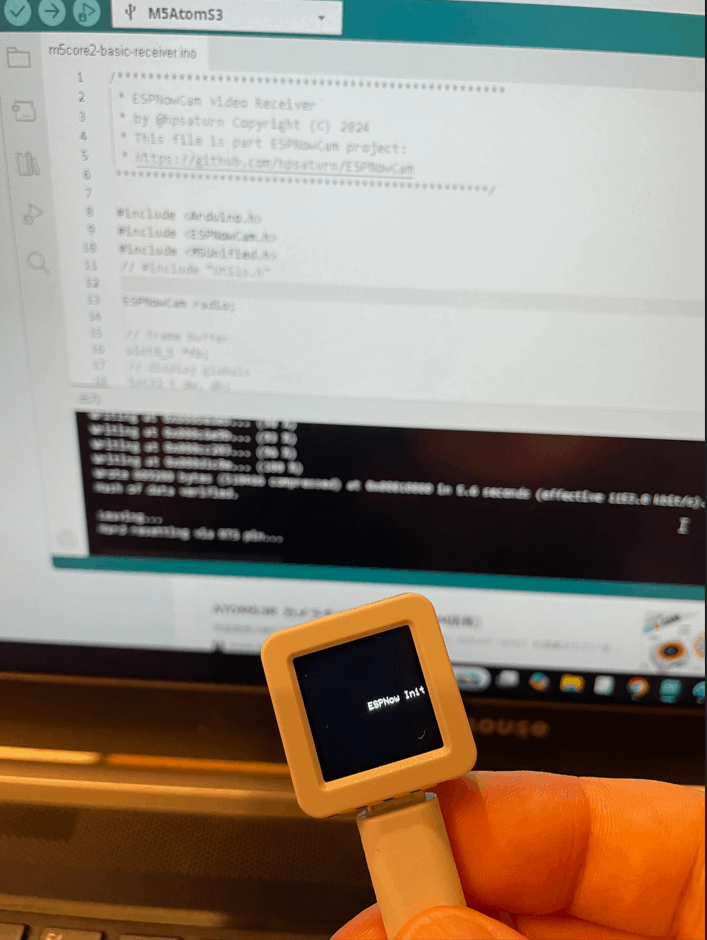
※画面表示の向きを変更したい場合は、M5.Lcd.setRotationを指定して変更できます。
  M5.begin(cfg);
  //add
  M5.Lcd.setRotation(2);  // AtomS3をUSB側を上にして顔にする場合
4. カメラ送信側:AtomS3R Camera Kit
4-1. AtomS3R Camera KitをPCと接続します
・AtomS3R CAM - Web CAM (Arduino)のサンプルから、Pinおよびカメラ設定を確認します
4-2. Gitのカスタム例:custom-camera-sender.cppを修正
・オリジナル
・修正版 - AtomS3R Camera Kit用
そのままArduinoのエディタに貼り付けて実行します。
・修正は4点。
1.#define POWER_GPIO_NUM 18の追加
2.Pinとカメラ設定をAtomS3R Camera Kitに変更(camera_config_t camera_config部分)
3.カメラ詳細設定(CameraBegin()のsensor_t *s = esp_camera_sensor_get()部分)
4.カメラの起動設定?(setup()のpinMode と digitalWrite)
/**************************************************
 * ESPNowCam video Transmitter
 * by @hpsaturn Copyright (C) 2024
 * This file is part ESPNowCam project:
 * https://github.com/hpsaturn/ESPNowCam
 - AtomS3RCam
 https://github.com/m5stack/M5AtomS3/blob/main/examples/Basics/camera/camera.ino
 https://github.com/m5stack/M5AtomS3/blob/main/examples/Basics/camera/camera_pins.h
**************************************************/

#include <Arduino.h>
#include <esp_camera.h>
#include <ESPNowCam.h>
#include <Utils.h>

ESPNowCam radio;
camera_fb_t* fb;

bool has_psram = false;

#define POWER_GPIO_NUM 18

// Please change this to your Camera pins:
camera_config_t camera_config = {
    .pin_pwdn     = -1,
    .pin_reset    = -1,
    .pin_xclk     = 21,
    .pin_sscb_sda = 12,
    .pin_sscb_scl = 9,
    .pin_d7       = 13,
    .pin_d6       = 11,
    .pin_d5       = 17,
    .pin_d4       = 4,
    .pin_d3       = 48,
    .pin_d2       = 46,
    .pin_d1       = 42,
    .pin_d0       = 3,

    .pin_vsync = 10,
    .pin_href  = 14,
    .pin_pclk  = 40,

    .xclk_freq_hz = 20000000,
    .ledc_timer   = LEDC_TIMER_0,
    .ledc_channel = LEDC_CHANNEL_0,

    .pixel_format  = PIXFORMAT_RGB565,
    .frame_size    = FRAMESIZE_QQVGA,
    // FRAMESIZE_96X96,    // 96x96 - OK
    // FRAMESIZE_QQVGA,    // 160x120 - OK
    // FRAMESIZE_QCIF,     // 176x144 - OK
    // FRAMESIZE_HQVGA,    // 240x176 - OK
    // FRAMESIZE_240X240,  // 240x240 - OK
    // FRAMESIZE_QVGA,     // 320x240 - OK

    .jpeg_quality  = 0,
    .fb_count      = 2,
    .fb_location   = CAMERA_FB_IN_PSRAM,
    .grab_mode     = CAMERA_GRAB_LATEST,
    .sccb_i2c_port = 0,
};

bool CameraBegin() {
  esp_err_t err = esp_camera_init(&camera_config);
  if (err != ESP_OK) {
    return false;
  }

  // Add
  sensor_t *s = esp_camera_sensor_get();
  s->set_hmirror(s, 1);        // 左右反転
  s->set_vflip(s, 1); //上下反転 0無効 1有効

  //カメラ追加設定
  // sensor_t * s = esp_camera_sensor_get();
  // s->set_hmirror(s, 1); //左右反転 0無効 1有効
  // s->set_vflip(s, 1); //上下反転 0無効 1有効
  // s->set_colorbar(s, 1); //カラーバー 0無効 1有効
  // s->set_brightness(s, 1);  // up the brightness just a bit
  // s->set_saturation(s, 0);  // lower the saturation

  return true;
}

bool CameraGet() {
  fb = esp_camera_fb_get();
  if (!fb) {
    return false;
  }
  return true;
}

bool CameraFree() {
  if (fb) {
    esp_camera_fb_return(fb);
    return true;
  }
  return false;
}

void processFrame() {
  if (CameraGet()) {
    if (has_psram) {
      uint8_t *out_jpg = NULL;
      size_t out_jpg_len = 0;
      frame2jpg(fb, 12, &out_jpg, &out_jpg_len);
      radio.sendData(out_jpg, out_jpg_len);
      free(out_jpg);
    }
    else{
      radio.sendData(fb->buf, fb->len);
      delay(30); // ==> weird delay for cameras without PSRAM
    }
    printFPS("CAM:");
    CameraFree();
  }
}

void setup() {
  Serial.begin(115200);

  // add - これが無いと動かなかった
    pinMode(POWER_GPIO_NUM, OUTPUT);
    digitalWrite(POWER_GPIO_NUM, LOW);
    delay(500);

  delay(1000); // only for debugging

  if(psramFound()){
    has_psram = true;
    size_t psram_size = esp_spiram_get_size() / 1048576;
    Serial.printf("PSRAM size: %dMb\r\n", psram_size);
    // suggested config with PSRAM
    camera_config.pixel_format = PIXFORMAT_RGB565;
    camera_config.fb_location = CAMERA_FB_IN_PSRAM;
    camera_config.fb_count = 2;
  }
  else{
    Serial.println("PSRAM not found! Basic framebuffer setup.");
  }

  radio.init();

  if (!CameraBegin()) {
    Serial.println("Camera Init Fail");
    delay(1000);
    ESP.restart();
  }
  delay(500);
}

void loop() {
  processFrame();
}
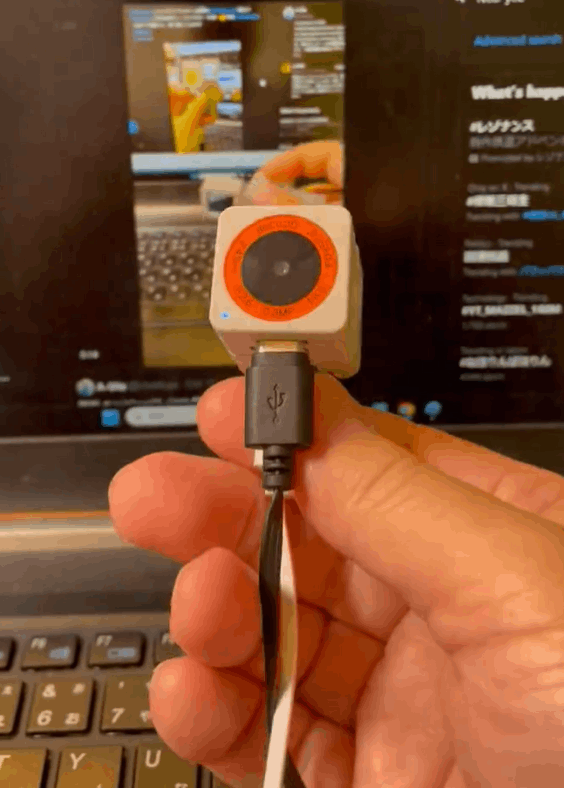
4-3. 書き込んで完成
親指の先サイズのカメラが完成です!
【最後に】
私はただ既に作られたモノを組合わせただけですが、楽しいものができました!
それぞれの製作者様に感謝!
・M5社:AtomS3R / ATOMS3R Camera Kit
・ESPNowCam - Data streamer
Discussion