【Next.js × Notion API】SSGを利用したポートフォリオサイトを作る
Next.js × Notion API を使ったサイト構築の方法についてポイントをまとめました。
Next.js の SSG (静的サイトジェネレート)を使うと高速なページ切り替えを実現できます。
Notion に記事を書く ⇒ API で記事の内容を取得 ⇒ Next.js で SSG して公開
という流れです。
プロジェクト作成
Jamstack Themes というサイトに Next.js の SSG 対応のテーマがあるので今回はそれを利用。
# クローン
git clone https://github.com/stackbit-themes/exto-nextjs.git

# 開発サーバー起動
yarn install
yarn dev
localhost:3000 にアクセスするとサイトを表示できる。

Notion API でデータ取得
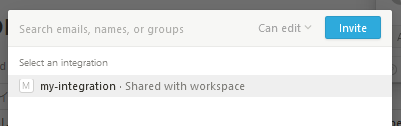
API を使うためには TOKEN が必要で Notion - My integrations のページで発行。
Integration を作成すると、Internal Integration Token がコピーできるのでプロジェクトのルートフォルダに .env を作成し貼り付けておく。
NEXT_PUBLIC_NOTION_TOKEN=secret_abcdefg...
API を操作るためのキット Notion SDK for JavaScript が用意されているのでインストール。
yarn add @notionhq/client
データを取得するには事前に Notion 側で右上の Share → Invite から作成した Integration を追加しておく必要があるので注意。
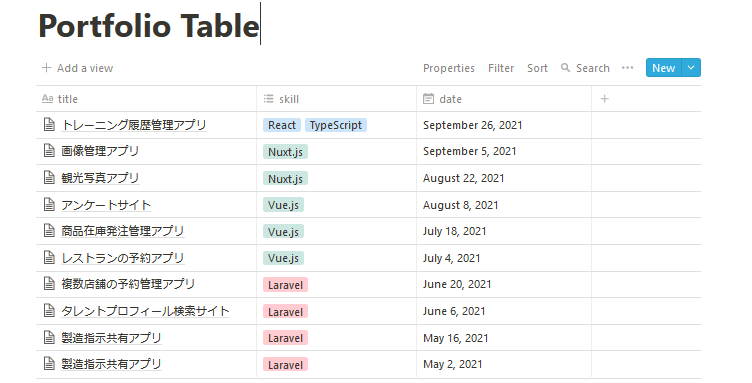
取得方法には3つあり Database / Page / Block のいずれかの塊でデータを取得する。Database の方法がデータを扱いやすいので Notion 側を Table にしておくと良い。
一覧ページの実装
API Reference を参考にデータ取得して一覧表示してみる。
databaseId はブラウザでテーブルを開いた時のURLの末尾の文字列。
const { Client } = require("@notionhq/client")

export default async function fetchProjects() {
  const notion = new Client({ auth: process.env.NEXT_PUBLIC_NOTION_TOKEN });
  const databaseId = 'zxcvbnmasdfghj123456789';
  const response = await notion.databases.query({ database_id: databaseId });
  return response.results.map(row => {
    return {
      pageId: row.id,
      title: row.properties.title.title[0].plain_text,
      skill: row.properties.skill.multi_select.map(skill => skill.name),
      date: row.properties.date.date.start.replace(/\-/g, '/')
    }
  });
}
getStaticProps の中でデータを取得して props に入れる。getStaticProps はサーバーサイドで実行され静的なファイルを生成することが可能。
import { getProjects } from '../utils';

export async function getStaticProps({ params }) {
		/* 省略 */
    if (params.slug[0] === 'portfolio') {
        const projects = await getProjects();
        props.projects = projects;
        return { props }
    }
    return { props };
}
コンポーネント側で受け取って値を表示する。
renderProject(project) {
		const pageId = _.get(project, 'pageId');
    const projectUrl = ''
    const title = _.get(project, 'title');
    const skill = _.get(project, 'skill');
    const skillStr = skill.join(', ')
    const date = _.get(project, 'date');
    const dateTimeAttr = moment(date).strftime('%Y-%m-%d %H:%M');
    const formattedDate = moment(date).strftime('%Y/%m/%d');

    return (
        <article key={pageId} className="project">
            <Link href={projectUrl} className="project-link">
                <header className="project-header">
                    <h2 className="project-title">{title}</h2>
                    <div>{ skillStr }</div>
                    <div className="post-meta">
                        <time className="published" dateTime={dateTimeAttr}>{formattedDate}</time>
                    </div>
                </header>
            </Link>
        </article>
    );
}

render() {
/* 省略 */
<div className={`portfolio-feed layout-${layoutStyle}`}>
    {this.props.projects.map(project => this.renderProject(project))}
</div>
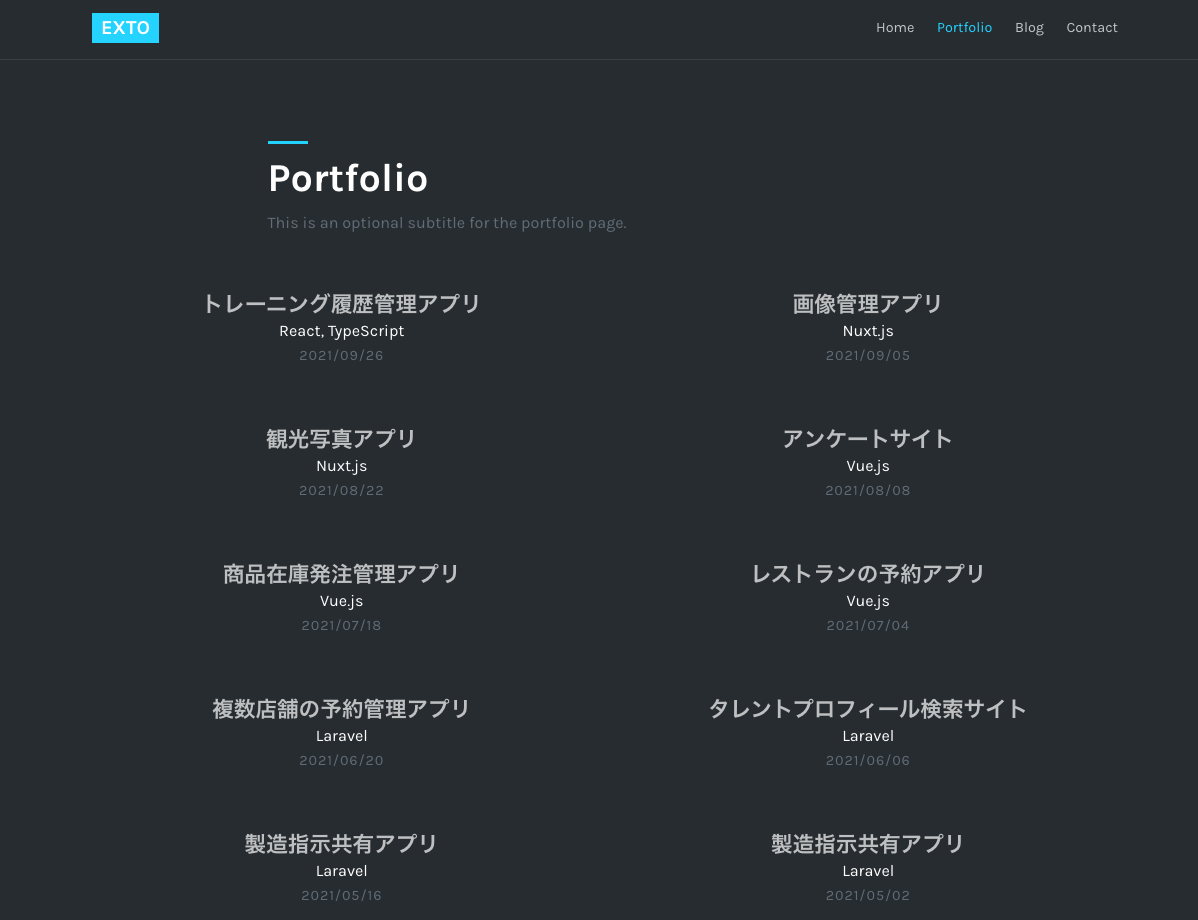
Notion の対象データの一覧表示が完成。
詳細ページの実装
各投稿へのリンクは /portfolio/ { notion page id } としてリンクを設定する。getPageUrl を使って詳細ベージのURLを取得。
const projectUrl = getPageUrl(project, { withPrefix: true });

<Link href={projectUrl} className="project-link">
getStaticProps の中でデータを取得して props に入れる。
__metadata のプロパティがないとエラーが発生するのでこのタイミングで入れておく。
export async function getStaticProps({ params }) {
  console.log('Page [...slug].js getStaticProps, params: ', params);
  const pagePath = '/' + (params.slug ? params.slug.join('/') : '');
  const props = await sourcebitDataClient.getStaticPropsForPageAtPath(pagePath);
  const projects = await getProjects();

  if (pagePath.match(/\/portfolio\/.+/)) {  // 詳細ページ
    const project = projects.find(pj => pj.pageId === params.slug[1])
    const pageContent = await getPageContent(params.slug[1]);
    props.page = {
      __metadata: {
        modelName: 'page'
      }
    }
    props.project = project;
    props.content = pageContent.content;
    return { props };
  }

  if (params.slug[0] === 'portfolio') {  // 一覧ページ
    props.projects = projects;
    return { props }
  }

  return { props };
}
getPageContent を使って Notion の対象ページの内容を取得。
const { Client } = require('@notionhq/client');

export default async function getPageContent(pageId) {
  const notion = new Client({ auth: process.env.NOTION_TOKEN });
  const children = await notion.blocks.children.list({ block_id: pageId, page_size: 100 }); // max 100
  let content = [];
  children.results.map((block) => {
    content.push({ type: block.type, block: block });
  });
  return { content };
}
コンポーネント側で props を受け取り描画する。
export default class Page extends React.Component {
  render() {
    const project = _.get(this.props, 'project');
    const content = _.get(this.props, 'content');
    const data = _.get(this.props, 'data');
    const config = _.get(data, 'config');
    const page = _.get(this.props, 'page');

    return (
      <Layout page={page} config={config}>
        <div className="inner outer">
          <article className="post post-full">
            <header className="post-header inner-sm">
              <h1 className="post-title line-top">{project.title}</h1>
              <div className="post-subtitle">
                {project.skill && project.skill.map(skill => <span key={skill}>{htmlToReact(skill)}</span>)}
                <span className="post-date">{project.date}</span>
              </div>
            </header>
            {content.map(item => (
              <div className="post-content inner-sm" key={item.block.id}>
                {(item.type === 'heading_2') ? <p className="heading-2">{item.block.heading_2.text[0].text.content}</p> : ''}
                {(item.type === 'heading_3') ? <p className="heading-3">{item.block.heading_3.text[0].text.content}</p> : ''}
                {(item.type === 'image') ? <div className="capture-wrap"><img src={item.block.image.file.url} className="capture-image" /></div> : ''}
                {(item.type === 'paragraph') ? (
                  <div>
                    {(item.block.paragraph.text.length > 0) ? (
                      item.block.paragraph.text.map(text => (text.href) ? (
                        <Link href={text.href} target="_blank" key={text.href}>{text.plain_text}</Link>
                      ) : <span key={text.href}>{text.plain_text}</span>)
                    ) : " " }
                  </div>
                ) : ''}
                {(item.type === 'bulleted_list_item') ? <li>{item.block.bulleted_list_item.text[0].plain_text}</li> : ''}
              </div>
            ))}
          </article>
        </div>
      </Layout>
    );
  }
}
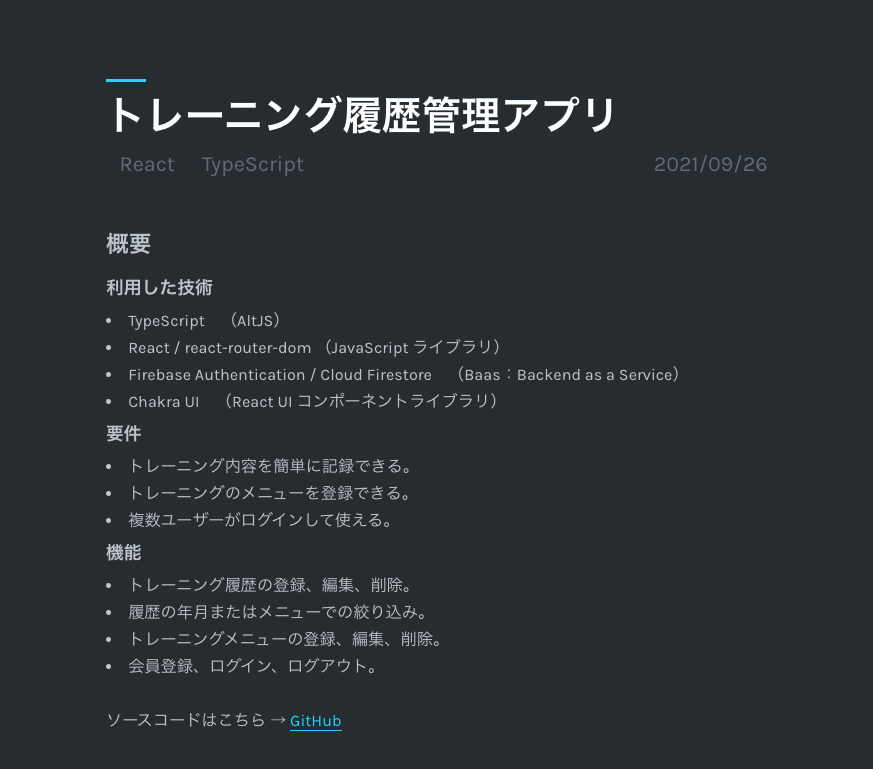
Notion の対象ページの詳細表示が完成。
まとめ
Next.js × Notion API でのサイト作成方法のポイントについて解説しました。
最終的なソースコードは GitHub に載せています。良かったらご参照ください。
Notion は UI が優れているので文書を書くのに重宝しています。
同じように Notion API を使ったサイト作成しようとしている方のお役に立てると幸いです。
参考
Start building with the Notion API > API Reference
Notion APIとNext.jsで日記サイトを作った
Discussion