【Notionブログ】Next.jsでカテゴリー別記事一覧ページを作成する
はじめに
オウンドメディア制作やポートフォリオ作成のためにNotion APIを用いたNotionブログ作成にチャレンジされる方は多くいらっしゃいます。ただ公開されているNotionブログの個別投稿ページでは、ほとんどのURLが、
https://example.site/[記事タイトル]
または
https://example.site/[ID]
となっています。
今回はNext.jsで①カテゴリー別の記事一覧ページの作成、
(https://example.site/[カテゴリー名])
②①に基づいた個別投稿ページのURLの設定を行なっていきます。
(https://example.site/[カテゴリー名]/[記事タイトル])
プロジェクトによっては、上記のような対応が必要になるかと思いますが、それをまとめたサイトが見当たらなかったため、記事にしました。今回はNotionAPIにはNode.jsからアクセスして、静的サイトジェネレーター(SSG)を利用して作成しています。
↓完成後のサンプルサイトです。
■ 参考文献
Next.jsのセットアップからNotionブログにインストールまで
今回はこの部分は省略します。以下のリンクの記事を参考にしてみてください。 この記事についても、公開されている「notion-blog-nextjs」をベースに作成しています。
■ 初期の状態はこんな感じ
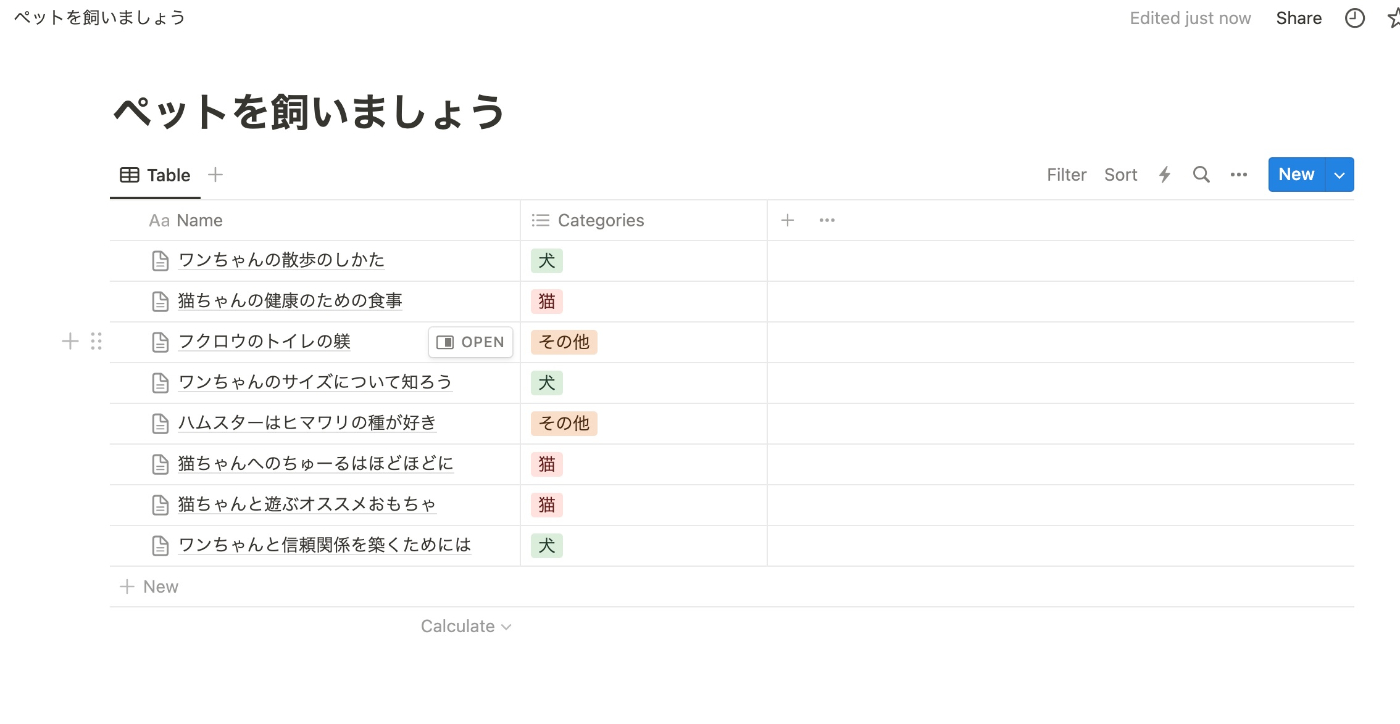
下の画像は、作成したNotionのページです。今回例としてペットについての記事を8件書いています。

下の画像は、先ほどのNotionから情報を取得したサイトのトップページです。

■ ディレクトリの作成
pagesの直下に[category],その直下に[title]とindex.jsx、[title]の直下にindex.jsxを配置しました。つまり[category]直下のindex.jsxが、カテゴリー別記事一覧ページ、[title]直下のindex.jsxが個別投稿ページになります。今回は必要最低限の実装になるので、各々で拡張子や必要なcssの設定を行なってください。

カテゴリー別記事一覧ページ
■ 必要な関数を設定する。
記事のカテゴリーを取得する関数を設定します。
export const getPostsByCategory = async (databaseId, categoryName) => {
  const response = await notion.databases.query({
    database_id: databaseId,
    filter: {
      property: "Categories",
      multi_select: {
        contains: categoryName,
      },
    },
  });
  return response.results;
};
notionが用意しているfilterを使います。上記のproperty名と下の画像の赤枠の部分は合致するようにしてください。今回は『Category』にしています。

■ ページを実装する
import Head from "next/head";
import { getDatabase, getPostsByCategory } from "../../lib/notion";
import Link from "next/link";
import { databaseId } from "../index.jsx";

export default function Category({ page }) {
  if (!page) {
    return <div />;
  }
  return (
    <div>
      <Head>
        <title>
          {page[0].properties.Categories.multi_select[0].name}のページ
        </title>
        <link rel="icon" href="/favicon.ico" />
      </Head>

      <div>
        <h1>{page[0].properties.Categories.multi_select[0].name}の記事一覧</h1>
      </div>
      <article>
        <ol>
          {page.map((post) => {
            const date = new Date(post.last_edited_time).toLocaleString(
              "en-US",
              {
                month: "short",
                day: "2-digit",
                year: "numeric",
              }
            );
            return (
              <li
                key={post.properties.Name.title[0].plain_text}
                className={styles.post}
              >
                <h2>
                  <div>{post.properties.Name.title[0].plain_text}</div>
                </h2>
                <p className={styles.postDescription}>{date}</p>
                <Link
                  href={`/${post.properties.Categories.multi_select[0].name}/${post.properties.Name.title[0].plain_text}`}
                >
                  Read post →
                </Link>
              </li>
            );
          })}
        </ol>
      </article>
    </div>
  );
}

export const getStaticPaths = async () => {
  const database = await getDatabase(databaseId);
  const allTags = database
    .map((post) => post.properties.Categories.multi_select)
    .reduce((acc, categories) => acc.concat(categories), [])
    .filter((category, index, self) => self.indexOf(category) === index);
  return {
    paths: allTags.map((category) => ({ params: { category: category.name } })),
    fallback: true,
  };
};

export const getStaticProps = async (context) => {
  const { category } = context.params;
  const page = await getPostsByCategory(databaseId, category);
  return {
    props: {
      page,
    },
    revalidate: 1,
  };
};
関数名"getDatabase"はデフォルトでnotion.jsに設定してあります。必要に応じて見た目の部分は変更してください。
.map((post) => post.properties.Categories.multi_select)
.reduce((acc, categories) => acc.concat(categories), [])
.filter((category, index, self) => self.indexOf(category) === index);
ここでは、取得したすべてのカテゴリーを一つの配列に結合し、その後、重複するカテゴリーを削除しています。
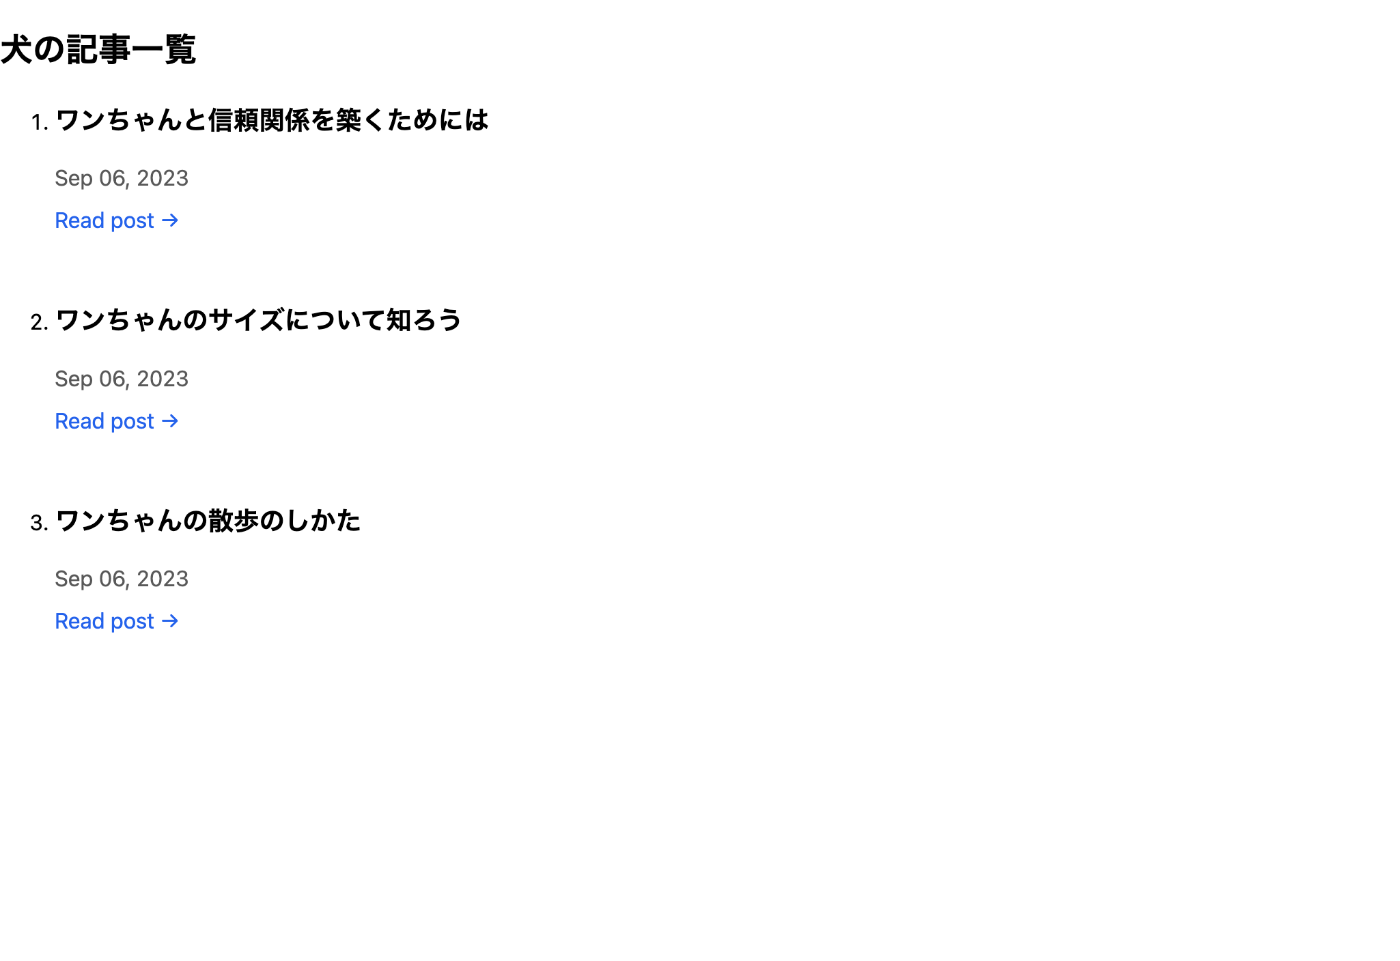
■ プレビュー
カテゴリー別記事一覧ページができました。

個別投稿ページ
■ 必要な関数を設定する。
個別記事の投稿内容を取得する関数を設定します。デフォルトで実装されている関数"getDatabase","getPage","getBlocks"に加えて、getIdFromTitleという関数を作ります。
export const getIdFromTitle = async (title, database) => {
  const page = database.find(
    (post) => post.properties.Name.title[0].plain_text === title
  );
  return page ? page.id : null;
};
この関数は、指定されたtitleと一致するデータベース内のページ(またはレコード)を探して、そのページのUUIDを返します。
■ ページを実装する
import { Fragment } from "react";
import Head from "next/head";
import {
  getDatabase,
  getPage,
  getBlocks,
  getIdFromTitle,
} from "../../../lib/notion";
import Link from "next/link";
import { databaseId } from "../../index.jsx";

[省略]

export default function Post({ page, blocks }) {
  if (!page || !blocks) {
    return <div />;
  }
  return (
    <div>
      <Head>
        <title>{page.properties.Name.title[0].plain_text}</title>
        <link rel="icon" href="/favicon.ico" />
      </Head>
      <article>
        <h2>
          <Text text={page.properties.Name.title} />
        </h2>
        <section>
          <div>
            カテゴリー名:
            {page.properties.Categories.multi_select[0].name}
          </div>
          <div>
            {blocks.map((block) => (
              <Fragment key={block.id}>{renderBlock(block)}</Fragment>
            ))}
          </div>
          <Link href="/">← Go home</Link>
        </section>
      </article>
    </div>
  );
}

export const getStaticPaths = async () => {
  const database = await getDatabase(databaseId);
  const paths = database.flatMap((post) =>
    post.properties.Categories.multi_select.map((category) => ({
      params: {
        category: category.name,
        title: post.properties.Name.title[0].plain_text,
      },
    }))
  );

  return {
    paths: paths,
    fallback: true,
  };
};

export const getStaticProps = async (context) => {
  const { title } = context.params;
  const database = await getDatabase(databaseId);
  const uuid = await getIdFromTitle(title, database);

  if (!uuid) {
    return { notFound: true };
  }

  const page = await getPage(uuid);
  const blocks = await getBlocks(uuid);

  return {
    props: {
      page,
      blocks,
    },
    revalidate: 1,
  };
};
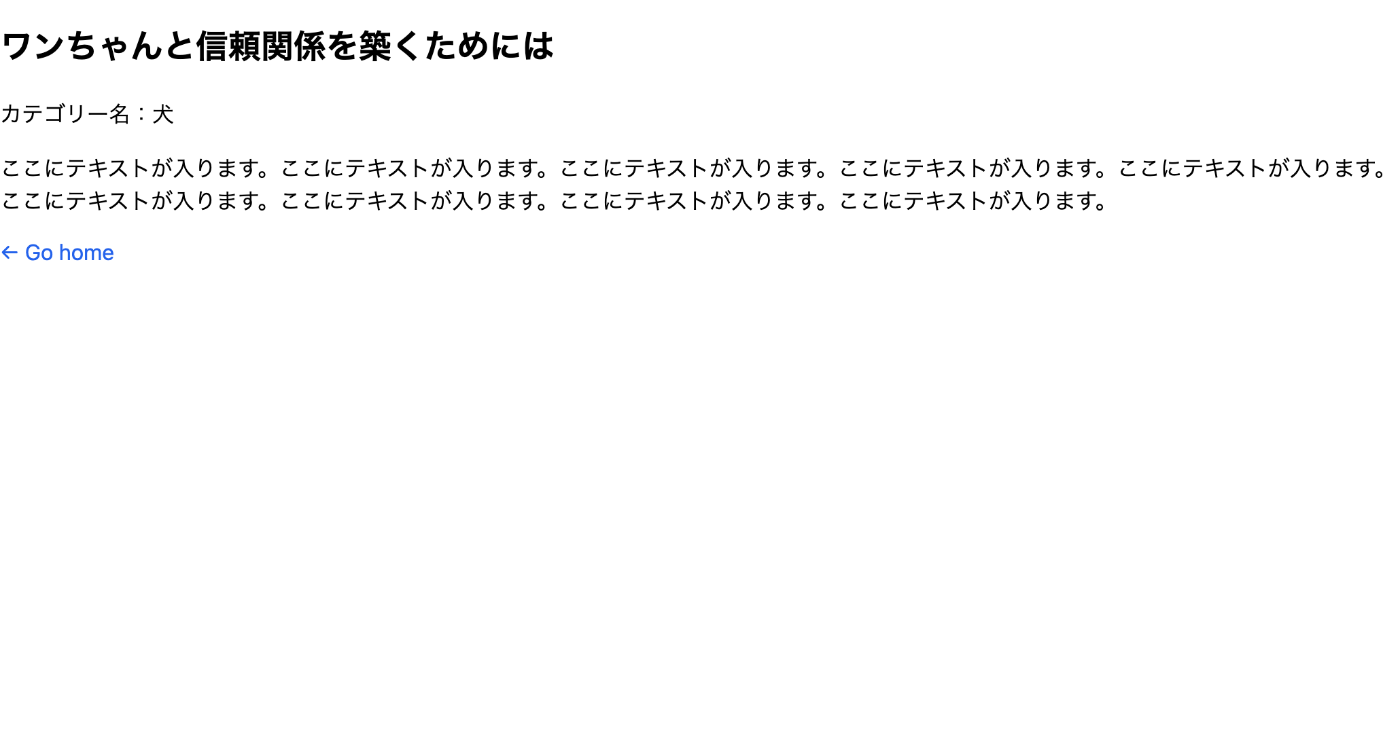
■ プレビュー
個別投稿ページができました。

完成!!
ぜひ実践してみてください。今回は必要最低限の実装に留め、リファクタリングなども行なっていないので、その点ご容赦ください。
Discussion