Apple Pay を Flutter で実装してみた
はじめに
こんにちは!
株式会社アンドエーアイで Flutter エンジニアをしている Takuya です。
本記事では、Apple Pay を Flutter で実装してみたので、その手順について記載しています。
背景
Apple Pay を使用する案件が今後発生するかもしれないため、その予習としてどのように Flutter で実装できるかを調べていました。
調べると、日本語の記事が少なかったので、今回記事化しました!
必要なツール
-
pay パッケージ
Google が出しているパッケージで、Apple Pay と Google Pay を実装するために必要な API を提供しています。 -
Apple Developer Account
年に 99 USD(約14833円)で入れます。 -
Xcode
Xcode 15.4を使用しました。 -
Flutter
stable チャネルの Flutter 3.24.3 を使用しました。 -
Dart
Dart 3.5.3を使用しました。 -
IDE
VS Code を使用しました。 -
iPhone
iOS Simulator で問題ないですが、実機の方がリアルなので、おすすめです!
手順
プロジェクト作成
以下コマンドで my_first_apple_pay_app という名前のプロジェクトを作成します。
$ flutter create my_apple_pay_app
プロジェクトのディレクトリへ移動し、VS Code を開きます。
$ cd my_apple_pay_app && code .
pay パッケージをインストールします。
$ flutter pub add pay
Apple Pay を Apple Developer Account と XCode で使用するための準備
公式によると、以下の3つの手順を実施する必要があります。
To set up your Apple developer account and Xcode to implement Apple Pay in your apps, you complete three steps:
- Create a merchant identifier.
- Create a Payment Processing certificate.
- Enable Apple Pay in Xcode.
merchant identifier を作成
公式を参考に、まずは merchant identifier を作成します。
merchant identifier とは、以下のことです。
A merchant identifier uniquely identifies you to Apple Pay as a merchant who is able to accept payments. A merchant identifier never expires, and you can use the same one for multiple apps.
簡単にいうと、ユーザがアプリ上で何かを売る時に、Apple Pay で支払いを受け付けるので、それに必要なIDです。
公式の以下のステップを実施します。
A merchant identifier uniquely identifies you to Apple Pay as a merchant who is able to accept payments. A merchant identifier never expires, and you can use the same one for multiple apps.
- In Certificates, Identifiers & Profiles, click Identifiers in the sidebar, then click the add button (+) on the top left.
- Select Merchant IDs, then click Continue.
- Enter the merchant description and identifier name, then click Continue.
- Review the settings, then click Register.
Certificates, Identifiers & Profiles > Identifier > Register a Merchant ID で作成します。

Merchant IDs を選択。
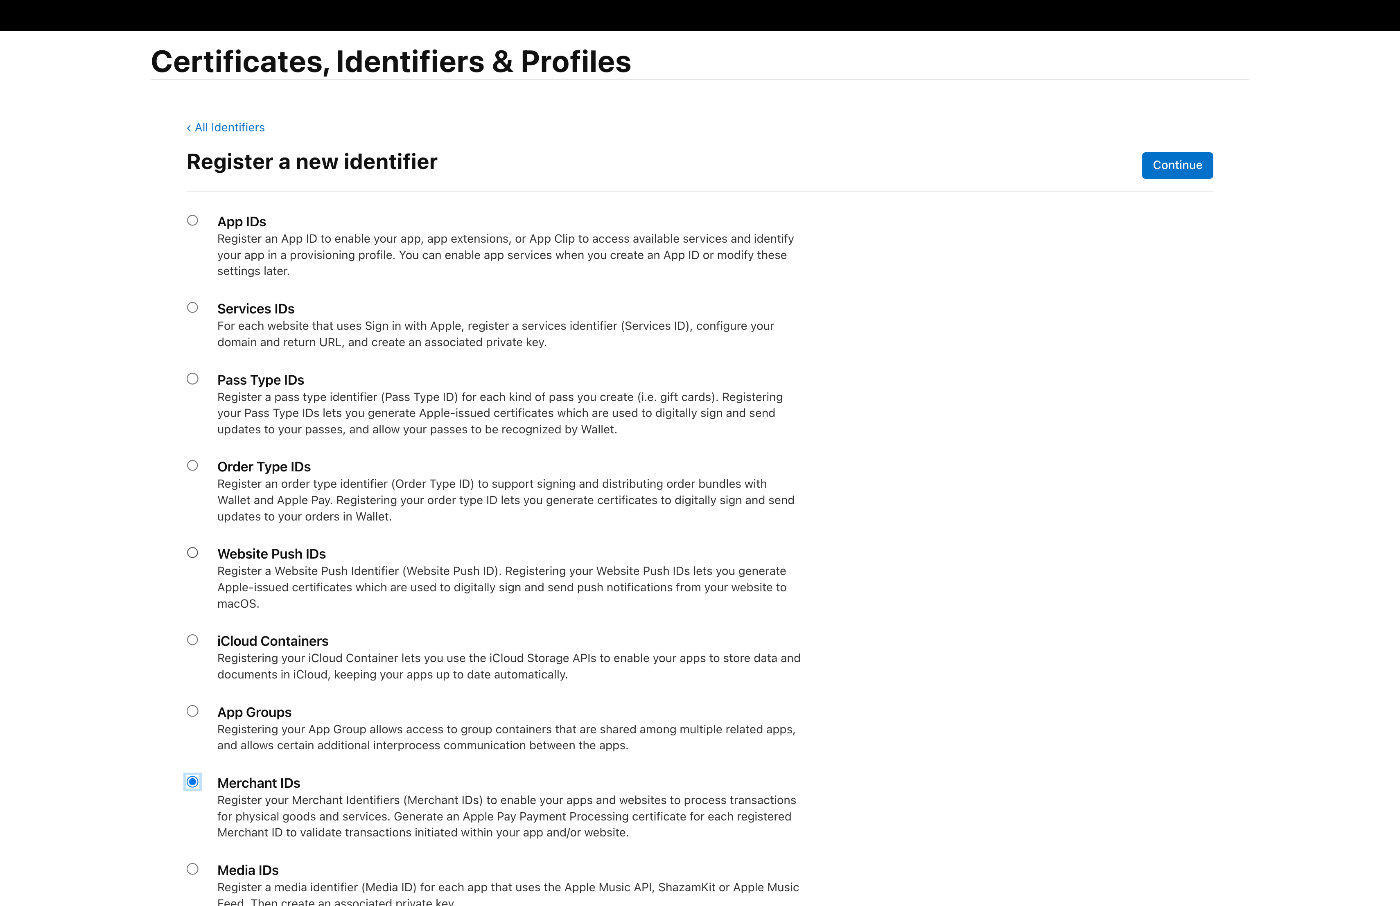
Description と Identifier を入力。

Register します。

作成完了です!

Payment processing certificate を作成
Payment processing certificate を作成します。以下の手順を実施します。
A payment processing certificate is associated with your merchant identifier and used to encrypt payment information. The payment processing certificate expires every 25 months. If the certificate is revoked, you can recreate it.
- In Certificates, Identifiers & Profiles, click Identifiers in the sidebar.
- Under Identifiers, select Merchant IDs using the filter on the top right.
- On the right, select your merchant identifier.
Note: If a banner appears at the top of the page saying that you need to accept an agreement, click the Review Agreement button and follow the instructions before continuing.- Under Apple Pay Payment Processing Certificate, click Create Certificate.
- Create a certificate signing request on your Mac, then click Continue.
- Click Choose File.
- In the dialog that appears, select the certificate request file (a file with a .certSigningRequest file extension), then click Choose.
- Click Continue.
- Click Download.
The certificate file (a file with a .cer file extension) appears in your Downloads folder.
Certificates, Identifiers & Profiles > Identifiers に移動します。

右上のドロップダウンで Merchant IDs を選択します。

Apple Payment Processing はトランザクションデータを暗号化するために、証明書が必要です。証明書を作成します。
Apple Pay servers use the certificate’s public key to encrypt payment data. You (or your payment service provider) use the private key to decrypt the data to process payments.
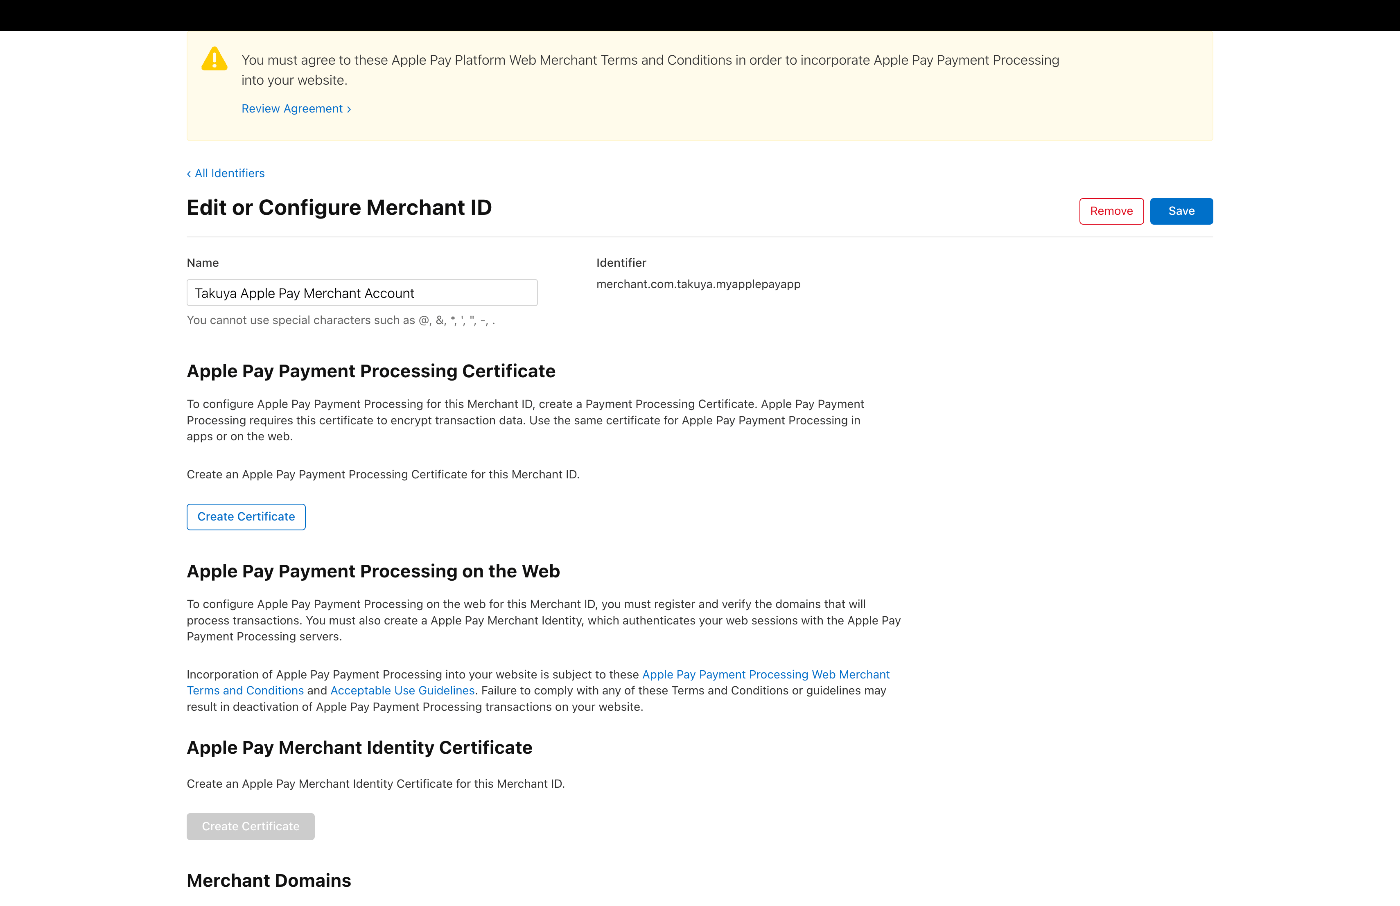
Create Certificate > No を選択 > Continue

公式を参考に Certificate signing request を作成します。
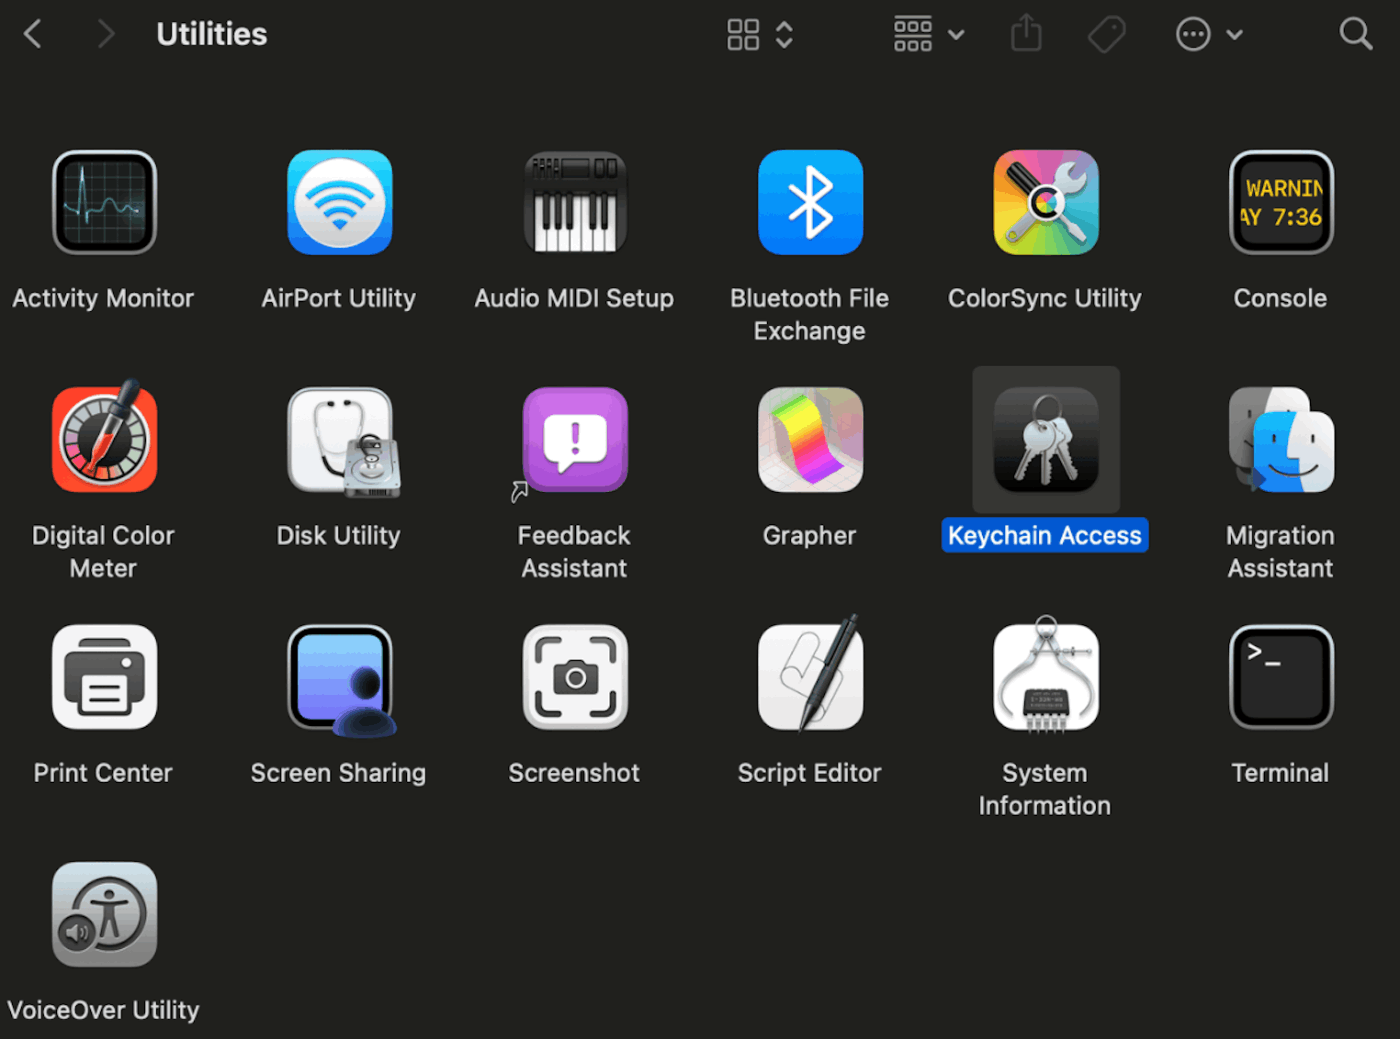
Applications/Utilities/Keychain Access を開きます。
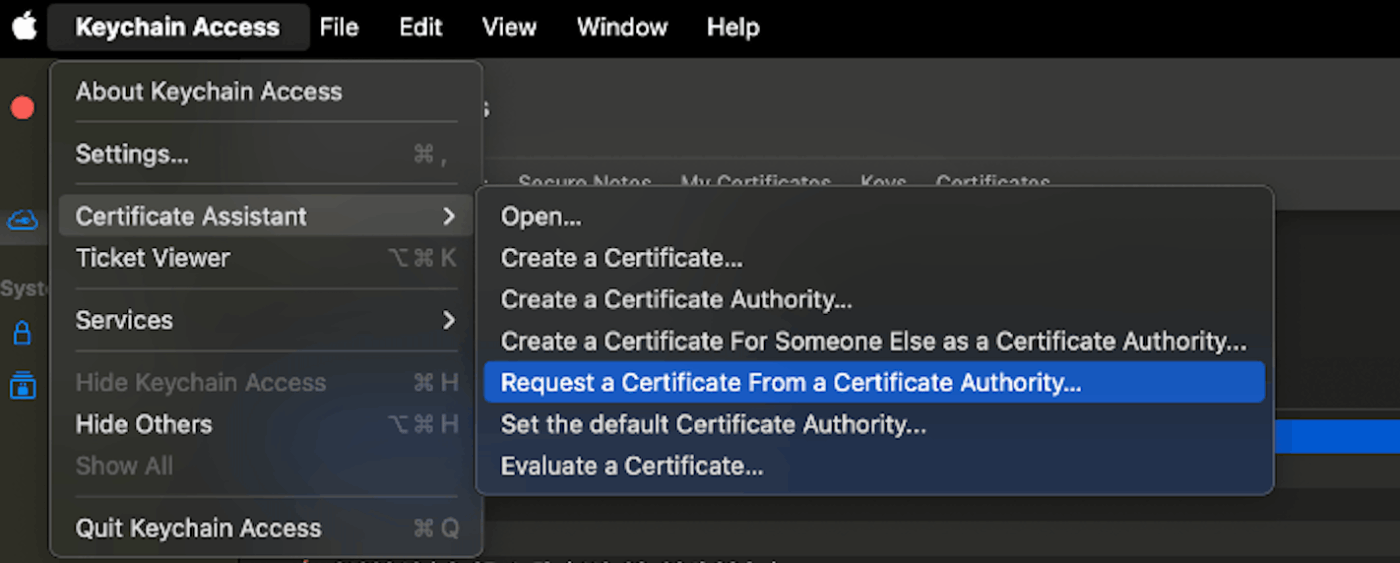
Keychain Access > Certificate Assistant > Request a Certificate from a Certificate Authority
User Email Address、Common Name を入力します。CA Email Addressは空欄でOKです。Saved to diskを選択して、 Continue をクリックします。

Algorithm と Key Size を ECC と 256bits に設定します。

作成したCertificate signing request を選択して Continue

右上からダウンロードします。apple_pay.cer というファイルがダウンロードされますので、完了後に KeyChain の Login に保存しておくいいです。

XCodeでApple Pay capability を許可
次に、XCode で Apple Pay capability を許可します。公式の以下の手順を実施します。
After creating a merchant identifier, enable the Apple Pay capability in your Xcode project.
- Open your project with Xcode. In the Project navigator, select the project.
- Choose the target for the app from either the Project/Targets pop-up menu or in the Targets section of the outline view.
- Click the Signing & Capabilities tab in the project editor.
- In the toolbar, click the Library button (+) to open the Capabilities library and select the Apple Pay capability.
- Within the Apple Pay capability, click the refresh button to synchronize your merchant identifiers from the Apple Developer site.
- Select the merchant identifier to use with this app.
プロジェクトを Xcode で開きます。
$ open ios/Runner.xcodeproj
Debug > ツールバーの右上の+ボタンで Capabilities を開く > Apple Pay を選択します。

Merchant ID を選択します。

これで下準備完了です。あとはコードを書いていきます。
コード実装
root 直下に assets/default_apple_pay_config.json 作成し、以下記載します。こちらのコードは pay パッケージから出ているサンプルを参考にしています。
merchantIdentifier と displayName は変更してください。
{
  "provider": "apple_pay",
  "data": {
    "merchantIdentifier": "merchant.com.takuya.myapplepayapp", // 作成したMerchantIDを入力
    "displayName": "Takuya's Product",
    "merchantCapabilities": ["3DS", "debit", "credit"],
    "supportedNetworks": ["amex", "visa", "discover", "masterCard"],
    "countryCode": "US",
    "currencyCode": "USD",
    "requiredBillingContactFields": [
      "emailAddress",
      "name",
      "phoneNumber",
      "postalAddress"
    ],
    "requiredShippingContactFields": [],
    "shippingMethods": [
      {
        "amount": "0.00",
        "detail": "Available within an hour",
        "identifier": "in_store_pickup",
        "label": "In-Store Pickup"
      },
      {
        "amount": "4.99",
        "detail": "5-8 Business Days",
        "identifier": "flat_rate_shipping_id_2",
        "label": "UPS Ground"
      },
      {
        "amount": "29.99",
        "detail": "1-3 Business Days",
        "identifier": "flat_rate_shipping_id_1",
        "label": "FedEx Priority Mail"
      }
    ]
  }
}
pubspec.yaml にassetsを加えます。
flutter:
  assets:
    - assets/
また、main.dart は以下のようにします。
import 'package:flutter/material.dart';
import 'package:pay/pay.dart';
void main() {
runApp(const MyApp());
}
class MyApp extends StatelessWidget {
const MyApp({super.key});
Widget build(BuildContext context) {
return MaterialApp(
title: 'Flutter Demo',
theme: ThemeData(
colorScheme: ColorScheme.fromSeed(seedColor: Colors.deepPurple),
useMaterial3: true,
),
home: const MyHomePage(),
);
}
}
// これが支払い内容として表示される
const _paymentItems = [
PaymentItem(
label: 'Total',
amount: '99.99',
status: PaymentItemStatus.final_price,
)
];
// default_apple_pay_config.jsonと同じ
const String defaultApplePay = '''{
"provider": "apple_pay",
"data": {
"merchantIdentifier": "merchant.com.takuya.myapplepayapp",
"displayName": "Takuya's Product",
"merchantCapabilities": ["3DS", "debit", "credit"],
"supportedNetworks": ["amex", "visa", "discover", "masterCard"],
"countryCode": "US",
"currencyCode": "USD",
"requiredBillingContactFields": ["emailAddress", "name", "phoneNumber", "postalAddress"],
"requiredShippingContactFields": [],
"shippingMethods": [
{
"amount": "0.00",
"detail": "Available within an hour",
"identifier": "in_store_pickup",
"label": "In-Store Pickup"
},
{
"amount": "4.99",
"detail": "5-8 Business Days",
"identifier": "flat_rate_shipping_id_2",
"label": "UPS Ground"
},
{
"amount": "29.99",
"detail": "1-3 Business Days",
"identifier": "flat_rate_shipping_id_1",
"label": "FedEx Priority Mail"
}
]
}
}''';
class MyHomePage extends StatelessWidget {
const MyHomePage({super.key});
Widget build(BuildContext context) {
return Scaffold(
appBar: AppBar(
title: const Text('Apple Pay Example'),
),
body: Center(
child: Column(
mainAxisAlignment: MainAxisAlignment.center,
children: [
ApplePayButton(
paymentConfiguration:
PaymentConfiguration.fromJsonString(defaultApplePay),
paymentItems: _paymentItems,
style: ApplePayButtonStyle.black,
type: ApplePayButtonType.buy,
margin: const EdgeInsets.only(top: 15.0),
loadingIndicator: const Center(
child: CircularProgressIndicator(),
),
),
],
),
),
);
}
}
Sandbox テスターアカウントを追加
実際のデバイスでテストカードを使用するには、Apple Developer にテスターアカウントを追加します。
こちらを参考に実施します。
ちなみに Sandbox とは、Apple Pay をテスト用のクレジット/デビットカードでテストするための環境のことです。
The Apple Pay sandbox environment allows merchants and developers to test their implementation of Apple Pay with test credit and debit cards. Currently the sandbox supports Apple Pay testing for:
Apple Pay を Sandbox でテストするためには、以下が必要です。
You’ll need the following to test Apple Pay in the sandbox:
- iPhone 6 or later, iPad mini 3 or later, iPad Air 2, iPad Pro, or Apple Watch
- App Store Connect sandbox tester account
- Supported test credentials
こちらを参考に、テストアカウントを作成します。
To create a sandbox tester account, follow these steps:
- Sign in to App Store Connect.
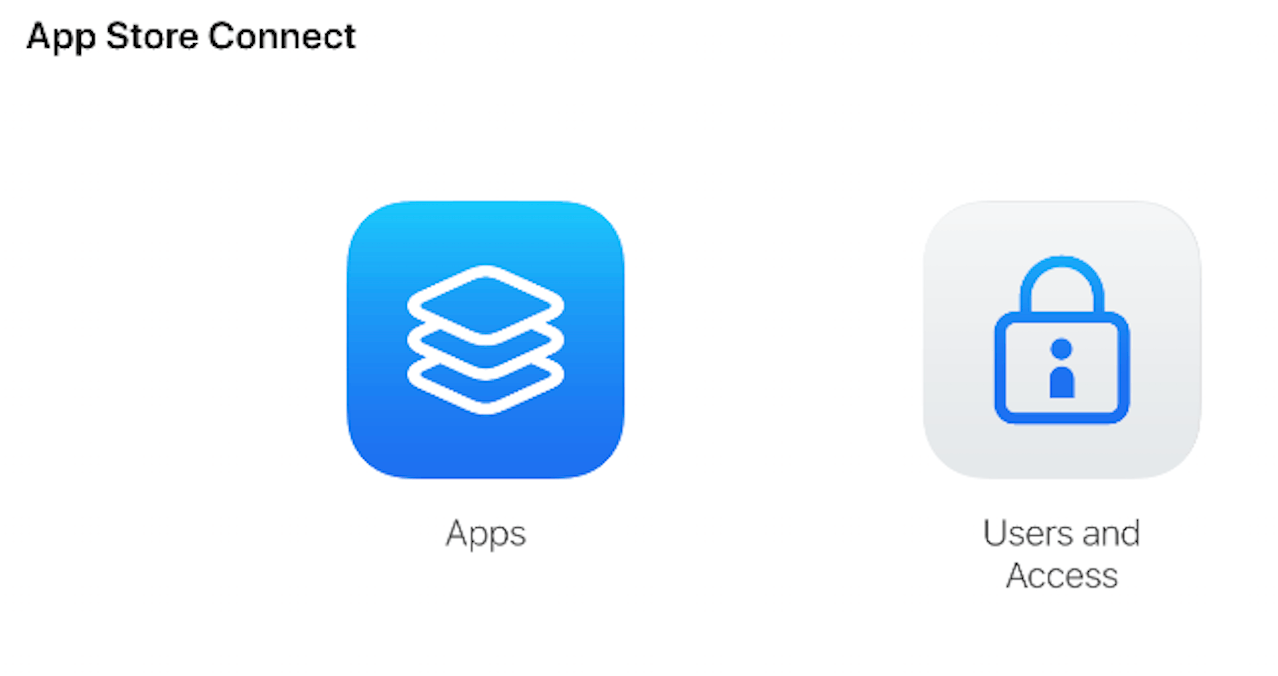
- On the homepage, click Users and Access.
- Under Sandbox, click Testers.
- Click “+” to set up your tester accounts.
- Complete the tester information form and click Invite.
- Sign out of your Apple ID on all testing devices and sign back in with your new sandbox tester account.
App Store Connect へログインし、Users and Access をクリック
Sandbox > Add Test Accounts

Password と Region を入力し、作成する。

実機 iPhone での下準備
iPhone 上で、iCloud からサインアウトし、作成したテストアカウントでログインします。
こちらを参考に下記のテスト用クレジットカードをApple Payへ追加します。
3717 377570 42005
Expiration Date: Any
CID: 1111
後述つまずいた点でもあるように、以下をUSに設定します。
- 実機の Region を US にする。
- Shipping Address を US にする。
これで準備完了です!
iPhone 実機もしくは iOS Simulator でビルドする
実機ビルドはこちらを参考にしてください。
結果
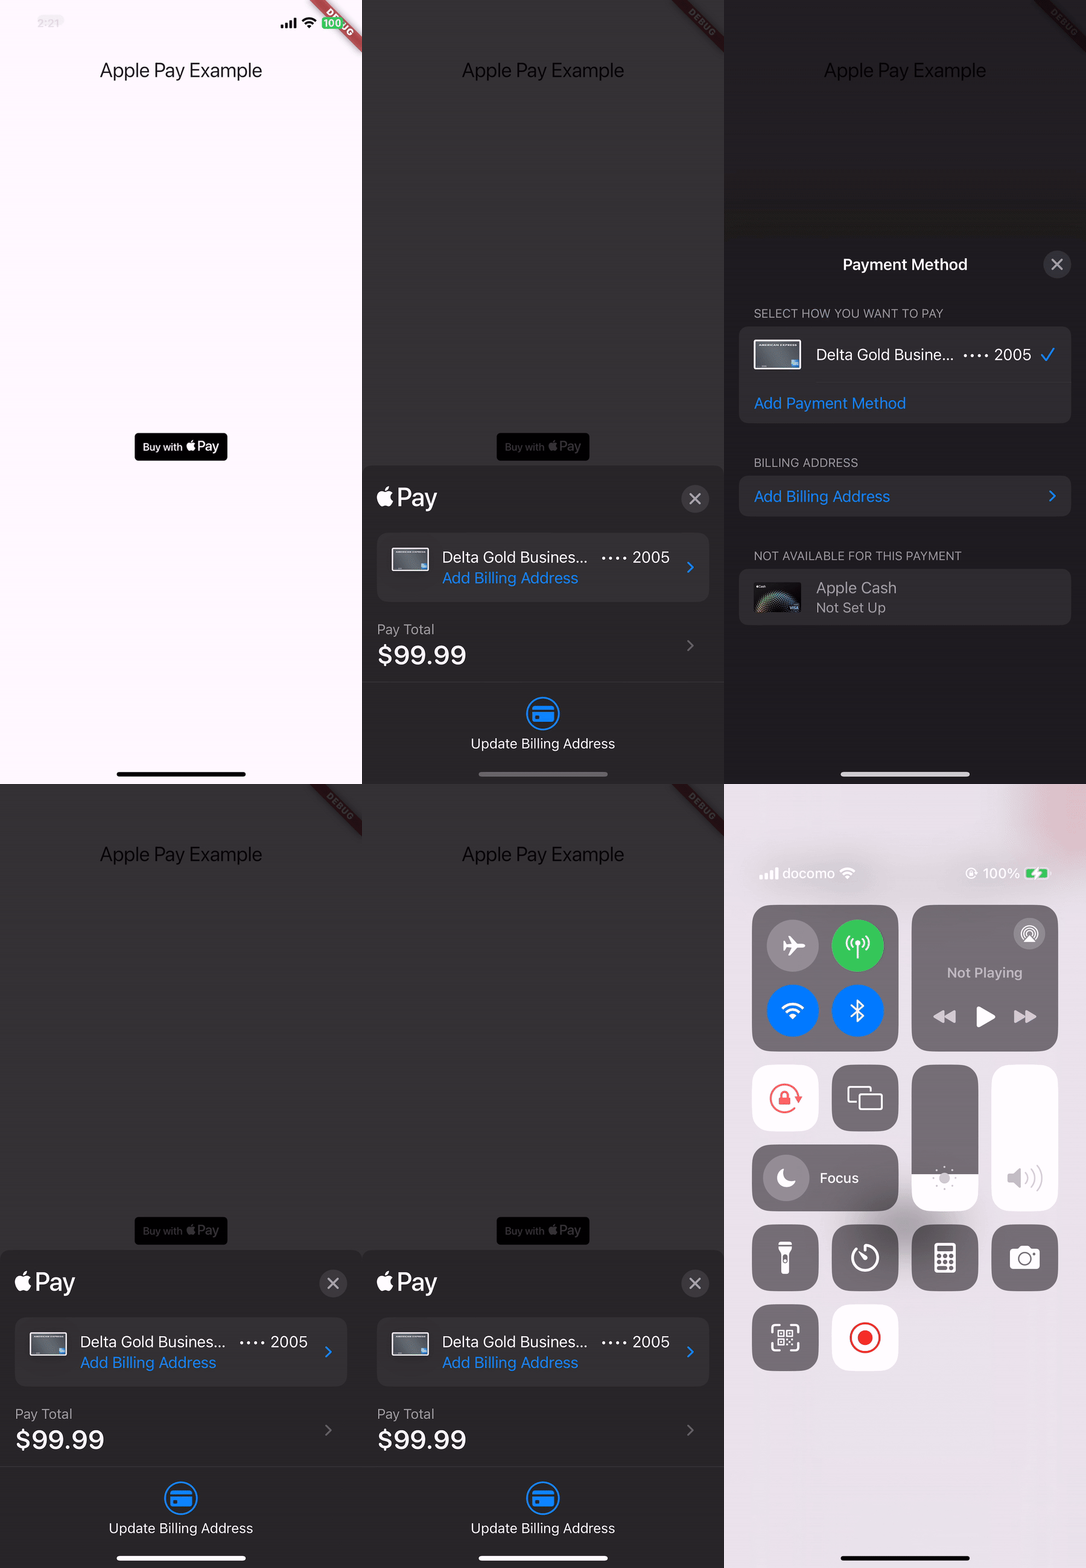
無事実機でうまく動きました!
つまずいた点
iOS Simulator では ApplePayButton が表示されるが、実機では表示されないという事象が発生したので、こちらのStackOverflowの手順を実施したところ解消しました。
要するに、ロケーションを全て US に設定した方が良いということなので、それができていればOKです。最後まで手順を踏んでいれば、全て US で設定できてるはずです。
PR
アンドエーアイでは事業拡大のため、即戦力エンジニアを募集中!Flutterだけでなく、インフラ、Web、ネイティブ開発などの知識を持つ方も歓迎します。最新技術を追い、チームに積極的に貢献できる方をお待ちしています!
採用ページ
エンジニア採用ページ
参考
Discussion
👏