【Nginx】Pixiの仮想環境とNginx【conda-forge】
Pixi Web
こういったものは往々にして、「
これもその類かと思いきや、なんと本当に
0. Pixi
pixiコマンドが使えるようになります。
curl -fsSL https://pixi.sh/install.sh | sh
# curlが使えない場合:
wget -qO- https://pixi.sh/install.sh | sh
1.
pixi init nginx_sample
nginx_sampleというフォルダーと、その中にpixi.tomlというファイルが作られます。
$ ls nginx_sample/
pixi.toml
[workspace]
channels = ["conda-forge"]
name = "nginx_sample"
platforms = ["linux-64"]
version = "0.1.0"

[tasks]

[dependencies]
本記事の最終的な形
[workspace]
channels = ["conda-forge"]
name = "nginx_sample"
platforms = ["linux-64"]
version = "0.1.0"

[tasks]
version = "nginx -version"

start = "nginx"
stop = "nginx -s stop"
reload = "nginx -s reload"
test = "nginx -t"

init = [
    { task = "envsubst_default_site" },
    { task = "copy_nginx_conf" }
]

# envsubst_default_site = { cmd = "bash -c 'envsubst < nginx/sites.d/default-site.conf.template > .pixi/envs/default/etc/nginx/sites.d/default-site.conf'", inputs = ["nginx/sites.d/default-site.conf.template"], outputs = [".pixi/envs/default/etc/nginx/sites.d/default-site.conf"] }
[tasks.envsubst_default_site]
cmd = "bash -c 'envsubst < nginx/sites.d/default-site.conf.template > .pixi/envs/default/etc/nginx/sites.d/default-site.conf'"
inputs = ["nginx/sites.d/default-site.conf.template"]
outputs = [".pixi/envs/default/etc/nginx/sites.d/default-site.conf"]

[tasks.copy_nginx_conf]
cmd = "cp nginx/nginx.conf .pixi/envs/default/etc/nginx/nginx.conf"
inputs = ["nginx/nginx.conf"]
outputs = [".pixi/envs/default/etc/nginx/nginx.conf"]

[dependencies]
nginx = ">=1.25.3,<2"
2. Nginx
pixi addコマンドでインストールできます。
$ pixi add nginx
✔ Added nginx >=1.25.3,<2
これでpixi.tomlが更新されます。
︙

[dependencies]
nginx = ">=1.25.3,<2"
簡単な確認
バージョンを表示することで、簡単に動作確認をしてみましょう。
$ pixi run nginx -version
nginx version: nginx/1.25.3
これは次のようにすることと同じです。
$ pixi shell

(nginx_sample) $ nginx -version
nginx version: nginx/1.25.3
タスクについて
pixi run nginx -versionと入力するのは手間なので、これを
︙

[tasks]
version = "nginx -version"

[dependencies]
nginx = ">=1.25.3,<2"
これで、バージョン確認が次のコマンドで出来るようになります。
$ pixi run version
✨ Pixi task (version): nginx -version
nginx version: nginx/1.25.3
これだけでは大した役に立ちませんが、後で起動や停止などに使います。
3. Web
systemctl start nginxがよく使われますが、ここではsystemctlではなくnginxというコマンドを使います。
現時点での起動と停止について
初期状態の設定では、デーモン化がCtrl + Cで停止できるようになっています。
$ cat .pixi/envs/default/etc/nginx/nginx.conf | grep daemon
# Bear in mind that non-stop upgrade is not an option with "daemon off".
daemon off;
nginxコマンドを実行すると、何も表示されないままになります。
$ pixi run nginx
これでhttp://localhost:8080またはhttp://127.0.0.1:8080(ポート番号については後述)でテストページが表示されます。

テストページ(拡大率:
Ctrl + Cで停止します。
4. nginx.conf
nginx.confという設定ファイルで行います。通常の位置は/etc/nginx/nginx.confあたりでしょう。etcフォルダーはシステムに関する情報が格納される場所です。etcフォルダー内にnginxフォルダーが作られ、設定などの情報が格納されます。
しかし今、etcフォルダーには何も追加されません。
Pixi etcフォルダー
そもそも、仮想環境はnginx_sample/.pixi/envs/以下に作られています。
$ ls .pixi/envs/
default
今回はdefaultという仮想環境のみ存在しています。このdefault以下を見ると、etcフォルダーが存在します。
$ ls .pixi/envs/default/
bin  cmake  conda-meta  etc  fonts  include  lib  man  sbin  share  ssl  var
この中にnginxフォルダーがありますから、設定ファイルもその中に存在します。
$ ls .pixi/envs/default/etc/nginx/
default-site  fastcgi.conf  fastcgi_params  koi-utf  koi-win  mime.types  nginx.conf  nginx.conf.default  scgi_params  sites.d  uwsgi_params  win-utf
$ ls .pixi/envs/default/etc/nginx/ | grep nginx.conf
nginx.conf
nginx.conf.default
nginx.confとnginx.conf.defaultとがありますが、それぞれ大きく内容が異なります。
各ファイル全容
# nginx Configuration File
# https://www.nginx.com/resources/wiki/start/topics/examples/full/
# http://nginx.org/en/docs/dirindex.html
# https://www.nginx.com/resources/wiki/start/

# Run as a unique, less privileged user for security.
# user nginx www-data;  ## Default: nobody

# If using supervisord init system, do not run in deamon mode.
# Bear in mind that non-stop upgrade is not an option with "daemon off".
daemon off;

# Sets the worker threads to the number of CPU cores available in the system
# for best performance.
# Should be > the number of CPU cores.
# Maximum number of connections = worker_processes * worker_connections
worker_processes auto;  ## Default: 1

# Maximum number of open files per worker process.
# Should be > worker_connections.
# http://blog.martinfjordvald.com/2011/04/optimizing-nginx-for-high-traffic-loads/
# http://stackoverflow.com/a/8217856/2127762
# Each connection needs a filehandle (or 2 if you are proxying).
worker_rlimit_nofile 8192;

events {
  # If you need more connections than this, you start optimizing your OS.
  # That's probably the point at which you hire people who are smarter than
  # you as this is *a lot* of requests.
  # Should be < worker_rlimit_nofile.
  worker_connections 8000;
}

# Log errors and warnings to this file
# This is only used when you don't override it on a server{} level
#error_log  logs/error.log  notice;
#error_log  logs/error.log  info;
error_log  var/log/nginx/error.log warn;

# The file storing the process ID of the main process
pid var/run/nginx.pid;


http {
  # Log access to this file
  # This is only used when you don't override it on a server{} level
  access_log var/log/nginx/access.log;

  # Hide nginx version information.
  server_tokens off;

  # Controls the maximum length of a virtual host entry (ie the length
  # of the domain name).
  server_names_hash_bucket_size 64;

  # Specify MIME types for files.
  include mime.types;
  default_type application/octet-stream;

  # How long to allow each connection to stay idle.
  # Longer values are better for each individual client, particularly for SSL,
  # but means that worker connections are tied up longer.
  keepalive_timeout 20s;

  # Speed up file transfers by using sendfile() to copy directly
  # between descriptors rather than using read()/write().
  # For performance reasons, on FreeBSD systems w/ ZFS
  # this option should be disabled as ZFS's ARC caches
  # frequently used files in RAM by default.
  sendfile on;

  # Don't send out partial frames; this increases throughput
  # since TCP frames are filled up before being sent out.
  tcp_nopush on;

  # Enable gzip compression.
  gzip on;

  # Compression level (1-9).
  # 5 is a perfect compromise between size and CPU usage, offering about
  # 75% reduction for most ASCII files (almost identical to level 9).
  gzip_comp_level 5;

  # Don't compress anything that's already small and unlikely to shrink much
  # if at all (the default is 20 bytes, which is bad as that usually leads to
  # larger files after gzipping).
  gzip_min_length 256;

  # Compress data even for clients that are connecting to us via proxies,
  # identified by the "Via" header (required for CloudFront).
  gzip_proxied any;

  # Tell proxies to cache both the gzipped and regular version of a resource
  # whenever the client's Accept-Encoding capabilities header varies;
  # Avoids the issue where a non-gzip capable client (which is extremely rare
  # today) would display gibberish if their proxy gave them the gzipped version.
  gzip_vary on;

  # Compress all output labeled with one of the following MIME-types.
  gzip_types
    application/atom+xml
    application/javascript
    application/json
    application/ld+json
    application/manifest+json
    application/rss+xml
    application/vnd.geo+json
    application/vnd.ms-fontobject
    application/x-font-ttf
    application/x-web-app-manifest+json
    application/xhtml+xml
    application/xml
    font/opentype
    image/bmp
    image/svg+xml
    image/x-icon
    text/cache-manifest
    text/css
    text/plain
    text/vcard
    text/vnd.rim.location.xloc
    text/vtt
    text/x-component
    text/x-cross-domain-policy;
  # text/html is always compressed by gzip module

  # This should be turned on if you are going to have pre-compressed copies (.gz) of
  # static files available. If not it should be left off as it will cause extra I/O
  # for the check. It is best if you enable this in a location{} block for
  # a specific directory, or on an individual server{} level.
  # gzip_static on;

  include sites.d/*.conf;

}
#user  nobody;
worker_processes  1;

#error_log  logs/error.log;
#error_log  logs/error.log  notice;
#error_log  logs/error.log  info;

#pid        logs/nginx.pid;


events {
    worker_connections  1024;
}


http {
    include       mime.types;
    default_type  application/octet-stream;

    #log_format  main  '$remote_addr - $remote_user [$time_local] "$request" '
    #                  '$status $body_bytes_sent "$http_referer" '
    #                  '"$http_user_agent" "$http_x_forwarded_for"';

    #access_log  logs/access.log  main;

    sendfile        on;
    #tcp_nopush     on;

    #keepalive_timeout  0;
    keepalive_timeout  65;

    #gzip  on;

    server {
        listen       80;
        server_name  localhost;

        #charset koi8-r;

        #access_log  logs/host.access.log  main;

        location / {
            root   html;
            index  index.html index.htm;
        }

        #error_page  404              /404.html;

        # redirect server error pages to the static page /50x.html
        #
        error_page   500 502 503 504  /50x.html;
        location = /50x.html {
            root   html;
        }

        # proxy the PHP scripts to Apache listening on 127.0.0.1:80
        #
        #location ~ \.php$ {
        #    proxy_pass   http://127.0.0.1;
        #}

        # pass the PHP scripts to FastCGI server listening on 127.0.0.1:9000
        #
        #location ~ \.php$ {
        #    root           html;
        #    fastcgi_pass   127.0.0.1:9000;
        #    fastcgi_index  index.php;
        #    fastcgi_param  SCRIPT_FILENAME  /scripts$fastcgi_script_name;
        #    include        fastcgi_params;
        #}

        # deny access to .htaccess files, if Apache's document root
        # concurs with nginx's one
        #
        #location ~ /\.ht {
        #    deny  all;
        #}
    }


    # another virtual host using mix of IP-, name-, and port-based configuration
    #
    #server {
    #    listen       8000;
    #    listen       somename:8080;
    #    server_name  somename  alias  another.alias;

    #    location / {
    #        root   html;
    #        index  index.html index.htm;
    #    }
    #}


    # HTTPS server
    #
    #server {
    #    listen       443 ssl;
    #    server_name  localhost;

    #    ssl_certificate      cert.pem;
    #    ssl_certificate_key  cert.key;

    #    ssl_session_cache    shared:SSL:1m;
    #    ssl_session_timeout  5m;

    #    ssl_ciphers  HIGH:!aNULL:!MD5;
    #    ssl_prefer_server_ciphers  on;

    #    location / {
    #        root   html;
    #        index  index.html index.htm;
    #    }
    #}

}
従って初期設定を残しておくには、nginx.conf.defaultではなくnginx.confのコピーを取っておかなければなりません。
仮想環境とlogファイル
設定ファイルがあるように、ログファイルも仮想環境に存在します。通常の位置が/var/log/nginx/であるのと同じように、仮想環境での位置は.pixi/envs/default/var/log/nginx/です。
$ ls .pixi/envs/default/var/log/nginx/
access.log  error.log
基本的な設定内容の確認
本記事ではごく基本的な内容に絞って、設定を確認、編集します。まずはどのような設定になっているか、現状を把握しましょう。
daemonは当初offになっています。Ctrl + Cで停止できたのはこのためです。
daemon off;
裏を返せば、daemonをonにすると、Ctrl + Cで停止できなくなります。Ctrl + Cの操作一つで停止されては困るため、こちらの方があるべき姿とも言えます。
daemon on;
includeを使うことがあります。includeを使います。
http {
︙
  include sites.d/*.conf;
}
sites.d/*.confは、sites.dフォルダーにあって.confの付く全てのファイルを指します。sites.dフォルダーがどこにあるかと言えば、.pixi/envs/default/etc/nginx/sites.d/です。
$ ls .pixi/envs/default/etc/nginx/sites.d/
default-site.conf
よって、ここにあるdefault-site.confの内容も設定に含まれていることがわかります。
default-site.conf全容
server {
    listen       8080;
    server_name  localhost;

    location / {
        root   etc/nginx/default-site/;
        index  index.html index.htm;
    }

    #error_page  404              /404.html;

    # redirect server error pages to the static page /50x.html
    error_page   500 502 503 504  /50x.html;
    location = /50x.html {
        root   etc/nginx/default-site/;
    }
}
今、二つのファイルは次の関係にあります。
http {
︙
  include sites.d/*.conf;
}
server {
    listen       8080;
    server_name  localhost;

    location / {
        root   etc/nginx/default-site/;
        index  index.html index.htm;
    }
︙
}
includeを使わない場合、次のように書かれます。その場に展開されることに注意。
http {
︙
  server {
    listen       8080;
    server_name  localhost;

    location / {
        root   etc/nginx/default-site/;
        index  index.html index.htm;
    }
  ︙
  }
}
listenには、接続を受け付ける
server {
    listen       8080;
︙
}
http://localhost:8080で接続していたのは、この設定によるものです。listen 8000;とすれば、http://localhost:8000で接続されるようになります。
locationには、
server {
︙
    location / {
        root   etc/nginx/default-site/;
        index  index.html index.htm;
    }
︙
}
location /とあるのは、http://localhost:8000で「.pixi/envs/default/etc/nginx/default-site/」の中にあるindex.htmlが表示されるようになっています。
$ ls .pixi/envs/default/etc/nginx/default-site
50x.html  index.html
仮に、.pixi/envs/default/etc/nginx/default-site/の配下にtest1というフォルダーを、その中に異なるindex.htmlを作ります。
$ ls .pixi/envs/default/etc/nginx/default-site
50x.html  index.html  test1
$ ls .pixi/envs/default/etc/nginx/default-site/test1/
index.html
test1/index.html
<!DOCTYPE html>
<html>
<head>
    <title>test1</title>
    <style>
    html { color-scheme: light dark; }
    body { width: 35em; margin: 0 auto;
    font-family: Tahoma, Verdana, Arial, sans-serif; }
    </style>
</head>
<body>
    <h1>test1</h1>
</body>
</html>
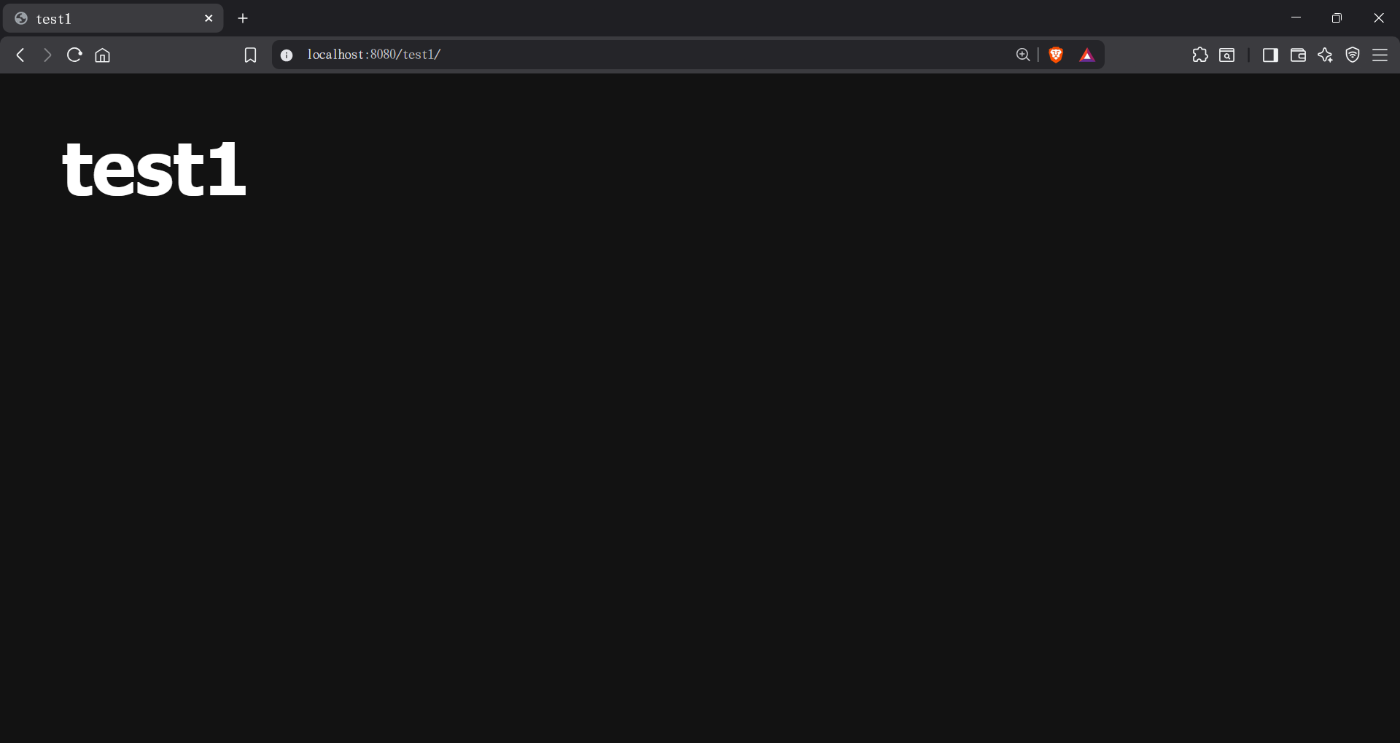
http://localhost:8080/test1/で、test1/index.htmlが表示されるようになります。
5. Nginx
nginx.confの内容のうち、daemonの項目を変更します。
daemon on;
これにより、Ctrl + Cで停めることは出来なくなりました。ここで、開始や停止のような制御など、主要なコマンドをタスクとしてpixi.tomlに登録します。
[tasks]
start = "nginx"
stop = "nginx -s stop"
reload = "nginx -s reload"
test = "nginx -t"
startとstopはそのまま開始と停止です。
reloadは、設定の変更を適用するための操作であり、これを行わなければ、設定ファイルを修正しても意味がありません。
testは設定ファイルの記述を確かめ、間違いがあれば当該箇所が表示されるというものです。
6.
server {
︙
    location / {
        root   etc/nginx/default-site/;
        index  index.html index.htm;
    }
︙
}
設定には、etc/nginx/default-site/とあります。先述しているように、これは仮想環境内の.pixi/envs/default/etc/nginx/default-site/を指し、仮想環境外の、実際の環境とも言うべき/etc配下を示すのではありません。
$ cd /etc/nginx
-bash: cd: /etc/nginx: No such file or directory
仮想環境の外を考える意義
全ての
なんとなれば、この仮想環境は次のコマンドで容易く滅亡するのです。
$ pixi clean
  removed /⋯/nginx_sample/.pixi/envs
$ ls -a .pixi/
.  ..  .condapackageignore  .gitignore
もう一度
$ pixi run nginx
しかし、先ほど仮に作ったtest1/index.htmlは既に失われており、現存しません。
$ ls .pixi/envs/default/etc/nginx/default-site/
50x.html  index.html
つまり「消えては困るので」、仮想環境の外に
仮想環境の外を指すには
仮想環境の外は、単に「絶対パス」で指すことができます。
まずは単純に、仮想環境外の
$ ls
pixi.lock  pixi.toml  workspace.html
nginx_sample/workspace.html
<!DOCTYPE html>
<html>
<head>
    <title>workspace</title>
    <style>
    html { color-scheme: light dark; }
    body { width: 35em; margin: 0 auto;
    font-family: Tahoma, Verdana, Arial, sans-serif; }
    </style>
</head>
<body>
    <h1>workspace</h1>
</body>
</html>
次に、これを設定ファイルで指示します。ここでは簡単のため、先の設定ファイルdefault-site.confに上書きします。
server {
︙
    location / {
        root   etc/nginx/default-site/;
        index  index.html index.htm;
    }
    location /workspace/ {
        alias  /⋯/nginx_sample/;
        index  workspace.html;
    }
︙
}
rootとalias
root /⋯/nginx_sample/;とすると、http://localhost:8080/workspace/という/⋯/nginx_sample/workspace/というフォルダーを指してしまいます。
alias /⋯/nginx_sample/;とすれば、http://localhost:8080/workspace/という/⋯/nginx_sample/を指すようになります。
aliasに書くパスは、次のように確認できます。但し、/⋯/nginx_sampleではなく/⋯/nginx_sample/としておきましょう。
$ pixi shell-hook | grep ROOT
export PIXI_PROJECT_ROOT=/⋯/nginx_sample

設定ファイルも消えては困る
ここでもう一度pixi cleanとすると、今設定した内容も失われます。事ある毎に初期化されては困るので、設定ファイルも仮想環境外に保持しておきましょう。
本記事では二つのファイル以外扱っていないので、その二つのみ、ワークスペースに置いておきます。
$ ls nginx/
nginx.conf  sites.d
$ ls nginx/sites.d/
default-site.conf.template
7.
ところで先の設定に於いて、絶対パスを調べる方法としてこのようなものに触れました。
$ pixi shell-hook | grep ROOT
export PIXI_PROJECT_ROOT=/⋯/nginx_sample
pixi shell-hookは、
$ pixi shell-hook | grep PROJECT
export PIXI_PROJECT_ROOT=/⋯/nginx_sample
export PIXI_PROJECT_VERSION=0.1.0
export PIXI_PROJECT_NAME=nginx_sample
export PIXI_PROJECT_MANIFEST=/⋯/nginx_sample/pixi.toml
先ほどはPIXI_PROJECT_ROOTを基に、ワークスペースの絶対パスを調べたのでした。
設定ファイルには環境変数を使いたい
環境変数PIXI_PROJECT_ROOTに絶対パスの情報が入っているということは、わざわざ設定ファイルに書かずとも、この環境変数を使えば済むと考えられます。移植性と秘匿性が高まるため、寧ろ絶対パスを直接書くようなことは避けたいものです。
しかしenvsubstコマンドを使って、「設定ファイルを出力する」方法が使われているとのことです。
envsubst
envsubstコマンドは、次のように環境変数をその値で置換するものです。
$ pixi shell
(nginx_sample) $ cat texts/env_platforms.txt
platforms: $PIXI_ENVIRONMENT_PLATFORMS
(nginx_sample) $ envsubst '$$PIXI_ENVIRONMENT_PLATFORMS' < texts/env_platforms.txt
platforms: linux-64
(nginx_sample) $ envsubst < texts/env_platforms.txt
platforms: linux-64

(nginx_sample) $ cat texts/env_environments.txt
environment name: $PIXI_ENVIRONMENT_NAME
(nginx_sample) $ envsubst '$$PIXI_ENVIRONMENT_NAME' < texts/env_environments.txt
environment name: default
(nginx_sample) $ envsubst < texts/env_environments.txt
environment name: default
これだけでは、置換結果が表示されるだけです。次にこの結果をファイルに出力します。
(nginx_sample) $ envsubst '$$PIXI_ENVIRONMENT_PLATFORMS' < texts/env_platforms.txt > texts/env_platforms_out.txt
(nginx_sample) $ cat texts/env_platforms_out.txt
platforms: linux-64
これを設定ファイルに応用することで、設定ファイルに環境変数を使用することができるようになります。しかし、都度これを入力するのでは面倒です。そこで、
Pixi
[tasks]
envsubst_error = "envsubst < texts/env_platforms.txt > texts/env_platforms_out.txt"
先のコマンドをそのままタスクとして登録しましたが、これではエラーになります。
$ ixi run envsubst_error
✨ Pixi task (envsubst_error in default): envsubst < texts/env_platforms.txt > texts/env_platforms_out.txt
Error:   × failed to parse shell script. Task: 'envsubst < texts/env_platforms.txt > texts/env_platforms_out.txt '
  ╰─▶ Multiple redirects are currently not supported.
        < texts/env_platforms.txt > texts/env_platforms_out.txt
        ~
原因はMultiple redirects are currently not supported.とある通り、リダイレクト(<や>)を複数使うことができないのです。今できたことがタスクにするとできなくなるのは、deno_task_shellを使っているためと思われます。
そこで、bashなど、他のシェルを使います。
[tasks]
envsubst_bash = 'bash -c "envsubst < texts/env_platforms.txt > texts/env_platforms_out.txt"'
$ pixi run envsubst_bash
✨ Pixi task (envsubst_bash): bash -c "envsubst < texts/env_platforms.txt > texts/env_platforms_out.txt"
$ cat texts/env_platforms_out.txt
platforms: linux-64
テンプレートから設定ファイルへ
環境変数の置換の仕方が分かったので、設定ファイルに応用します。default-site.conf.templateというテンプレートファイルを作りました。
$ cat nginx/sites.d/default-site.conf.template
server {
    listen       8080;
    server_name  localhost;

    location / {
        root   etc/nginx/default-site/;
        index  index.html index.htm;
    }
    location /workspace/ {
        alias  $PIXI_PROJECT_ROOT/;
        index  workspace.html;
    }

    #error_page  404              /404.html;

    # redirect server error pages to the static page /50x.html
    error_page   500 502 503 504  /50x.html;
    location = /50x.html {
        root   etc/nginx/default-site/;
    }
}
この環境変数を置換し、設定ファイルとして出力するタスクを登録します。書き方が異なりますが、コメントになっている長いものと同じ意味です。
# envsubst_default_site = { cmd = "bash -c 'envsubst < nginx/sites.d/default-site.conf.template > .pixi/envs/default/etc/nginx/sites.d/default-site.conf'", inputs = ["nginx/sites.d/default-site.conf.template"], outputs = [".pixi/envs/default/etc/nginx/sites.d/default-site.conf"] }
[tasks.envsubst_default_site]
cmd = "bash -c 'envsubst < nginx/sites.d/default-site.conf.template > .pixi/envs/default/etc/nginx/sites.d/default-site.conf'"
inputs = ["nginx/sites.d/default-site.conf.template"]
outputs = [".pixi/envs/default/etc/nginx/sites.d/default-site.conf"]
ついでに
もう一つの設定ファイルnginx.confも、仮想環境にコピーするようにしましょう。
[tasks.copy_nginx_conf]
cmd = "cp nginx/nginx.conf .pixi/envs/default/etc/nginx/nginx.conf"
inputs = ["nginx/nginx.conf"]
outputs = [".pixi/envs/default/etc/nginx/nginx.conf"]
そして、これら設定を適用するタスクを一つにまとめます。
[tasks]
init = [
    { task = "envsubst_default_site" },
    { task = "copy_nginx_conf" }
]

[tasks.envsubst_default_site]
cmd = "bash -c 'envsubst < nginx/sites.d/default-site.conf.template > .pixi/envs/default/etc/nginx/sites.d/default-site.conf'"
inputs = ["nginx/sites.d/default-site.conf.template"]
outputs = [".pixi/envs/default/etc/nginx/sites.d/default-site.conf"]

[tasks.copy_nginx_conf]
cmd = "cp nginx/nginx.conf .pixi/envs/default/etc/nginx/nginx.conf"
inputs = ["nginx/nginx.conf"]
outputs = [".pixi/envs/default/etc/nginx/nginx.conf"]
これで、二つの長いコマンドがこれだけで済むようになります。
$ pixi run init
✨ Pixi task (envsubst_default_site): bash -c 'envsubst < nginx/sites.d/default-site.conf.template > .pixi/envs/default/etc/nginx/sites.d/default-site.conf'

✨ Pixi task (copy_nginx_conf): cp nginx/nginx.conf .pixi/envs/default/etc/nginx/nginx.conf
跋
以上、
Discussion