【Flutter】slangパッケージの便利な機能(多言語対応)
はじめに
以下の記事で、多言語対応するためのパッケージslangの簡単な導入方法ついて取り上げました。
slangはその使いやすさと機能の豊富さから、多くの開発者に支持されています。この記事は、slangの便利な機能について少しだけ取り上げます。
slangとは
slangはFlutterアプリのテキストを簡単かつ柔軟に翻訳する多言語対応のためのパッケージです。言語切り替え、文言の変更、新しい言語の追加などが直感的で手軽に行え、開発者が多言語対応にかかる手間を大幅に削減します。
*詳しくは上の記事を参考にしてください。
また特徴も、公式からでているドキュメントに詳細に書かれております。今回はそのドキュメントから機能を紹介します。
slang.yamlorbuild.yamlで詳細な設定
slang.yamlまたは、build.yamlの設定ファイルをルートディレクトリに配置することで詳細な設定ができます。どちらのファイルを用いても、機能面的には違いはなくbuild_runnerを使うか使わないかの違いだそうです。(本記事では、build_runnerを使うことを想定してbuild.yamlを採用)
build_runnerの配置
.
├── android
├── assets
├── build
├── ios
├── lib
├── linux
├── macos
├── test
├── web
├── windows
├── analysis_options.yaml
├── build.yaml ## ここに配置!!!
├── pubspec.lock
└── pubspec.yaml
設定ファイルでできること
slang.yamlまたは、build.yamlの設定ファイルでできることを、いくつか公式から拝借しました。また、設定できるkeyについての全文を後述しています。
-
base_locale:デフォルトの言語を設定 -
fallback_strategy:不足している翻訳の処理方法 -
namespaces入力ファイルを分割(true言語毎にファイルを分ける必要がなくなる[1]) -
translate_var:翻訳変数の名前
これらをbuild.yamlで設定すると以下のようになります。
targets:
  $default:
    builders:
      slang_build_runner:
        options:
          base_locale: ja
          fallback_strategy: en
	  namespaces: true
	  translate_var: i18n ##変数をtからi18nに変更
全文
| Key | Type | 用途 | デフォルト |
|---|---|---|---|
| base_locale | String | デフォルトの言語を設定 | en |
| fallback_strategy | none, base_locale | 不足している翻訳の処理方法 | none |
| input_directory | String | 入力ディレクトリのパス | null |
| input_file_pattern | String | 入力ファイルのパターン、.json、.yaml、または .csv で終わる必要があります | .i18n.json |
| output_directory | String | 出力ディレクトリのパス | null |
| output_file_name | String | 出力ファイル名 | null |
| output_format | single_file, multiple_files | 分割出力ファイル | single_file |
| locale_handling | Boolean | ロケールの処理ロジックを生成 | true |
| flutter_integration | Boolean | Flutter の機能を生成 | true |
| namespaces | Boolean | 入力ファイルを分割 | false |
| translate_var | String | 翻訳変数の名前 | t |
| enum_name | String | Enum 名 | AppLocale |
| translation_class_visibility | private, public | クラスの可視性 | private |
| key_case | null, camel, pascal, snake | キーの変換 (オプション) | null |
| key_map_case | null, camel, pascal, snake | マップ用のキーの変換 (オプション) | null |
| param_case | null, camel, pascal, snake | パラメータの変換 (オプション) | null |
| string_interpolation | dart, braces, double_braces | 文字列補完モード | dart |
| flat_map | Boolean | フラットマップの生成 | true |
| translation_overrides | Boolean | 翻訳のオーバーライドを有効化 | false |
| timestamp | Boolean | "Built on" タイムスタンプの書き込み | true |
| maps | List<String> | キー経由でアクセスするエントリー | [] |
| pluralization/auto | off, cardinal, ordinal | 自動的に複数形を検出 | cardinal |
| pluralization/default_parameter | String | デフォルトの複数形パラメータ | n |
| pluralization/cardinal | List<String> | カーディナルを持つエントリー | [] |
| pluralization/ordinal | List<String> | オーディナルを持つエントリー | [] |
| <context>/enum | List<String> | 廃止予定: コンテキスト形式 | no default |
| <context>/paths | List<String> | 廃止予定: このコンテキストを使用するエントリー | [] |
| <context>/default_parameter | String | デフォルトパラメータ名 | context |
| <context>/generate_enum | Boolean | Enum を生成 | true |
| children of interfaces | Alias:Path のペア | エイリアスインターフェース | null |
| obfuscation/enabled | Boolean | 名前の難読化を有効化 | false |
| obfuscation/secret | String | 難読化の秘密鍵 (null の場合はランダム) | null |
| imports | List<String> | インポートステートメントの生成 | [] |
List・ Map形式
slangではList・Map形式を用いて、多言語対応できます。
List形式
List形式はそれぞれの言語設定ファイルに以下のように記述します。
{
    "evaluation": [
        "Excellent",
        "Good",
        "Fair",
        "Poor",
        "Very Poor"
    ]
}
{
    "evaluation": [
        "大変良い",
        "良い",
        "普通",
        "悪い",
        "大変悪い"
    ]
}
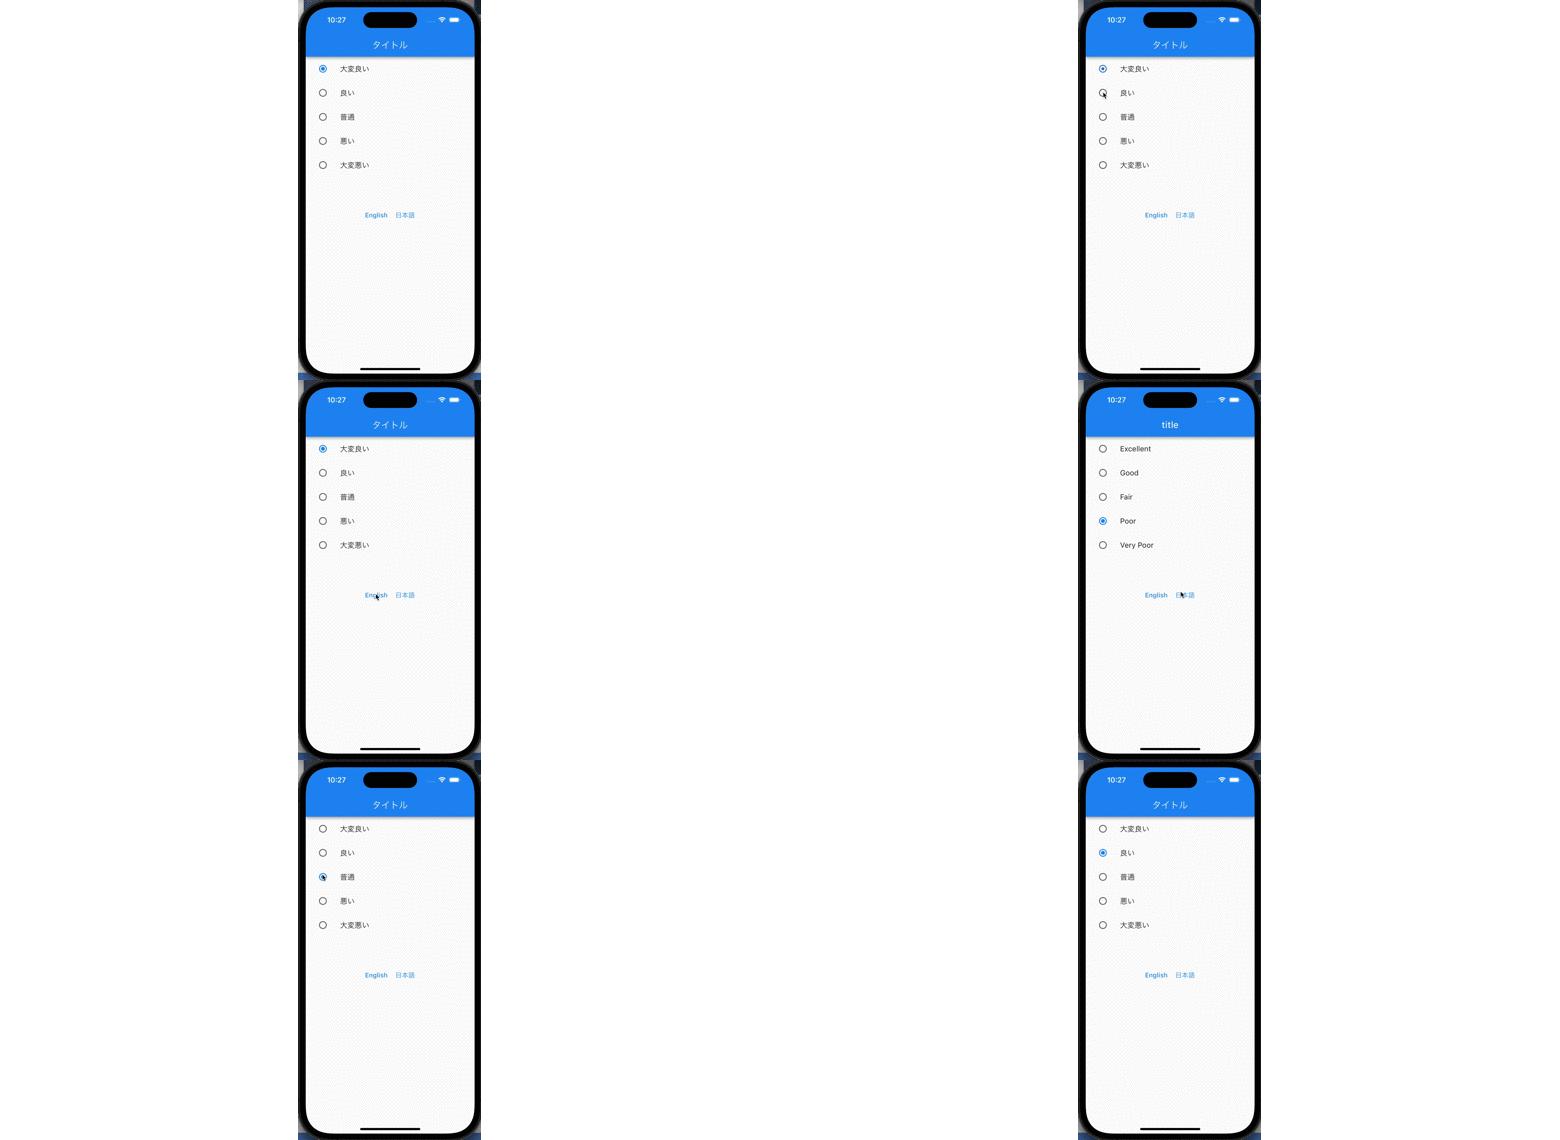
参照方法は、{設定している変数}.strings.evaluation[0]でExcellentまたは、大変良いとなります。
プロジェクトでの実装例は以下の通りです。
      ListView.builder(
	itemCount: Evaluation.values.length,
	itemBuilder: (BuildContext context, int index) {
	  return ListTile(
	    title: Text(i18n.strings.evaluation[index]),
	    leading: Radio<Evaluation>(
	      value: Evaluation.values[index],
	      groupValue: _evaluation,
	      onChanged: (Evaluation? value) {
		setState(() {
		  _evaluation = value;
		});
	      },
	    ),
	  );
	},
      ),

実装例 全文
import 'package:flutter/material.dart';
import 'i18n/strings.g.dart';
class LocalizationsTestScreen extends StatefulWidget {
const LocalizationsTestScreen({Key? key}) : super(key: key);
State<LocalizationsTestScreen> createState() =>
_LocalizationsTestScreenState();
}
class _LocalizationsTestScreenState extends State<LocalizationsTestScreen> {
Evaluation? _evaluation = Evaluation.excellent;
Widget build(BuildContext context) {
return Scaffold(
appBar: AppBar(
title: Text(i18n.strings.mainScreen.title),
),
body: SizedBox(
width: MediaQuery.of(context).size.width,
child: Column(
mainAxisAlignment: MainAxisAlignment.center,
crossAxisAlignment: CrossAxisAlignment.center,
children: [
Expanded(
child: ListView.builder(
itemCount: Evaluation.values.length,
itemBuilder: (BuildContext context, int index) {
return ListTile(
title: Text(i18n.strings.evaluation[index]),
leading: Radio<Evaluation>(
value: Evaluation.values[index],
groupValue: _evaluation,
onChanged: (Evaluation? value) {
setState(() {
_evaluation = value;
});
},
),
);
},
),
),
Row(
mainAxisAlignment: MainAxisAlignment.center,
children: [
TextButton(
onPressed: () {
LocaleSettings.setLocale(AppLocale.en);
setState(() {});
},
child: const Text(
'English',
),
),
TextButton(
onPressed: () {
LocaleSettings.setLocale(AppLocale.ja);
setState(() {});
},
child: const Text(
'日本語',
),
),
],
),
const Spacer(),
],
),
),
);
}
}
enum Evaluation {
excellent,
good,
fair,
poor,
veryPoor,
}
Map形式
Map形式はそれぞれの言語設定ファイルに以下のように記述します。
{
    "geoTable": {
        "title": "Nation and City",
        "country": "country",
        "capital": "capital",
        "nationCityPairs(map)": {
            "USA": "Washington, D.C.",
            "Japan": "Tokyo",
            "France": "Paris"
        }
    }
}
{
    "geoTable": {
        "title": "国と首都",
        "country": "国",
        "capital": "首都",
        "nationCityPairs(map)": {
            "アメリカ": "ワシントン D.C.",
            "日本": "東京",
            "フランス": "パリ"
        }
    }
}
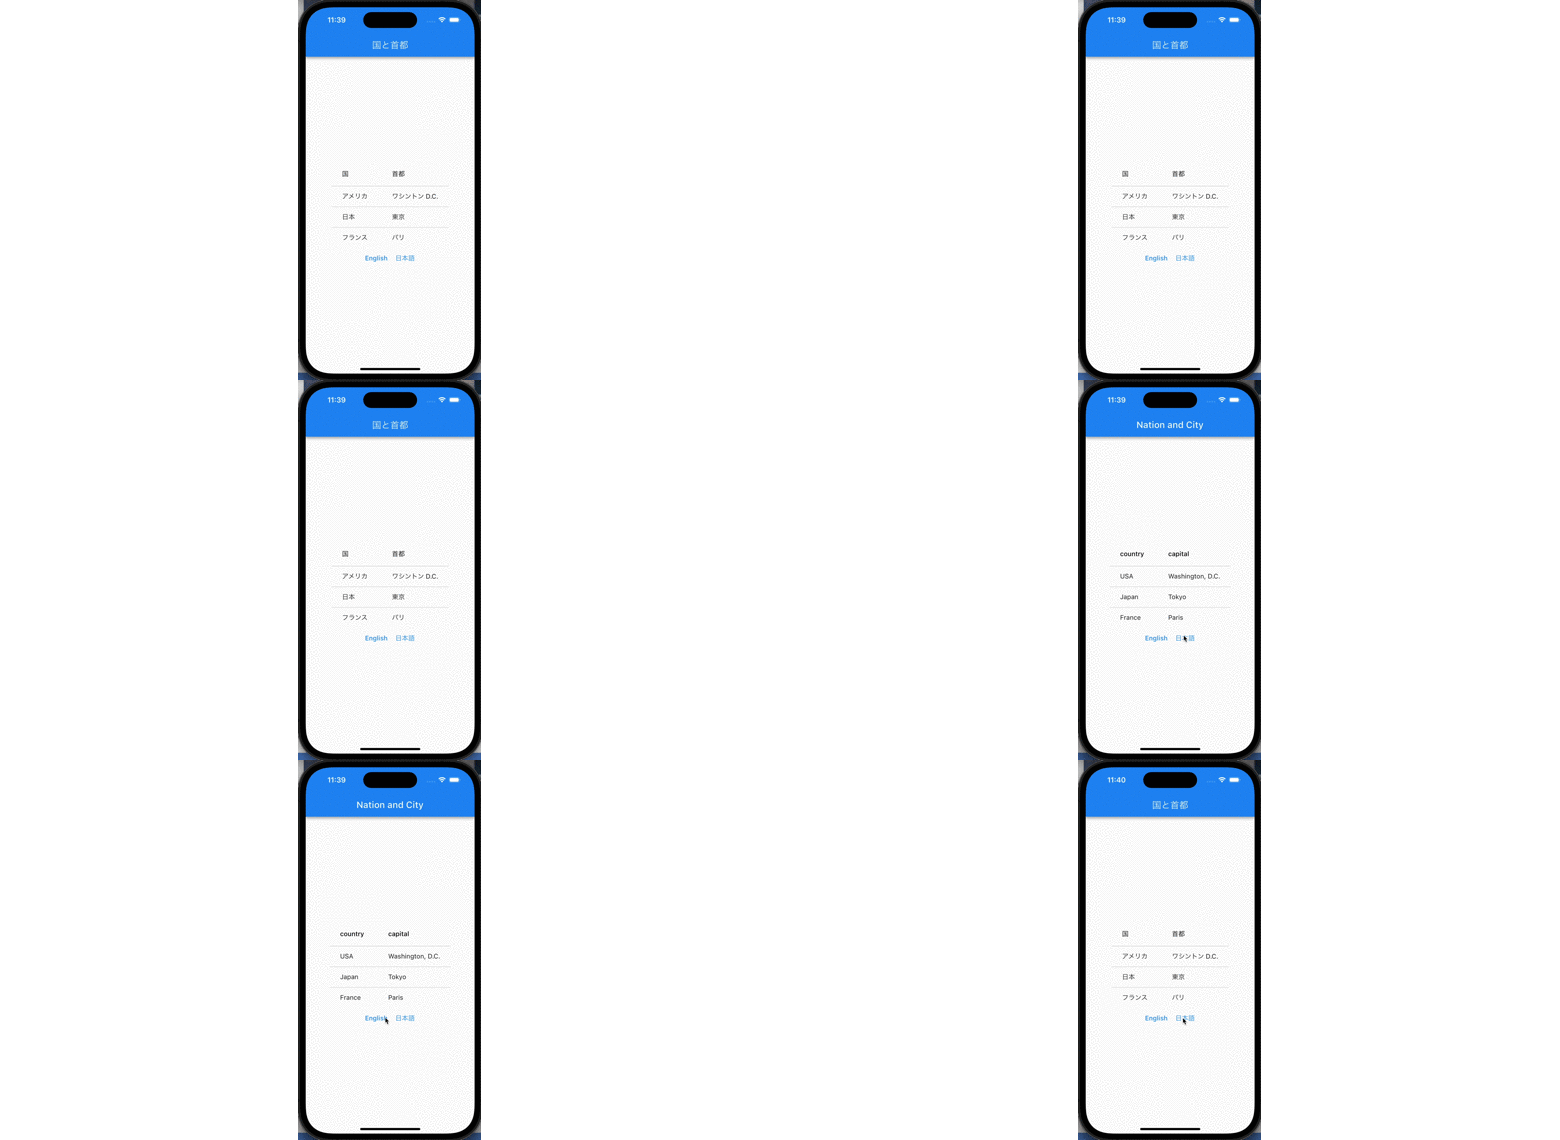
参照方法は、{設定している変数}.strings.geoTable.nationCityPairs.keyでUSAまたは、アメリカやJapan、日本となります。
プロジェクトでの実装例は以下の通りです。
            DataTable(
              columns: [
                DataColumn(label: Text(i18n.strings.geoTable.country)),
                DataColumn(label: Text(i18n.strings.geoTable.capital)),
              ],
              rows: i18n.strings.geoTable.nationCityPairs.entries.map((pair) {
                return DataRow(cells: [
                  DataCell(Text(pair.key)),
                  DataCell(Text(pair.value)),
                ]);
              }).toList(),
            ),

実装例 全文
import 'package:flutter/material.dart';
import 'i18n/strings.g.dart';
class LocalizationGeoData extends StatefulWidget {
const LocalizationGeoData({Key? key}) : super(key: key);
State<LocalizationGeoData> createState() => _LocalizationRadioState();
}
class _LocalizationRadioState extends State<LocalizationGeoData> {
Widget build(BuildContext context) {
return Scaffold(
appBar: AppBar(
title: Text(i18n.strings.geoTable.title),
),
body: SizedBox(
width: MediaQuery.of(context).size.width,
child: Column(
mainAxisAlignment: MainAxisAlignment.center,
crossAxisAlignment: CrossAxisAlignment.center,
children: [
DataTable(
columns: [
DataColumn(label: Text(i18n.strings.geoTable.country)),
DataColumn(label: Text(i18n.strings.geoTable.capital)),
],
rows: i18n.strings.geoTable.nationCityPairs.entries.map((pair) {
return DataRow(cells: [
DataCell(Text(pair.key)),
DataCell(Text(pair.value)),
]);
}).toList(),
),
Row(
mainAxisAlignment: MainAxisAlignment.center,
children: [
TextButton(
onPressed: () {
LocaleSettings.setLocale(AppLocale.en);
setState(() {});
},
child: const Text(
'English',
),
),
TextButton(
onPressed: () {
LocaleSettings.setLocale(AppLocale.ja);
setState(() {});
},
child: const Text(
'日本語',
),
),
],
),
],
),
),
);
}
}
Pluralization(複数化)
キーワードを用いることで、値によって出力を変更できます。
キーワード:zero・one・two・few・many・other
    "someKey": {
        "title": "通知",
        "notification": {
            "zero": "通知は来ていません",
            "other": "$n 件の通知が届いています"
        }
    }
    "someKey": {
        "title": "notification",
        "notification": {
            "zero": "No notification has arrived",
            "one": "$n notification has been received",
            "other": "$n notifications has been received"
        }
    }
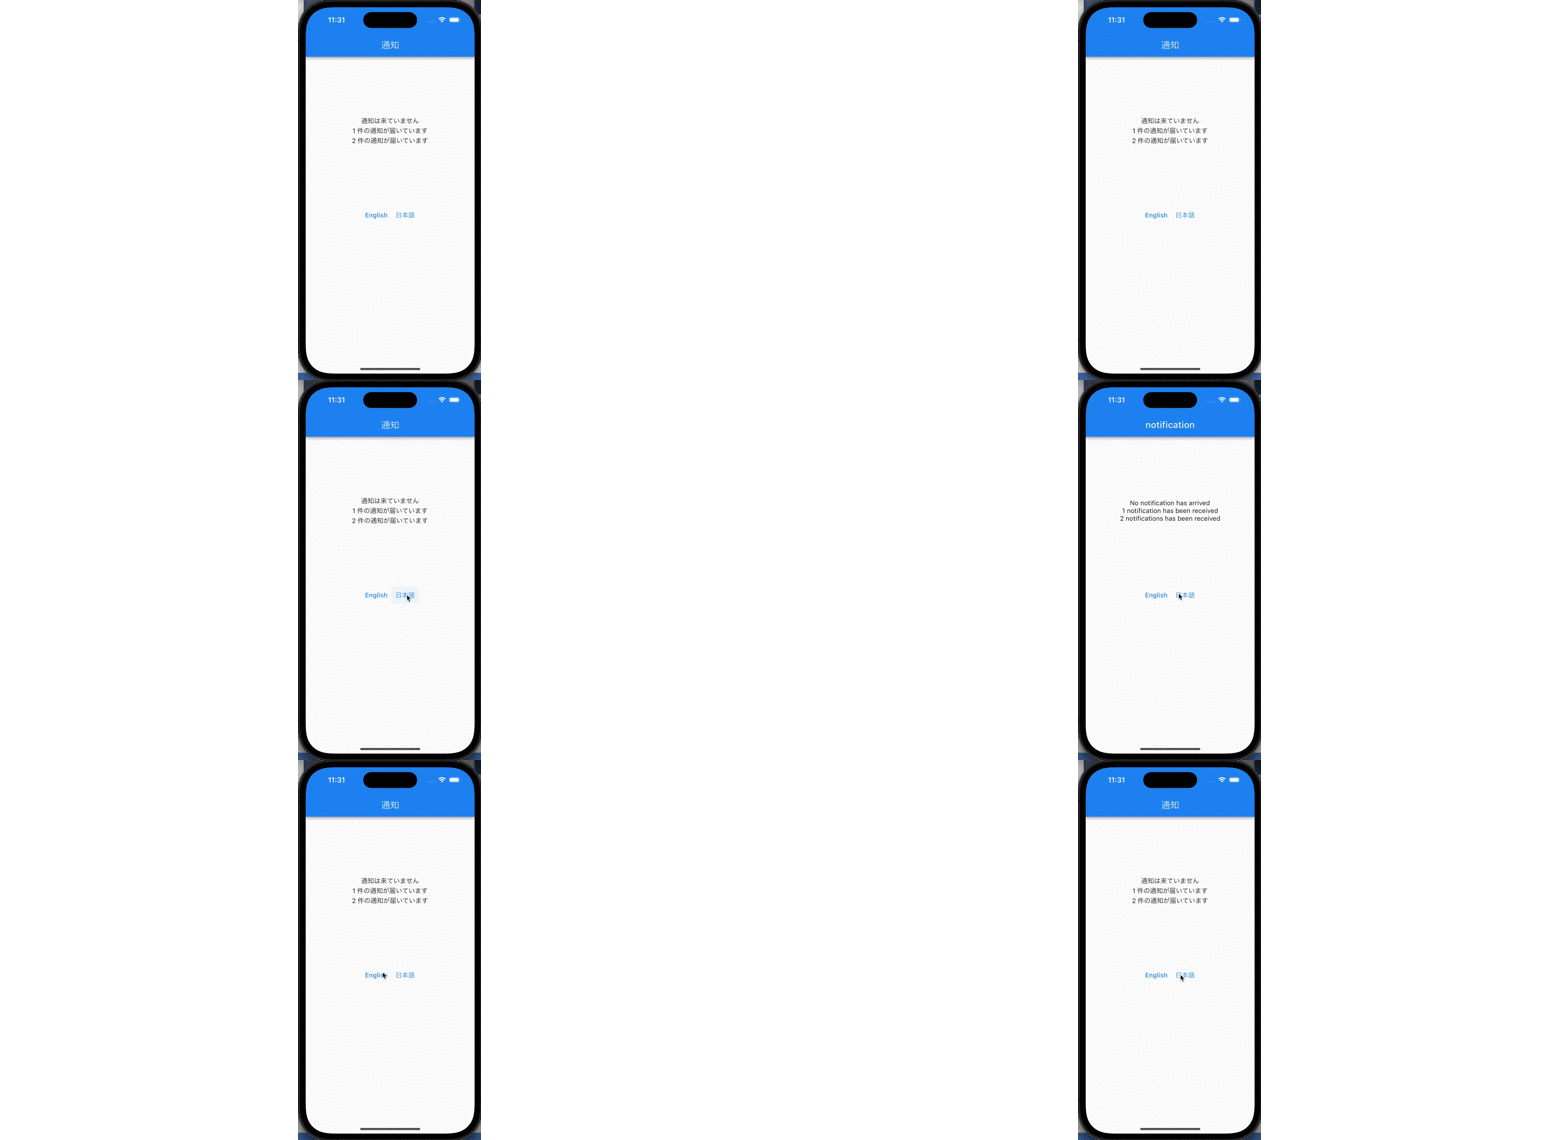
変数nに対して、制御を行なっています。
プロジェクトでの実装例は以下の通りです。
Column(
  mainAxisAlignment: MainAxisAlignment.center,
  children: [
    Text(i18n.strings.someKey.notification(
        n: 0)), // No notification has arrived または 通知は来ていません

    Text(i18n.strings.someKey.notification(
        n: 1)), // 1 notification has been received または 1 件の通知が届いています

    Text(i18n.strings.someKey.notification(
        n: 2)), // 2 notifications has been received または 2 件の通知が届いています
  ],
),

実装例 全文
import 'package:flutter/material.dart';
import 'i18n/strings.g.dart';
class LocalizationSomeKey extends StatefulWidget {
const LocalizationSomeKey({Key? key}) : super(key: key);
State<LocalizationSomeKey> createState() => _LocalizationRadioState();
}
class _LocalizationRadioState extends State<LocalizationSomeKey> {
Widget build(BuildContext context) {
return Scaffold(
appBar: AppBar(
title: Text(i18n.strings.someKey.title),
),
body: SizedBox(
width: MediaQuery.of(context).size.width,
child: Column(
mainAxisAlignment: MainAxisAlignment.center,
crossAxisAlignment: CrossAxisAlignment.center,
children: [
Expanded(
child: Column(
mainAxisAlignment: MainAxisAlignment.center,
children: [
Text(i18n.strings.someKey.notification(
n: 0)), // No notification has arrived または 通知は来ていません
Text(i18n.strings.someKey.notification(
n: 1)), // 1 notification has been received または 1 件の通知が届いています
Text(i18n.strings.someKey.notification(
n: 2)), // 2 notifications has been received または 2 件の通知が届いています
],
),
),
Row(
mainAxisAlignment: MainAxisAlignment.center,
children: [
TextButton(
onPressed: () {
LocaleSettings.setLocale(AppLocale.en);
setState(() {});
},
child: const Text(
'English',
),
),
TextButton(
onPressed: () {
LocaleSettings.setLocale(AppLocale.ja);
setState(() {});
},
child: const Text(
'日本語',
),
),
],
),
const Spacer(),
],
),
),
);
}
}
最後に
今回はSlangの多様な機能について部分てきに掘り下げました。Slangにはここでは紹介していない機能がまだあります。(有用な活用法が思いつかなかったため取り上げていません。)
今後もここで取り上げていないSlangの機能を使って楽に多言語化できそうな実装シーンがあれば記事にしたいと思います。
ここまで読んでくださり、ありがとうございました。
参考資料
-
以下の記事で詳しく書かれています。
https://qiita.com/popy1017/items/3495be9fdc028161bef9 ↩︎
Discussion