Android Jetpack ComposeでUI Testを体験してみた
前の記事です
まとめ記事)Androidでテストをしたい【勉強編】
Android kotlinでUnit Testを体験してみた
これらの続きです。
インストゥルメント化単体テストを作成する[1]が次のステップらしいのですが、デバイス依存のUnit Testのいい例が思い浮かばず、ひとまずUI Testに手を出してみようと思います。
4 実際にUI Testを書いてみる
今回、以下の記事を参考にします。
- Compose レイアウトのテスト / Android
https://developer.android.com/jetpack/compose/testing - Writing An Integration Test With Jetpack Compose and Dagger Hilt / Michel Onwordi
https://medium.com/nerd-for-tech/writing-an-integration-test-with-jetpack-compose-and-dagger-hilt-8ef888c1a23d -
単一アプリの UI をテストする / Android
https://developer.android.com/training/testing/ui-testing/espresso-testing?hl=ja
Jetpack Composeでないのであれば、この方法が良さそう。
4.1 テストの対象となるアプリ
今回、テストの対象となるアプリは、前回の記事[2]で作成したサンプルアプリケーションを使います。以下の様な動作をします。このアプリのソースコードはGithubに置いています。
4.2 必要な依存関係を入れる
app/build.gradleにUI Testに必要な依存関係を入れます。公式ページの記載[3]と、createAndroidComposeRuleを使用するのに必要な依存関係を入れます。
...省略
dependencies {
...省略
    kaptTest 'com.google.dagger:hilt-android-compiler:2.28-alpha'
    testImplementation 'com.google.dagger:hilt-android-testing:2.28-alpha'
    androidTestImplementation 'com.google.dagger:hilt-android-testing:2.28-alpha'
    }
4.3 テストコードを書いていく
まず、動くかどうか確認するために、今のアプリの状態で通るようなテストコードを書いていきます。何も文字を入力せずに「Send」ボタンを押すと、「Success. Result is 」と表示されるので以下の入出力関係でテストコードを書きます。
入力:「Send」ボタンを押す
出力:「Success. Result is 」
書いたテストコードは以下になります。
package email.example.praticaltest.view

import androidx.activity.viewModels
import androidx.compose.ui.test.assertIsDisplayed
import androidx.compose.ui.test.junit4.createAndroidComposeRule
import androidx.compose.ui.test.onNodeWithText
import androidx.compose.ui.test.performClick
import email.example.praticaltest.view_model.MainViewModel
import org.junit.Before
import org.junit.Rule
import org.junit.Test

class InitialViewKtTest {

    @get:Rule
    val composeTestRule = createAndroidComposeRule<MainActivity>()

    @Before
    fun setup() {
        composeTestRule.setContent {
            MainView(mainViewModel =
	    composeTestRule.activity.viewModels<MainViewModel>().value)
        }
    }

    @Test
    fun MyTest() {
        composeTestRule.onNodeWithText("Send").performClick()
        composeTestRule.onNodeWithText("Success. Result is ")
	.assertIsDisplayed()
    }
}
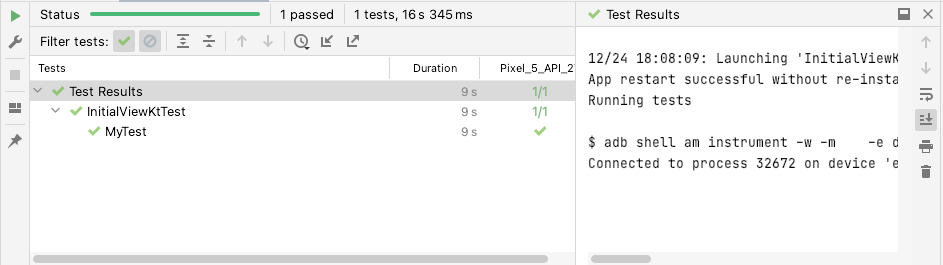
4.4 実行する
実行すると、以下のような表示結果が得られました。通ってそうです。
ちなみにエミュレータは以下のように動きます。ヌルヌル勝手に動く。すごい…

4.5 改良する
4.5.1 テスト項目を書き出す
今のは、簡単な例だったのですが実際にユーザーが使うときのことを想定して、テストを組みたいと思います。
本当は、沢山押すボタンがあって、ボタンを押した動作が正常に現れるかをテストするのかと思いますが、入力できるところが少ないので、テストパターン(テスト項目)は前の記事[2:1]の3.5.2を、そのまま使います。一応、下に貼っておきます。
表2: テスト項目
| Case | 入力1(str1) | 入力2(str2) | 出力 |
|---|---|---|---|
| 1 | 文字列 | 文字列 | 入力1+入力2 |
| 2 | 文字列 | null | 入力1 |
| 3 | null | 文字列 | 入力2 |
| 4 | null | null | "文字列が入力されていません" |
4.5.2 テストコードを修正する
表2全てを実装しようと思ったのですが、コードが長くなるので、この記事に貼り付けるのは1つだけにしておきます。全て見たい方はGithubの方で確認をお願いします。
package email.example.praticaltest.view
import androidx.activity.viewModels
import androidx.compose.ui.test.assertIsDisplayed
import androidx.compose.ui.test.junit4.createAndroidComposeRule
import androidx.compose.ui.test.onNodeWithText
import androidx.compose.ui.test.performClick
import androidx.compose.ui.test.performTextInput
import email.example.praticaltest.view_model.MainViewModel
import org.junit.Before
import org.junit.Rule
import org.junit.Test
class InitialViewKtTest {
@get:Rule
val composeTestRule = createAndroidComposeRule<MainActivity>()
@Before
fun setup() {
composeTestRule.setContent {
            MainView(mainViewModel =
	    composeTestRule.activity.viewModels<MainViewModel>().value)
}
}
@Test
fun MyTest1() {
val str1 = "Hello."
val str2 = "I'm a student."
composeTestRule.onNodeWithText("Str1")
.performTextInput(str1) //テキスト入力、TextFieldのlabel = {Text("Str1")}が必要
composeTestRule.onNodeWithText("Str2")
.performTextInput(str2) //テキスト入力、TextFieldのlabel = {Text("Str2")}が必要
composeTestRule.onNodeWithText("Send").performClick()
composeTestRule.onNodeWithText("Success. Result is ${str1+str2}")
.assertIsDisplayed()
}
}
4.5.3 修正したテストコードの実行結果
以下の実行結果の通り、正常に通りました。エミュレータの動作の様子も貼っておきます。僕が入力しているわけではなく、自動で入力されています。すごい…

まとめ
ここまで3つの記事で基本的なテストについて勉強してきました。
実践でも使っていきたいと思います。
細かいTIPSは、追々、記事を書いていきたいなと思います。
中規模テストや大規模テストも折りを見て勉強します。
-
インストゥルメント化単体テストを作成する / Android https://developer.android.com/training/testing/unit-testing/instrumented-unit-tests?hl=ja ↩︎
-
Android kotlinでUnit Testを体験してみた / Akira Kashihara on Zenn https://zenn.dev/akira_kashihara/articles/03d1e2496eb2a5 ↩︎ ↩︎
-
Compose レイアウトのテスト / Android
https://developer.android.com/jetpack/compose/testing ↩︎ ↩︎
Discussion