dockerとserverless frameworkでLambdaしたい


はじめに
Lambdaのお勉強をしたので開発環境を整えたいなと思った時にcloud9だとお金かかって嫌だったのでローカルPCでdockerの環境作成をしました。
やること
1.Dockerfileの作成
2.docker-compose.ymlの作成
3.起動確認
4.serverless frameworkのセットアップ
1.Dockerfileの作成
大きく分けて4つぐらい環境作成してるので1つずつ見ていきます。
1-1.Ubuntuの作成
# ubuntuのイメージをダウンロード
FROM ubuntu

# ワークディレクトリ
WORKDIR /src

# timezone
RUN ln -sf /usr/share/zoneinfo/Asia/Tokyo /etc/localtime

# apt
RUN apt update
RUN apt upgrade -y
amazonlinux2でいい感じに環境構築したかったのですが、nodejsのインストールで上手くいかなかったのでubuntuで環境構築しています。(※理由は1-2)
1-2.Nodejsのインストール
# install nodejs
RUN apt install -y ca-certificates curl gnupg && \
    curl -fsSL https://deb.nodesource.com/gpgkey/nodesource-repo.gpg.key | \
    gpg --dearmor -o /etc/apt/keyrings/nodesource.gpg && \
    echo "deb [signed-by=/etc/apt/keyrings/nodesource.gpg] https://deb.nodesource.com/node_18.x nodistro main" | \
    tee /etc/apt/sources.list.d/nodesource.list && \
    apt update && apt install nodejs -y
curl -fsSL https://deb.nodesource.com/setup_18.x | bash -でnodejsをインストールしたかったのですが下記のメッセージが発生してインストールできませんでした。
================================================================================
▓▓▓▓▓▓▓▓▓▓▓▓▓▓▓▓▓▓▓▓▓▓▓▓▓▓▓▓▓▓▓▓▓▓▓▓▓▓▓▓▓▓▓▓▓▓▓▓▓▓▓▓▓▓▓▓▓▓▓▓▓▓▓▓▓▓▓▓▓▓▓▓▓▓▓▓▓▓▓▓
================================================================================

                           SCRIPT DEPRECATION WARNING


  This script, located at https://deb.nodesource.com/setup_X, used to
  install Node.js is deprecated now and will eventually be made inactive.

  Please visit the NodeSource distributions Github and follow the
  instructions to migrate your repo.
  https://github.com/nodesource/distributions

  The NodeSource Node.js Linux distributions GitHub repository contains
  information about which versions of Node.js and which Linux distributions
  are supported and how to install it.
  https://github.com/nodesource/distributions


                          SCRIPT DEPRECATION WARNING

================================================================================
▓▓▓▓▓▓▓▓▓▓▓▓▓▓▓▓▓▓▓▓▓▓▓▓▓▓▓▓▓▓▓▓▓▓▓▓▓▓▓▓▓▓▓▓▓▓▓▓▓▓▓▓▓▓▓▓▓▓▓▓▓▓▓▓▓▓▓▓▓▓▓▓▓▓▓▓▓▓▓▓
================================================================================

TO AVOID THIS WAIT MIGRATE THE SCRIPT
Continuing in 60 seconds (press Ctrl-C to abort) ...
どうやらインストール方法が変更されたらしい。
shellのリンクに飛べば作業内容が書いてますので、手順通りにDockerfileに組み込めば大丈夫でした。ただこの手順だとamazonlinux2はnodejsのインストールを私は出来なかったので諦めました。
1-3.Pythonのインストール
# install python
RUN apt install -y build-essential \
    libbz2-dev libdb-dev libreadline-dev \
    libffi-dev libgdbm-dev liblzma-dev \
    libncursesw5-dev libsqlite3-dev libssl-dev \
    zlib1g-dev uuid-dev tk-dev && \
    apt install -y wget && \
    wget https://www.python.org/ftp/python/3.9.13/Python-3.9.13.tar.xz && \
    tar xJf Python-3.9.13.tar.xz && \
    cd Python-3.9.13 && \
    ./configure && \
    make && make install && \
    cd .. && rm -f Python-3.9.13.tar.xz && \
    rm -rf Python-3.9.13
Python Japanに記載されてる手順をそのまま組み込んでいます。 その後に開発で必要なモジュールをインストールしていきます。
# setup python
RUN pip3 install --upgrade pip
RUN pip3 install -r requirements.txt
1-4.aws-cliインストール
RUN curl "https://awscli.amazonaws.com/awscli-exe-linux-x86_64.zip" -o "awscliv2.zip" && \
    apt install unzip && unzip awscliv2.zip && ./aws/install && \
    rm awscliv2.zip && rm -rf aws
cloud9からだと認証は不要ですが、今回はローカルPCからアクセスするのでaws-cliを使用して認証していきます。
serverless frameworkのセットアップをしたかったのですが、serverless createを実行してもフォルダが作成されなかったので、起動したコンテナに入ってserverless frameworkの環境を作成していきます。
2.docker-compose.ymlの作成
version: '3'
services:
  # バックエンド
  demo-app:
    build: .
    image: lambda-try:v1
    container_name: 'lambda-try'
    tty: true
    volumes:
      - ./src:/src
    ports:
      - 8000:8000  # ホストマシンのポート8000を、docker内のポート8000に接続する
    environment:
      - DEFAULT_REGION=ap-northeast-1
ポートの設定はとりあえず記載してるだけで、この後使用することはありません。environmentは自分が作業したいリージョンを記載してください。
3.起動確認
dockerfileとdocker-compose.ymlの作成が完了したら同じディレクトリにsrcフォルダとrequirements.txtファイルを用意してビルド&コンテナを起動します。
起動したらdocker execでコンテナに入って作業していきます。
docker compose build
docker compose up
docker exec -it 'container name' bash
4.awsの認証設定
aws configure --profile sls
自分が使用するIAMのアクセスキーやシークレットキーを入力していきます。
AWS Access Key ID [None]: ****
AWS Secret Access Key [None]: ****
Default region name [None]: ap-northeast-1
Default output format [None]:
5.serverless frameworkのセットアップ
npm i -g serverless
serverless create --template aws-python3 --path pipeline
cd pipeline
serverless plugin install -n serverless-python-requirements
sls deploy --stage local
serverless frameworkをインストールしてデプロイしていきます。
serverless create --template aws-python3 --path pipelineを実行すると、pythonベースのserverless frameworkの環境が作成されます。
serverless.ymlはリージョンとステージだけ変更します。
# you can overwrite defaults here
  stage: local
  region: ap-northeast-1
最後にsls deploy --stage localを実行すればデプロイが完了します。
下記のメッセージが出ればデプロイ完了です。
※私はすでに「pipeline」というサービス名でデプロイしていたので、lambdatestというサービス名に変更しています。
Running "serverless" from node_modules

Deploying lambdatest to stage local (ap-northeast-1)

✔ Service deployed to stack lambdatest-local (176s)

functions:
  hello: lambdatest-local-hello (41 MB)

Need a faster logging experience than CloudWatch? Try our Dev Mode in Console: run "serverless dev"
AWSコンソールにログインしてlambdaがデプロイされているか確認しに行きましょう。
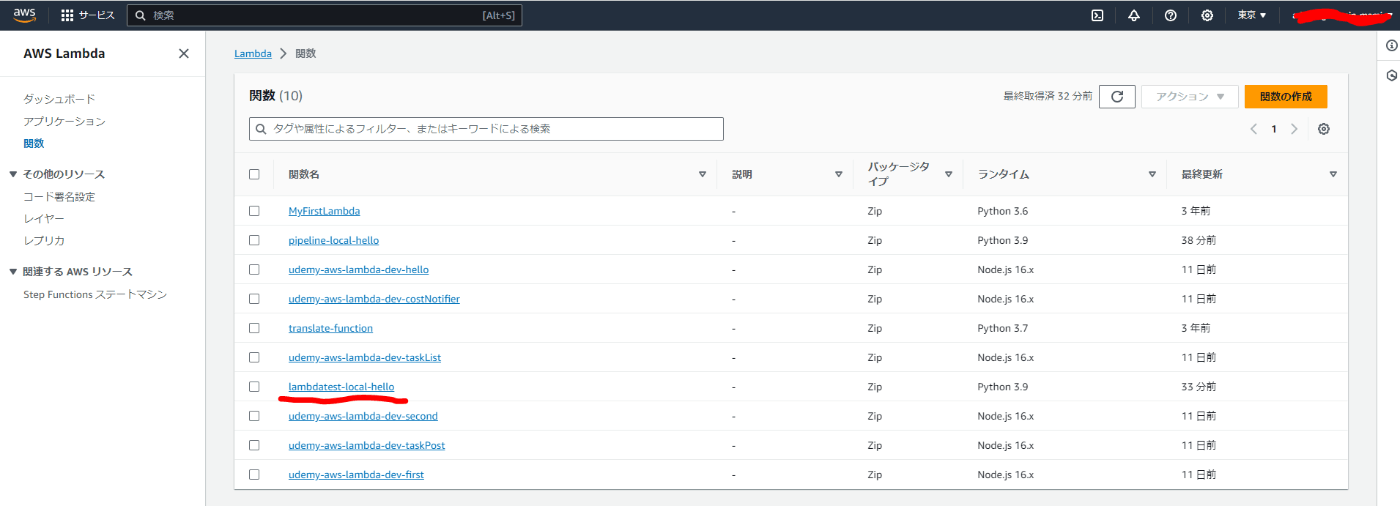
関数一覧にデプロイした関数名が表示されてると思いますのでクリックします。
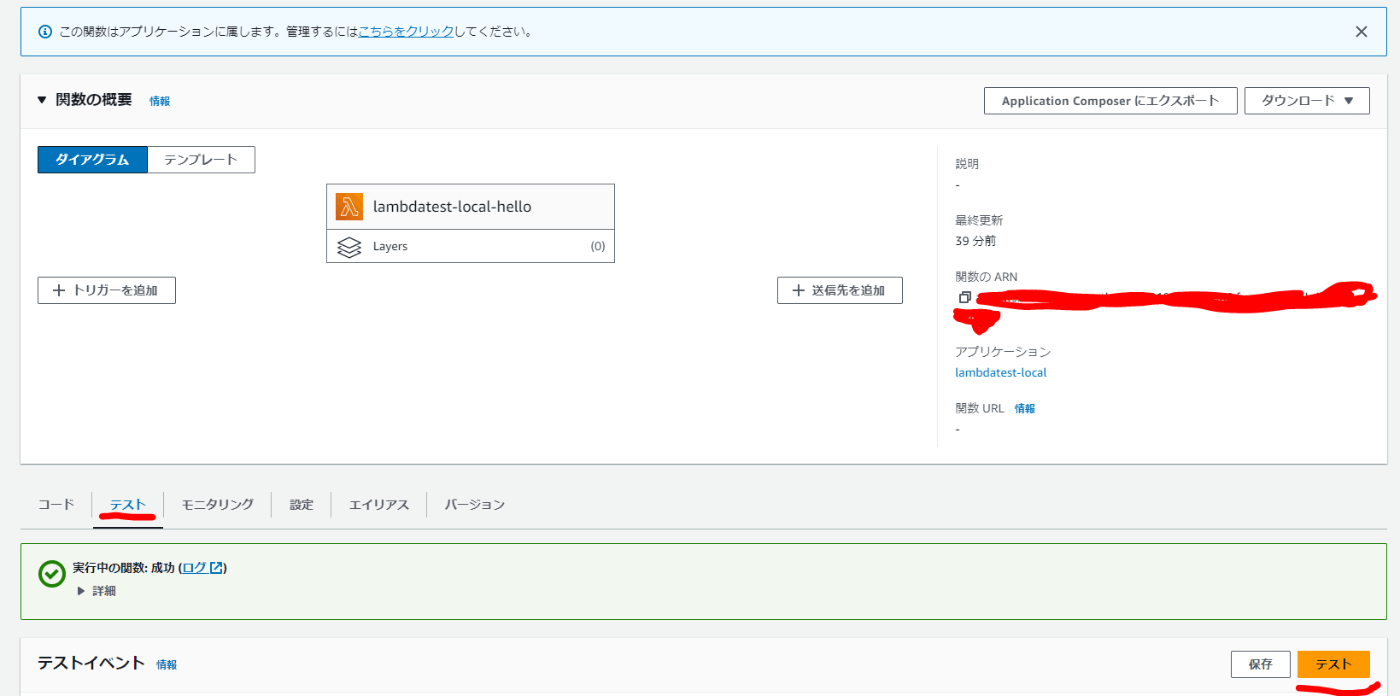
関数の中に入ると下のほうにテストができますので、実行して成功すれば完了です。
Discussion