Cloud9上にTerraform開発環境を構築する
はじめに
- この記事ははじめてのアドベントカレンダー Advent Calendar 2023 シリーズ 13の23日目の記事です。
- 個人的な備忘録です。
- Cloud9上にTerraform開発環境を構築し、Terraformで同じVPCにEC2を作成する手順を記載します。
- ハンズオン感覚で作って壊せるように、後片付けの手順も記載しています。
構成図

構築手順
Terraform開発環境用のサブネットにて、IPアドレスの自動割り当て設定を有効化する
今回はデフォルト以外の既存VPCのパブリックサブネットを使用した。
使用するサブネットの設定を編集して「IPアドレスの自動割り当て設定を有効化」を行う。
-
AWSマネジメントコンソールへログインする。
左上の検索バーにて、「VPC」を検索して選択する。
左のサイドバーにて、「サブネット」を選択する。 -
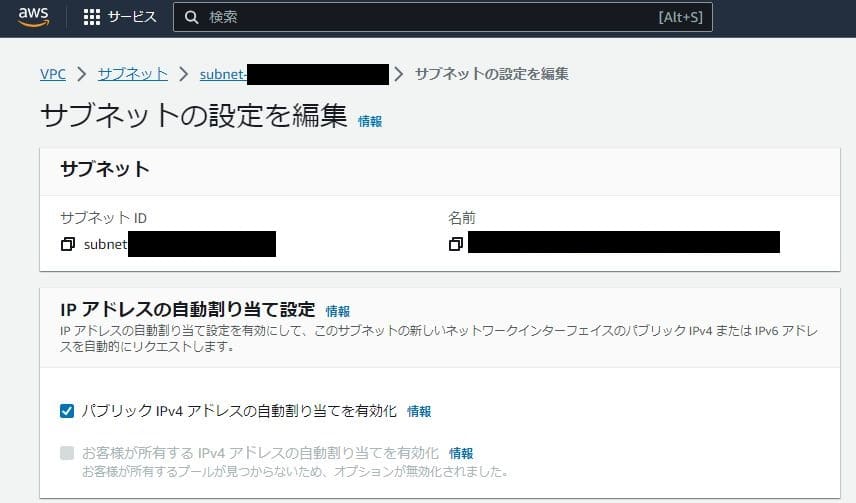
使用するサブネットを選択し、「アクション」から「サブネットの設定を編集」を選択する。
-
「IPアドレスの自動割り当て設定」にて「パブリックIPv4アドレスの自動割り当てを有効化」にチェックを入れる。
Cloud9環境を用意する
-
左上の検索バーにて、「Cloud9」を検索して選択する。
-
Cloud9のマネジメントコンソールにて「環境を作成」を選択する。

-
下記内容を設定し、それ以外はデフォルトのままで「作成」を選択する。
今回VPCは既存VPCのパブリックサブネットを使用する。名前:任意の名称 インスタンスタイプ:t2.micro プラットフォーム:Amazon Linux 2 VPC:1で設定したサブネットのあるVPC サブネット:1で設定したサブネット -
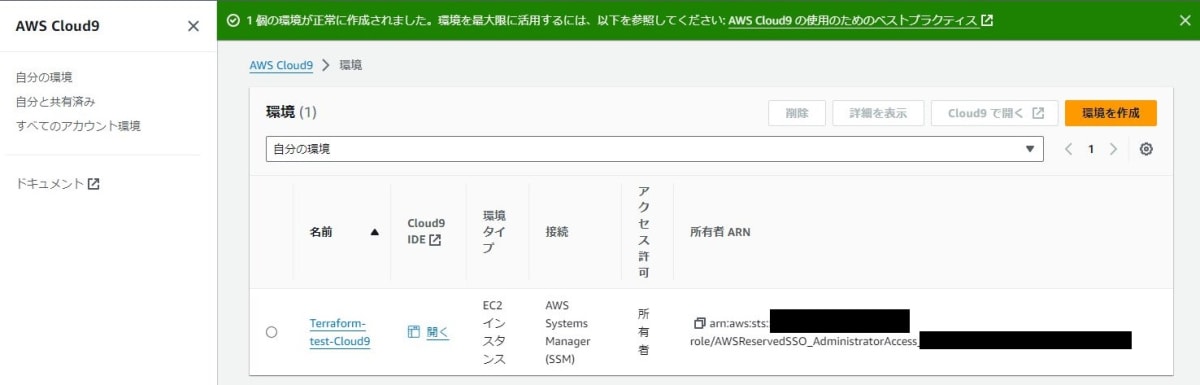
Cloud9の環境が構築されるまで待つ。構築完了まで数分かかる。
Cloud9の環境構築完了後、「開く」を選択する。
Cloud9環境にTerraformをインストールする
-
Cloud9を開くと、下記のようなIDE(統合開発環境)が表示されます。
こちらの下側に表示されているターミナルにてコマンド入力を行う。

-
Cloud9の場合、aws-cliやgitがデフォルトでインストールされている。
aws-cli、gitのバージョンを確認する。$ aws --version aws-cli/2.13.36 Python/3.11.6 Linux/5.10.199-190.747.amzn2.x86_64 exe/x86_64.amzn.2 prompt/off $ git -v git version 2.40.1 -
Terraformのバージョン管理に便利なtfenvをインストールする。
$ git clone https://github.com/tfutils/tfenv.git ~/.tfenv Cloning into '/home/ec2-user/.tfenv'... remote: Enumerating objects: 1959, done. remote: Counting objects: 100% (564/564), done. remote: Compressing objects: 100% (150/150), done. remote: Total 1959 (delta 463), reused 451 (delta 410), pack-reused 1395 Receiving objects: 100% (1959/1959), 416.21 KiB | 6.61 MiB/s, done. Resolving deltas: 100% (1267/1267), done. -
tfenvのパスを通す。
$ sudo ln -s ~/.tfenv/bin/* /usr/local/bin -
tfenvのバージョンを確認する。
$ tfenv -v tfenv 3.0.0-18-g1ccfddb -
インストール可能なTerraformのクライアントのバージョンを確認する。
デフォルトだと全バージョン表示されてしまうため、headコマンドで最新の10バージョンのみ表示する。$ tfenv list-remote | head -n 10 1.7.0-alpha20231130 1.7.0-alpha20231108 1.7.0-alpha20231025 1.6.5 1.6.4 1.6.3 1.6.2 1.6.1 1.6.0 1.6.0-rc1 -
Terraformをインストールする。
Terraformのバージョンは、今回は最新の安定板であるv1.6.5を使用する。
※Terraformのバージョンは、利用する機能や互換性に注意して選択すること。$ tfenv install 1.6.5 Installing Terraform v1.6.5 Downloading release tarball from https://releases.hashicorp.com/terraform/1.6.5/terraform_1.6.5_linux_amd64.zip ################################################################################################################################################################################### 100.0% Downloading SHA hash file from https://releases.hashicorp.com/terraform/1.6.5/terraform_1.6.5_SHA256SUMS Not instructed to use Local PGP (/home/ec2-user/.tfenv/use-{gpgv,gnupg}) & No keybase install found, skipping OpenPGP signature verification terraform_1.6.5_linux_amd64.zip: OK Archive: /tmp/tfenv_download.zVcXGu/terraform_1.6.5_linux_amd64.zip inflating: /home/ec2-user/.tfenv/versions/1.6.5/terraform Installation of terraform v1.6.5 successful. To make this your default version, run 'tfenv use 1.6.5' -
インストール済みのTerraformバージョンを確認する。
$ tfenv list 1.6.5 No default set. Set with 'tfenv use <version>' -
利用するTerraformのバージョンを指定する。
$ tfenv use 1.6.5 Switching default version to v1.6.5 Default version (when not overridden by .terraform-version or TFENV_TERRAFORM_VERSION) is now: 1.6.5 -
利用中のTerraformのバージョンを確認する。
$ terraform -v
Terraform v1.6.5
on linux_amd64
tfstateファイルを配置するS3バケットを作成する
-
左上の検索バーにて、「S3」を検索して選択する。
「バケットを作成」をクリックする。 -
下記内容を設定し、それ以外はデフォルトのままで「バケットを作成」を選択する。
バケット名は一意となる名称を設定する。AWSリージョン:アジアパシフィック(東京)ap-northeast-1 バケットタイプ:汎用 バケット名:任意のバケット名 -
バケットが正常に作成されたことを確認する。
Terraformの初期設定を行う
-
Terraformの作業用フォルダを作成し移動する。
今回はwork-terraformという名前のフォルダを作成する。$ mkdir work-terraform $ cd work-terraform -
左サイドバーにて、作成したフォルダ名を右クリックし、「New File」を選択する。
新規作成されたファイルに「main.tf」と名前を付ける。


-
左サイドバーのmain.tfファイルをダブルクリックする。
main.tfファイルを編集できるようになる。

-
main.tfファイルに以下を記載する。
main.tfterraform { # AWSプロバイダーのバージョン指定 required_providers { aws = { source = "hashicorp/aws" version = "~> 5.29.0" } } #tfstateファイルをS3に配置する backend s3{ bucket = "先程作成したS3バケット名" region = "ap-northeast-1" key = "任意のファイル名.tfstate" } }AWSプロバイダーのバージョンは、今回は最新板であるv5.29.0を使用する。
※AWSプロバイダーのバージョンは、利用する機能や互換性に注意して選択すること。
tfstateファイルを配置するS3バケットとして、先ほど作成したS3バケット名を記載する。tfstateファイル名は、任意のファイル名.tfstateの書式で記載する。
-
ワークスペースの初期化および必要なプラグインのダウンロードを行う。
$ terraform init

Initializing the backend...

Initializing provider plugins...
- Finding hashicorp/aws versions matching "~> 5.29.0"...
- Installing hashicorp/aws v5.29.0...
- Installed hashicorp/aws v5.29.0 (signed by HashiCorp)

Terraform has created a lock file .terraform.lock.hcl to record the provider
selections it made above. Include this file in your version control repository
so that Terraform can guarantee to make the same selections by default when
you run "terraform init" in the future.

Terraform has been successfully initialized!

You may now begin working with Terraform. Try running "terraform plan" to see
any changes that are required for your infrastructure. All Terraform commands
should now work.

If you ever set or change modules or backend configuration for Terraform,
rerun this command to reinitialize your working directory. If you forget, other
commands will detect it and remind you to do so if necessary.
TerraformでEC2を作成する
-
今回はcloud9と同じのVPCのプライベートサブネットにEC2を作成する。
main.tfの下部に下記を追記する。main.tfprovider "aws" { region = "ap-northeast-1" } resource "aws_instance" "terraform-test-ec2" { ami = "ami-035d55281a86f9439" instance_type = "t2.micro" subnet_id = "同じVPCのプライベートサブネットのサブネットID" tags = { Name = "terraform-test-ec2" } } -
Terraformによる環境構築を実行した時のリソース差分を確認する。
$ terraform plan Terraform used the selected providers to generate the following execution plan. Resource actions are indicated with the following symbols: + create Terraform will perform the following actions: # aws_instance.terraform-test-ec2 will be created + resource "aws_instance" "terraform-test-ec2" { (中略) + vpc_security_group_ids = (known after apply) } Plan: 1 to add, 0 to change, 0 to destroy. -
Terraformによる環境構築を実行する。
Enter a value:と表示されたら「yes」と入力してEnterを押す。$ terraform apply Do you want to perform these actions? Terraform will perform the actions described above. Only 'yes' will be accepted to approve. Enter a value: yes aws_instance.terraform-test-ec2: Creating... aws_instance.terraform-test-ec2: Still creating... [10s elapsed] aws_instance.terraform-test-ec2: Still creating... [20s elapsed] aws_instance.terraform-test-ec2: Still creating... [30s elapsed] aws_instance.terraform-test-ec2: Creation complete after 32s [id=i-08de33c6d3b33625c] Apply complete! Resources: 1 added, 0 changed, 0 destroyed. -
EC2が作成されていることを確認する。
左上の検索バーにて、「EC2」を検索して選択する。
左サイドバーにて「インスタンス」を選択する。
検索バーにて先程作成したEC2の名前を検索する。
正常に作成された。

後片付け
Terraformで作成したEC2を削除する
-
Terraformで作成した環境を削除する。
Enter a value:と表示されたら「yes」と入力してEnterを押す。$ terraform destroy aws_instance.terraform-test-ec2: Refreshing state... [id=i-08de33c6d3b33625c] Terraform used the selected providers to generate the following execution plan. Resource actions are indicated with the following symbols: (中略) Plan: 0 to add, 0 to change, 1 to destroy. Do you really want to destroy all resources? Terraform will destroy all your managed infrastructure, as shown above. There is no undo. Only 'yes' will be accepted to confirm. Enter a value: yes aws_instance.terraform-test-ec2: Destroying... [id=i-08de33c6d3b33625c] aws_instance.terraform-test-ec2: Still destroying... [id=i-08de33c6d3b33625c, 10s elapsed] aws_instance.terraform-test-ec2: Still destroying... [id=i-08de33c6d3b33625c, 20s elapsed] aws_instance.terraform-test-ec2: Still destroying... [id=i-08de33c6d3b33625c, 30s elapsed] aws_instance.terraform-test-ec2: Destruction complete after 30s Destroy complete! Resources: 1 destroyed. -
EC2が削除されていることを確認する。
左上の検索バーにて、「EC2」を検索して選択する。
左サイドバーにて「インスタンス」を選択する。
検索バーにて先程作成したEC2の名前を検索する。

cloud9環境を削除する
-
Cloud9のマネジメントコンソールにて削除するCloud9環境を選択する。
「削除」を選択する。
-
テキストボックスに「削除」と入力し、「削除」ボタンを選択する。

s3バケットを削除する
-
S3のマネジメントコンソールにて、削除するS3バケットを選択する。
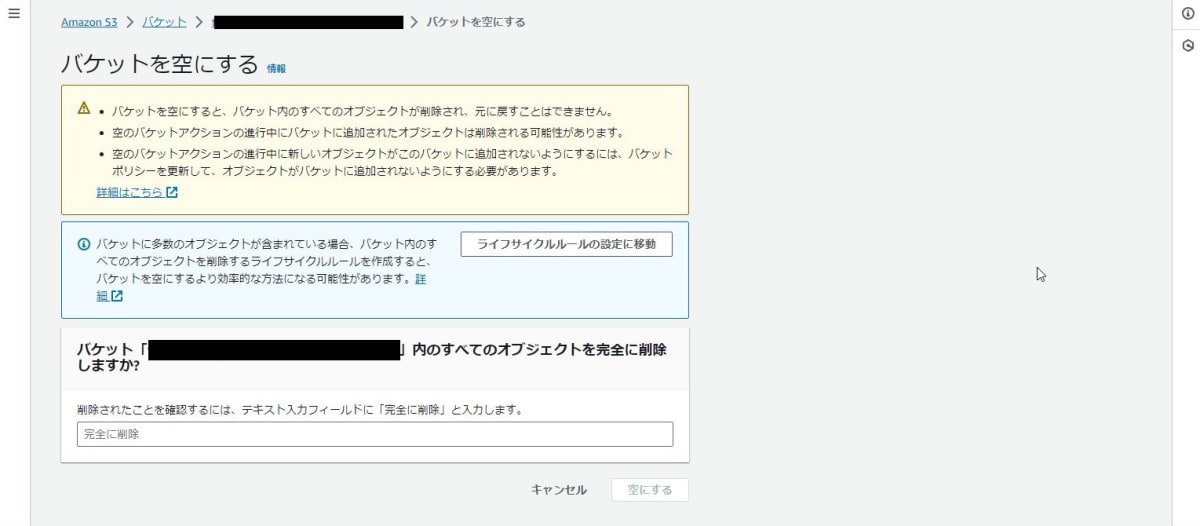
「空にする」を選択する。

-
テキストボックスに「完全に削除」と入力し、「空にする」ボタンを選択する。
-
「終了」を選択し、削除するS3バケットを選択する。
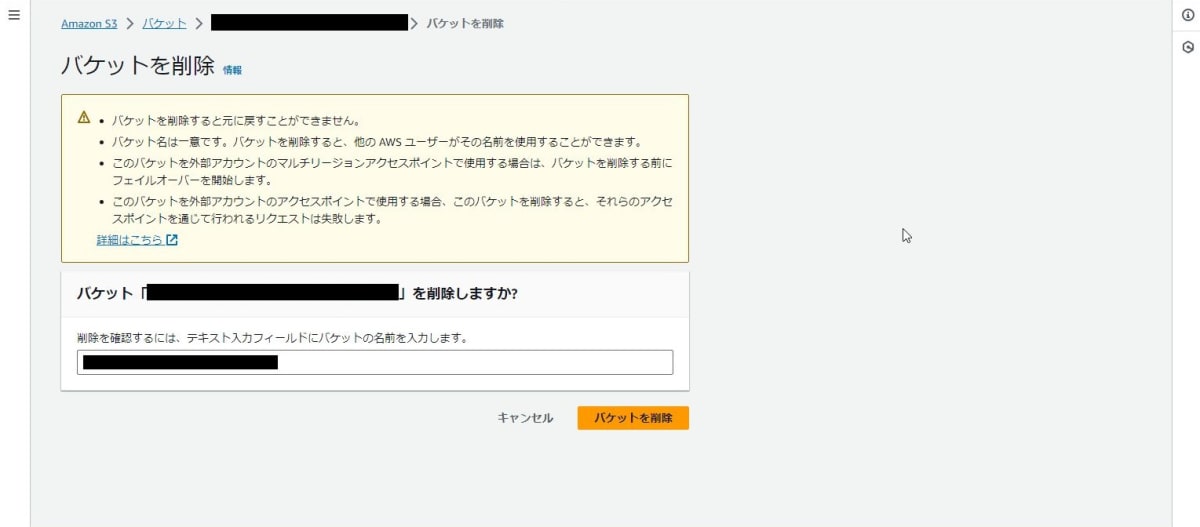
「削除」を選択する。 -
テキストボックスに削除するバケット名を入力し、「バケットを削除」ボタンを選択する。
Discussion