step by step VContainer vol.3
当記事の概要
VContainerってなんか凄そう?VContainerを理解したいけど「意味わからん!」というUnityを交えたC#のプログラミングにある程度慣れてきた中級者向けに、VContainerに関連する用語や知識、プログラムサンプルを数回の記事に分けて整理したものになります。主に自分のために書いていますが、もしどなたかの参考になれば幸いです。
前回はこちらからどうぞ。
第3回:用語編 その2 - デザインパターン、プログラミングパターンに関する知識
第3回の今回は、VContainerと関係の深い知識や用語の中から特に技術的な次の内容を整理してみました。ソースコード多めです。
- Inversion of Control
- Singleton パターン
- Factory パターン
人によってはご存じの用語も多々あると思います。理解のある内容は適宜読み飛ばしながら進めてもらえると良いと思います。また、この記事で取り上げた用語をある程度理解できている方は、もう公式のHelloWorldページを読んでしまった方が理解が早いと思います。
Inversion of Control
Inversion of Control(制御の反転。以下、IoC)とは、プログラミングにおいて依存関係を逆転させる技術もしくはそのような考えに沿ってプログラムの構造を変化させることです。
例えば、次のような「Spaceボタンを押す毎にカウンターを増やして画面に表示する」プログラムがあったとします。
using UnityEngine;
using UnityEngine.InputSystem;
using TMPro;

public class BeforeIoC : MonoBehaviour
{
  public TextMeshProUGUI label;
  public int count = 0;

  void Update()
  {
    if(Keyboard.current.spaceKey.wasReleasedThisFrame)
    {
      count++;
      label.text = count+" times pressed.";
    }
  }
}
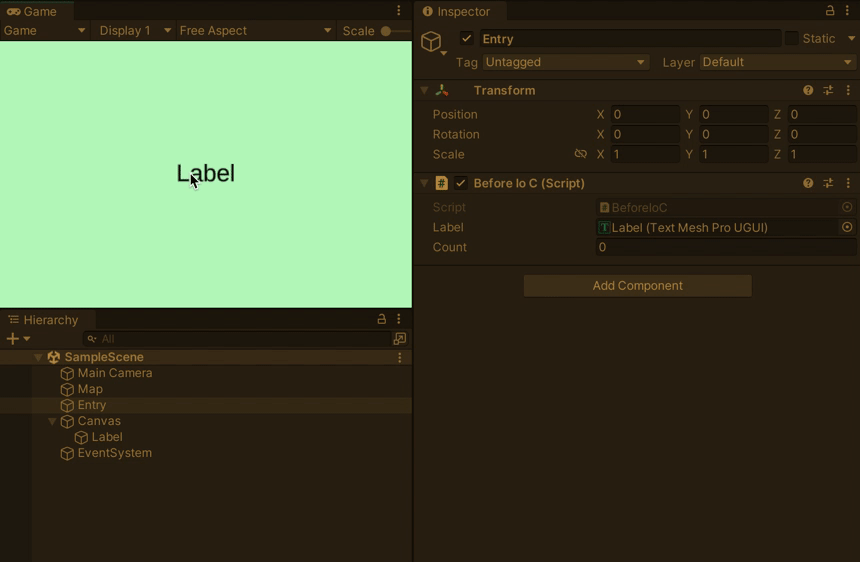
このプログラムでは、「キーボードを押す」、「カウンターを増やす」、「文字を表示する」などの機能が実現できるライブラリ(UnityEngine.InputSystemやTMPro)を呼び出し利用する形をとる中央集権的な構造となっています。こういったプログラムはIoCの考え方において「従来式のプログラミング」と見なされます。
IoCはプログラム構造の考え方を変え、任意のコードから「入力をする機能」、「出力をする機能」、「何かを実行する機能」「データを管理する機能」などの個別目的に特化したコードを制御する形にプログラムを変換します。

IoC後の構造は、制御フローが整理されたことに加え、プログラムの部品化が進み、機能それぞれの独立性が高まることで拡張のしやすさが一段と高まります。
VContainerをはじめとしたDIコンテナは、このIoCの考えた方をより進める(実現しやすくする、実現できる)ためのソフトウェアと言えます。
IoCを意識して前述のプログラムを変換したものを以下に提示します。一見プログラムが増えているように見えますが、より大規模なゲーム開発になってくるとこういった構造の方が別の処理で使い回しがきいたり、より柔軟に組み換えたり、組み合わせたりが行える様になるメリットの方が大きいと考えられます。(インターフェースなどを組み合わせるとさらに良くなりますが、それは今後の記事にて取り上げます!)
using VContainer.Unity;

// 統括:命令を下す側として機能する任意の処理。
public class AfterIoC : IStartable
{
  private KeyInput input;
  private GUIOutput output;
  private ActionHolder holder;
  private GameInfo info;

  public AfterIoC(KeyInput input, GUIOutput output, ActionHolder holder, GameInfo info)
  {
    this.input = input;
    this.output = output;
    this.holder = holder;
    this.info = info;
  }

  void IStartable.Start()
  {
    input.SetAction( () => holder.actions(output,info) );
  }
}
using System;
using VContainer.Unity;

// 入力担当
public class KeyInput : ITickable
{
  private UnityEngine.InputSystem.Controls.KeyControl key;
  private Action action = null;

  public KeyInput(UnityEngine.InputSystem.Controls.KeyControl key)
  {
    this.key = key;
  }

  public void SetAction(Action action)
  {
    this.action = action;
  }

  void ITickable.Tick()
  {
    if( action == null ) return;
    if( key.wasReleasedThisFrame )
    {
      action.Invoke();
    }
  }
}
using UnityEngine;
using TMPro;

// 出力担当
public class GUIOutput : MonoBehaviour
{
  public TextMeshProUGUI tmpro;
}
using System;

// 何かを実行する担当
public class ActionHolder
{
  public Action<GUIOutput,GameInfo> actions;
  public ActionHolder(Action<GUIOutput,GameInfo> actions)
  {
    this.actions = actions;
  }
}
// データ担当
public class GameInfo
{
  public int count;
  public GameInfo(int count){
    this.count = count;
  }
}
using System;
using UnityEngine;
using UnityEngine.InputSystem;
using VContainer;
using VContainer.Unity;

// IoCの構造を実現するためにVContainerでDIする
public class IoCLifetimeScope : LifetimeScope
{
    [SerializeField] GUIOutput output;

    protected override void Configure(IContainerBuilder builder)
    {
      builder.RegisterEntryPoint<KeyInput>(Lifetime.Scoped).WithParameter("key",Keyboard.current.spaceKey).AsSelf();
      builder.RegisterComponent(output);
      builder.Register<ActionHolder>(Lifetime.Singleton).WithParameter<Action<GUIOutput,GameInfo>>(
        (output, info) => {
          info.count++;
          output.tmpro.text = info.count+" times pressed.";
        }
      );
      builder.Register<GameInfo>(Lifetime.Singleton).WithParameter<int>(0);
      builder.RegisterEntryPoint<AfterIoC>(Lifetime.Scoped);
    }
}
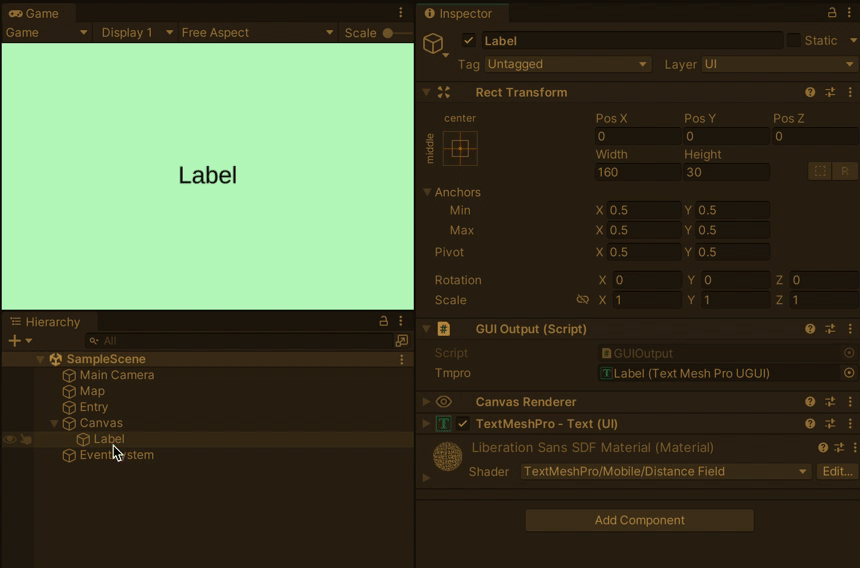
実行結果
Singleton パターン
あるクラスについてインスタンスが単一であることを保証するプログラム構造(デザインパターン)です。
インスタンスを新規に作成したいケースではnewキーワードを使用するわけですが、newは実行するたびに同じデータの形の入れ物が複製され、別々のインスタンスとして管理されます。

以下はSingletonパターンを実行するサンプルです。ベースはwikipediaを参考にしています。
public class Singleton {
  private static Singleton instance = new Singleton();
  public int id;

  private Singleton() {}

  public static Singleton getInstance() {
    return Singleton.instance;
  }
}
using UnityEngine;

public class SingletonSample : MonoBehaviour
{
    void Start()
    {
        Singleton s1 = Singleton.getInstance();
        Singleton s2 = Singleton.getInstance();
        s1.id = 12345;
	s2.id = 54321;
        Debug.Log( s1.id );
        Debug.Log( s2.id );
    }
}
s1,s2には理論上同じインスタンスが入っているため、どちらかの情報(上記で言うフィールドid)を変更すると、最終的に変更された内容が反映されます。
インスタンスを共有する形はSingletonに拘らずとも、例えばstaticなフィールドを活用する方法もありますがアプリ起動中はデータが残り続け、メインメモリを圧迫します。ことさら大規模なゲームであれば様々なデータをSingletonの形として持ちたいことになりますが、このような理由でデータの寿命管理をプログラムに組み込み、上手にやりくりする必要が生まれます。
さてここでVContainerの出番です。VContainerを使うと、上記のようなSingletonパターンを再現したプログラムを頑張って構築する必要はなく、簡単なパラメータの変更でこれが実現できます。以下のサンプルではフィールドa1,a2をシングルトンで運用し、フィールドb1,b2はシングルトンではなくフィールド毎に別インスタンスを使用する運用を実現しています。
using UnityEngine;
using VContainer.Unity;

public class SingletonCheck : IStartable
{
  ClassA a1,a2;
  ClassB b1,b2;

  public SingletonCheck(ClassA a1, ClassA a2, ClassB b1, ClassB b2)
  {
    this.a1 = a1;
    this.a2 = a2;
    this.b1 = b1;
    this.b2 = b2;
  }

  void IStartable.Start()
  {
    Debug.Log("a1:"+a1.id+",a2:"+a2.id);
    Debug.Log("b1:"+b1.text+",b2:"+b2.text);
    a2.id = 5; // ClassAはシングルトンのため変更はa1にも影響
    b2.text = "上書きしました"; // ClassBはシングルトンではないのでb2のデータのみ変更
    Debug.Log("a1:"+a1.id+",a2:"+a2.id);
    Debug.Log("b1:"+b1.text+",b2:"+b2.text);
  }
}

public class ClassA
{
  public int id;
  public ClassA(int id){ this.id = id; }
}

public class ClassB
{
  public string text;
  public ClassB(string text){ this.text = text; }
}
using VContainer;
using VContainer.Unity;

public class SingletonLifetimeScope : LifetimeScope
{
    protected override void Configure(IContainerBuilder builder)
    {
      builder.Register<ClassA>(Lifetime.Singleton).WithParameter<int>(1);
      builder.Register<ClassB>(Lifetime.Transient).WithParameter<string>("初期文字");
      builder.RegisterEntryPoint<SingletonCheck>(Lifetime.Scoped);
    }
}
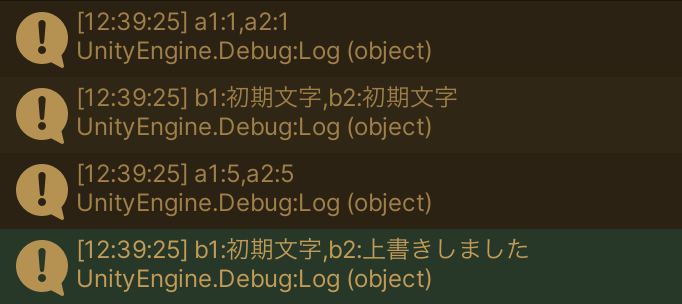
VContainerを活用したインスタンス管理例
シングルトンにするかしないかの設定はLifetimeScopeのクラス上で「登録」時の引数にLifetime.Singletonと指定するだけです。シングルトンにせず、フィールド毎に異なるインスタンスを保有したい場合はLifetime.Transientを指定します。そのほかにも、Lifetime.Scopedという値を存在しますが、これについては後々説明を行います。
Factory パターン
インスタンスを生成する仕組みを抽象化するためのプログラム構造(デザインパターン)です。何らかのインスタンスを生成する際にインスタンス生成過程を一箇所に集中させるためなどに利用することができ、和訳にもあるとおりインスタンスの「工場」として活躍します。
以下はFactory Methodパターンと呼ばれるFactoryパターンの親戚を実行するサンプルです。ベースはwikipediaを参考にしています。
using UnityEngine;

public class FactorySample : MonoBehaviour
{
  void Start()
  {
    FoodFactory factory;
    PanFactory pfactory = new PanFactory();
    OnigiriFactory ofactory = new OnigiriFactory();

    factory = pfactory;
    IFood a = factory.Produce("カレー");
    IFood b = factory.Produce("コッペ");
    a.ShowDetails();
    b.ShowDetails();
    pfactory.ShowNumberOfProduction();

    factory = ofactory;
    IFood c = factory.Produce("カレー");
    c.ShowDetails();
  }
}
using UnityEngine;

// Factory Methodをもつクラス。Creatorと呼ぶ。
public abstract class FoodFactory
{
  public IFood Produce(string material)
  {
    return CreateFood(material);
  }
  protected abstract IFood CreateFood(string material); // ここがFactory Methodと呼ばれる部分
}

// Factory Methodの具体的な実装はCreatorのサブクラスで行う
public class OnigiriFactory : FoodFactory
{
  protected override IFood CreateFood(string material)
  {
    return new Onigiri(material);
  }
}

// Factory Methodパターンでは、インスタンスの生成以外の処理を挟むことが出来る様になる
public class PanFactory : FoodFactory
{
  private int count = 0;

  protected override IFood CreateFood(string material)
  {
    count++;
    Pan p = new Pan(material, count);
    return p;
  }

  public void ShowNumberOfProduction()
  {
    Debug.Log("PanFactoryにおけるパンの製造数は"+count+"個です。");
  }
}
using UnityEngine;

public interface IFood
{
  string Material{ get; set; }
  void ShowDetails();
}

public class Pan : IFood
{
  public string Material{ get; set; }
  public int id;

  public Pan(string material, int id)
  {
    Material = material;
    this.id = id;
  }

  public void ShowDetails()
  {
    Debug.Log("これは製造番号"+id+"の"+Material+"パンです。");
  }
}

public class Onigiri : IFood
{
  public string Material{ get; set; }

  public Onigiri(string material)
  {
    Material = material;
  }

  public void ShowDetails()
  {
    Debug.Log("これは"+Material+"おにぎりです。");
  }
}
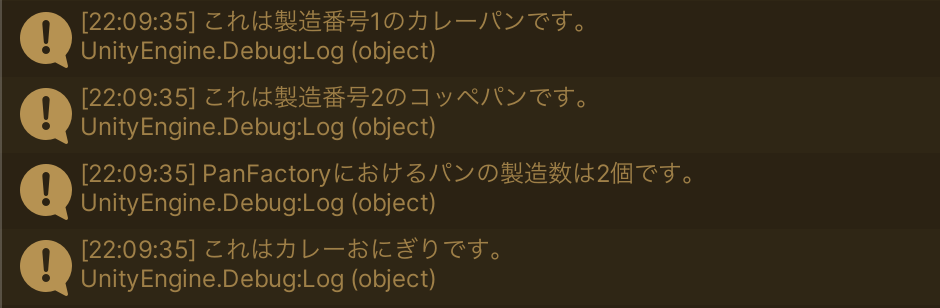
FactorySample.csの実行結果
実はVContainerでは、上記のようなFactoryクラスを利用した注入は推奨されておらず、デリゲートを使った手法を推奨しています。そのようにすることで、インスタンスの生成をゲーム実行中の任意のタイミングで行えるよう調整できるからです。以下は、VContainerでデリゲートを使った登録の例です。
using System;
using System.Collections.Generic;
using UnityEngine;
using UnityEngine.InputSystem;
using VContainer;
using VContainer.Unity;

public class ItemFuncSample : ITickable
{
  private List<InventoryPocket> inventory = new List<InventoryPocket>();
  private List<Item> itemDatabase;
  private ItemCreator creator;

  // ↓ここの引数に注入したい
  public ItemFuncSample(List<Item> itemDatabase,ItemCreator creator)
  {
    this.itemDatabase = itemDatabase;
    this.creator = creator;
  }

  // 前述の通り、TickメソッドはUpdateメソッド相当
  // InputSystemを使い、特定のキーボードのボタンが押されたら・・・という処理をしている
  void ITickable.Tick()
  {
    if( Keyboard.current.aKey.wasReleasedThisFrame )
    {
      Debug.Log("Push A Key");
      AddToInventory( creator.CreateItem(itemDatabase[0].id,itemDatabase[0].name) );
    }
    if( Keyboard.current.sKey.wasReleasedThisFrame )
    {
      Debug.Log("Push S Key");
      AddToInventory( creator.CreateItem(itemDatabase[1].id,itemDatabase[1].name) );
    }
    if( Keyboard.current.dKey.wasReleasedThisFrame )
    {
      Debug.Log("Push D Key");
      AddToInventory( creator.CreateItem(itemDatabase[2].id,itemDatabase[2].name) );
    }
    if( Keyboard.current.spaceKey.wasReleasedThisFrame ) ShowInventory();
  }

  private void AddToInventory(Item item)
  {
    foreach( var pocket in inventory)
    {
      if( pocket.item.id == item.id )
      {
        pocket.quantity++;
        return ;
      }
    }
    inventory.Add( new InventoryPocket(item,1) );
  }

  private void ShowInventory()
  {
    string result="";
    foreach( var pocket in inventory)
    {
      result += pocket.item.id+":"+pocket.item.name+":"+pocket.quantity+". ";
    }
    Debug.Log( result );
  }
}

public class ItemCreator
{
  readonly Func<int,string,Item> factory;

  // ↓ここの引数(デリゲート)に注入したい
  public ItemCreator(Func<int,string,Item> factory)
  {
    this.factory = factory;
  }

  public Item CreateItem(int id,string name)
  {
    return factory(id, name);
  }
}

[Serializable]
public class Item
{
  public int id;
  public string name;

  public Item(int id,string name)
  {
    this.id = id;
    this.name = name;
  }
}

public class InventoryPocket
{
  public Item item;
  public int quantity;

  public InventoryPocket(Item item,int quantity)
  {
    this.item = item;
    this.quantity = quantity;
  }
}
最後にこれらをLifetimeScopeを継承したクラス内のConfigureメソッド上に整理し、「登録」していきます。
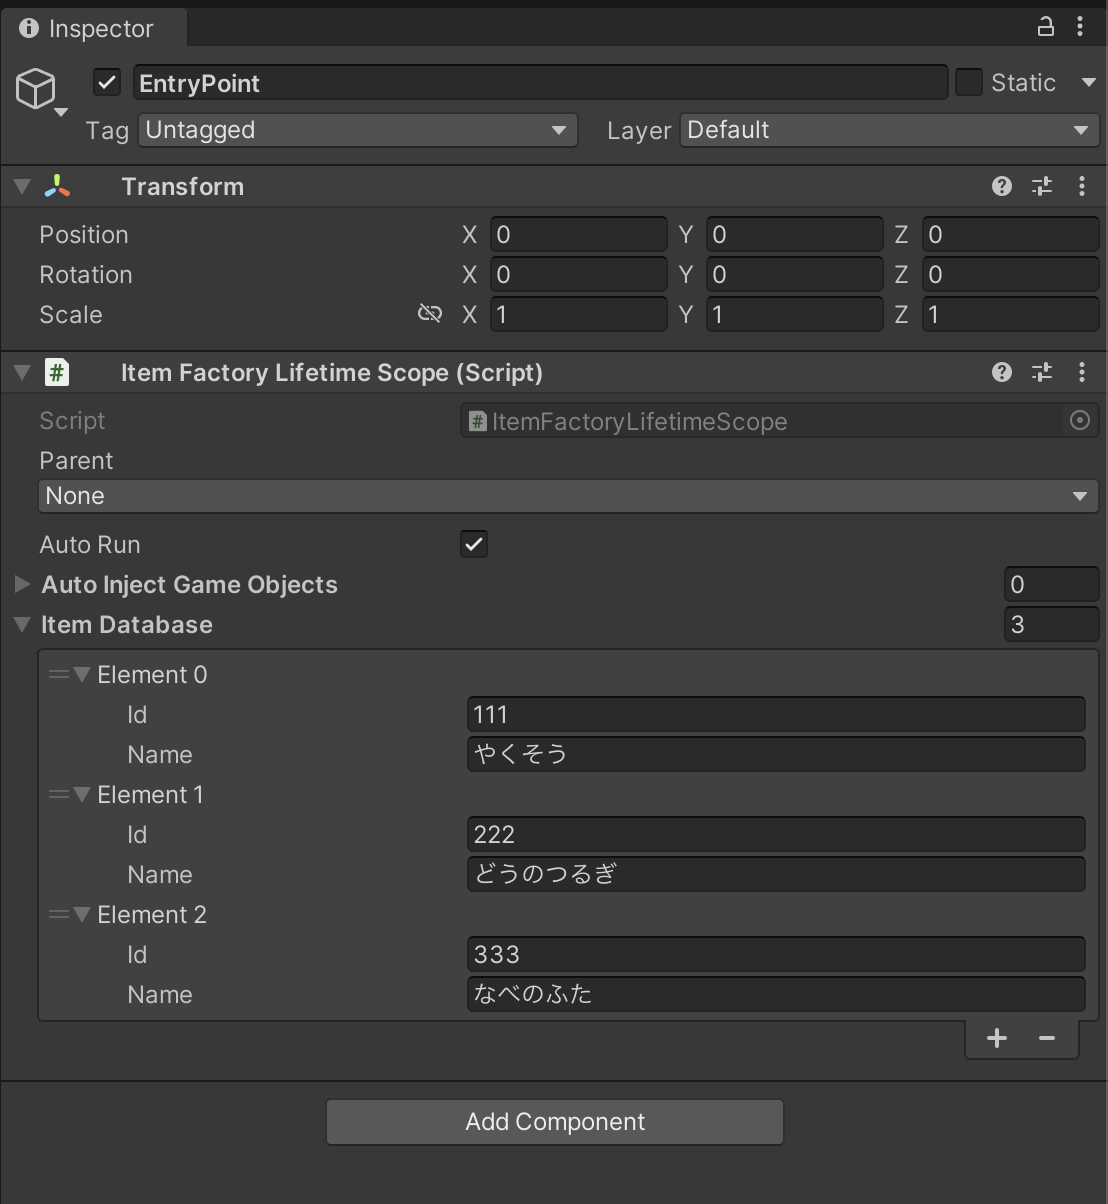
今回は、ItemFactoryLifetimeScopeと名付けたクラスを以下のように作成し、Hierarchy上にある任意のGameObjectにアタッチし、実行してみます。
using System;
using System.Collections.Generic;
using UnityEngine;
using VContainer;
using VContainer.Unity;

public class ItemFactoryLifetimeScope : LifetimeScope
{
  [SerializeField] List<Item> itemDatabase;

  protected override void Configure(IContainerBuilder builder)
  {
    builder.Register<ItemCreator>(Lifetime.Singleton);
    builder.RegisterEntryPoint<ItemFuncSample>().WithParameter<List<Item>>(itemDatabase);
    builder.RegisterFactory<int, string, Item>(container =>
    {
      // RegisterFactoryの引数自体もデリゲート
      // 引数containerは他の「登録」内容を参照するために利用できる(今回は未使用)
      Func<int,string,Item> func = (id,name) => new Item(id,name);
      return func;
    }, Lifetime.Scoped);
  }
}
実行前に[SerializeField]となっているitemDatabaseにいくつかアイテムを登録しておきましょう。
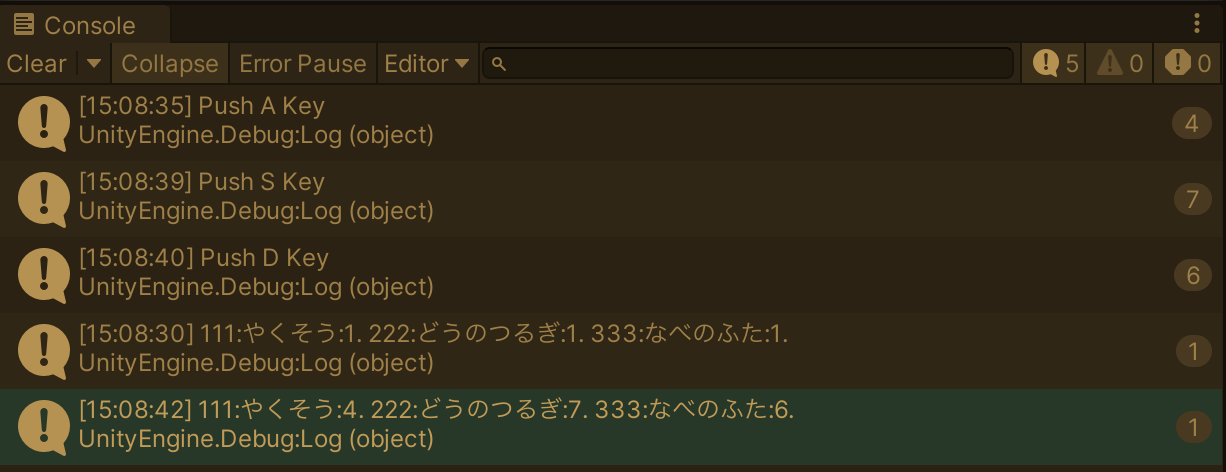
ItemFactoryLifetimeScopeの実行結果例
第3回目の終わりに
用語編はさらに続きます。本編はいつ始まるんだ・・・。次回はVContainerの公式ドキュメントなどでも使用される用語を中心にソフトウェア開発の知識をちょこっと確認します。
Discussion