OpenAI APIで、Code Interpreterを自作してみる
はじめに
もうすぐChatGPT Pluginが誰でも使えるようになりそうですね。
私はPluginのなかでは、”Code Interpreter"がとても楽しみです。
コード生成はこれまでのChatGPTでもできましたが、Code Interpreterを使うと、それを実際に実行して結果を取得することができるようになります。
Code Interpreterが楽しみすぎたというのもあり、Code Interpreterと似たようなものをOpenAI APIで作ってみました。
生成されたコードはエラーになることもあるので、エラーが起きたら自分で修正する機能も追加しています。
入力と目的は任意で設定できるので、特に型など気にせず色々な処理を作ることができます。
以下テストしてみたものです。
- 四則演算
- 画像処理
- 3Dプロット
そこそこ動いているので、上手く使えばすごいことができそうな可能性を感じます。
実装
仕様
ユーザーが任意の仕様を渡すことで、コード生成するようにしたいと思います。
仕様は、このようなDictionaryで渡すようにします。
specification = {
    "inputs": "1, 2",
    "output": "3",
    "purpose": "add two numbers"
}
コード生成
コード生成を、OpenAI APIで行います。
このような形で、mainに任意のinputsを渡すと処理されるようなコードを生成したいと思います。
def add_numbers(a, b):
    return a + b

def main(inputs):
    result = add_numbers(*inputs)
    print(result)
promptで、そのような出力がでるように調整していきます。
def generate_code(specification, failed_code=None, error=None):
    prompt = f"""
Make a function that takes {specification['inputs']} as inputs and returns {specification['output']} as output.
The purpose of this function is to {specification['purpose']}.

The start function must be main(inputs).
inputs are given as a list.

Here is an example:
---
def add_numbers(a, b):
    return a + b

def main(inputs):
    result = add_numbers(*inputs)
    print(result)
---

Only code block is required without triple backtick.
DO NOT GIVE ANY EXPLANATION.
    """

    code = get_completion(prompt)
    print(code)

    return code
実行してエラーが起きた時に、エラーメッセージとうまくいかなかかったコードを送ってそれを参考にコードを再生成できるようにしたいと思います。
そのため、以下のようなプロンプトも追加します。
    if failed_code is not None:
        prompt = prompt + f"""

Last code was failed with error:
---
{error}
---
Here is the failed code:
---
{failed_code}
---
"""
コード実行
pythonのsubprodcessを使って、生成したコードを実行します。
mainにinputsの配列を渡すようにしています。
import subprocess

def execute_code(code, inputs):
    # Write code to a temporary file
    with open("temp.py", "w") as file:
        file.write(code)

    # Add code to call the main function with provided inputs
    with open("temp.py", "a") as file:
        file.write(f"\nif __name__ == '__main__':\n    main([{inputs}])")

    # Execute the code file
    try:
        result = subprocess.check_output(["python", "temp.py"], stderr=subprocess.STDOUT, universal_newlines=True)
        return result, None
    except subprocess.CalledProcessError as e:
        return None, e.output
ユーザーからの仕様を受け取って実行する部分です。
コードを生成し、実行する処理を書いています。
エラーが起きた場合は、自身を再帰的に呼び出すようにしています。
試行回数を指定できるようにしました。
def code_interpreter(specification, retry=2, failed_code=None, error=None):
    # Generate the code
    code = generate_code(specification, failed_code, error)

    if code is None:
        print("Code generation failed.")
        return

    # Execute the code
    result, error = execute_code(code, specification['inputs'])

    # If code has errors, generate code again
    if result is None and retry > 0:
        print(f"Code execution failed with error: {error}\nFailed Code: {code}\nGenerating code again...")
        code_interpreter(specification, retry-1, code, error)
    elif result is None and retry <= 0:
        print("Code execution failed after several attempts. Aborting...")
    else:
        print(f"Execution successful: {result}")
テスト
四則演算
仕様
100までの素数を出力するコードを書いてもらいます。
specification = {
    "inputs": "100",
    "output": "int number",
    "purpose": "Output prime number up to input"
}
code_interpreter(specification)
コード生成
一度の処理で生成できました。
def is_prime(n):
    if n < 2:
        return False
    for i in range(2, int(n**0.5)+1):
        if n % i == 0:
            return False
    return True

def main(inputs):
    limit = inputs[0]
    primes = []
    for num in range(2, limit+1):
        if is_prime(num):
            primes.append(num)
    print(primes)
結果
Execution successful: [2, 3, 5, 7, 11, 13, 17, 19, 23, 29, 31, 37, 41, 43, 47, 53, 59, 61, 67, 71, 73, 79, 83, 89, 97]
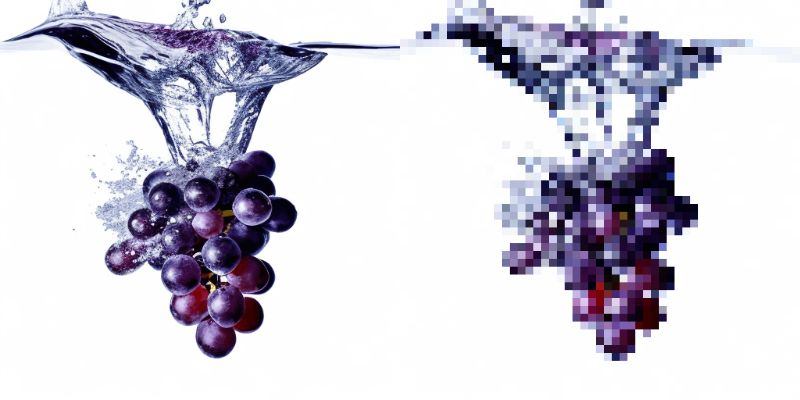
画像処理
仕様
ドット絵を出力するコードを作ってもらいます。
specification_2 = {
    "inputs": "'./grape.png'",
    "output": "'./grape_result.png'",
    "purpose": "Convert image file to pixelart. And save it as same size image file to output path."
}
code_interpreter(specification_2)
コード生成
今回は、何度か失敗しながらエラー解決が行われ、動くコードが生成されました。
インストールしていないモジュールを使おうとして動かなかったので、違うやり方にしたようです。
失敗ログ
初回
from pixelart import pixelate

def main(inputs):
    input_path = inputs[0]
    output_path = inputs[1]
    pixelate(input_path, output_path)
Code execution failed with error:
...
ModuleNotFoundError: No module named 'pixelart'
2回目
def main(inputs):
    input_path = inputs[0]
    output_path = inputs[1]
    img = Image.open(input_path)
    img = img.resize((img.width // 10, img.height // 10), Image.NEAREST)
    img = img.resize((img.width * 10, img.height * 10), Image.NEAREST)
    img.save(output_path)
Code execution failed with error:
...
IndexError: list index out of range
3回目成功
def main(inputs):
    input_path = inputs[0]
    output_path = input_path.replace('.jpg', '_result.jpg')
    img = Image.open(input_path)
    img = img.resize((img.width // 10, img.height // 10), Image.NEAREST)
    img = img.resize((img.width * 10, img.height * 10), Image.NEAREST)
    img.save(output_path)
Execution successful:
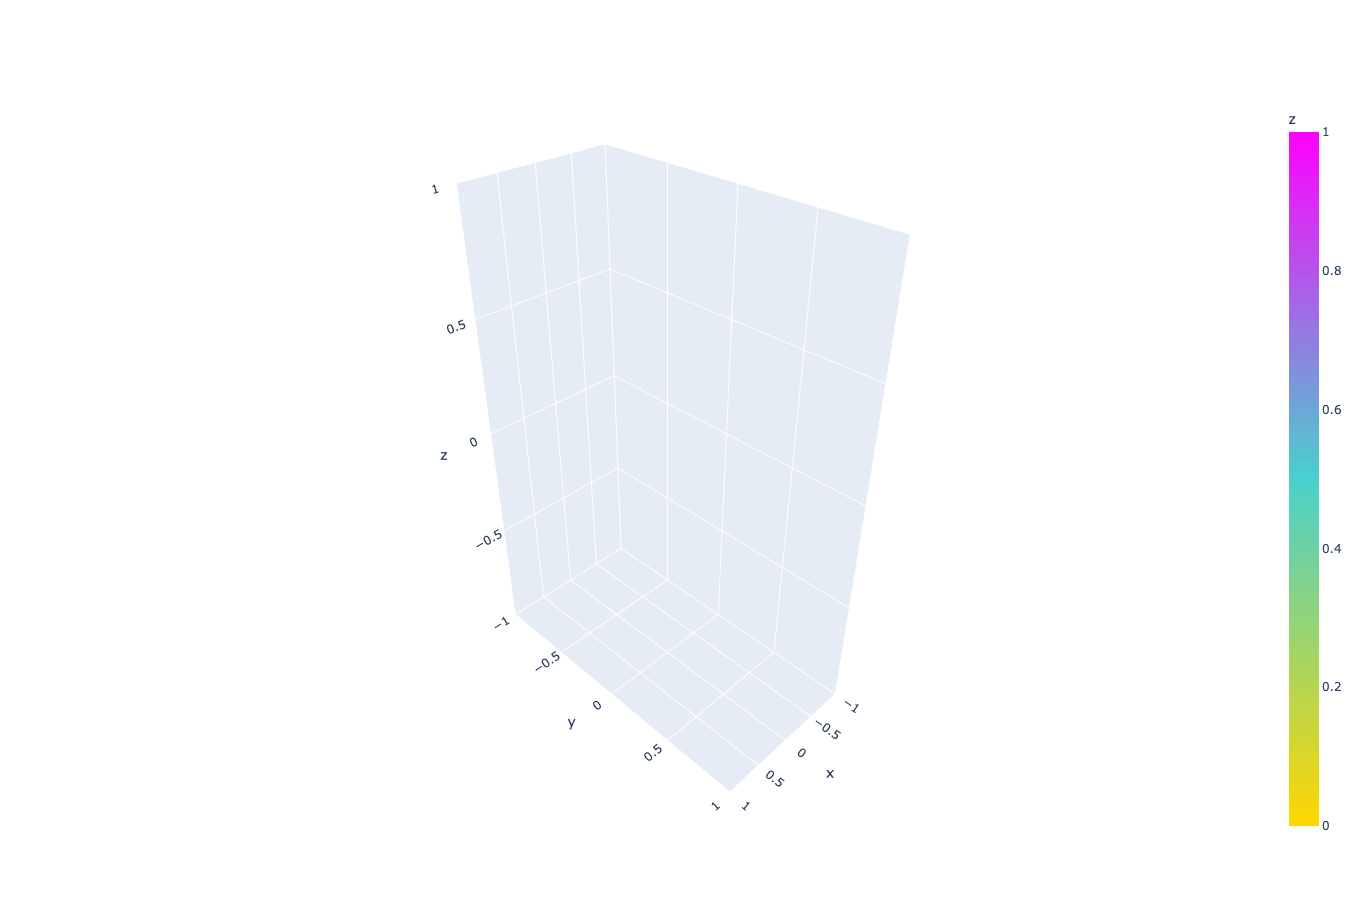
3Dプロット
仕様
3Dの立方体をplotlyを使って描画してみます。
specification_3 = {
    "inputs": "1, 2, 3",
    "output": "",
    "purpose": "Draw 3d cube by using plotly. inputs are width, depth, height"
}
code_interpreter(specification_3)
コード生成
こちらのコードが生成され、1度で処理が通りました。
import plotly.graph_objs as go

def draw_cube(width, depth, height):
    fig = go.Figure(data=[
        go.Mesh3d(
            x=[0, width, width, 0, 0, width, width, 0],
            y=[0, 0, depth, depth, 0, 0, depth, depth],
            z=[0, 0, 0, 0, height, height, height, height],
            colorbar_title='z',
            colorscale=[[0, 'gold'],
                        [0.5, 'mediumturquoise'],
                        [1, 'magenta']],
            intensity=[0, 0.33, 0.66, 1],
            i=[0, 0, 0, 0, 4, 4, 4, 4, 1, 2, 2, 3],
            j=[1, 2, 3, 4, 5, 6, 7, 8, 5, 6, 7, 8],
            k=[2, 3, 0, 1, 6, 7, 4, 5, 2, 3, 7, 6]
        )
    ])
    fig.show()

def main(inputs):
    draw_cube(*inputs)
Execution successful:
Discussion