🍋
見出しが飛び出ているtable
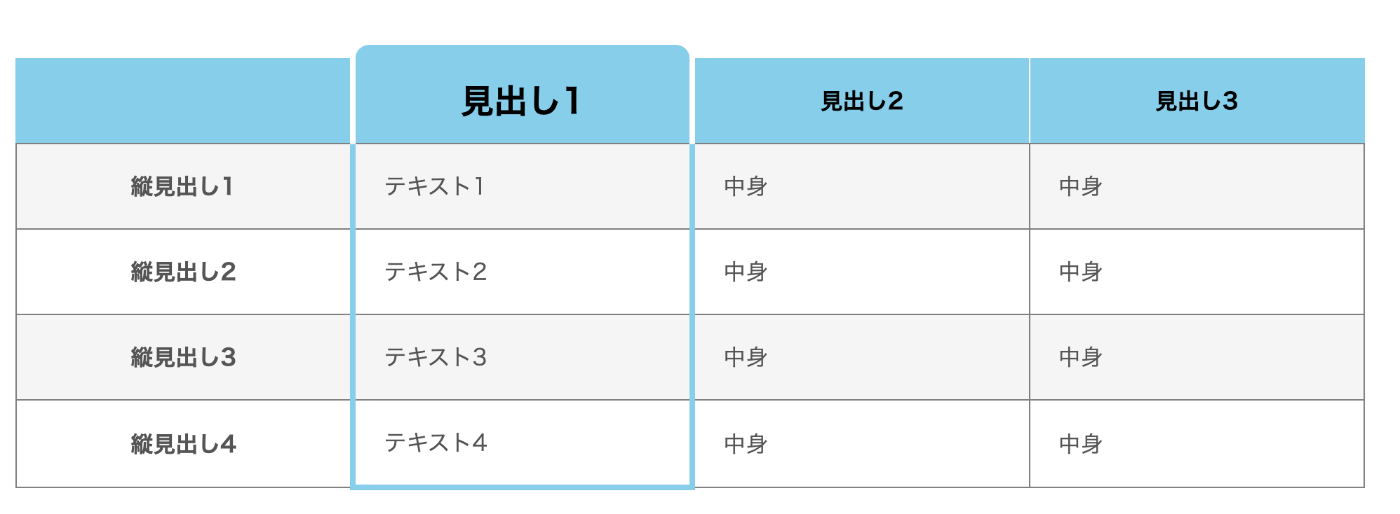
価格表や比較表で、見出しが飛び出しているtableを作りたいと思ったことはありませんか。
これは、CSSの擬似要素を使うと簡単に作成できます。
コード
    <div class="table-wrap">
      <table>
        <thead>
          <tr>
            <th></th>
            <th>見出し1</th>
            <th>見出し2</th>
            <th>見出し3</th>
          </tr>
        </thead>
        <tbody>
          <tr>
            <th>縦見出し1</th>
            <td>テキスト1</td>
            <td>中身</td>
            <td>中身</td>
          </tr>
          <tr>
            <th>縦見出し2</th>
            <td>テキスト2</td>
            <td>中身</td>
            <td>中身</td>
          </tr>
          <tr>
            <th>縦見出し3</th>
            <td>テキスト3</td>
            <td>中身</td>
            <td>中身</td>
          </tr>
          <tr>
            <th>縦見出し4</th>
            <td>テキスト4</td>
            <td>中身</td>
            <td>中身</td>
          </tr>
        </tbody>
      </table>
    </div>
.table-wrap{
    margin: 50px 0;
}

th,
td {
  border: solid 1px gray; /* テーブルに線をつける */
  padding: 10px 20px; /*余白*/
  width: 200px; /*幅*/
  height: 40px; /*高さ*/
}

table {
  border-collapse: collapse;
  position: relative;
}

/* ==================
見出し
================== */
th {
  font-weight: bold;

  /* color: white; */
}
/* 横の見出し */
thead th:first-child {
  background-color: skyblue;
  border-top: none;
  border-left: 1px solid skyblue;
}
th:nth-child(3) {
  background-color: skyblue;
  border-top: none;
  border-right: solid 1px white;
}
th:nth-child(4) {
  background-color: skyblue;
  border-top: none;
  border-right: solid 1px skyblue;
}

/* ちょっとはみ出した横の見出し */
th:nth-child(2) {
  background-color: skyblue;
  position: relative;
  font-size: 1.5rem;
  border-right: solid 4px white;
  border-left: solid 4px white;
}

th:nth-child(2)::before {
  content: "";
  width: 100%;
  height: 10px;
  position: absolute;
  background-color: skyblue;
  border-radius: 10px 10px 0 0;
  left: 0;
  bottom: 100%;
}

/* 縦の見出し */
th:first-of-type {
  color: #555;
}

/* ==================
データセル
================== */
td {
  color: #555;
}

tr:nth-child(odd) {
  background-color: #f5f5f5;
}

/* 縦に囲む */
td:nth-child(2) {
  border: solid 4px skyblue;
  border-top: solid 1px gray;
  border-bottom: none;
}
tr:last-child td:nth-child(2) {
  border-bottom: solid 4px skyblue;
}
HTMLの解説
今回は縦と横に見出しがあるtableを作成しました。
特別なことはしていない、シンプルなテーブルです。
CSSの解説
横の見出し
横の見出しは、nth-childで背景色を指定しています。
今回はすべてskyblueにしていますが、個別に色を指定すればカラフルになります。
thead th:first-child {
  background-color: skyblue;
  border-top: none;
  border-left: 1px solid skyblue;
}
th:nth-child(3) {
  background-color: skyblue;
  border-top: none;
  border-right: solid 1px white;
}
th:nth-child(4) {
  background-color: skyblue;
  border-top: none;
  border-right: solid 1px skyblue;
}
ちょっと飛び出た見出し
nth-child(2)に、position: relative;を設定するのがポイントです。
飛び出している部分は、擬似要素で指定します。
まずposition: absolute;をして、height: 10px;で高さをもたせます。ここの数字を大きくすればするほど飛び出ます!
さらに border-radius: 10px 10px 0 0;で飛び出した部分を角丸に。
th:nth-child(2) {
  background-color: skyblue;
  position: relative;
  font-size: 1.5rem;
  border-right: solid 4px white;
  border-left: solid 4px white;
}

th:nth-child(2)::before {
  content: "";
  width: 100%;
  height: 10px;
  position: absolute;
  background-color: skyblue;
  border-radius: 10px 10px 0 0;
  left: 0;
  bottom: 100%;
}
縦に表を囲む
縦に囲みたい部分をnth-child(2)で指定します。border: solid 4px skyblue;をかけて、border-top: solid 1px gray;でCSSを上書きして表の真ん中の線を足しています。
このままだと最下部の線がつかないので、tr:last-child td:nth-child(2)で最下部の線をつけます。
td:nth-child(2) {
  border: solid 4px skyblue;
  border-top: solid 1px gray;
  border-bottom: none;
}
tr:last-child td:nth-child(2) {
  border-bottom: solid 4px skyblue;
}
Discussion