🌳
【p5.js】画像に文字をマッピングする

目的
p5.jsで画像に文字をマッピングしてみます。
コードはTypeScript(4.8.4)です。
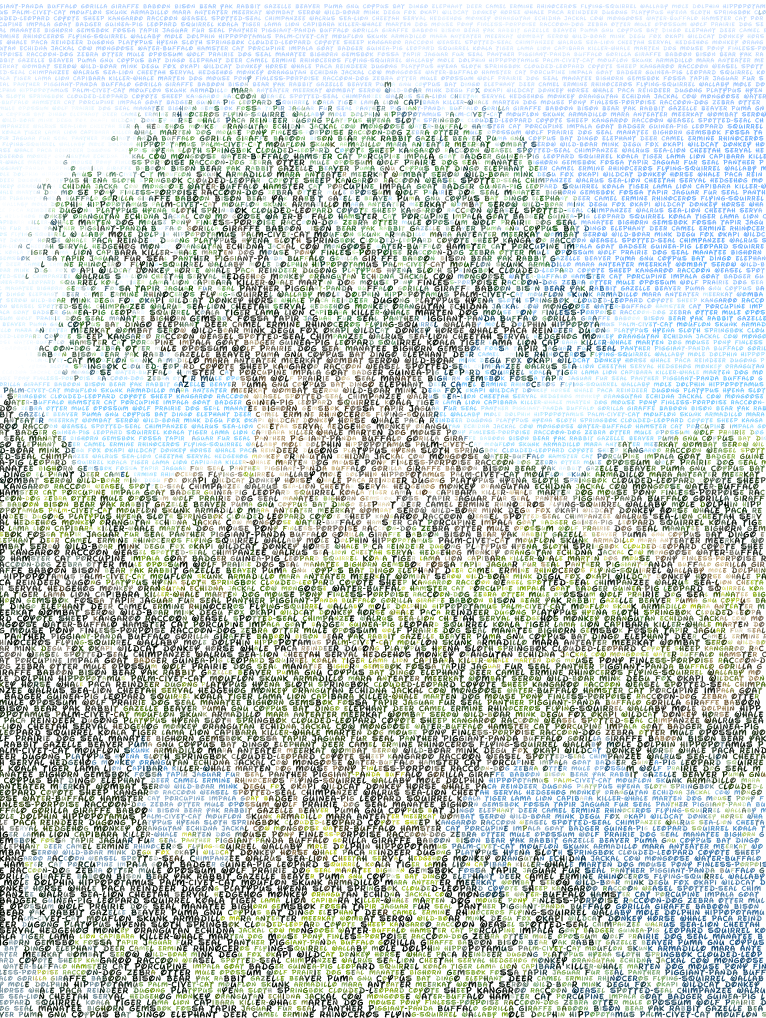
最終結果イメージはこちらです。
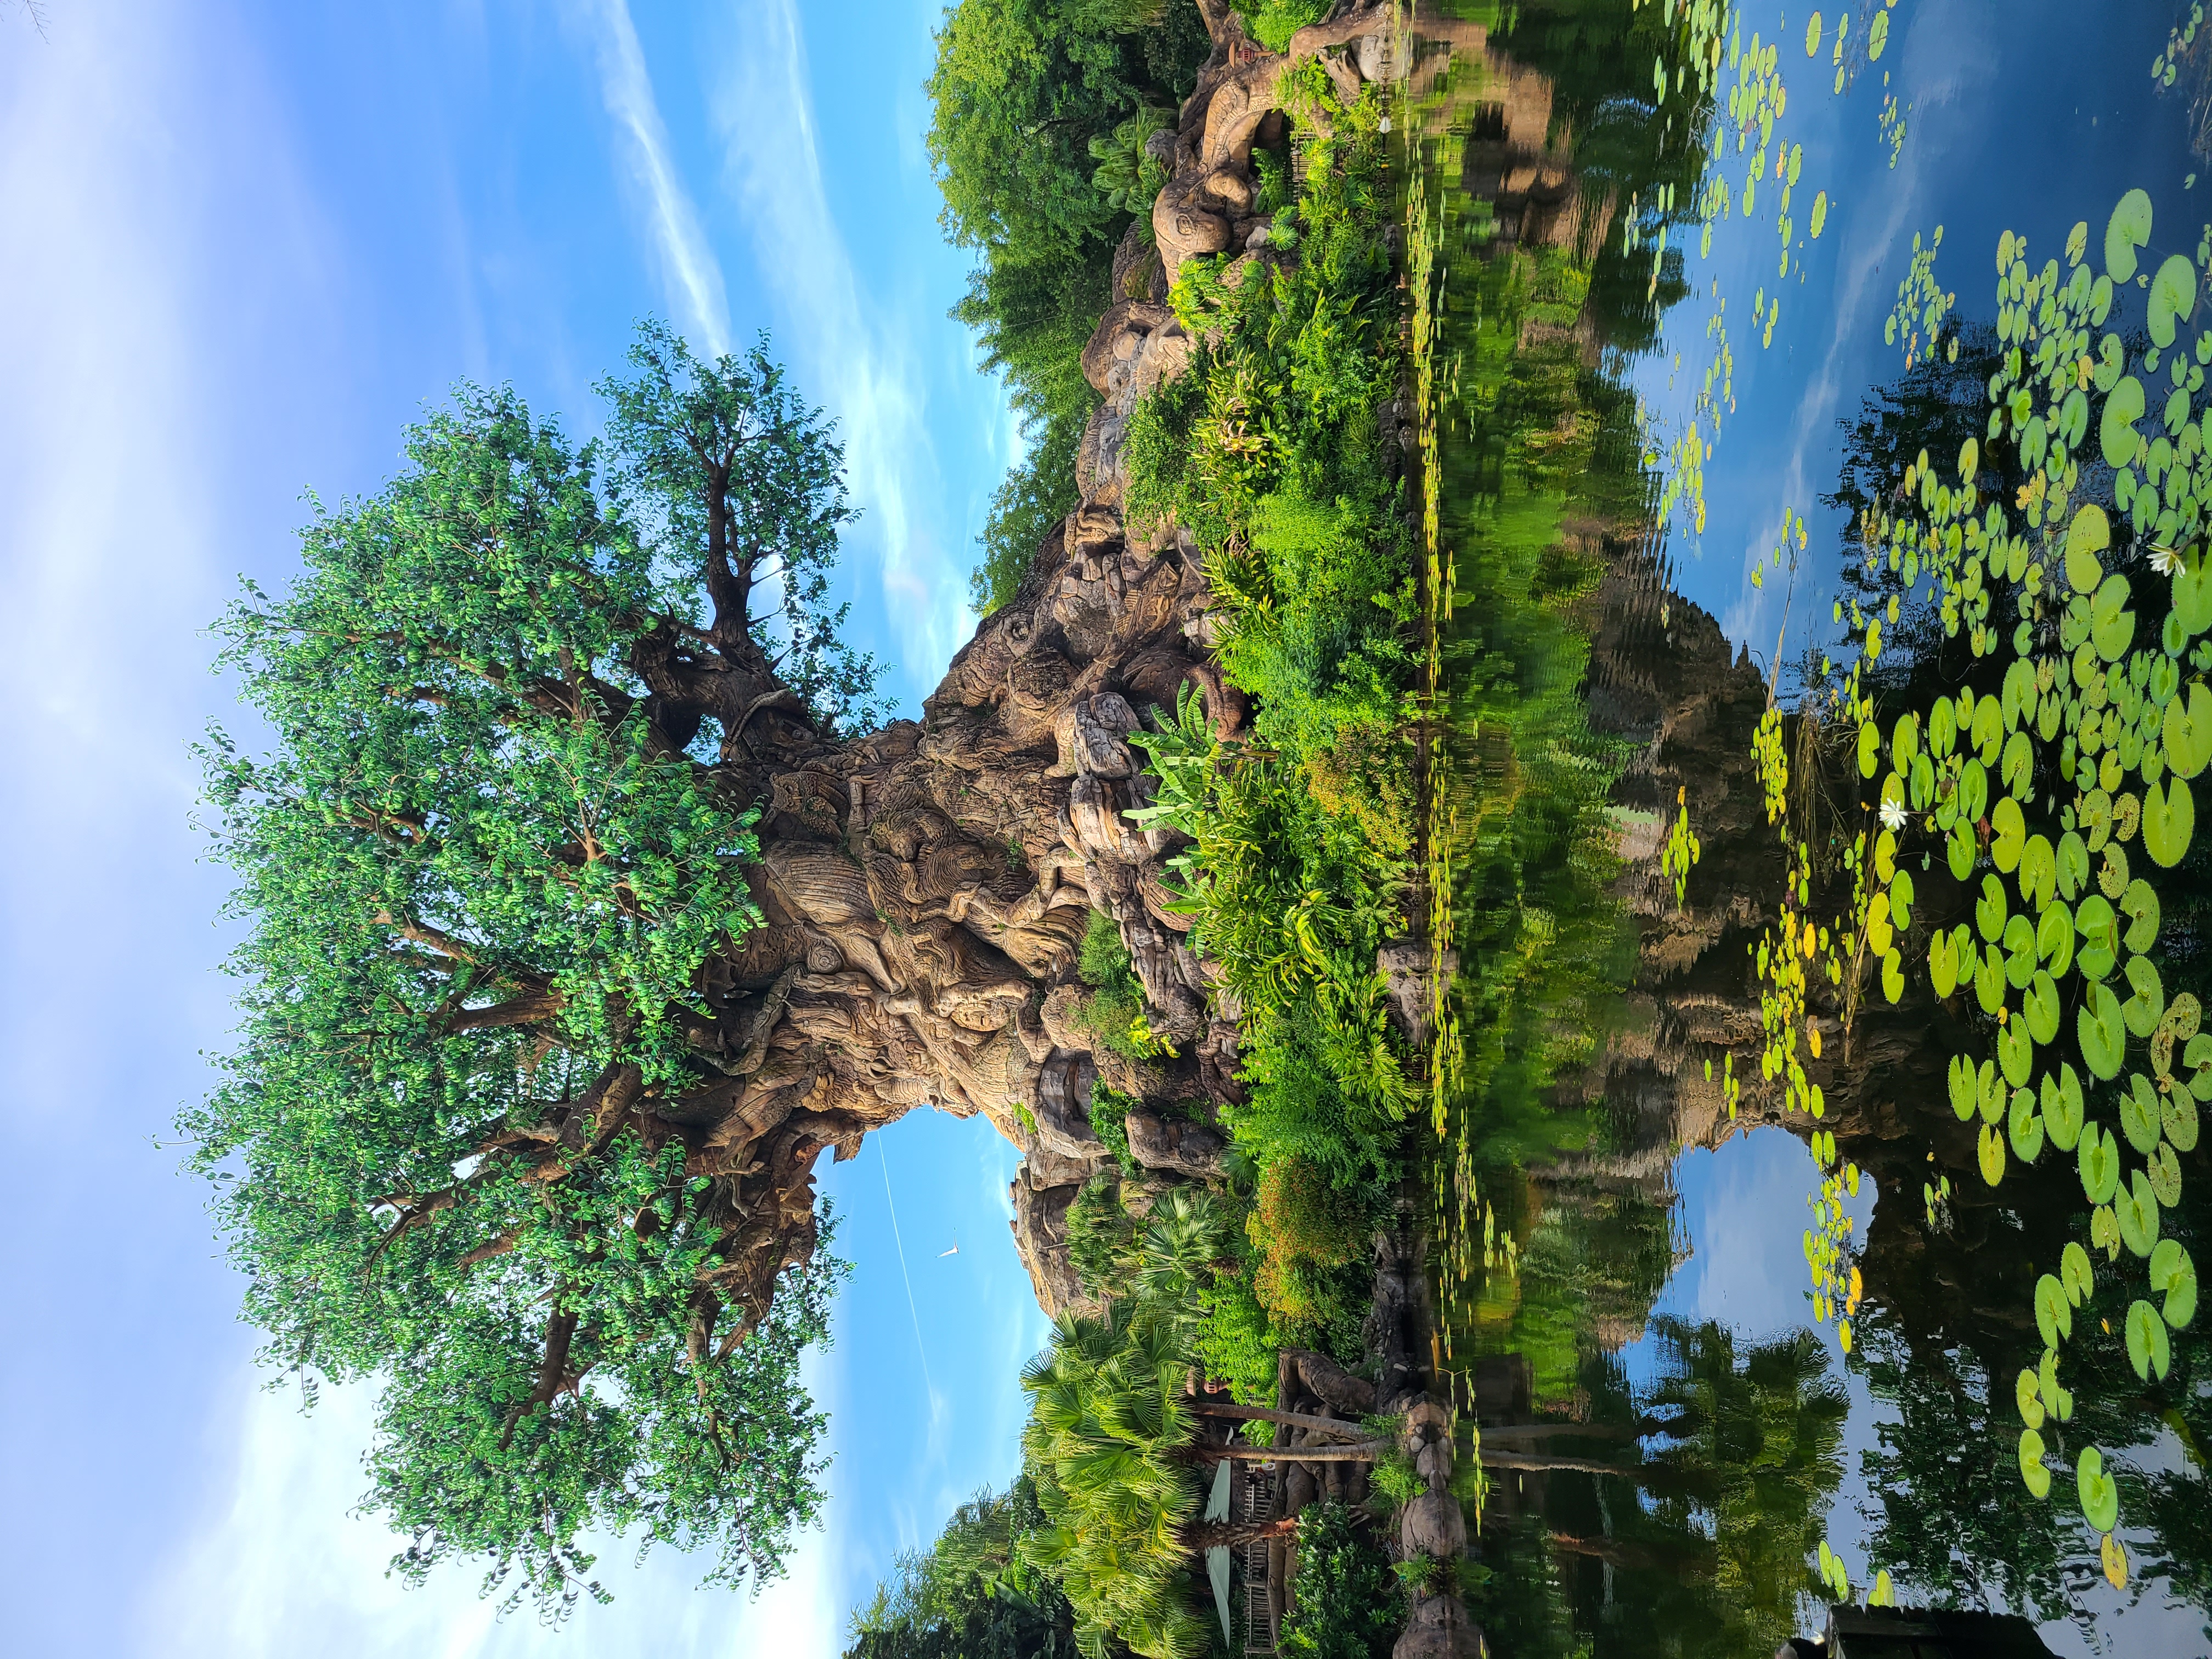
元画像はこちらです。
アメリカのフロリダ州オーランドにあるディズニーアニマルキングダムの「ツリー・オブ・ライフ」です。
もう1度いきたいフロリダ ディズニーワールド。
コーディングはこちらを参考にしました。
コードについて
import * as p5 from 'p5';
import { ANIMAL_LETTERS } from './animal-letters';

function arrayShuffle<T>(array: T[]) {
  for (let i = array.length - 1; 0 < i; i--) {
    // 0〜(i+1)の範囲で値を取得
    const r = Math.floor(Math.random() * (i + 1));

    // 要素の並び替えを実行
    const tmp = array[i];
    array[i] = array[r];
    array[r] = tmp;
  }
  return array;
}

const sketch = (p: p5) => {
  const letters = arrayShuffle(ANIMAL_LETTERS).join(' '); // マッピングしていく文字列
  let img: p5.Image;
  const canvasWidth = 768;
  const canvasHeight = 1024;
  let imageWidth: number;
  let imageHeight: number;
  let ratio: number;
  var fontSizeMax = 9;
  const fontSizeMin = 5;
  const spacing = 6; // line height
  const betweenLetters = 0.5;
  let font: p5.Font;

  p.preload = () => {
    // ベース画像のロード
    img = p.loadImage(
      'https://raw.githubusercontent.com/yosshitaku067/images-for-stackblitz/main/disney-world-ak.jpg'
    );

    // フォントのロード
    p.loadFont('https://fonts.cdnfonts.com/s/10244/waltographUI.woff', (f) => {
      font = f;
    });
  };

  p.setup = () => {
    // 比率を計算
    ratio = Math.min(canvasWidth / img.width, canvasHeight / img.height);

    // 画像のサイズを計算
    imageWidth = img.width * ratio;
    imageHeight = img.height * ratio;

    p.createCanvas(canvasWidth, canvasHeight); // キャンバスを作成
    p.textFont(font); // フォントの設定
    p.textAlign(p.LEFT, p.CENTER); // テキストの並び設定

    p.background(255);

    console.log(
      `width: ${img.width} -> ${imageWidth},`,
      `height: ${img.height} -> ${imageHeight}`
    );

    // ループはしない
    p.noLoop();
  };

  p.draw = () => {
    let x = 0; // 画像のX位置
    let y = 10;
    let counter = 0;

    img.loadPixels();

    while (y < p.height) {
      // 画像の位置(X, Y)を算出
      const imgX = p.round(p.map(x, 0, imageWidth, 0, img.width));
      const imgY = p.round(p.map(y, 0, imageHeight, 0, img.height));

      // 画像位置から色を抽出
      const color = p.color(img.get(imgX, imgY));

      // 色が黒に近いほどフォントサイズが大きくなるように設定
      const greyscale = p.round(
        p.red(color) * 0.222 + p.green(color) * 0.707 + p.blue(color) * 0.071
      );
      const fontSize = p.map(greyscale, 0, 255, fontSizeMax, fontSizeMin);

      // 文字を描画
      p.push();
      p.translate(x, y);
      p.textSize(fontSize);
      p.textStyle(p.BOLD);
      p.fill(color);
      const letter = letters.charAt(counter);
      p.text(letter, 0, 0);
      const letterWidth = p.textWidth(letter) + betweenLetters;
      x += letterWidth; // 文字の横幅分X位置をずらす
      p.pop();

      // 横方向の折り返し
      if (x + letterWidth >= p.width) {
        x = 0;
        y += spacing;
      }

      counter++;
      // 文字列を最初から
      if (counter >= letters.length) {
        counter = 0;
      }
    }
  };
};

new p5(sketch);
処理内容は基本的にコードコメントに書いてある通りですが、
img.loadPixels();
loadPixels関数を利用して、
画像のピクセルデータから(X、Y)の位置を指定して、
その位置の色情報から下記の処理で文字の大きさに重みをつけることで、
濃い色が少しだけおおきく表示されるようにしています。
const greyscale = p.round(
p.red(color) * 0.222 + p.green(color) * 0.707 + p.blue(color) * 0.071
);
const fontSize = p.map(greyscale, 0, 255, fontSizeMax, fontSizeMin);
実行環境はStackBlitzに置いています。
以上。ありがとうございました。
本当にもう1度フロリダに行きたい。
Discussion