🌋flutter_hooksのuseReducer入門
上記記事を拝見し、useReducerという便利なHookが存在することを知ったので軽く触ってみました。
useReducerとは?
先ほどの記事を読んでもらえれば詳しくわかると思いますが、本記事でも軽く説明しておきます。
useReducer は、flutter_hooksライブラリによって提供されるフックの一つで、複雑な状態管理を効率的に行うため用意されています。
useReducerの主な利点は以下の通りです:
- 関連する状態の一括更新: 複数の関連する状態を一度に更新することができます。
- 複雑な状態ロジックのカプセル化: 状態変化のロジックを reducer 内に集約し、コードの整理と可読性の向上を図ります。
- 再利用性: 純粋関数である reducer は、複数のコンポーネント間で再利用可能です。
- テストの容易さ: 純粋関数であるため、reducer の単体テストが容易になります。
useReducerを使ってカウンターアプリを作る
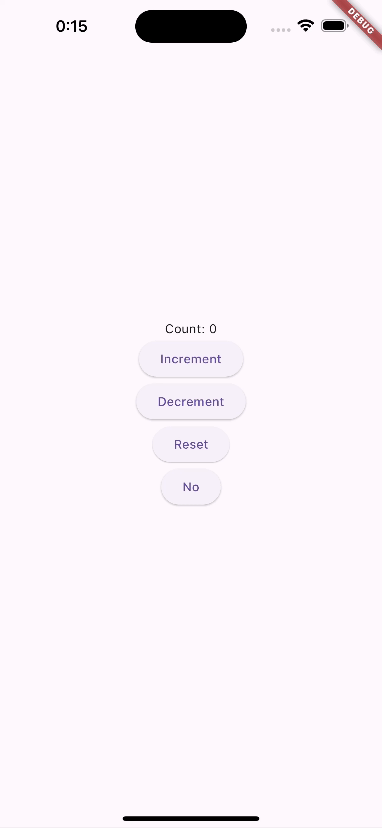
複雑な状態や処理ではないカウンターアプリでuseReducerを使用するメリットはない(むしろ冗長なのでデメリット)と思いますが、基本的な使い方を学ぶためカウンターアプリでサンプルを作りました。
import 'package:flutter/material.dart';
import 'package:flutter_hooks/flutter_hooks.dart';
class UseReducerSample extends HookWidget {
const UseReducerSample({super.key});
Widget build(BuildContext context) {
    final store = useReducer<State, CountAction>(
      reducer,
      initialState: State(),
      initialAction: NoAction(),
    );
return Scaffold(
body: Center(
child: Column(
mainAxisAlignment: MainAxisAlignment.center,
children: <Widget>[
Text('Count: ${store.state.counter}'),
ElevatedButton(
onPressed: () => store.dispatch(Increment()),
child: Text('Increment'),
),
ElevatedButton(
onPressed: () => store.dispatch(Decrement()),
child: Text('Decrement'),
),
ElevatedButton(
onPressed: () => store.dispatch(Reset()),
child: Text('Reset'),
),
ElevatedButton(
onPressed: () => store.dispatch(NoAction()),
child: Text('No'),
),
],
),
),
);
}
}
sealed class CountAction {}

class Increment extends CountAction {}

class Decrement extends CountAction {}

class Reset extends CountAction {}

class NoAction extends CountAction {}
State reducer(State state, CountAction action) => switch (action) {
      Increment() => State(counter: state.counter + 1),
      Decrement() => State(counter: state.counter - 1),
      Reset() => State(counter: 0),
      NoAction() => state,
    };
class State {
State({this.counter = 0});
final int counter;
}
注目すべき点はuseReducer部分です。
final store = useReducer<State, CountAction>(
reducer,
initialState: State(),
initialAction: NoAction(),
);
<State, CountAction>部分で、Stateは管理する状態クラスが指定され、CountActionは状態を更新するアクションを表す基底クラスを指定しています。useReducerでは、このアクションをdispatch(発行)することによって状態を変更します。
sealed class CountAction {}
class Increment extends CountAction {}
class Decrement extends CountAction {}
class Reset extends CountAction {}
class NoAction extends CountAction {}
Dart3から導入されたsealedクラスを基底クラスとし、それぞれアクションクラスで継承しています。
State reducer(State state, CountAction action) => switch (action) {
Increment() => State(counter: state.counter + 1),
Decrement() => State(counter: state.counter - 1),
Reset() => State(counter: 0),
NoAction() => state,
};
reducer関数では受け取ったアクションクラスによって返却する状態を変更しています。このreducerをuseReducerの第一引数に指定することによって、状態の変更をViewに通知します。
実際にアクションを実行する際には下記のように実行します。
final store = useReducer<State, CountAction>(
  reducer,
  initialState: State(),
  initialAction: NoAction(),
);

 ・・・

ElevatedButton(
  onPressed: () => store.dispatch(Increment()),
  child: Text('Increment'),
),
initialState は、フックが最初に使用されるときの初期値で、ここではState() コンストラクタを使用して、初期状態を生成しています。
class State {
  State({this.counter = 0});
  final int counter;
}
initialAction は、フックが初めてレンダリングされるときに実行されるアクションです。NoAction() を指定しているので、特になんの変更も行いません。
NoAction() => state, ← そのままstateを返却しています。
テストを書く
useStateを使ったカウンターアプリの場合、flutter_hooks_testといったパッケージを使う必要があったり、状態のロジックがウィジットと密接に関わっているため純粋なユニットテストを書くことが難しいです。しかし、useReducerでreducer関数を定義している場合、reducer関数を純粋な関数として定義しているので、テストを簡単に書くことが出来ます。
void main() {
  group('Reducerテスト', () {
    test('カウンターを増加', () {
      final initialState = State(counter: 0);
      final newState = reducer(initialState, Increment());

      expect(newState.counter, 1);
    });

    test('カウンターを減少', () {
      final initialState = State(counter: 0);
      final newState = reducer(initialState, Decrement());

      expect(newState.counter, -1);
    });

    test('カウンターをリセット', () {
      final initialState = State(counter: 5);
      final newState = reducer(initialState, Reset());

      expect(newState.counter, 0);
    });

    test('変更しない', () {
      final initialState = State(counter: 3);
      final newState = reducer(initialState, NoAction());

      expect(newState.counter, 3);
    });
  });
}
まとめ
useReducerをうまく活用すれば、ユーザ情報入力画面のように複雑なフォームの状態管理やECアプリのショッピングカートの状態管理等を簡潔に行うことができます。自分自身、まださらっと試したくらいなのでこれから活用してuseReducerの知識を深めていこうと思います。
Discussion