Minkube上に理想の環境を構築する
インストールするもの
- Knative Serving
- Knative Eventing
- Tekton Pipelines
- Tekton Triggers
- Tekton Dashboard
-
Argo CD
Tektonで実行するタスク - Git Clone
- Kaniko
とりあえずTekton Triggersまでインストールしてみる。
すると、CrashLoopBackOff状態になっているPodが複数ある。
➜ k get pods -A
NAMESPACE                    NAME                                                READY   STATUS              RESTARTS        AGE
knative-serving              activator-5886599f75-69kv7                          0/1     Running             0               64s
knative-serving              autoscaler-6c785b5655-mbgmh                         0/1     Running             0               64s
knative-serving              controller-6dd9b8448-k4t6f                          0/1     CrashLoopBackOff    1 (13s ago)     64s
knative-serving              webhook-7dbc5d48d7-9vjfd                            0/1     CrashLoopBackOff    2 (19s ago)     64s
kube-system                  coredns-7db6d8ff4d-55lsh                            0/1     Running             0               8m31s
kube-system                  etcd-minikube                                       1/1     Running             0               8m46s
kube-system                  kube-apiserver-minikube                             1/1     Running             0               8m46s
kube-system                  kube-controller-manager-minikube                    1/1     Running             0               8m46s
kube-system                  kube-proxy-6c4c5                                    0/1     CrashLoopBackOff    6 (2m39s ago)   8m32s
kube-system                  kube-scheduler-minikube                             1/1     Running             0               8m46s
kube-system                  storage-provisioner                                 0/1     CrashLoopBackOff    5 (2m45s ago)   8m44s
tekton-pipelines-resolvers   tekton-pipelines-remote-resolvers-f48546f7b-j48sh   0/1     ContainerCreating   0               24s
tekton-pipelines             tekton-events-controller-7489fc7bb4-phxql           1/1     Running             0               24s
tekton-pipelines             tekton-pipelines-controller-6f594c7c-mnwdj          0/1     Running             0               24s
tekton-pipelines             tekton-pipelines-webhook-559bb45678-4tfcr           0/1     ContainerCreating   0               24s
落ちているPodの1つをDescribeすると、Errorが出ている。
➜ k describe pods -n knative-serving webhook-7dbc5d48d7-9vjfd
    Last State:      Terminated
      Reason:        Error
      Exit Code:     1
      Started:       Sat, 15 Jun 2024 11:08:56 +0900
      Finished:      Sat, 15 Jun 2024 11:09:01 +0900
    Ready:           False
ログを見てみると、タイムアウトが発生している。
  knative-sample git:(main) k logs -n knative-serving webhook-7dbc5d48d7-9vjfd
2024/06/15 02:11:51 Registering 1 clients
2024/06/15 02:11:51 Registering 2 informer factories
2024/06/15 02:11:51 Registering 3 informers
2024/06/15 02:11:51 Registering 4 controllers
2024/06/15 02:11:56 Error reading/parsing logging configuration: timed out waiting for the condition: Get "https://10.96.0.1:443/api/v1/namespaces/knative-serving/configmaps/config-logging": context deadline exceeded
kube-proxyも落ちているため、これのログも見てみる。
too many open filesとのこと。Minikubeのファイルディスクリプタが不足している?
➜  k logs kube-proxy-6c4c5 -n kube-system
E0615 02:08:47.894888       1 run.go:74] "command failed" err="failed complete: too many open files"
簡単にググると、全然関係ないOSSだが、k3dのローカルクラスタで同じようなエラーが出てる人がいる。
ここでは、inotifyの監視数の上限を超えてることが原因だという結論になっている。
以下のように、inotifiyの監視数をもとの10倍にするというワークアラウンドが提案されている。
sudo sysctl fs.inotify.max_user_instances=1280
sudo sysctl fs.inotify.max_user_watches=655360
実行してみると、すべてのPodが立ち上がった。
➜  knative-sample git:(main) k get pods -A
NAMESPACE                    NAME                                                 READY   STATUS    RESTARTS      AGE
knative-serving              activator-5886599f75-69kv7                           1/1     Running   7 (15m ago)   27m
knative-serving              autoscaler-6c785b5655-mbgmh                          1/1     Running   8 (14m ago)   27m
knative-serving              controller-6dd9b8448-k4t6f                           1/1     Running   8 (15m ago)   27m
knative-serving              net-kourier-controller-56c8fcbc4f-2gj9j              1/1     Running   7 (16m ago)   22m
knative-serving              webhook-7dbc5d48d7-9vjfd                             1/1     Running   8 (16m ago)   27m
kourier-system               3scale-kourier-gateway-6b6749bc9b-7t89l              1/1     Running   8 (10m ago)   22m
kube-system                  coredns-7db6d8ff4d-55lsh                             1/1     Running   0             35m
kube-system                  etcd-minikube                                        1/1     Running   0             35m
kube-system                  kube-apiserver-minikube                              1/1     Running   0             35m
kube-system                  kube-controller-manager-minikube                     1/1     Running   0             35m
kube-system                  kube-proxy-6c4c5                                     1/1     Running   9 (19m ago)   35m
kube-system                  kube-scheduler-minikube                              1/1     Running   0             35m
kube-system                  storage-provisioner                                  1/1     Running   9 (14m ago)   35m
tekton-pipelines-resolvers   tekton-pipelines-remote-resolvers-f48546f7b-j48sh    1/1     Running   6 (15m ago)   27m
tekton-pipelines             tekton-events-controller-7489fc7bb4-phxql            1/1     Running   6 (16m ago)   27m
tekton-pipelines             tekton-pipelines-controller-6f594c7c-mnwdj           1/1     Running   6 (16m ago)   27m
tekton-pipelines             tekton-pipelines-webhook-559bb45678-4tfcr            1/1     Running   6 (16m ago)   27m
tekton-pipelines             tekton-triggers-controller-7f687f87bf-hw7tm          1/1     Running   5 (16m ago)   23m
tekton-pipelines             tekton-triggers-core-interceptors-5bbf85579f-l6wjw   1/1     Running   0             23m
tekton-pipelines             tekton-triggers-webhook-7c5c68dfc4-6rm57             1/1     Running   6 (14m ago)   23m
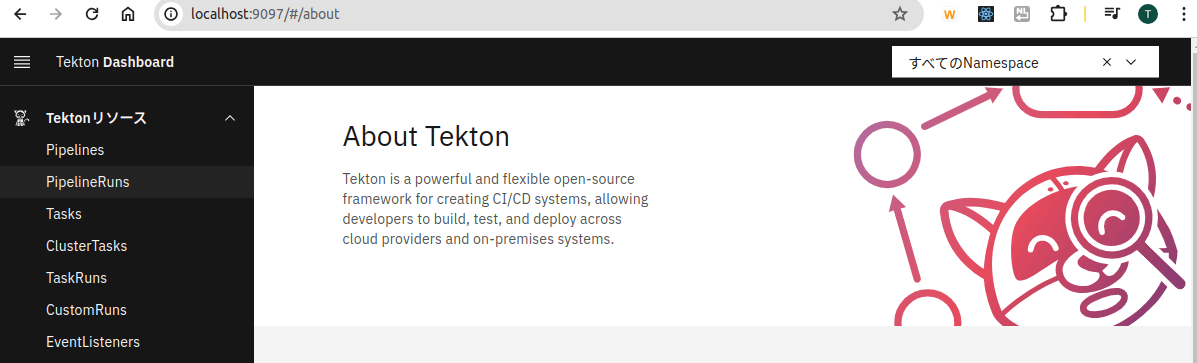
Tektonがインストールできたので、Dashboardもインストールする。
➜ kubectl apply --filename https://storage.googleapis.com/tekton-releases/dashboard/latest/release.yaml
port-forwardによってブラウザで開けるようにする
➜ kubectl --namespace tekton-pipelines port-forward svc/tekton-dashboard 9097:9097
localhost:9097でアクセスできた。
Gitからクローンする用のTask定義をTekton Hubから取得
kubectl apply -f https://raw.githubusercontent.com/tektoncd/catalog/main/task/git-clone/0.9/git-clone.yaml
リポジトリを保存するためのPVCを作成する
➜  cat blog-backend-claim.yaml
apiVersion: v1
kind: PersistentVolumeClaim
metadata:
  name: blog-backend-claim
spec:
  storageClassName: manual
  accessModes:
    - ReadWriteOnce
  resources:
    requests:
      storage: 1Gi
PVCに紐付けるPVを作成する。
➜  cat blog-backend-pv.yaml
apiVersion: v1
kind: PersistentVolume
metadata:
  name: blog-backend-pv
  labels:
    type: local
spec:
  persistentVolumeReclaimPolicy: Delete
  storageClassName: manual
  capacity:
    storage: 3Gi
  hostPath:
    path: "/var/lib/kubernetes/pv00"
  accessModes:
  - ReadWriteOnce
TaskRunを以下のように定義して、クローンするリポジトリとPVCを指定する。
➜ cat git-clone-run.yaml
apiVersion: tekton.dev/v1beta1
kind: TaskRun
metadata:
  generateName: git-clone-run-
spec:
  taskRef:
    name: git-clone
  podTemplate:
    securityContext:
      fsGroup: 65532
  workspaces:
    - name: output
      persistentVolumeClaim:
        claimName: blog-backend-claim
  params:
    - name: url
      value: https://github.com/regmarmcem/blog-backend.git
    - name: revision
      value: main
TaskRunの作成
➜ k create -f git-clone-run.yaml
失敗。Permission Deniedだそうな。
{"level":"error","ts":1718511772.086492,"caller":"git/git.go:53","msg":"Error running git [init /workspace/output/]: exit status 1\n/workspace/output/.git: Permission denied\n","stacktrace":"github.com/tektoncd/pipeline/pkg/git.run\n\tgithub.com/tektoncd/pipeline/pkg/git/git.go:53\ngithub.com/tektoncd/pipeline/pkg/git.Fetch\n\tgithub.com/tektoncd/pipeline/pkg/git/git.go:88\nmain.main\n\tgithub.com/tektoncd/pipeline/cmd/git-init/main.go:53\nruntime.main\n\truntime/proc.go:250"}
minikubeのPVは、特定のディレクトリ配下以外はリブート時に削除されてしまうらしい。 これが原因かもしれないので、PVを作り直す。
PVとPVCのファイナライザーを削除する
➜  kubectl edit pv blog-backend-pv
# 以下の行を削除
  finalizers:
  - kubernetes.io/pv-protection
➜  kubectl edit pvc blog-backend-claim
# 以下の行を削除
  finalizers:
  - kubernetes.io/pvc-protection
PVとPVCを削除
➜  kubectl delete pv blog-backend-pv
➜  kubectl delete pvc blog-backend-claim
yamlのhostPathを以下のように書き換えて、再実行
apiVersion: v1
kind: PersistentVolume
metadata:
  name: blog-backend-pv
  labels:
    type: local
spec:
  persistentVolumeReclaimPolicy: Delete
  storageClassName: manual
  capacity:
    storage: 3Gi
  hostPath:
    path: "/data/pv00"
  accessModes:
  - ReadWriteOnce
しかし、同じくPermission Deniedになる。
該当のディレクトリを確認してみる。すると、PVが/data/pv00にマウントされているもの、ディレクトリの所有者がrootで、パーミッションが755
➜  minikube ssh
docker@minikube:~$ ls -ld /data/pv00/
drwxr-xr-x 2 root root 4096 Jun 16 04:40 /data/pv00/
以下を読む限り、initContainersでディレクトリのパーミッションを変えるしかない?
もう少し調べてみると、Storage Provisionerの設定の問題っぽいissueが出てくる。 rancherでも似たような話がある。
この辺はMInikubeの周辺ツールの問題の可能性があるから、本番環境で同じようなことは起こらないものと信じ、深追いはしないでおく。
今回は、minikubeのホストのディレクトリのパーミッションを直接変えて対応する。
➜  minikube ssh
docker@minikube:~$ sudo chmod 777 /data/pv00
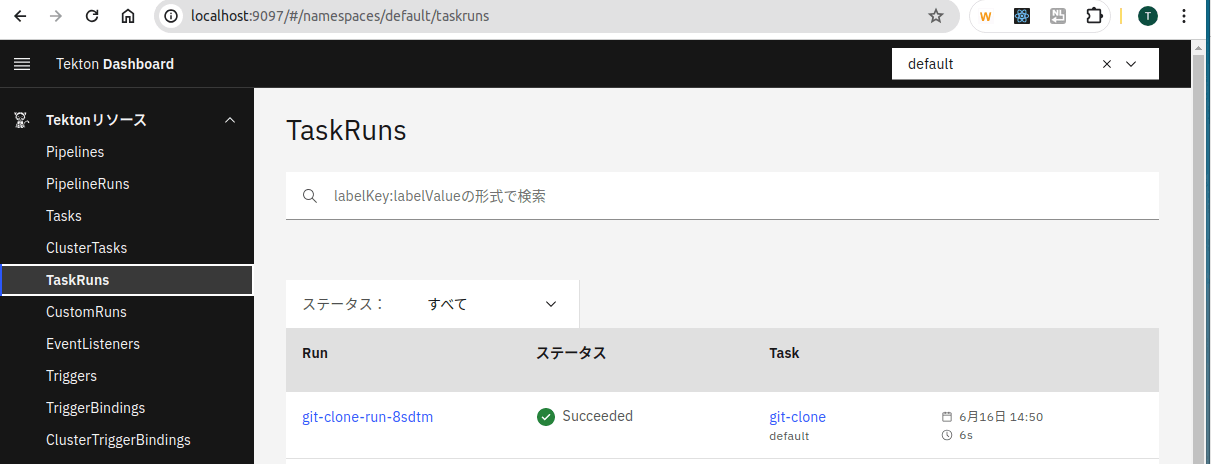
これで、再度git-cloneを実行すると、成功するようになった。
➜  k create -f git-clone-run.yaml
taskrun.tekton.dev/git-clone-run-8sdtm created
cloneしたアプリケーションをビルドするために、KanikoのTaskを作成する。
kubectl apply -f https://raw.githubusercontent.com/tektoncd/catalog/main/task/kaniko/0.6/kaniko.yaml
上記のkaniko.yamlだとECRの権限がなくエラーになるため、以下のように環境変数の設定を追加する。
>       env:
>         - name: AWS_SDK_LOAD_CONFIG
>           value: 'false'
>         - name: AWS_ACCESS_KEY_ID
>           valueFrom:
>             secretKeyRef:
>               name: aws-env
>               key: AWS_ACCESS_KEY_ID
>         - name: AWS_SECRET_ACCESS_KEY
>           valueFrom:
>             secretKeyRef:
>               name: aws-env
>               key: AWS_SECRET_ACCESS_KEY
上記のyamlにセットさせるSecretを作成する
kubectl create secret generic aws-env --from-literal=AWS_ACCESS_KEY_ID=<access-key-id> --from-literal=AWS_SECRET_ACCESS_KEY=<secret-key>
また、ソースコードのクローンとビルドを一連の流れで行いたいため、Pipelineを作成する。
apiVersion: tekton.dev/v1beta1
kind: Pipeline
metadata:
  name: pull-build
spec:
  workspaces:
  - name: repository
    description: Git Repo content
  - name: dockerconfig
    description: /home/kaniko/.docker/config.json
  params:
  - name: target-app
    type: string
    description: Target application in BookInfo Apps
  - name: app-url
    type: string
    description: Git Repo URL for Application to be Built
  - name: app-revision
    type: string
    description: Git Repo Revision for Application to be Built
  - name: registry-url
    type: string
    description: Target container registry URL
  - name: image-tag
    type: string
    description: Target container image tag
  tasks:
  - name: pull-app
    taskRef:
      name: git-clone
    params:
    - name: url
      value: $(params.app-url)
    - name: revision
      value: $(params.app-revision)
    workspaces:
    - name: output
      workspace: repository
  - name: build-app
    taskRef:
      name: kaniko
    runAfter:
    - pull-app
    params:
    - name: IMAGE
      value: $(params.registry-url)/$(params.target-app):$(params.image-tag)
    workspaces:
    - name: source
      workspace: repository
    - name: dockerconfig
      workspace: dockerconfig
ECRリポジトリにログインするときに、AWSのクレデンシャルを用いるようにするためには、amazon-ecr-credential-helperの利用が必要。
ECRのurlに対して、docker loginをしたときに自動的にamazon-ecr-credential-helperが発火するようにするため、~/.docker/config.jsonをTaskに教える。
以下の内容でSecretのyamlを作成
apiVersion: v1
kind: Secret
metadata:
  name: awsecr-cred
data:
  config.json:
    value:
.docker/config.jsonをbase64エンコードして、上記のyamlに書き込み
export BASE64_DOCKER_CONFIG=$(cat ~/.docker/config.json| base64 -w0) && yq -i '.data."config.json".value = strenv(BASE64_DOCKER_CONFIG)' awsecr-cred.yaml
上記のyamlからSecretを作成
k apply -f awsecr-cred.yaml
以下のようにPipelineRunを定義し、Pipelineを実行
apiVersion: tekton.dev/v1beta1
kind: PipelineRun
metadata:
  generateName: pull-build-run-
spec:
  params:
    - name: target-app
      value: "<アプリ名>"
    - name: app-url
      value: "<GitHubのURL>"
    - name: app-revision
      value: "main"
    - name: registry-url
      value: "<AWS_ACCOUNT_ID>.dkr.ecr.<AWS_REGION>.amazonaws.com"
    - name: image-tag
      value: "<tag>"
  workspaces:
    - name: repository
      persistentVolumeClaim:
        claimName: docker-source-pvc # pullしたソースコードをおいてあるPVC
    - name: dockerconfig
      secret:
        secretName: awsecr-cred
  pipelineRef:
    name: pull-build
上記を実行すると、Pipelineが動き出し、ソースコードをビルドしてECRレジストリに配布する。
k create -f pull-build-run.yaml
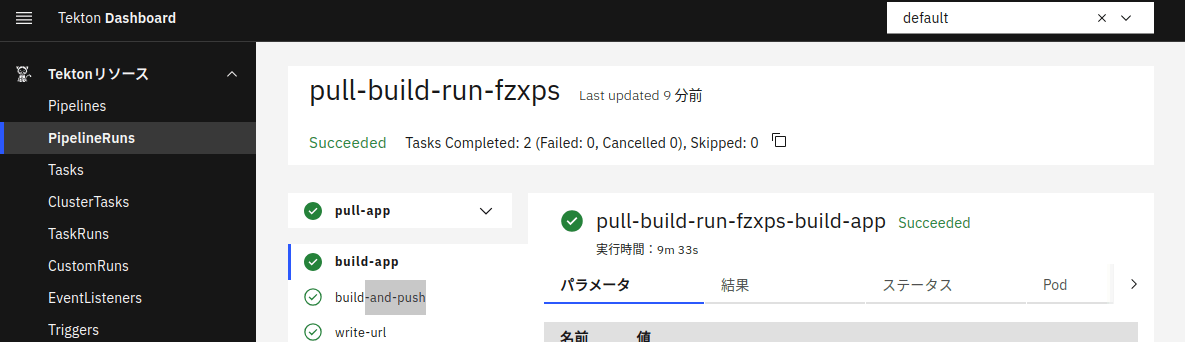
上記までで、ソースコードをビルドしてDockerイメージにするところまでできた。
次に、ECRリポジトリからimageをpullして、環境に配置する。
まずは、Argo CDをインストールする。
kubectl create namespace argocd
kubectl apply -n argocd -f https://raw.githubusercontent.com/argoproj/argo-cd/stable/manifests/install.yaml
その後、Getting Startedに従って進める。
アクセスのために、Port Forwardingする。
kubectl port-forward svc/argocd-server -n argocd 8080:443
Argo CDのadminユーザーのパスワードを取得する
argocd admin initial-password -n argocd
localhost:8080にアクセスし、上記で取得したパスワードでログインする。
パスワードを更新しようとすると、エラーが出る。
argocd account update-password
FATA[0000] Argo CD server address unspecified
これはCLIでログインしていないせいで発生したらしい。
ログインして再実行
argocd login localhost:8080 --insecure
argocd account update-password
初期パスワードが格納されていたSecretは消したほうがいいらしい。
以下のコマンドで削除する。
k delete secret -n argocd argocd-initial-admin-secret
アプリをデプロイするクラスタをArgo CDに登録する
# 現在のコンテキストを取得
k config current-context
# => minikube
argocd cluster add minikube
WARNING: This will create a service account `argocd-manager` on the cluster referenced by context `minikube` with full cluster level privileges. Do you want to continue [y/N]?
 INFO[0002] ServiceAccount "argocd-manager" already exists in namespace "kube-system"
INFO[0002] ClusterRole "argocd-manager-role" updated
INFO[0002] ClusterRoleBinding "argocd-manager-role-binding" updated
FATA[0002] rpc error: code = Unknown desc = Get "https://127.0.0.1:32794/version?timeout=32s": dial tcp 127.0.0.1:32794: connect: connection refused
エラー発生。https://127.0.0.1:32794への通信が失敗している。
下記のissueにいろんなworkaroundが載っている。
--in-clusterオプションを付与して、実行は成功した。
argocd cluster add minikube --in-cluster
WARNING: This will create a service account `argocd-manager` on the cluster referenced by context `minikube` with full cluster level privileges. Do you want to continue [y/N]? y
INFO[0001] ServiceAccount "argocd-manager" already exists in namespace "kube-system"
INFO[0001] ClusterRole "argocd-manager-role" updated
INFO[0001] ClusterRoleBinding "argocd-manager-role-binding" updated
Cluster 'https://kubernetes.default.svc' added
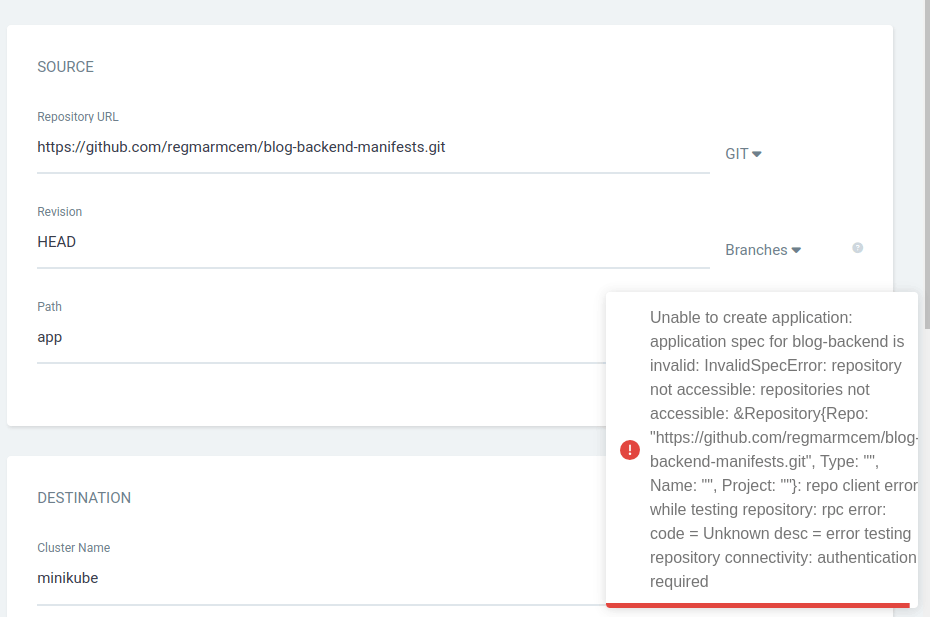
Applicationを作成する。このとき、プライベートリポジトリを指定すると、権限エラーになる
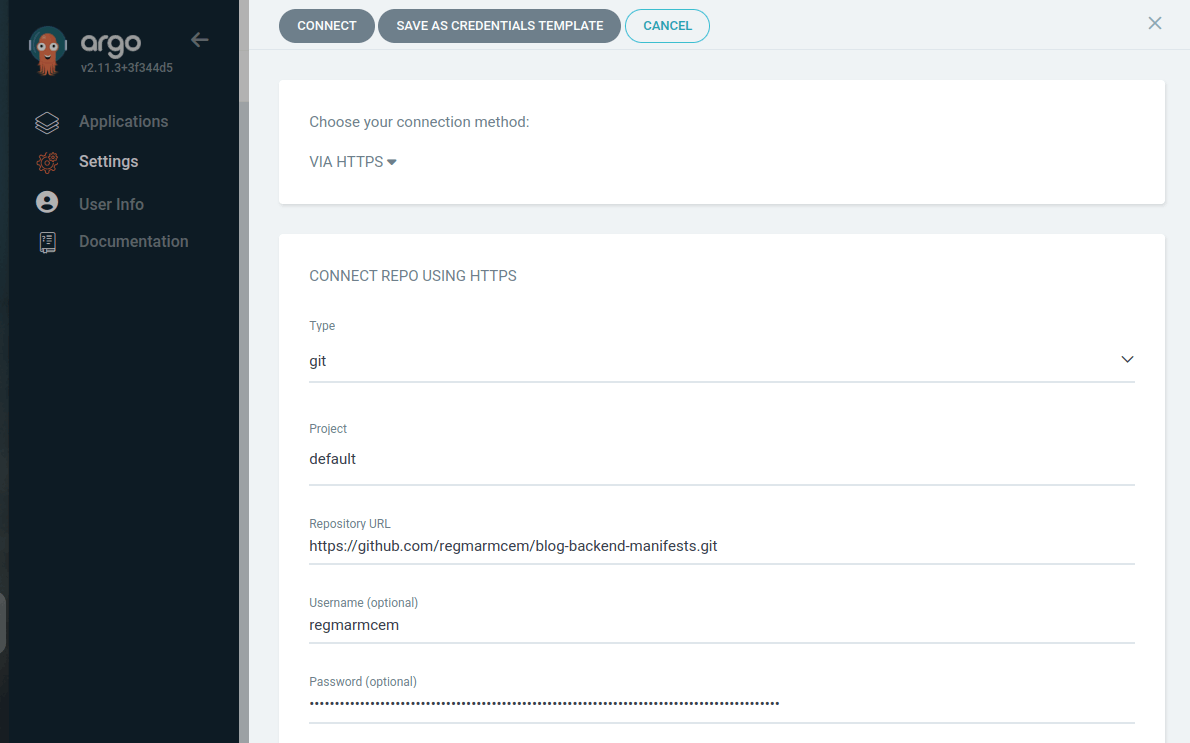
設定から、Private Repositoryへの接続を設定する。このとき、GitHubのPTAを取得し、Password欄に入力する。
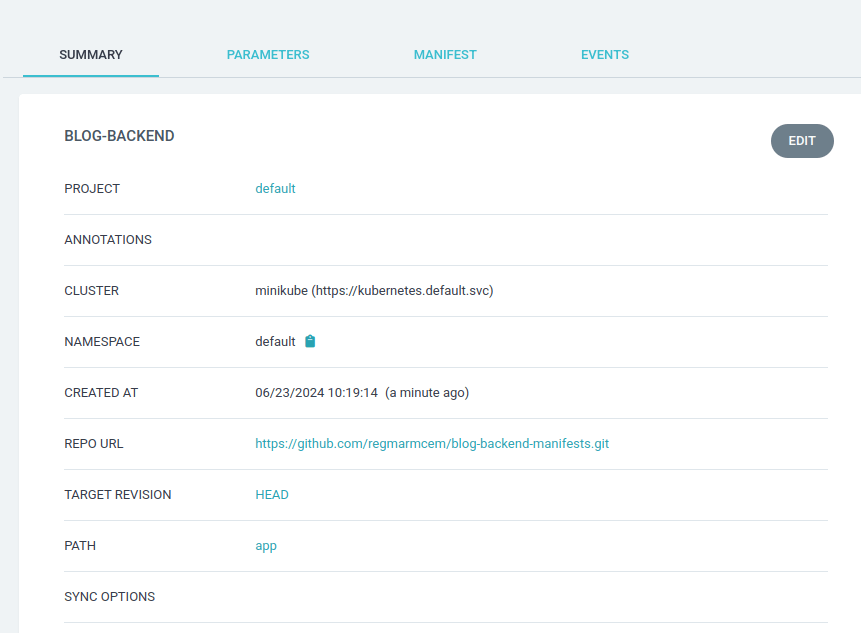
改めてApplicationを作成し、syncする。
すると、コンテナイメージのpullに失敗する。これは、ArgoCDにECRの権限を与えていないからだと思われる。
➜  k get pods
NAME                                 READY   STATUS         RESTARTS   AGE
blog-backend-68777b6c9d-gpccv        0/1     ErrImagePull   0          6s
blog-backend-68777b6c9d-qdw65        0/1     ErrImagePull   0          6s
この記事にあるように、ECRの認可トークンを取得し、Secretを作成する。
deploymentのimagePullSecretsに設定することで、イメージをPullする。
※minikube上なのでこういうワークアラウンドに終始しているが、EKSにデプロイする際にはWorker NodeのIAMロールを用いてPullするのが良いと思われる。
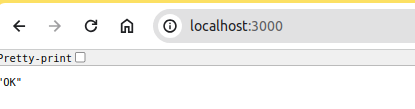
再度Syncすると、アプリのデプロイに成功した。

最終的には、以下のような記事を参考にしつつ、よりよい方法を探りたい
Knativeでblog-backendを立ち上げる
apiVersion: serving.knative.dev/v1
kind: Service
metadata:
  name: blog-backend
spec:
  template:
    spec:
      containers:
        - image: <ECR repository>
          ports:
            - containerPort: 3000
          envFrom:
          - secretRef:
              name: dotenv
          volumeMounts:
          - mountPath: /mnt/efs/db
            name: sqlite-volume
      imagePullSecrets:
      - name: ecr-token
      volumes:
        - name: sqlite-volume
          hostPath:
            path: /data/pv00/src
Knative Servingリソースを作成しようとすると、hostPathというフィールドが無効だと言われる。
k apply -f knative/serving.yaml

Error from server (BadRequest): error when creating "knative/serving.yaml": Service in version "v1" cannot be handled as a Service: strict decoding error: unknown field "spec.template.spec.volumes[0].hostPath"
hostPath以下をコメントアウトして再実行すると、configMap, emptyDir, projected, secretのいずれかを記載しないといけないらしい
k apply -f knative/serving.yaml
Warning: Kubernetes default value is insecure, Knative may default this to secure in a future release: spec.template.spec.containers[0].securityContext.allowPrivilegeEscalation, spec.template.spec.containers[0].securityContext.capabilities, spec.template.spec.containers[0].securityContext.runAsNonRoot, spec.template.spec.containers[0].securityContext.seccompProfile
Error from server (BadRequest): error when creating "knative/serving.yaml": admission webhook "validation.webhook.serving.knative.dev" denied the request: validation failed: expected exactly one, got neither: spec.template.spec.volumes[0].configMap, spec.template.spec.volumes[0].emptyDir, spec.template.spec.volumes[0].projected, spec.template.spec.volumes[0].secret
ここでは、blog.sqliteというsqliteファイルをマウントしたい。
- configMap/secret: 環境変数などの設定に使うため、適さない
- emptyDir: tmpディレクトリのようなもんで、Podの一時ディレクトリでしかない。今回は適さない
-
projected: 特定のボリュームソースでなければならない。具体的には以下。これは適さない。
- secret
- downloadAPI
- configMap
- serviceAccountToken
- clusterTrustBundle
Knativeの公式ドキュメントに、対処方法が書いてある。
PersistentVolumes are supported but require a feature flag to be enabled.
フィーチャーフラグを有効化すればいいらしい。
ConfigMapを編集して、フィーチャーフラグを有効化する。
kubectl get cm --namespace knative-serving config-features -o yaml > config-features.yaml