Closed8
Debian 12 上に qemu + KVM + virtio の仮想化環境を作って Windows を動かす
Debian 12 上に qemu + KVM + virtio の仮想化環境を作って Windows を動かす。
$ cat /etc/os-release
PRETTY_NAME="Debian GNU/Linux 12 (bookworm)"
NAME="Debian GNU/Linux"
VERSION_ID="12"
VERSION="12 (bookworm)"
VERSION_CODENAME=bookworm
ID=debian
HOME_URL="https://www.debian.org/"
SUPPORT_URL="https://www.debian.org/support"
BUG_REPORT_URL="https://bugs.debian.org/"
必要なパッケージをインストールする。
sudo apt install -y qemu-kvm libvirt0
実行ユーザーを libvirt グループに追加する。
usermod -aG libvirt $USER
SSH 経由で libvirt の GUI を使うために適当なクライアントマシンに virt-manager をインストールする。
今回は WSL2 上で動いている Arch Linux をクライアントとして使う。
sudo pacman -S virt-manager
SSH 経由でサーバーに接続する。
virt-manager -c qemu+ssh://koyashiro@nas.koyashi.ro/system
WSLg のお陰で X や Wayland の設定をしなくてもウィンドウが開く。
Windows の ISO は Microsoft のサイトから入手しておく。
ブリッジネットワークを作成する。
iface br0 inet static
        address 192.168.1.60
        network 192.168.1.0
        netmask 255.255.255.0
        broadcast 192.168.1.255
        gateway 192.168.1.1
        bridge_ports enp1s0
        bridge_stp off
        bridge_fd 0
        bridge_maxwait 0
ブリッジネットワークを開始。
sudo ifup br0
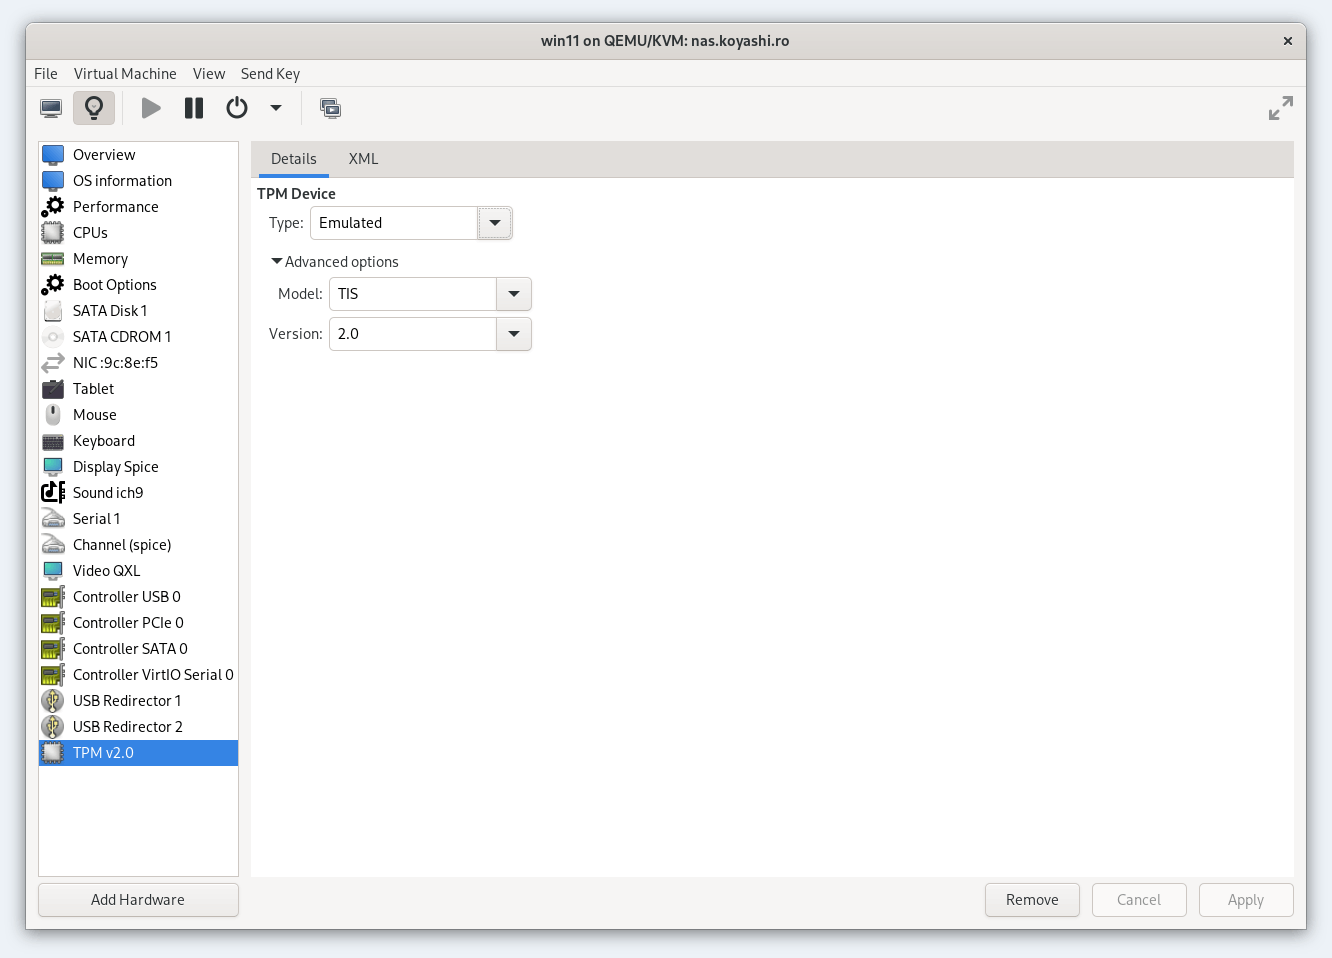
Windows 11 をインストールする場合は TPM Device を 以下のように設定する必要がある。
Model: TIS
Version: 2.0
Windows に virtio ドライバをインストールする。
以下から Stable virtio-win ISO をダウンロード。
https://github.com/virtio-win/virtio-win-pkg-scripts/blob/master/README.md
仮想マシンに ISO をマウントし virtio-win-gt-x64.exe を実行してドライバをインストールする。
/dev/sdb を 仮想マシンにパススルーする。
<disk type="block" device="disk">
  <driver name="qemu" type="raw" cache="none"/>
  <source dev="/dev/sdb" index="1"/>
  <backingStore/>
  <target dev="vdc" bus="virtio"/>
</disk>
このスクラップは2023/08/18にクローズされました