Solana開発メモ
Macbook Air 13インチ Late 2020のセットアップ
CLionをダウンロード
WebStormをダウンロード
Docker for Macのインストール
Homebrewのインストール
ohmyzshのインストール
Terminalにテーマを追加
pecoのインストール
$ brew install peco
$ vi ~/.zshrc
...

function peco-select-history() {
  BUFFER=$(\history -n -r 1 | peco --query "$LBUFFER")
  CURSOR=$#BUFFER
  zle clear-screen
}
zle -N peco-select-history
bindkey '^r' peco-select-history

# search a destination from cdr list
function peco-get-destination-from-cdr() {
  cdr -l | \
  sed -e 's/^[[:digit:]]*[[:blank:]]*//' | \
  peco --query "$LBUFFER"
}

function peco-cdr() {
  local destination="$(peco-get-destination-from-cdr)"
  if [ -n "$destination" ]; then
    BUFFER="cd $destination"
    zle accept-line
  else
    zle reset-prompt
  fi
}
zle -N peco-cdr
bindkey '^u' peco-cdr
nodeのインストール
$ curl -o- https://raw.githubusercontent.com/nvm-sh/nvm/v0.39.1/install.sh | bash
$ vi ~/.zshrc
...
export NVM_DIR="$([ -z "${XDG_CONFIG_HOME-}" ] && printf %s "${HOME}/.nvm" || printf %s "${XDG_CONFIG_HOME}/nvm")"
[ -s "$NVM_DIR/nvm.sh" ] && \. "$NVM_DIR/nvm.sh"
rustupのインストール
$ brew install rustup
$ rustup-init
$ vi ~/.zshrc
...
export CARGO_HOME="$HOME/.cargo"
export PATH="$CARGO_HOME/bin:$PATH"
solana cliのインストール
$ sh -c "$(curl -sSfL https://release.solana.com/v1.9.2/install)"
$ vi ~/.zshrc
# solana
export PATH="/Users/ab/.local/share/solana/install/active_release/bin:$PATH"
jqのインストール
$ brew install jq
Hello World
deploy devnet
$ solana-keygen new
$ solana config set --url https://api.devnet.solana.com
$ solana airdrop 2 $(solana-keygen pubkey ~/.config/solana/id.json)
$ solana balance $(solana-keygen pubkey ~/.config/solana/id.json)
2 SOL
$ cargo build-bpf
$ solana program deploy /Users/ab/Projects/toybox-contract/target/deploy/contract.so
...
Program Id: Ag86qo2YmJ6h787YxzwQJ3ka7auDXgG4Gdm8FDikgAQr
$ solana program show Ag86qo2YmJ6h787YxzwQJ3ka7auDXgG4Gdm8FDikgAQr
Program Id: Ag86qo2YmJ6h787YxzwQJ3ka7auDXgG4Gdm8FDikgAQr
Owner: BPFLoaderUpgradeab1e11111111111111111111111
ProgramData Address: ASAHvjSJymXiREVKvu4pjSMBUXbYBhsCqb28EPsCW8M6
Authority: BdWx4rjtN23d4GcWzpKfxmnmVzN5jSdmETmgwwfCCf8m
Last Deployed In Slot: 105192341
Data Length: 121088 (0x1d900) bytes
Balance: 0.84397656 SOL
コントラクトの実行
$ npm i @solana/web3.js
$ npm i borsh
contract.js
const web3 = require("@solana/web3.js");
const borsh = require('borsh');

class GreetingAccount {
    counter = 0;
    constructor(fields = undefined) {
        if (fields) {
            this.counter = fields.counter;
        }
    }
}
const GreetingSchema = new Map([
    [GreetingAccount, {kind: 'struct', fields: [['counter', 'u32']]}],
]);
const GREETING_SIZE = borsh.serialize(
    GreetingSchema,
    new GreetingAccount(),
).length;
const GREETING_SEED = 'hello';


(async () => {
    // Connect to cluster
    const connection = new web3.Connection(
        web3.clusterApiUrl('devnet'),
        'confirmed',
    );
    // get airdrop
    const from = web3.Keypair.generate();
    const airdropSignature = await connection.requestAirdrop(
        from.publicKey,
        web3.LAMPORTS_PER_SOL, // 10000000 Lamports in 1 SOL
    );
    await connection.confirmTransaction(airdropSignature);
    console.log('airdrop done')
    // create account
    const programId = new web3.PublicKey('Ag86qo2YmJ6h787YxzwQJ3ka7auDXgG4Gdm8FDikgAQr')
    const greetedPubkey = await web3.PublicKey.createWithSeed(
        from.publicKey,
        GREETING_SEED,
        programId,
    );
    const greetedAccount = await connection.getAccountInfo(greetedPubkey);
    if (greetedAccount === null) {
        const lamports = await connection.getMinimumBalanceForRentExemption(
            GREETING_SIZE,
        );
        const transaction = new web3.Transaction().add(
            web3.SystemProgram.createAccountWithSeed({
                fromPubkey: from.publicKey,
                basePubkey: from.publicKey,
                seed: GREETING_SEED,
                newAccountPubkey: greetedPubkey,
                lamports,
                space: GREETING_SIZE,
                programId,
            }),
        );
        await web3.sendAndConfirmTransaction(connection, transaction, [from]);
    }
    console.log('create account done')
    // run transaction
    const instruction = new web3.TransactionInstruction({
        keys: [{pubkey: greetedPubkey, isSigner: false, isWritable: true}],
        programId: programId,
        data: Buffer.alloc(0),
    });
    await web3.sendAndConfirmTransaction(
        connection,
        new web3.Transaction().add(instruction),
        [from]
    )
    console.log('transaction done')
})()
$ node contract.js
airdrop done
create account done
transaction done
実行結果
    const accountInfo = await connection.getAccountInfo(greetedPubkey);
    if (accountInfo === null) {
        throw 'Error: cannot find the greeted account';
    }
    const greeting = borsh.deserialize(
        GreetingSchema,
        GreetingAccount,
        accountInfo.data,
    );
    console.log(
        greetedPubkey.toBase58(),
        'has been greeted',
        greeting.counter,
        'time(s)',
    );
$ node contract.js
...
9mTDC3sXGvqANuwPsPQaVZtjjseDK8fNag4veP3Nb9DA has been greeted 6 time(s)
メモ
Returns minimum balance required to make account rent exempt.
家賃の免除に必要な支払い額を取得する
この額をアカウント作成時に渡すことでアカウントの家賃免除できる?
家賃免除の金額計算のためにスキーマ、実データをシリアライズしたサイズが必要になる = プログラム側のスキーマをJS側が知っている必要がある?
sendAndConfirmTransactionの実行でinstructionのデータ設定も必要なのでスキーマ情報は必要
何かコントラクトから自動で生成する方法があるか?
アカウントの作成
アカウント = トランザクションで保存するデータ(トランザクション間で受け渡されるデータ)
アカウントはデータとSOLを保持できる
アカウントには所有者がいる。所有者のみがデータを調整できる
アカウントはプログラムのみがモテる
このデータを保持するために家賃が必要
ただし、一定金額を先に収めると家賃が免除される
fromが違うと別のアカウント扱いになる
createAccountWithSeedで渡すpubkeyで別のアカウント扱いになる?TransactionInstructionで渡すpubkeyで作成したアカウントを選択する?
greetedPubkeyを使ってgetAccountInfoでアカウントを取得し、初回のみ作成するため同一のアカウントを使い回すことができる
別のアカウントでは保持しているデータが違うためカウントアップがまた0からになる = PubKeyを共有しないと同一のアカウントを更新できない
Escrowメモ
複数のユーザーで一つのアカウント?データ?を更新するには 上記のエスクローが参考になる?
プログラム = スマートコントラクト
システムプログラム?
BPFローダー?
Nativeローダー?
トークンアカウント = トークンを保持できるアカウント
トークンプログラム = トークンアカウントを持つプログラム
TransactionInstructionのkeysはプログラムのaccountsに対応してる?
connection.getAccountInfoで現在のアカウントのデータを取得できる。
pubkey指定が必要なので自身のアカウント以外は取得できない?pubkeyを共有すればいけるけどどう共有する?
ネィティブプログラム
Solanaには、バリデーターノードを実行するために必要な少数のネイティブプログラムが含まれています
システムプログラム(system program) = アカウントの作成、データの割り当て、プログラムの割り当てなどアカウントを管理するプログラム?
構成プログラム(config program) = 謎
ステークプログラム(stake program)= バリデータに委任に関係するごにょごにょするためのアカウントの管理するプログラム?普段は使わない
投票プログラム(vote program) = バリデータの投票や報酬を追跡するアカウントを管理するプログラム?普段は使わない
BPFローダー(BFP Loader) = チェーン上でプロラグムの管理、実行をするプログラム
トークンプログラム = トークンを管理するプログラム
トークンアカウント = トークンプログラムが保持しているアカウント
アカウント = トランザクションで保存するデータ(トランザクション間で受け渡されるデータ)
※ アカウントはただのデータ。注意。
A Account
createTempTokenAccountIx
initTempAccountIx
transferXTokensToTempAccIx
createEscrowAccountIx
A初期化?複数の処理を一括実行できる
  const tx = new Transaction().add(
    createTempTokenAccountIx,
    initTempAccountIx,
    transferXTokensToTempAccIx,
    createEscrowAccountIx,
    initEscrowIx
  );
initEscrowIxはプログラム呼び出し。
escrowのPubKeyは共有してる?
プログラムのPubKeyは共有していい・・・?
findProgramAddress(seeds: (Buffer | Uint8Array)[], programId: PublicKey): Promise<[PublicKey, number]>
[Buffer.from("escrow")]がseed
let (pda, _nonce) = Pubkey::find_program_address(&[b"escrow"], program_id);
PDAがsubkey
PDAは Program derived addressesで別Contractをプログラムで署名を使うための派生アドレス
EscrowをなどユーザーA <-> ユーザーB間ではなくEscrow Program -> ユーザーAのようにprogramからトークンを送信するときなどに必要
(ユーザーというかクライアントというかそういうものは何というのか?プログラムとの違いは?)
/// 0. `[writable]` the market to initialize
/// 1. `[writable]` zeroed out request queue
/// 2. `[writable]` zeroed out event queue
/// 3. `[writable]` zeroed out bids
/// 4. `[writable]` zeroed out asks
/// 5. `[writable]` spl-token account for the coin currency
/// 6. `[writable]` spl-token account for the price currency
/// 7. `[]` coin currency Mint
/// 8. `[]` price currency Mint
/// 9. `[]` the rent sysvar
/// 10. `[]` open orders market authority (optional)
/// 11. `[]` prune authority (optional, requires open orders market authority)
/// 12. `[]` crank authority (optional, requires prune authority)
0,1,2が何かって呼び出しのkeysの順序と属性
1 作成したPubKeyからTokenAccountを生成(このときのAccount所有者はユーザーA)
    static createInitAccountInstruction(
      programId: PublicKey,
      mint: PublicKey,
      account: PublicKey,
      owner: PublicKey,
    )
  const initTempAccountIx = Token.createInitAccountInstruction(
    TOKEN_PROGRAM_ID,
    XTokenMintPubkey,
    tempXTokenAccountKeypair.publicKey,
    aliceKeypair.publicKey
  );
2 ユーザーA -> TokenAccountにトークンを送信(このときのowner?送信の実行者はユーザーA)
    static createTransferInstruction(
      programId: PublicKey,
      source: PublicKey,
      destination: PublicKey,
      owner: PublicKey,
      multiSigners: Array<Signer>,
      amount: number | u64,
    )
  const transferXTokensToTempAccIx = Token.createTransferInstruction(
    TOKEN_PROGRAM_ID,
    aliceXTokenAccountPubkey,
    tempXTokenAccountKeypair.publicKey,
    aliceKeypair.publicKey,
    [],
    terms.bobExpectedAmount
  );
3 Escrowの呼び出し
4 EscrowProgram内でTokenAccountの所有権をプログラム(PDA)に変更
    setAuthority(
      account: PublicKey,
      newAuthority: PublicKey | null,
      authorityType: AuthorityType,
      currentAuthority: Signer | PublicKey,
      multiSigners: Array<Signer>,
    ): Promise<void>
        let owner_change_ix = spl_token::instruction::set_authority(
            token_program.key,
            temp_token_account.key,
            Some(&pda),
            spl_token::instruction::AuthorityType::AccountOwner,
            initializer.key,
            &[&initializer.key],
        )?;
EscrowState上に送信したトークンの数がない?
amountは実際にユーザーAが送信した数字ではなく、ユーザーBが送信することを期待する数字。
ユーザーBはAの期待する数字に対して実行するのでユーザーA側の処理で送信したトークンの数は不要。
ユーザーBからユーザーAへの送信
        let transfer_to_initializer_ix = spl_token::instruction::transfer(
            token_program.key,
            takers_sending_token_account.key,
            initializers_token_to_receive_account.key,
            taker.key,
            &[&taker.key],
            escrow_info.expected_amount,
        )?;
トークンアカウントからユーザーBへの送信 pdas_temp_token_account_info.amount
        let transfer_to_taker_ix = spl_token::instruction::transfer(
            token_program.key,
            pdas_temp_token_account.key,
            takers_token_to_receive_account.key,
            &pda,
            &[&pda],
            pdas_temp_token_account_info.amount,
        )?;
実際にユーザーBが受け取るのはトークンアカウントの数を受け取る。
ユーザーAが指定するamountはユーザーBに送信してほしいトークンの数。
ユーザーBが指定するamountはユーザーAが送信したトークンの数。(プログラム内でトークンアカウントに送信されたトークンのamountと一致するかチェック済み)
なので、各種アカウントを入れ替えても問題がない・・・はず・・・?
脱線
Connection::getTokenAccountsByOwner
Connection::getParsedProgramAccounts プログラムに紐づくAccountInfoの配列を取得できる?
Connection::getProgramAccounts プログラムに紐づくAccountInfoの配列を取得できる?(Parseする/しないの違いは何?実際に叩いてみたけど違いがわからない。
Token Swap Programなどで実行すると1600件ぐらい帰ってくる。AccountInfoは溜まり続けるため数万とかになったときにどう対策する?
getProgramAccountsの引数で渡せるConfigにDataSliceを設定できる。がDataSliceはAccountInfoのSliceなのでダメ。
もしやるならfiltersのmemcmpでやるべきか?その場合はStateの設計に気を遣う必要がありそう。あとうまく絞り込みをできるキーを作らないとやっぱりデータ量が多くなってメモリが死ぬ。
Stateの先頭において状態のenumを持たせて、その後に固定長なものを並べて、最後に長さの不定なものをおくとか。状態で初期化されていない・終了していないもの取得するとか、日付を持って今日のものだけ取得するとか。
Connection::onAccountChange AccountInfoの変更検知
- "finalized" - the node will query the most recent block confirmed by supermajority of the cluster as having reached maximum lockout, meaning the cluster has recognized this block as finalized
- "confirmed" - the node will query the most recent block that has been voted on by supermajority of the cluster.
- It incorporates votes from gossip and replay.
- It does not count votes on descendants of a block, only direct votes on that block.
- This confirmation level also upholds "optimistic confirmation" guarantees in release 1.3 and onwards.
- "processed" - the node will query its most recent block. Note that the block may still be skipped by the cluster.
finalizedは絶対に撤回されない、confirmedは撤回される可能性はあるけどほぼ大丈夫、processedは危ない。
is_signer: pubkeyに一致するトランザクション署名が指示で必要な場合は真。
is_writable: pubkey が読み書き可能なアカウントとしてロードできる場合、true を返します。
よくわかんにゃい。
sendAndConfirmTransactionで渡すSignerはトランザクションの署名をする人。
[aliceKeypair, tempXTokenAccountKeypair, escrowKeypair]
が、その場合に一時的なトークンアカウント、エスクローアカウントでの署名も必要なのはなぜなのか・・・?
https://github.com/paul-schaaf/solana-escrow/blob/master/program/src/processor.rs#L90-L94
Programからの呼び出しで署名している必要があったのかと思いきやそうではない。
multisigについて調べる?
UI
npx create-react-app my-app --template typescript
tsで書くときは--template typescriptをつける。
Wallet Adapter。いろいろなSolana Walletに対応してる。
react-scriptsコマンドが最新のv5だとWebpackのバージョンがあがり各種Polyfil系が動かなくなるっぽい。単純な解決策はわからないのでとりあえず4.0.3に下げる。(react-scriptsやめるならいろいろできそう)
Failed to compile.

./node_modules/@solana/wallet-adapter-wallets/lib/esm/adapters.mjs
Can't import the named export 'BitKeepWalletAdapter' from non EcmaScript module (only default export is available)
なんかコンパイルできない。
Webpack側の設定の問題らしい。react-scriptsはまだ解除したくないので怠い。
なんかreact-scriptsを上書きできるらしい。

なんか出た。
WalletModal.tsx:28 Uncaught TypeError: wallets is not iterable
    at :3000/static/js/vendors~main.chunk.js:22406
    at mountMemo (:3000/static/js/vendors~main.chunk.js:108713)
    at Object.useMemo (:3000/static/js/vendors~main.chunk.js:109080)
    at useMemo (:3000/static/js/vendors~main.chunk.js:124357)
    at WalletModal (:3000/static/js/vendors~main.chunk.js:22401)
    at renderWithHooks (:3000/static/js/vendors~main.chunk.js:107875)
    at mountIndeterminateComponent (:3000/static/js/vendors~main.chunk.js:110637)
    at beginWork (:3000/static/js/vendors~main.chunk.js:111836)
    at HTMLUnknownElement.callCallback (:3000/static/js/vendors~main.chunk.js:96825)
    at Object.invokeGuardedCallbackDev (:3000/static/js/vendors~main.chunk.js:96874)
    at invokeGuardedCallback (:3000/static/js/vendors~main.chunk.js:96934)
    at beginWork$1 (:3000/static/js/vendors~main.chunk.js:116676)
    at performUnitOfWork (:3000/static/js/vendors~main.chunk.js:115512)
    at workLoopSync (:3000/static/js/vendors~main.chunk.js:115449)
    at renderRootSync (:3000/static/js/vendors~main.chunk.js:115415)
    at performSyncWorkOnRoot (:3000/static/js/vendors~main.chunk.js:115032)
    at :3000/static/js/vendors~main.chunk.js:104285
    at unstable_runWithPriority (:3000/static/js/vendors~main.chunk.js:131383)
    at runWithPriority$1 (:3000/static/js/vendors~main.chunk.js:104231)
    at flushSyncCallbackQueueImpl (:3000/static/js/vendors~main.chunk.js:104280)
    at flushSyncCallbackQueue (:3000/static/js/vendors~main.chunk.js:104268)
    at discreteUpdates$1 (:3000/static/js/vendors~main.chunk.js:115160)
    at discreteUpdates (:3000/static/js/vendors~main.chunk.js:96635)
    at dispatchDiscreteEvent (:3000/static/js/vendors~main.chunk.js:98817)
そしてクリックしたらエラーでる。
resolutionを使ってもいいらいしい。
けど使ってもstreamでエラーでる。。。やはり4.0.3使うの安定か?
react-app-rewiredを使うと
WalletModal.tsx:28 Uncaught TypeError: wallets is not iterable
のエラーが出てクリックで死ぬ。
使わないと
Can't import the named export 'BitKeepWalletAdapter' from non EcmaScript module (only default export is available)
が出てBitKeepWalletAdapterでビルドエラーが出る。(なんかWalletの選択画面までいけたときあったけどガチャガチャしすぎてようわからん)
react-script 5.0.0とresolution使うと
export 'isDuplexStream' (imported as 'isDuplexStream') was not found in 'is-stream' (module has no exports)
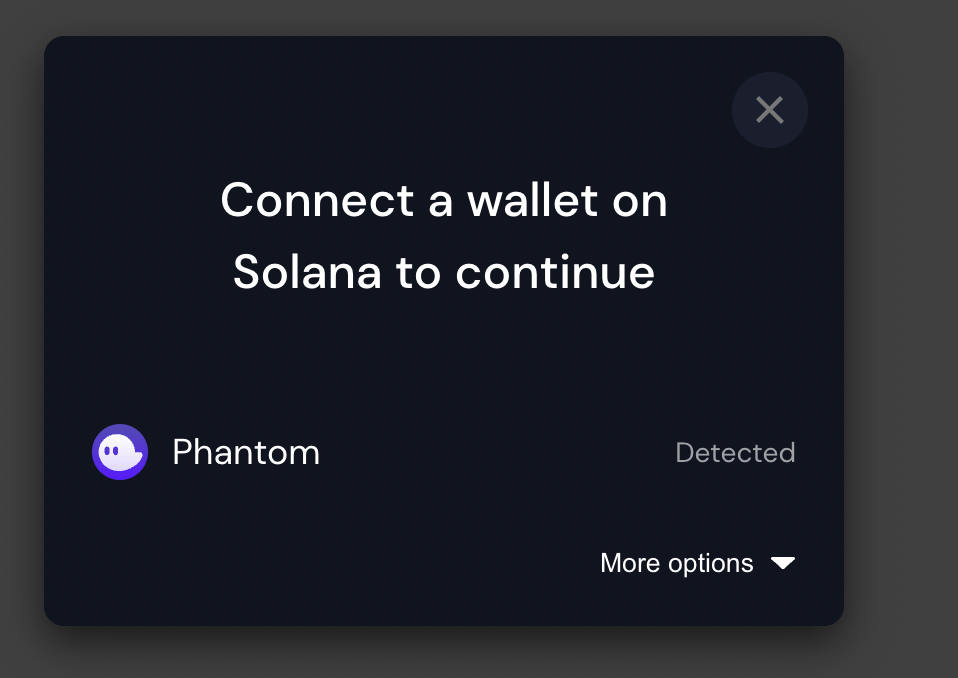
で死ぬ。が、Walletを選択できる。

stream周りのエラーは
$ yarn add stream stream-browserify
で解決できた。
つまり、react-scriptsを5.0.0を使う、react-error-overlayを使う、streamとstream-browserifyをインストールするというのが良いやり方っぽい。
雑だけどメニューできた。
import {Container, Navbar} from 'react-bootstrap';
import React, { FC, useMemo } from 'react';
import { ConnectionProvider, WalletProvider } from '@solana/wallet-adapter-react';
import { WalletAdapterNetwork } from '@solana/wallet-adapter-base';
import {
    LedgerWalletAdapter,
    PhantomWalletAdapter,
    SlopeWalletAdapter,
    SolflareWalletAdapter,
    SolletExtensionWalletAdapter,
    SolletWalletAdapter,
    TorusWalletAdapter,
} from '@solana/wallet-adapter-wallets';
import {
    WalletModalProvider,
    WalletDisconnectButton,
    WalletMultiButton
} from '@solana/wallet-adapter-react-ui';
import { clusterApiUrl } from '@solana/web3.js';

import 'bootstrap/dist/css/bootstrap.min.css';
import '@solana/wallet-adapter-react-ui/styles.css';

export const Header: FC = () => {
    // The network can be set to 'devnet', 'testnet', or 'mainnet-beta'.
    const network = WalletAdapterNetwork.Devnet;

    // You can also provide a custom RPC endpoint.
    const endpoint = useMemo(() => clusterApiUrl(network), [network]);

    // @solana/wallet-adapter-wallets includes all the adapters but supports tree shaking and lazy loading --
    // Only the wallets you configure here will be compiled into your application, and only the dependencies
    // of wallets that your users connect to will be loaded.
    const wallets = useMemo(
        () => [
            new PhantomWalletAdapter(),
            new SlopeWalletAdapter(),
            new SolflareWalletAdapter({ network }),
            new TorusWalletAdapter(),
            new LedgerWalletAdapter(),
            new SolletWalletAdapter({ network }),
            new SolletExtensionWalletAdapter({ network }),
        ],
        [network]
    );

    return (
        <Navbar bg="dark" variant="dark" fixed="top">
            <Container fluid>
                <Navbar.Brand href="#home">Example Escrow</Navbar.Brand>
                <Navbar.Collapse className="justify-content-end">
                    <ConnectionProvider endpoint={endpoint}>
                        <WalletProvider wallets={wallets} autoConnect>
                            <WalletModalProvider>
                                <WalletMultiButton className="btn btn-primary wallet-adapter-button-trigger" />
                                <WalletDisconnectButton className="m-lg-2 btn btn-secondary wallet-adapter-button-trigger " />
                            </WalletModalProvider>
                        </WalletProvider>
                    </ConnectionProvider>
                </Navbar.Collapse>
            </Container>
        </Navbar>
    );
}

Sveltekit
React + Next.jsな形で行こうとしたがCloudflare WorkersがNext.jsをサポートしていなかった。
モチベーションとしては
- Solana触りたい
- IPFS触りたい
- CloudflareWorkers、KV、R2(公開されてれば)触りたい
- CSRで動作する完全なdAppの形にしたい
- CSRではパフォーマンスとSEO、OGPなどで課題があるので、補助としてSSRをやりたい
というところがあるので、CloudflareWorkersに対応してるフレームワークの中ではStelveが無難にメジャーそうというのでStelve+StelveKitでCSRで組みながらSSRできる形を目指す。
(できればnext.js触りたかった・・・)
ただし、SolanaのWallet Adapterが対応してないので、作り込みは必要。
Projectの作成
$ npm init svelte@next [name]
$ npm run dev -- --open
で開発用のサーバー起動できる。
これを使うと複数の出力ができる。
import staticAdapter from '@sveltejs/adapter-static'
import cloudflareAdapter from '@sveltejs/adapter-cloudflare';
import adapter from '@macfja/svelte-multi-adapter'
import preprocess from 'svelte-preprocess';

/** @type {import('@sveltejs/kit').Config} */
const config = {
	// Consult https://github.com/sveltejs/svelte-preprocess
	// for more information about preprocessors
	preprocess: preprocess(),

	kit: {
		adapter: adapter([
			staticAdapter({
				pages: '.svelte-kit/static/',
				assets: '.svelte-kit/static/',
				fallback: 'index.html',
				precompress: false
			}),
			cloudflareAdapter()
		]),

		// Override http methods in the Todo forms
		methodOverride: {
			allowed: ['PATCH', 'DELETE']
		}
	}
};

export default config;
みたいにするとnpm run buildで静的サイトの出力とCloudflare Pages+Workerの出力が可能。