invalidateとrefresh
どう使い分けるのか?
riverpodのFutureProviderを使ってFirestoreからデータを取得すると、一度しかデータを取ってこれなくて、他のページに移動して戻ってきても変わらないので強制的に更新をかける必要があります。
今までは、ref.refreshをボタンを押したら実行するときに使ってたんですけど、どうやらよくない例だそうです。
今回は、invalidateとの使い分けをやってみようと思います。
invalidateとは?
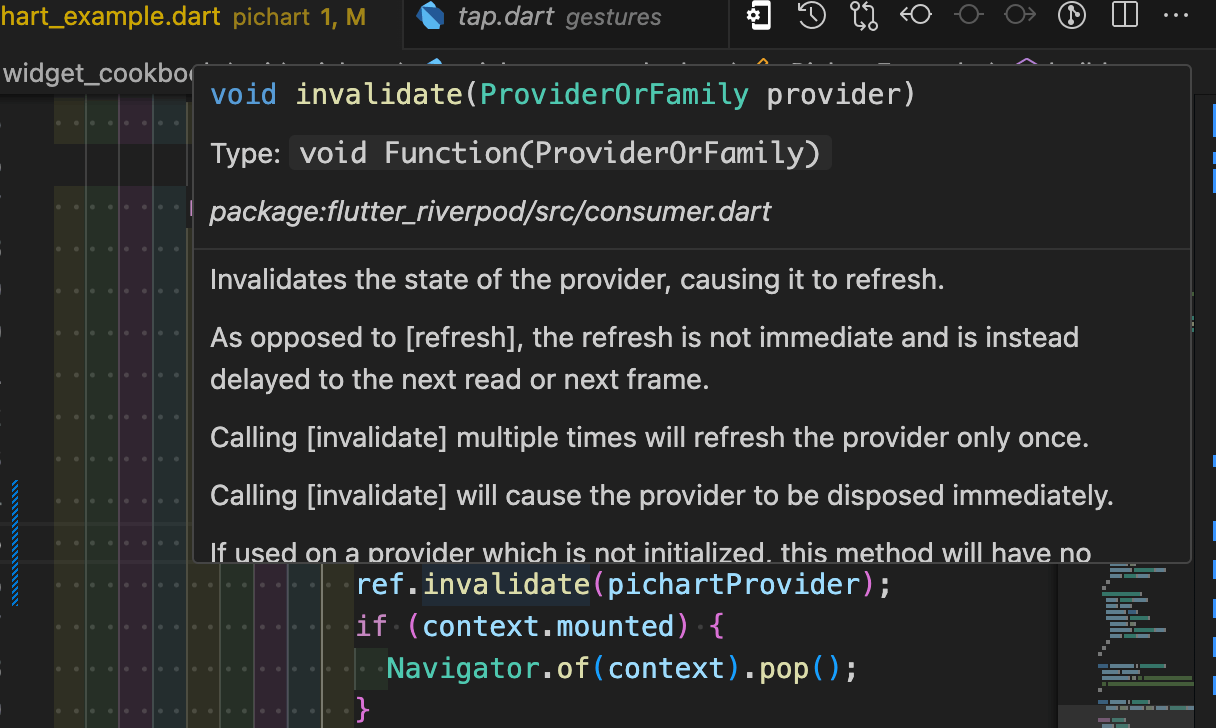
プロバイダの状態を無効にし、リフレッシュさせる。
refreshとは対照的に、リフレッシュは即時ではなく、次の読み取りまたは次のフレームまで遅延されます。
invalidateを複数回呼び出すと、プロバイダは1回だけリフレッシュされます。
invalidateを呼び出すと、プロバイダは直ちに破棄されます。
初期化されていないプロバイダでこのメソッドを使用しても、何の効果もありません。
refreshとは?
プロバイダの状態を直ちに再評価し、作成された値を返すように強制する。
refreshの戻り値を気にしない場合は、代わりにinvalidateを使用する。そうすることで
一度に複数のリフレッシュを避けることで、無効化ロジックをより弾力的にする。
プロバイダがすぐに必要でない場合、プロバイダの再計算を避けることができる。
このメソッドは、"pull to refresh "や "retry on error "のような、特定のプロバイダを再起動させる機能に便利です。
書き方
final newValue = ref.refresh(provider);
is strictly identical to doing:
ref.invalidate(provider);
final newValue = ref.read(provider);
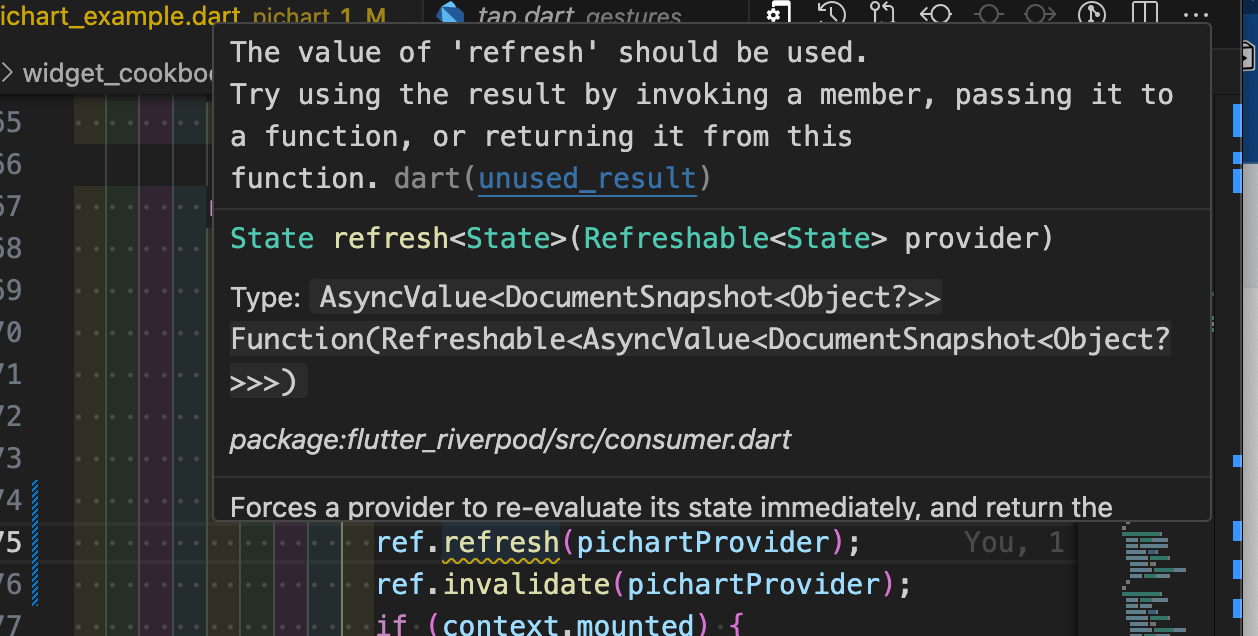
リントの警告が出てくる!
ref.refreshを使用するとリントの警告が出てきた!
いつもなら、無効にしていたがこれはよくない例なので別の対策をすることにした。
戻り値を使わないなら、この書き方をするのは良くない。

別の対策
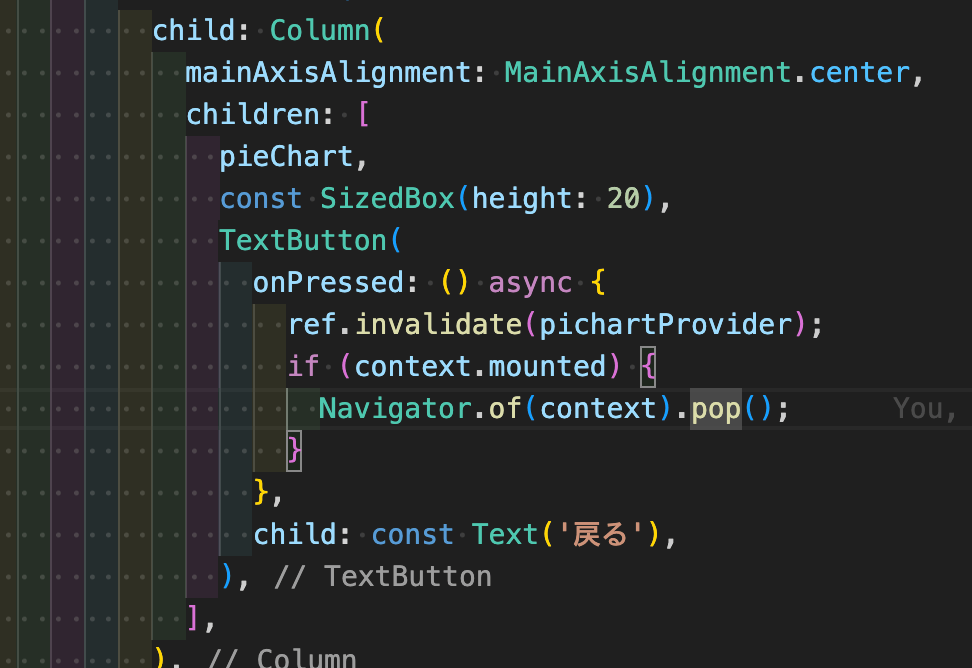
ref.invalidateも更新をしてくれるのですが、違いは何かというと、void型なので、戻り値を返さないことです。戻り値がないのでasync awaitを書く必要がなくなる。
これは間違って書いちゃった例なので後で修正します。

マウスをホバーして、どんな型が返ってくるか調べてみた。
invalidateの場合
戻り値がないので、void

refreshの場合
戻り値があるので、今回だとFutureProviderとFirestore使用しているので、AsyncValueとDocumentSnapshotがあるので、
State refresh<State>(Refreshable<State> provider)
Type: AsyncValue<DocumentSnapshot<Object?>> Function(Refreshable<AsyncValue<DocumentSnapshot<Object?>>>)
というデータ型がある。

正しく修正したコード
まだまだ、改良が必要かなと思いますが作って紹介している人いないので、知らない人にありがたいサンプルかもですね。
認証機能をつけている人は、.doc()のところにuidを指定してください。そうすると特定のユーザーのデータを指定することができます。
import 'package:cloud_firestore/cloud_firestore.dart';
import 'package:fl_chart/fl_chart.dart';
import 'package:flutter/material.dart';
import 'package:flutter_riverpod/flutter_riverpod.dart';
// ハードコーディングですけど、特定のドキュメントを取得するProviderを作成
final pichartProvider = FutureProvider<DocumentSnapshot>((ref) async {
final docRef = FirebaseFirestore.instance
.collection('pichart')
.doc('BSuZjQmrgdad7fO4WcXy');
return docRef.get();
});
/// [円グラフのUIを作成]
class PichartExample extends ConsumerWidget {
const PichartExample({Key? key}) : super(key: key);
Widget build(BuildContext context, WidgetRef ref) {
final pichart = ref.watch(pichartProvider);
return Scaffold(
appBar: AppBar(
title: const Text('Pichart'),
),
body: Column(
children: [
Padding(
padding: const EdgeInsets.only(left: 20, top: 20),
child: Column(
children: [
Row(
children: [
Container(
width: 30,
height: 30,
color: Colors.yellow,
),
const SizedBox(width: 10),
const Text('通勤時間'),
],
),
const SizedBox(height: 10),
Row(
children: [
Container(
width: 30,
height: 30,
color: Colors.purple,
),
const SizedBox(width: 10),
const Text('睡眠'),
],
),
const SizedBox(height: 10),
Row(
children: [
Container(
width: 30,
height: 30,
color: Colors.red,
),
const SizedBox(width: 10),
const Text('仕事'),
],
),
const SizedBox(height: 10),
Row(
children: [
Container(
width: 30,
height: 30,
color: Colors.blue,
),
const SizedBox(width: 10),
const Text('娯楽・趣味'),
],
),
const SizedBox(height: 10),
Row(
children: [
Container(
width: 30,
height: 30,
color: Colors.green,
),
const SizedBox(width: 10),
const Text('運動'),
],
),
],
),
),
const SizedBox(height: 50),
pichart.when(
data: (db) {
// db.existsはドキュメントが存在するかどうかを判定するプロパティ
if (db.exists) {
// ドキュメントのデータを取得 (double型に変換)
final work = (db['work'] as num).toDouble();
final entertainment = (db['entertainment'] as num).toDouble();
final exercise = (db['exercise'] as num).toDouble();
final commutingTime = (db['commutingTime'] as num).toDouble();
final sleep = (db['sleep'] as num).toDouble();
// 円グラフのセクションを作成
final sections = [
PieChartSectionData(
color: Colors.red,
value: work,
showTitle: true,
titleStyle: TextStyle(
fontSize: 16,
fontWeight: FontWeight.bold,
color: Colors.white,
),
),
PieChartSectionData(
color: Colors.blue,
value: entertainment,
showTitle: true,
titleStyle: TextStyle(
fontSize: 16,
fontWeight: FontWeight.bold,
color: Colors.white,
),
),
PieChartSectionData(
color: Colors.green,
value: exercise,
showTitle: true,
titleStyle: TextStyle(
fontSize: 16,
fontWeight: FontWeight.bold,
color: Colors.white,
),
),
PieChartSectionData(
color: Colors.yellow,
value: commutingTime,
showTitle: true,
titleStyle: TextStyle(
fontSize: 16,
fontWeight: FontWeight.bold,
color: Colors.white,
),
),
PieChartSectionData(
color: Colors.purple,
value: sleep,
showTitle: true,
titleStyle: TextStyle(
fontSize: 16,
fontWeight: FontWeight.bold,
color: Colors.white,
),
),
];
final pieChartData = PieChartData(
sections: sections,
sectionsSpace: 0, // 各セクション間のスペース
// その他のカスタマイズ可能なオプションをここに追加
);
final pieChart = SizedBox(
width: 250, height: 250, child: PieChart(pieChartData));
return Center(
child: Column(
mainAxisAlignment: MainAxisAlignment.center,
children: [
pieChart,
const SizedBox(height: 20),
TextButton(
onPressed: () {
ref.invalidate(pichartProvider);
if (context.mounted) {
Navigator.of(context).pop();
}
},
child: const Text('戻る'),
),
],
),
);
} else {
return const Center(child: Text('データがありません。'));
}
},
error: (_, __) => const Center(child: Text('Error')),
loading: () => const Center(child: CircularProgressIndicator()),
)
],
),
);
}
}
後は、main.dartでimportすれば使えます。
Future<void> main() async {
WidgetsFlutterBinding.ensureInitialized();
await Firebase.initializeApp(
options: DefaultFirebaseOptions.currentPlatform,
);
runApp(const ProviderScope(child: MyApp()));
}
class MyApp extends StatelessWidget {
const MyApp({super.key});
Widget build(BuildContext context) {
return MaterialApp(
debugShowCheckedModeBanner: false,
title: 'Cookbook',
theme: ThemeData(
appBarTheme: const AppBarTheme(
backgroundColor: Colors.black,
foregroundColor: Colors.white,
centerTitle: true,
),
),
home: const HomePage(),
);
}
}
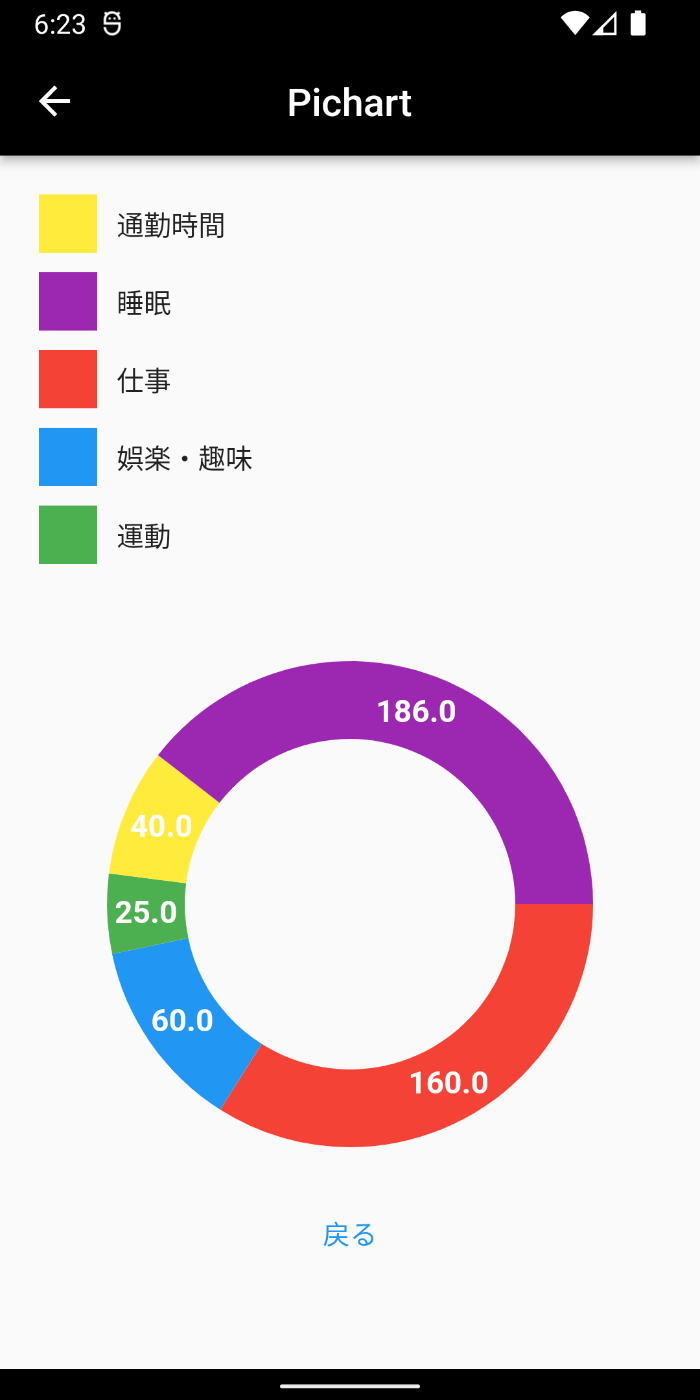
ビルドするとこんな感じです

まとめ
StreamProviderを使用していたら、データが変更されたら画面が切り替わりますが、FutureProviderだと、一度しかデータを取ってこないので更新をしてあげる必要があります。
公式にも書いてあったのですが解説によると
refreshの戻り値を気にしない場合は、代わりにinvalidateを使用する。そうすることで、次のような利点がある:
- 一度に複数のリフレッシュを避けることで、無効化ロジックをより弾力的にする。
- プロバイダがすぐに必要でない場合、プロバイダの再計算を避けることができる。
このメソッドは、"pull to refresh "や "retry on error "のような、特定のプロバイダを再起動させる機能に便利です。
ボタンを押した時に、他のページに移動する際に、画面を更新するロジックを実行するだけなら、invalidateでよかったということでした。
戻り値がないなら、refreshいらないんですね😱
Discussion