Swiperでローカルディレクトリの画像ビュワーをつくる(WebP、SVG対応)
Jitoinを開発しているitteと申します。Webエンジニア向けのサービスや記事を公開しています。
今回は、前回記事にしたFile System Access APIを使って何か作ってみます。
私のWindowsではローカル環境でWebPやSVGの画像を確認しようとするとブラウザが開いてしまい、ディレクトリ内のファイルを一枚ずつ順番に確認ができません。
Web開発のときに少しだけ面倒です。
そこで、これを実現するために、JavaScriptのFile System Access APIと、Swiperで簡易画像ビュワーを作ってみました。
imgタグで画像を開くのでWebPとSVGにも対応しています。

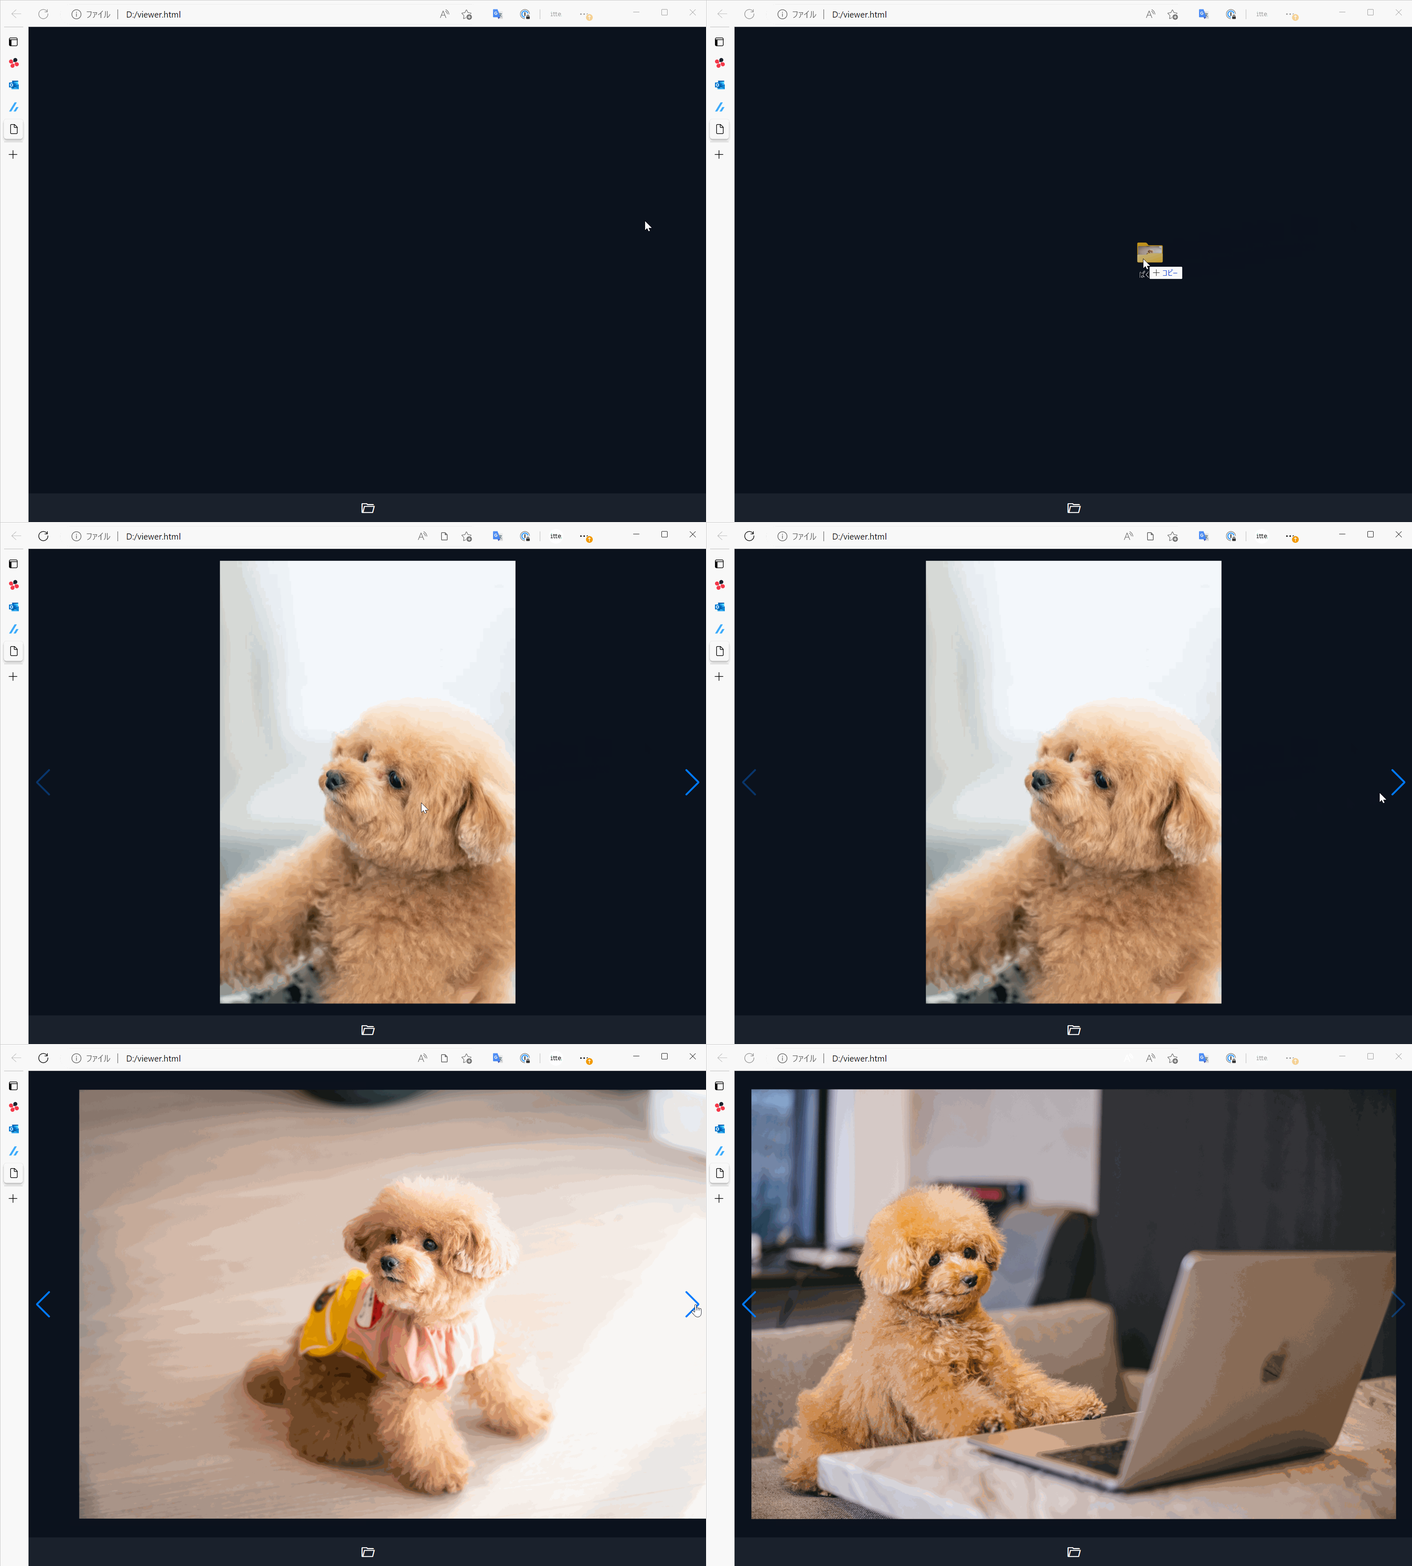
画像ビュワー(写真はぱくたそ)
FireFoxはFile System Access APIが未対応なので動きません。Safariもドラッグ&ドロップは動きません。
↓Glitchに置いています。以下のページからVisitを押してみてください。フォルダーアイコンをクリックするか、ドラッグ&ドロップでディレクトリを開きます。
オンライン画像ビュワーの特徴
Webで画像ビュワーを作るとメリットとデメリットがあります。
メリット
- インストールする必要が無い
- デザインを変更しやすい
- 画像以外にも動画やテキストファイル、バイナリファイルなど、自分次第でファイル対応しやすい
- CSSを操作してズームや回転などの機能追加しやすい
- Swiperをカスタマイズしてスライドショーやサムネイルなどの機能追加しやすい
デメリット
- ファイルをダブルクリックで開けない
- ディレクトリ単位で開く必要がある
ローカルファイルを1つダブルクリックして起動するような利便性を得るには、ElectronやWebView2を使って作ることになります。
私はそこまでの機能を求めませんが、いい感じのビュワーを簡単に作れそうですね。
作り方
File System Access API
File System Access APIの使い方は前回記事にまとめましたので、参照ください。
画像ファイルの表示方法
前回記事によりディレクトリの全ファイルを1枚ずつ取得する方法は分かりました。
画像ビュワーを作るには、取得した画像ファイルを表示する必要があります。これは、オブジェクトURLを作って<img>タグのsrc属性に与えればできます。
SwiperはappendSlide()メソッドで新しいスライドを追加できますので、次のようにすればファイルをSwiperで表示できます。
let file = await fileHandle.getFile()
let blobUrl = URL.createObjectURL(file)
swiper.appendSlide(`<div class="swiper-slide"><img src="${blobUrl}"></div>`)
ソースコード
後は、CSSで見た目を整えるだけです。
CSSによって長くなってしまいましたが、HTMLファイル1つ(100行)で作りました。外部から読み込んでいるのはSwiperとマテリアルアイコンだけです。
<!DOCTYPE html>
<meta charset="UTF-8">
<meta name="viewport" content="width=device-width, initial-scale=1.0">
<title>Web Image Viewer</title>

<link rel="stylesheet" href="https://cdn.jsdelivr.net/npm/swiper@8/swiper-bundle.min.css">
<link rel="stylesheet" href="https://fonts.googleapis.com/css2?family=Material+Symbols+Outlined:opsz,wght,FILL,GRAD@48,400,0,0">
<style>
* {
  margin: 0;
}
body {
  background-color: #0c121e;
}
.swiper {
  width: 100%;
  height: calc(100vh - 50px);
}
.swiper-slide,
.toolbar {
  display: flex;
  align-items: center;
  justify-content: center;
  font-size: 0;
}
.swiper-slide img {
  max-height: 95%;
  max-width: 95%;
}
.toolbar {
  height: 50px;
  background-color: #ffffff10;
}
.toolbar button {
  background-color: transparent;
  border: none;
  outline: 0;
  color: #ffffff;
  font-size: 30px;
  cursor: pointer;
  line-height: 40px;
  height: 40px;
  width: 40px;
  text-align: center;
}
</style>

<div class="swiper">
  <div class="swiper-wrapper"></div>
  <div class="swiper-button-prev"></div>
  <div class="swiper-button-next"></div>
</div>

<div class="toolbar">
  <button id="openDirectory"><span class="material-symbols-outlined">folder_open</span></button>
</div>

<script type="module">
import Swiper from 'https://cdn.jsdelivr.net/npm/swiper@8/swiper-bundle.esm.browser.min.js'

let imageExtensions = ['gif', 'jpg', 'jpeg', 'png', 'webp', 'svg']

let swiper = new Swiper('.swiper', {
  navigation: {
    nextEl: '.swiper-button-next',
    prevEl: '.swiper-button-prev',
  }
})

/* ディレクトリハンドルから画像を抽出してスライドに追加 */
async function addImages(dirHandle) {
  for await (let [name, handle] of dirHandle) {
    if (handle.kind === 'file' && name.includes('.') && imageExtensions.includes(name.split('.').pop())) { // 拡張子が画像のとき
      let file = await handle.getFile()
      let blobUrl = URL.createObjectURL(file)
      swiper.appendSlide(`<div class="swiper-slide"><img src="${blobUrl}"></div>`)
    }
  }
}

/* ボタンからディレクトリを開く */
document.getElementById('openDirectory').addEventListener('click', async () => {
  let dirHandle = await window.showDirectoryPicker({ startIn: 'pictures' })
  swiper.removeAllSlides()
  addImages(dirHandle)
})

/* ドラッグ&ドロップでディレクトリを開く */
document.addEventListener('dragover', event => event.preventDefault())
document.addEventListener('drop', async event => {
  event.preventDefault()

  let item = event.dataTransfer.items[0]
  let handle = await item.getAsFileSystemHandle()
  if (handle.kind === 'directory') {
    swiper.removeAllSlides()
    await addImages(handle)
  }
})
</script>
Discussion