

今まで間違って使ってた😱
Riverpodを普段使っているのですけど、メソッドを使うときに、StateNotifire使ったり、StateProviderを使っていたことがありました。
実はこれ、間違った使い方で状態を更新する必要がなければ使う意味がないんですよね。
サービスクラスを使うにはどうする?
例えばFirestoreにデータを保存するメソッドを使いたいときは、どうすればいいのかというと、状態管理をしていないアプリで定義して、使っているサービスクラスとか名前をつけているメソッドを持っているクラスをProviderで、呼び出すだけでした😅
過去に色々間違っているなと思う記事を書いたのですが、消すのも勿体無いので、残しておきます。比較するのに必要かなと思いまして...
まずはやってみる
今回は最近新しく追加された機能のジェネレーターなるものを使ってみました。これを使わなくてもできますので、もしなしでやるときは、サービスクラスを作成して、プロバイダーで呼び出すだけでできます。
pubspec.yamlに、今回必要なパッケージを追加します。ジェネレーターを使う時は、パッケージによって追加する位置が違うので、ファイルを載せておきます。
ターミナルから、コマンドで追加すれば正しい位置に追加してくれるので、普段からコマンドで追加するのがいいかもしれないですね。
name: riverpod_tutorial
description: A new Flutter project.
# The following line prevents the package from being accidentally published to
# pub.dev using `flutter pub publish`. This is preferred for private packages.
publish_to: 'none' # Remove this line if you wish to publish to pub.dev

# The following defines the version and build number for your application.
# A version number is three numbers separated by dots, like 1.2.43
# followed by an optional build number separated by a +.
# Both the version and the builder number may be overridden in flutter
# build by specifying --build-name and --build-number, respectively.
# In Android, build-name is used as versionName while build-number used as versionCode.
# Read more about Android versioning at https://developer.android.com/studio/publish/versioning
# In iOS, build-name is used as CFBundleShortVersionString while build-number is used as CFBundleVersion.
# Read more about iOS versioning at
# https://developer.apple.com/library/archive/documentation/General/Reference/InfoPlistKeyReference/Articles/CoreFoundationKeys.html
# In Windows, build-name is used as the major, minor, and patch parts
# of the product and file versions while build-number is used as the build suffix.
version: 1.0.0+1

environment:
  sdk: '>=2.19.4 <3.0.0'

# Dependencies specify other packages that your package needs in order to work.
# To automatically upgrade your package dependencies to the latest versions
# consider running `flutter pub upgrade --major-versions`. Alternatively,
# dependencies can be manually updated by changing the version numbers below to
# the latest version available on pub.dev. To see which dependencies have newer
# versions available, run `flutter pub outdated`.
dependencies:
  flutter:
    sdk: flutter
  flutter_riverpod: ^2.3.1
  riverpod_annotation: ^2.0.1
  firebase_core: ^2.8.0
  cloud_firestore: ^4.4.5

  # The following adds the Cupertino Icons font to your application.
  # Use with the CupertinoIcons class for iOS style icons.
  cupertino_icons: ^1.0.2

dev_dependencies:
  flutter_test:
    sdk: flutter
  riverpod_generator: ^2.1.3
  riverpod_lint: ^1.1.5
  build_runner: ^2.3.3

  # The "flutter_lints" package below contains a set of recommended lints to
  # encourage good coding practices. The lint set provided by the package is
  # activated in the `analysis_options.yaml` file located at the root of your
  # package. See that file for information about deactivating specific lint
  # rules and activating additional ones.
  flutter_lints: ^2.0.0

# For information on the generic Dart part of this file, see the
# following page: https://dart.dev/tools/pub/pubspec

# The following section is specific to Flutter packages.
flutter:

  # The following line ensures that the Material Icons font is
  # included with your application, so that you can use the icons in
  # the material Icons class.
  uses-material-design: true

  # To add assets to your application, add an assets section, like this:
  # assets:
  #   - images/a_dot_burr.jpeg
  #   - images/a_dot_ham.jpeg

  # An image asset can refer to one or more resolution-specific "variants", see
  # https://flutter.dev/assets-and-images/#resolution-aware

  # For details regarding adding assets from package dependencies, see
  # https://flutter.dev/assets-and-images/#from-packages

  # To add custom fonts to your application, add a fonts section here,
  # in this "flutter" section. Each entry in this list should have a
  # "family" key with the font family name, and a "fonts" key with a
  # list giving the asset and other descriptors for the font. For
  # example:
  # fonts:
  #   - family: Schyler
  #     fonts:
  #       - asset: fonts/Schyler-Regular.ttf
  #       - asset: fonts/Schyler-Italic.ttf
  #         style: italic
  #   - family: Trajan Pro
  #     fonts:
  #       - asset: fonts/TrajanPro.ttf
  #       - asset: fonts/TrajanPro_Bold.ttf
  #         weight: 700
  #
  # For details regarding fonts from package dependencies,
  # see https://flutter.dev/custom-fonts/#from-packages
ジェネレーターに必要なコードを作成する
まずは、repositoryディレクトリを作成して、data_service.dartを作成します。ファイルにロジックを書いたクラスを定義します。
import 'package:cloud_firestore/cloud_firestore.dart';

class DataService {
  final db = FirebaseFirestore.instance;

  Future<void> createItem(String item) async {
    await db.collection('item').add({
      'item': item,
      'createdAt': Timestamp.fromDate(DateTime.now()),
    });
  }
}
次に、ジェネレーターで使用するhello.dartを作成します。使うときの注意点は、自動生成される〇〇.g.dartと同じ名前にすることです。
今回はhello.g.dartというファイルが自動生成されます。
import 'package:riverpod_annotation/riverpod_annotation.dart';
import 'package:riverpod_tutorial/repository/data_service.dart';
part 'hello.g.dart'; // ファイル名と同じ名前にする
// メソッドの型を指定する
// 今回だと、クラスが型なので、DataServiceを指定する
// メソッドの引数の名前は、なんでもいいみたいです
DataService helloWorld(HelloWorldRef ref) {
return DataService();
}
ファイルを自動生成するコマンドを実行する
dart pub run build_runner watch
こちらが自動生成されたファイルです。下の方に書いてある変数名が、helloWorldProviderと書いてあるものをref.watch()で呼び出して使うことができます。
// GENERATED CODE - DO NOT MODIFY BY HAND
part of 'hello.dart';
// **************************************************************************
// RiverpodGenerator
// **************************************************************************
String _$helloWorldHash() => r'985a81040f347641617543a0dab2be430c437e4c';
/// See also [helloWorld].
(helloWorld)
final helloWorldProvider = AutoDisposeProvider<DataService>.internal(
helloWorld,
name: r'helloWorldProvider',
debugGetCreateSourceHash:
const bool.fromEnvironment('dart.vm.product') ? null : _$helloWorldHash,
dependencies: null,
allTransitiveDependencies: null,
);
typedef HelloWorldRef = AutoDisposeProviderRef<DataService>;
// ignore_for_file: unnecessary_raw_strings, subtype_of_sealed_class, invalid_use_of_internal_member, do_not_use_environment, prefer_const_constructors, public_member_api_docs, avoid_private_typedef_functions
アプリを実行するコード
Riverpodの記事で、毎回カウンターは見飽きていると周りの方々から言われるので、私はFirestore,LocalDBを使った記事を書いて例を説明するようにしています。
どうして、カウンターの記事ばかりなのでしょうね😅
import 'package:firebase_core/firebase_core.dart';
import 'package:flutter/material.dart';
import 'package:flutter_riverpod/flutter_riverpod.dart';
import 'package:riverpod_tutorial/repository/hello.dart';
import 'firebase_options.dart';
Future<void> main() async {
WidgetsFlutterBinding.ensureInitialized();
await Firebase.initializeApp(options: DefaultFirebaseOptions.currentPlatform);
runApp(const ProviderScope(child: MyApp()));
}
class MyApp extends StatelessWidget {
const MyApp({super.key});
Widget build(BuildContext context) {
return MaterialApp(
title: 'Flutter Demo',
theme: ThemeData(
primarySwatch: Colors.blue,
),
home: const ExampleApp(),
);
}
}
// TextEditingControllerを使用するためのプロバイダー
final itemProvider =
StateProvider.autoDispose((ref) => TextEditingController(text: ''));
class ExampleApp extends ConsumerWidget {
const ExampleApp({Key? key}) : super(key: key);
Widget build(BuildContext context, WidgetRef ref) {
/// ジェネレーターで生成されたプロバイダーを呼び出す
final dataService = ref.read(helloWorldProvider);
/// TextEditingControllerを呼び出す
final item = ref.watch(itemProvider);
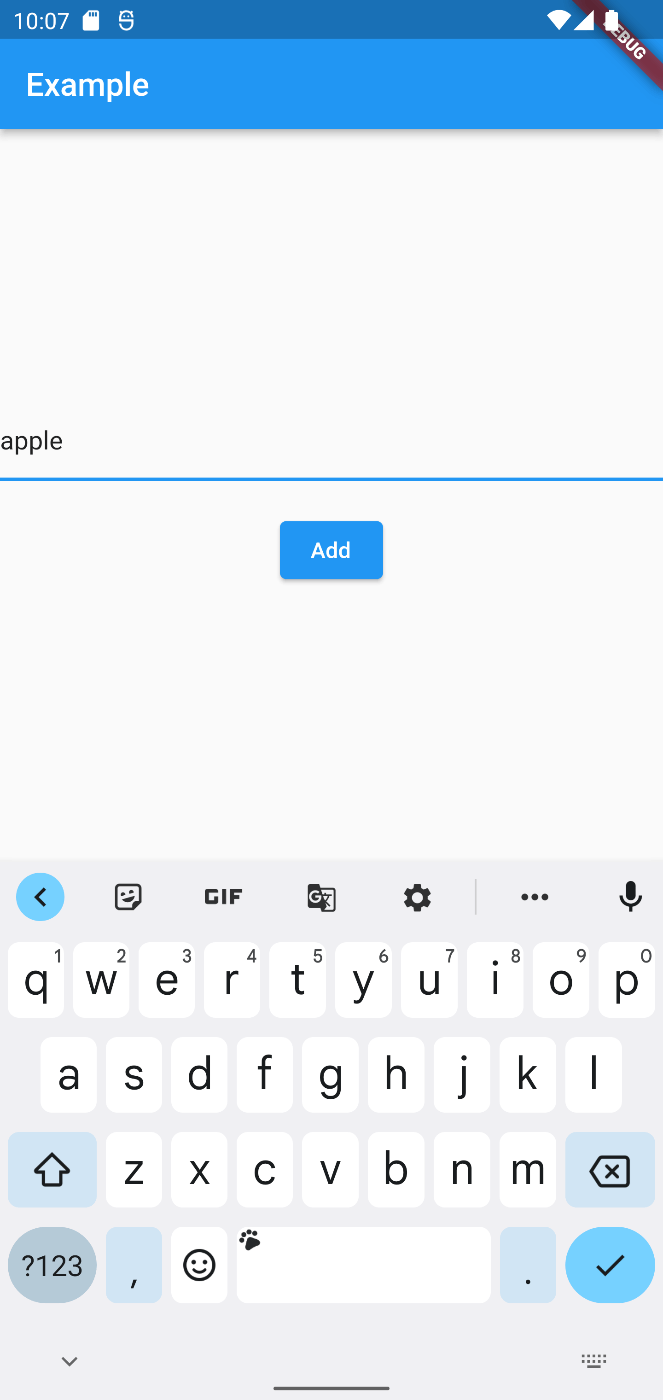
return Scaffold(
appBar: AppBar(
title: const Text('Example'),
),
body: Center(
child: Column(
mainAxisAlignment: MainAxisAlignment.center,
children: [
TextField(
controller: item,
),
const SizedBox(height: 20.0),
ElevatedButton(
onPressed: () async {
dataService.createItem(item.text);
},
child: const Text('Add')),
],
),
),
);
}
}
実行結果
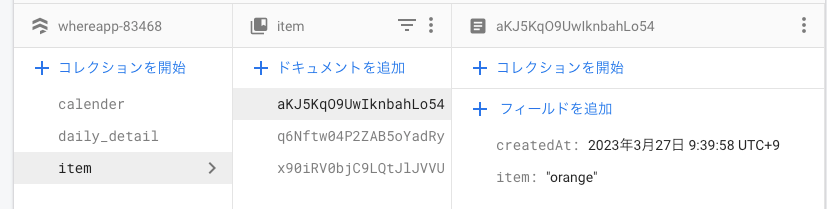
Firestoreにデータを追加できました。ジェネレーターは出たばかりの技術ですが、公式が推奨しているので、エラーでつまらない限りは、今後は使っていくのが普通になるのかもしれないですね。
Flutterの進化が速すぎてついていくの大変です💦
他のコレクションが入っているのは、Firestoreのプロジェクトを使い回しているからです。プロジェクトを作れる無料枠が5個までなので、ついやってしまいました。すいません🙇♂️
Googleのアカウントを切り替えればいくらでも作れる抜け穴がありますけどね😅

まとめ
こちらが完成品のコードです。もしうまくいかないなと思ったら、比較して、試してください。
自動生成をするパッケージって、タイポしていたりファイル名が違うとエラーが出て、実行できないのにハマってしますので、設定が正しくできているか先ずは、確認してからコマンドを実行しましょう。
皆様も良きFlutterライフを送ってください。

Flutter大学はFlutterエンジニアに特化した学習コミュニティです! 初心者から中上級者まで幅広く在籍し、切磋琢磨しています! 入会をご希望の方はこちらから→ flutteruniv.com
Discussion