【Android】Rich Text EditorのCompose Rich Editorを試す
概要
AndroidでRich Text Editorを実装する際に、良さげなライブラリを探していた所 Compose Rich Editor がComposeで扱いやすそうだったので試してみました。
※ Compose Multiplatform 対応との事ですが今回はAndroidのみでしか試してません。
動作環境
- M3 MacBook Air 14.4.1
- Android Studio Iguana | 2023.2.1 Patch 1
- エミュレータ: Pixel 8 Pro API Level VanillalceCream
ベースとなるプロジェクト作成
-
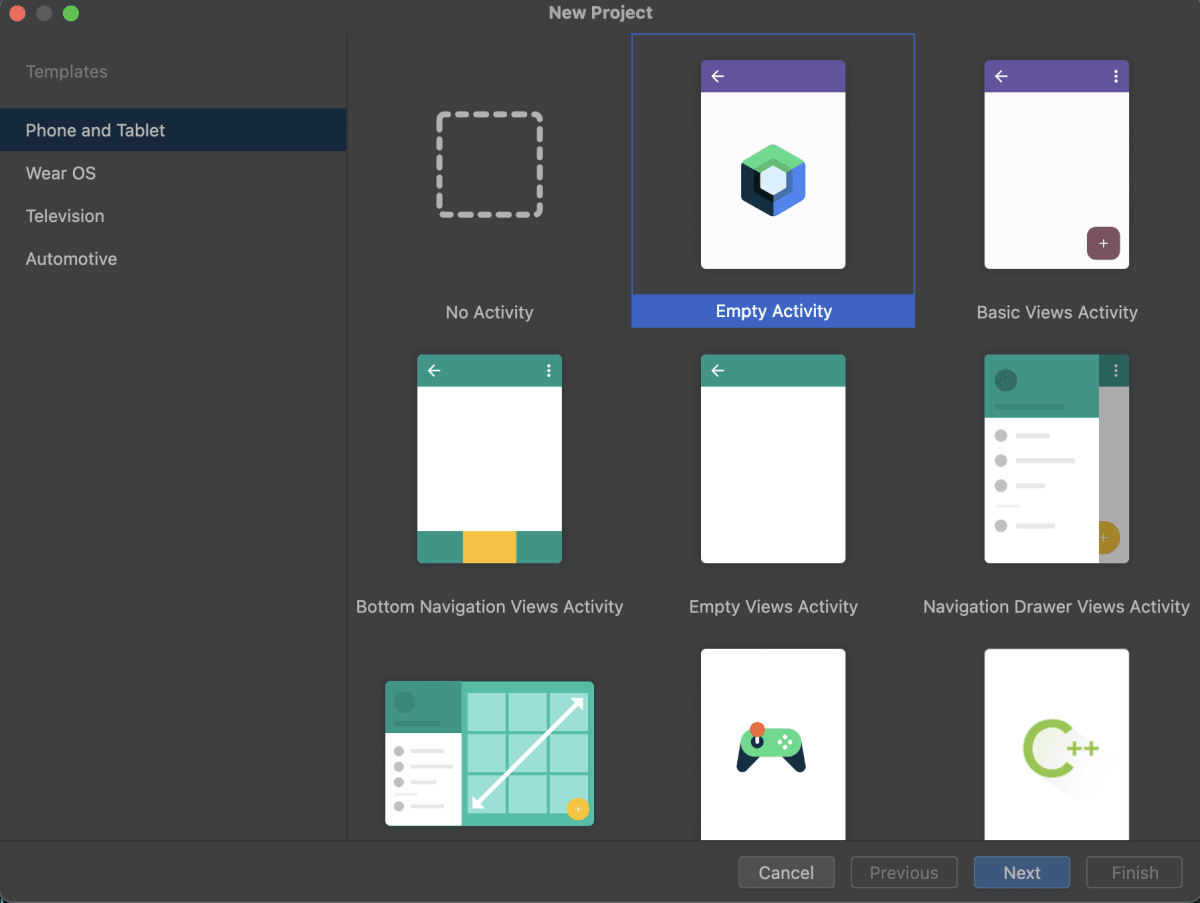
「New Project…」で「Empty Activity」を選択します
-
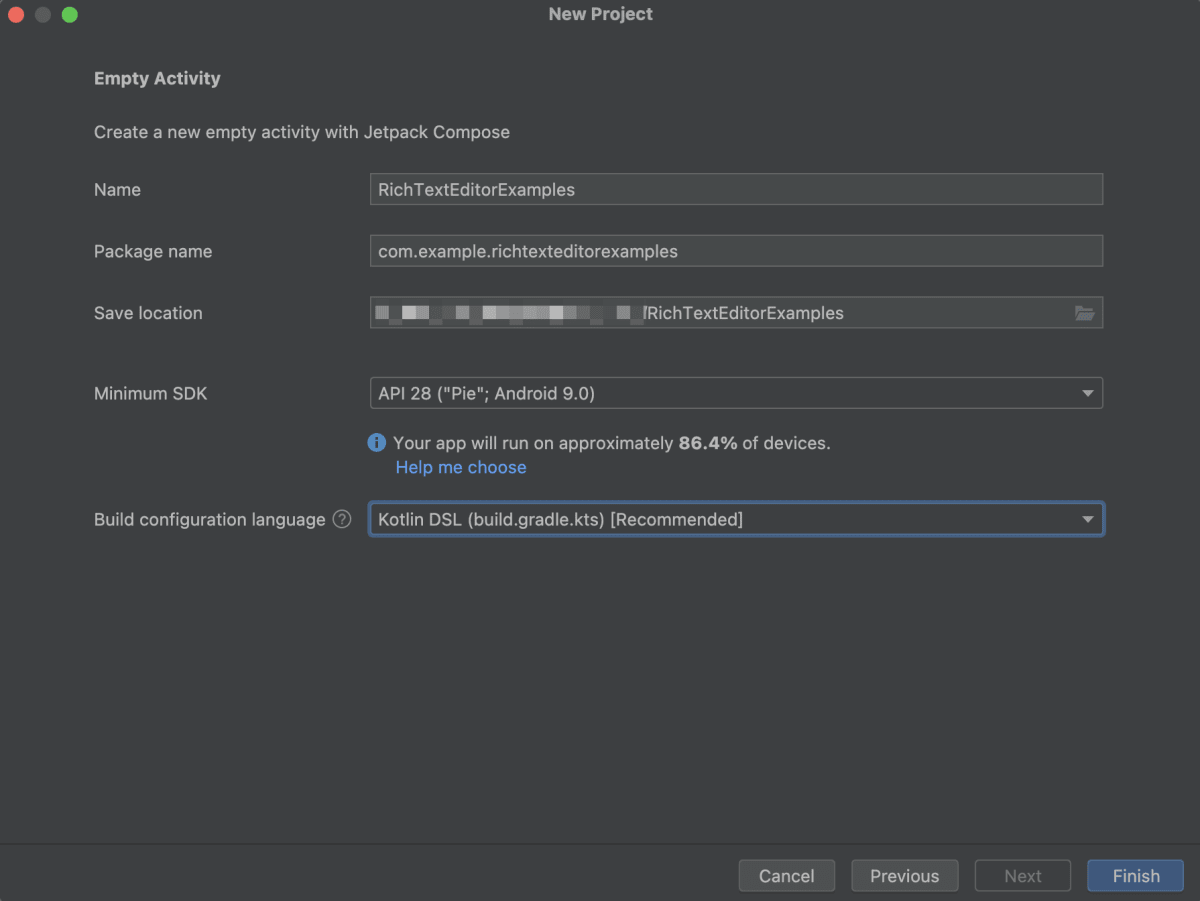
今回はプロジェクト名を「RichTextEditorExamples」として以下内容で作成します
Compose Rich Editor
- Jetpack Compose と Compose Multiplatform の両方に対応
- 一般的なテキスト スタイル機能をサポートする WYSIWYG エディタ
↑こちらでデモを触ることができます。
インストール
settings.gradle(.kts) の dependencyResolutionManagement > repositories に
mavenCentral() が設定されている事を確認し gradle/libs.versions.toml に以下を追加します。
[versions]
richeditorCompose = "1.0.0-rc03"

[libraries]
richeditor-compose = { module = "com.mohamedrejeb.richeditor:richeditor-compose", version.ref = "richeditorCompose" }
次に app/build.gradle.kts に以下を追加します。
dependencies {
  implementation(libs.richeditor.compose)
}
簡単な実装
早速シンプルなものを試してみたいと思います。まず MainActivity.kt に以下の様な Composable を作成します。
@Composable
fun Editor() {
    val state = rememberRichTextState()

    LazyColumn(
        modifier = Modifier
            .fillMaxSize()
            .padding(20.dp)
    ) {
        item {
            Button(onClick = {
                state.toggleSpanStyle(
                    SpanStyle(
                        fontWeight = FontWeight.Bold
                    )
                )
            }) {
                Text(text = "bold", color = if (state.currentSpanStyle.fontWeight == FontWeight.Bold) Color.Red else Color.White)
            }
        }
        item {
            RichTextEditor(
                modifier = Modifier.fillMaxWidth(),
                state = state,
            )
        }
    }
}
これを MainActivity 内で呼ぶように修正します。
class MainActivity : ComponentActivity() {
    override fun onCreate(savedInstanceState: Bundle?) {
        super.onCreate(savedInstanceState)
        setContent {
            RichTextEditorExamplesTheme {
                Surface(
                    modifier = Modifier.fillMaxSize(),
                    color = MaterialTheme.colorScheme.background
                ) {
                    Editor() // ← 修正
                }
            }
        }
    }
}
早速実行してみます!
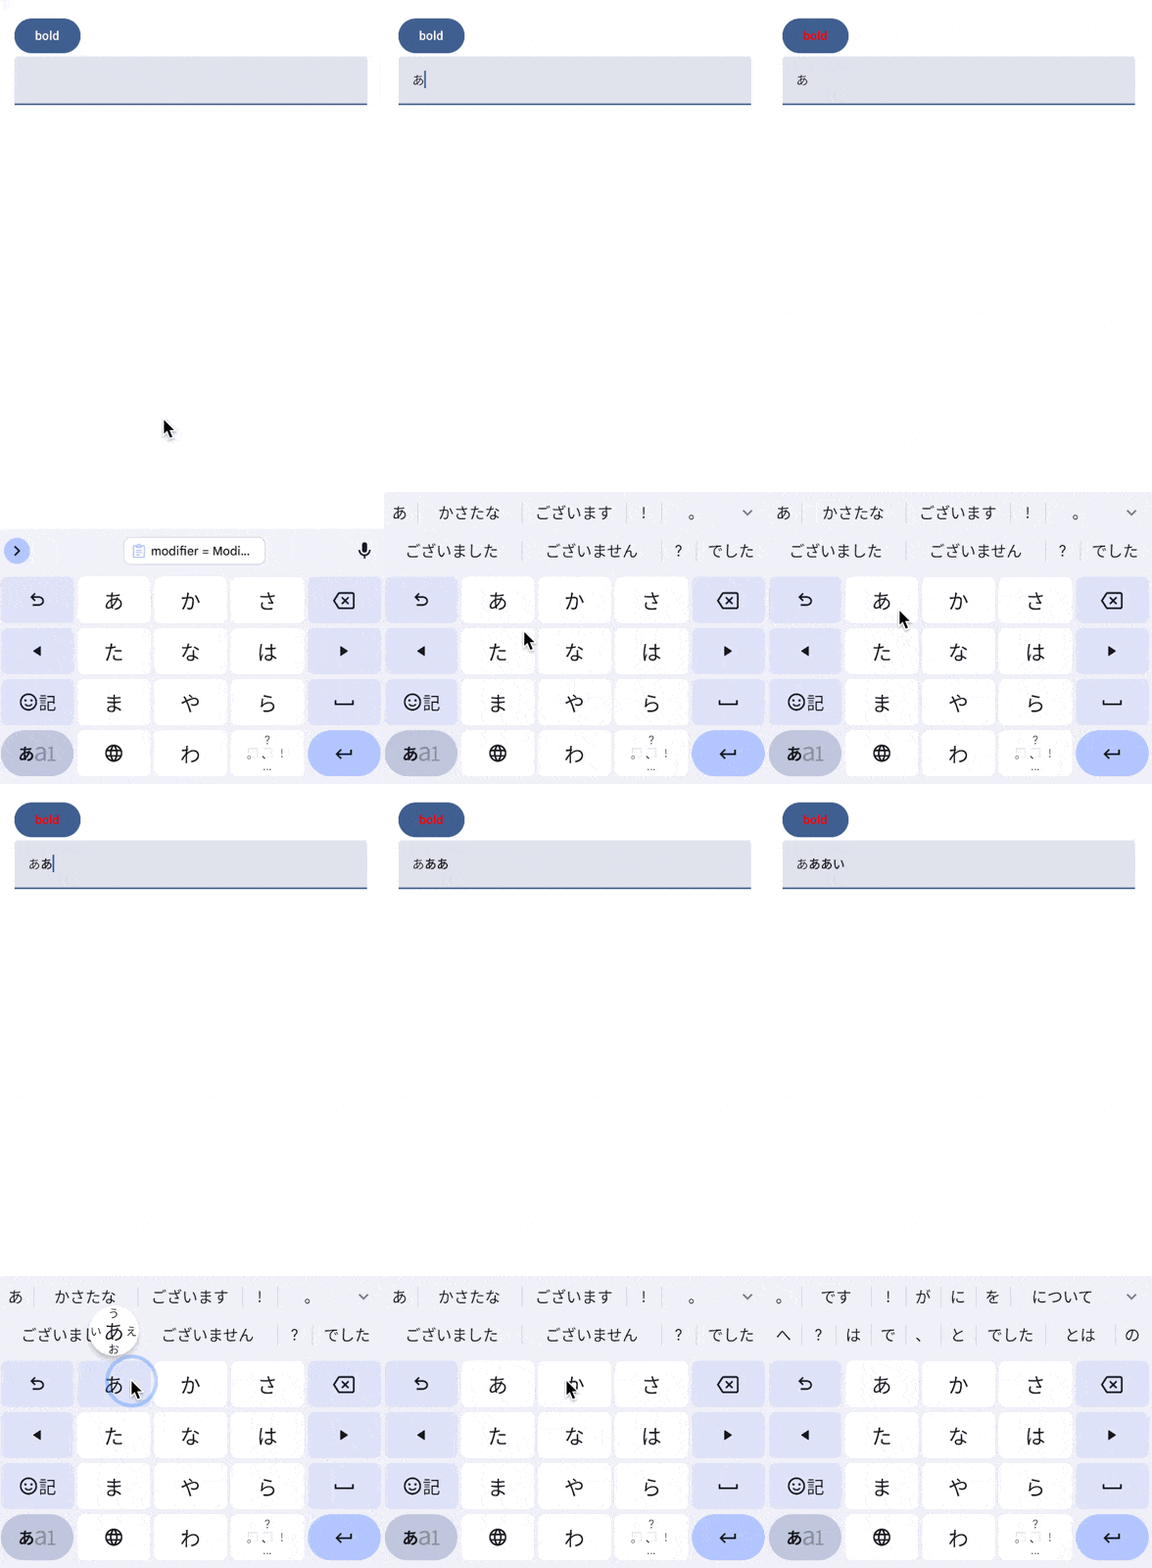
↑ちょっと分かりづらいかもですが、テキストが編集できて上部の「bold」のボタンを押すと、その後入力した文字に bold の装飾が追加されていることが分かります。
他のスタイル実装
bold 以外にもスタイル変更ボタンを設置し、色々試してみたいと思います。
@Composable
fun Editor() {
    val state = rememberRichTextState()

    LazyColumn(
        modifier = Modifier
            .fillMaxSize()
            .padding(20.dp)
    ) {
        item {
            LazyRow(
                verticalAlignment = Alignment.CenterVertically,
            ) {
             item {
                 StyleButton(
                     state = state,
                     text = "left",
                     isSelected = state.currentParagraphStyle.textAlign == TextAlign.Left,
                     onClick = {
                         state.addParagraphStyle(
                             ParagraphStyle(
                                 textAlign = TextAlign.Left,
                             )
                         )
                     }
                 )
                 StyleButton(
                     state = state,
                     text = "center",
                     isSelected = state.currentParagraphStyle.textAlign == TextAlign.Center,
                     onClick = {
                         state.addParagraphStyle(
                             ParagraphStyle(
                                 textAlign = TextAlign.Center,
                             )
                         )
                     }
                 )
                 StyleButton(
                     state = state,
                     text = "right",
                     isSelected = state.currentParagraphStyle.textAlign == TextAlign.Right,
                     onClick = {
                         state.addParagraphStyle(
                             ParagraphStyle(
                                 textAlign = TextAlign.Right,
                             )
                         )
                     }
                 )
                 StyleButton(
                     state = state,
                     text = "bold",
                     isSelected = state.currentSpanStyle.fontWeight == FontWeight.Bold,
                     onClick = {
                         state.toggleSpanStyle(
                             SpanStyle(
                                 fontWeight = FontWeight.Bold
                             )
                         )
                     }
                 )
                 StyleButton(
                     state = state,
                     text = "italic",
                     isSelected = state.currentSpanStyle.fontStyle == FontStyle.Italic,
                     onClick = {
                         state.toggleSpanStyle(
                             SpanStyle(
                                 fontStyle = FontStyle.Italic
                             )
                         )
                     }
                 )
                 StyleButton(
                     state = state,
                     text = "underline",
                     isSelected = state.currentSpanStyle.textDecoration?.contains(TextDecoration.Underline) == true,
                     onClick = {
                         state.toggleSpanStyle(
                             SpanStyle(
                                 textDecoration = TextDecoration.Underline
                             )
                         )
                     }
                 )
                 StyleButton(
                     state = state,
                     text = "lineThrough",
                     isSelected = state.currentSpanStyle.textDecoration?.contains(TextDecoration.LineThrough) == true,
                     onClick = {
                         state.toggleSpanStyle(
                             SpanStyle(
                                 textDecoration = TextDecoration.LineThrough
                             )
                         )
                     }
                 )
                 StyleButton(
                     state = state,
                     text = "fontSize",
                     isSelected = state.currentSpanStyle.fontSize == 28.sp,
                     onClick = {
                         state.toggleSpanStyle(
                             SpanStyle(
                                 fontSize = 28.sp
                             )
                         )
                     }
                 )
                 StyleButton(
                     state = state,
                     text = "red",
                     isSelected = state.currentSpanStyle.color == Color.Red,
                     onClick = {
                         state.toggleSpanStyle(
                             SpanStyle(
                                 color = Color.Red
                             )
                         )
                     }
                 )
                 StyleButton(
                     state = state,
                     text = "unorderedList",
                     isSelected = state.isUnorderedList,
                     onClick = {
                         state.toggleUnorderedList()
                     }
                 )
                 StyleButton(
                     state = state,
                     text = "orderedList",
                     isSelected = state.isOrderedList,
                     onClick = {
                         state.toggleOrderedList()
                     }
                 )
                 StyleButton(
                     state = state,
                     text = "code",
                     isSelected = state.isCodeSpan,
                     onClick = {
                         state.toggleCodeSpan()
                     }
                 )
             }
            }
        }
        item {
            RichTextEditor(
                modifier = Modifier.fillMaxWidth(),
                state = state,
            )
        }
    }
}

@Composable
fun StyleButton(state: RichTextState, text: String, isSelected: Boolean, onClick: () -> Unit) {
    Button(onClick = onClick) {
        Text(
            text = text,
            color = if (isSelected) Color.Red else Color.White
        )
    }
}
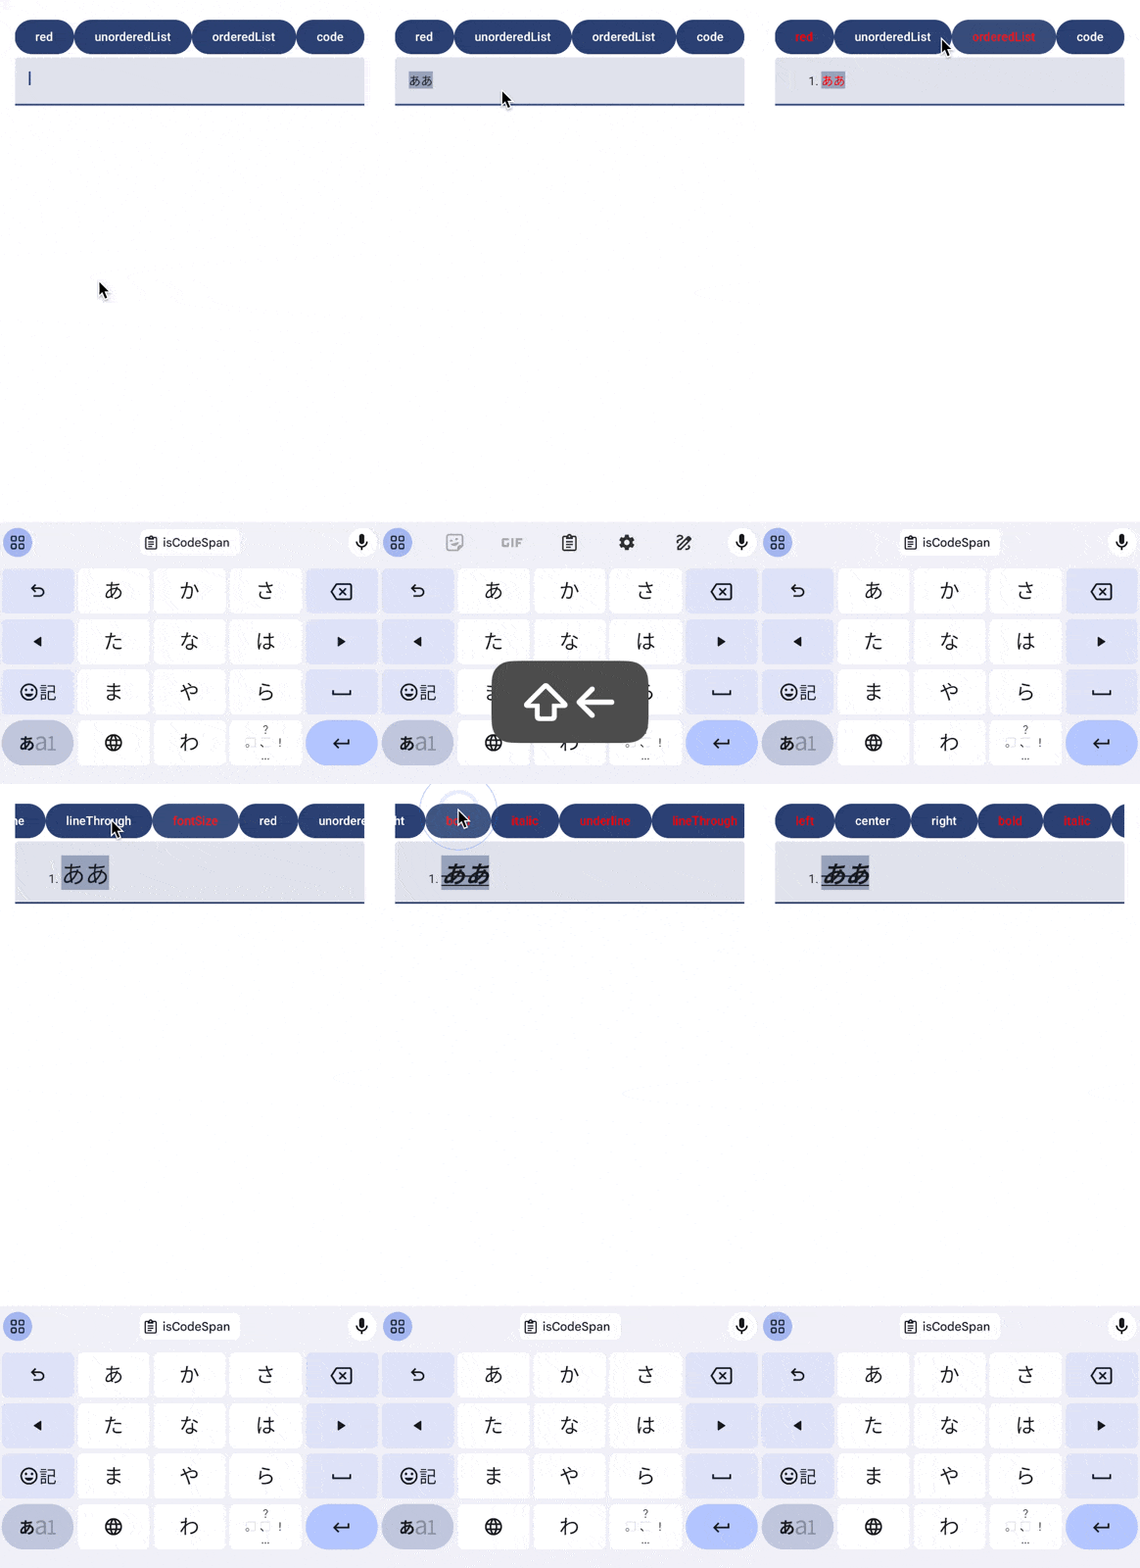
長くなりましたが、↑を実行すると以下のように色々試せます。
現在サポートしているスタイルはこちらで確認できます。
Import / Export
Compose Rich Editor では HTML と Markdown のImport / Export に対応している様です。
早速試してみたいと思います。 先ほどのEditor に以下を追加します。
@Composable
fun Editor() {
    val state = rememberRichTextState()
    val text = remember { mutableStateOf("") } // 追加

    LazyColumn(
        modifier = Modifier
            .fillMaxSize()
            .padding(20.dp)
    ) {
        item {
            LazyRow(
                verticalAlignment = Alignment.CenterVertically,
            ) {
             item {
                 // ...
            }
        }
        item {
            RichTextEditor(
                modifier = Modifier.fillMaxWidth(),
                state = state,
            )
        }
        // ↓新規追加
        item {
            Button(onClick = { text.value = state.toHtml() }) {
                Text(text = "HTML")
            }
        }
        item {
            Button(onClick = { text.value = state.toMarkdown() }) {
                Text(text = "Markdown")
            }
        }
        item {
            Text(text = text.value)
        }
    }
}
入力したテキストを HTML と Markdown で出力するボタンを設けて、出力された内容を表示させています。実行してみると↓の様に表示されました。
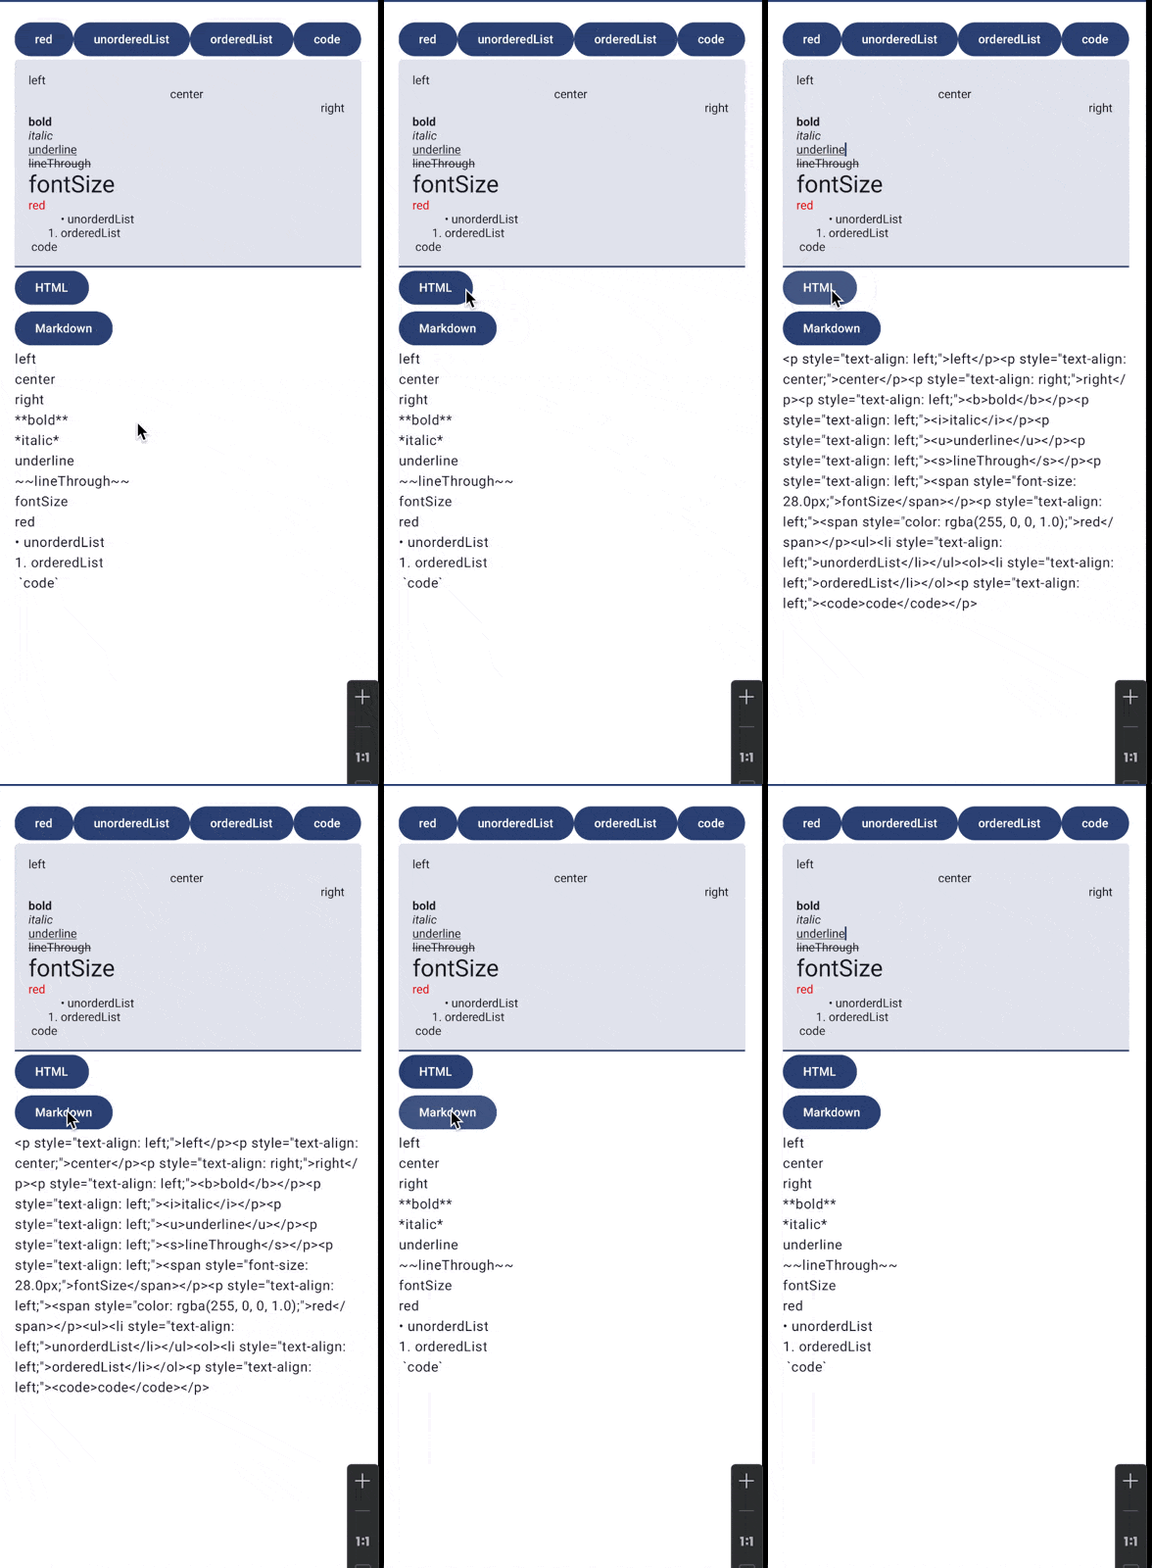
Markdown では left, center , right などの text-align や fontSize , fontColor , underline はhtmlで補完して出力などはしてくれないみたいです。
まとめ
見出しや画像、チェックボックスなど、あったら嬉しい機能はありますが、シンプルなものであれば使えそうかなという感想です。また link や codeブロック のちょっとしたスタイル調整はできそうですが、その他の細かなスタイル調整はできなさそうでした。
(※ 画像、チェックボックスははドキュメントに将来実装予定と明記されてます)
Discussion