iTranslated by AI
Analyzing Images Captured with SoraCam Using AWS Services





Goal
Analyze and display images taken with SoraCam using AWS services!

The architecture looks like this:

Preparation
Required Items
- SORACOM account
- SoraCam-related items
- SoraCam (AtomCam2)
- Wi-Fi environment
- SoraCam license (Continuous Recording License - 7-day plan)
For first-time SoraCam users, click here (from purchase to installation)!
SORACOM Account Creation, etc.
Set the coverage type to JP.
SoraCam Purchase to Setup
Actually, these days you don't necessarily need the app to set up SoraCam.
Installing SoraCam
A lot of knowledge regarding installation is gathered here:
- AWS account
- WordPress environment
Camera Check
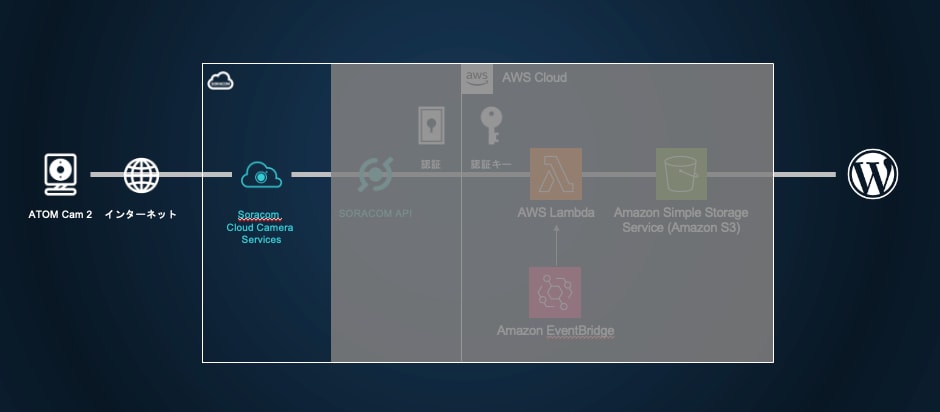
First and foremost, let's check if the camera is operating normally.
"SORACOM Cloud Camera Service" -> "Device Management"
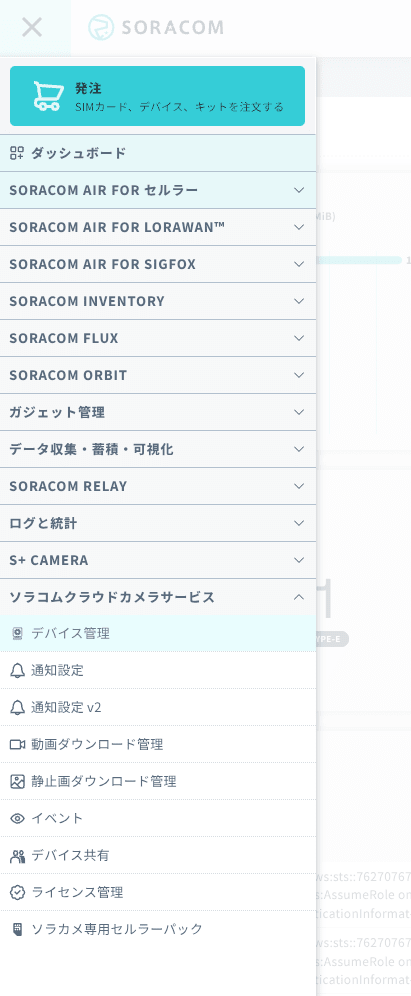
In the device list, confirm that the camera you just registered is online.
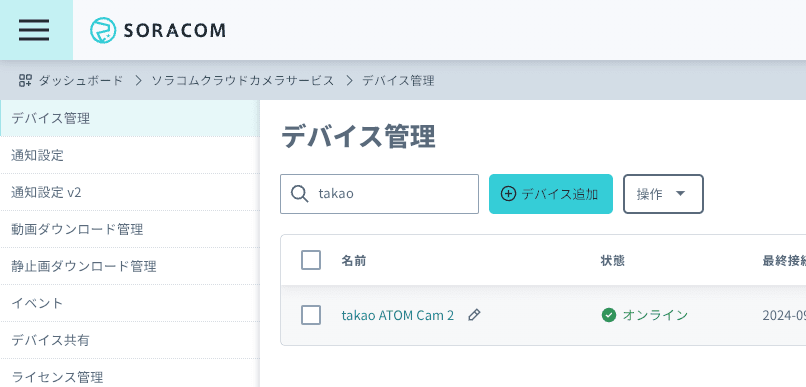
Furthermore, clicking on the camera's name will display the video feed from the camera.
Issue SORACOM API Keys
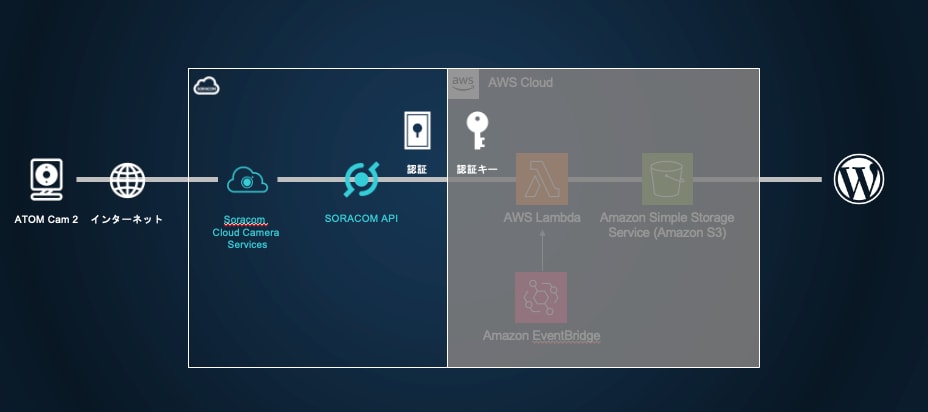
To obtain images from SoraCam's recorded data, we use the SORACOM API.
To use the API, you need to issue an API key. Follow the steps below to issue an API key:
-
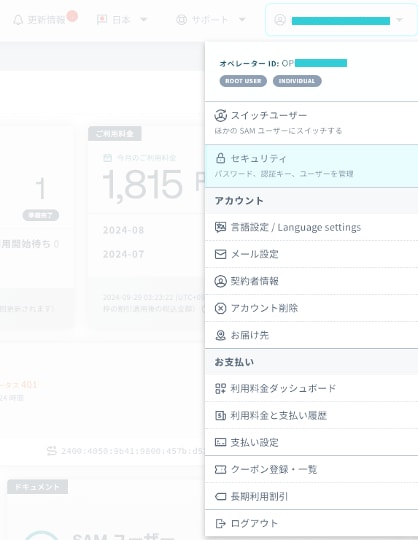
Click on the logged-in username in the upper right (the email address for a root user, or the SAM username for a SAM user) and click "Security" from the menu that appears.
-
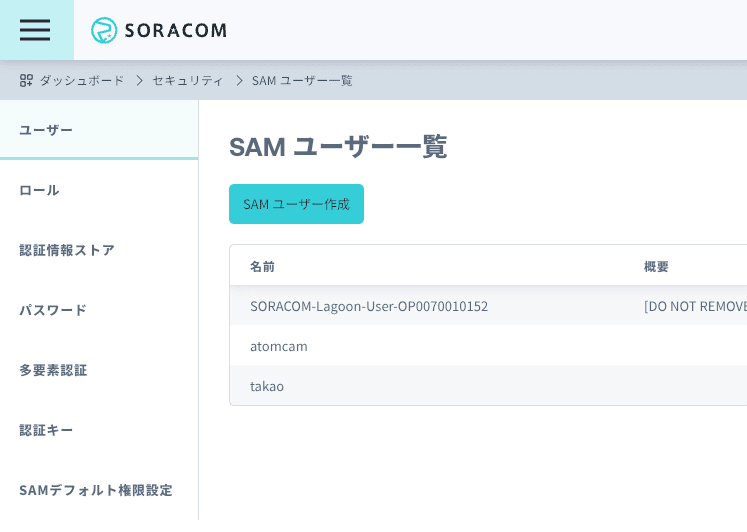
Click "Create SAM user" in the "Users" tab.
-
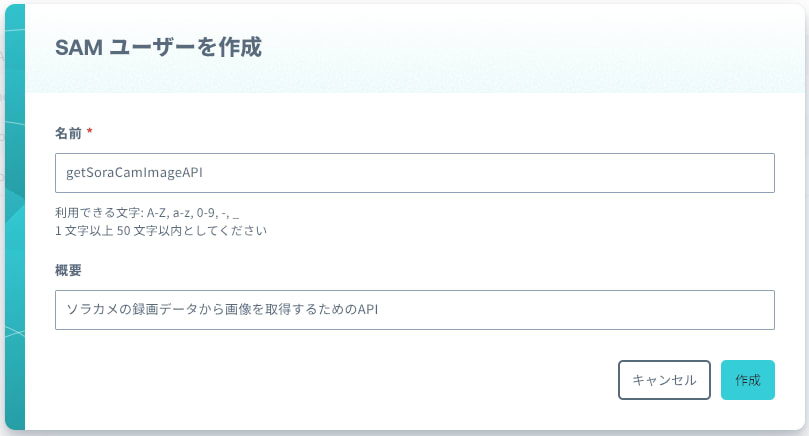
Give it a name so that you can recognize what this SAM user is for when you look at it later. Enter a description if necessary and click "Create".
-
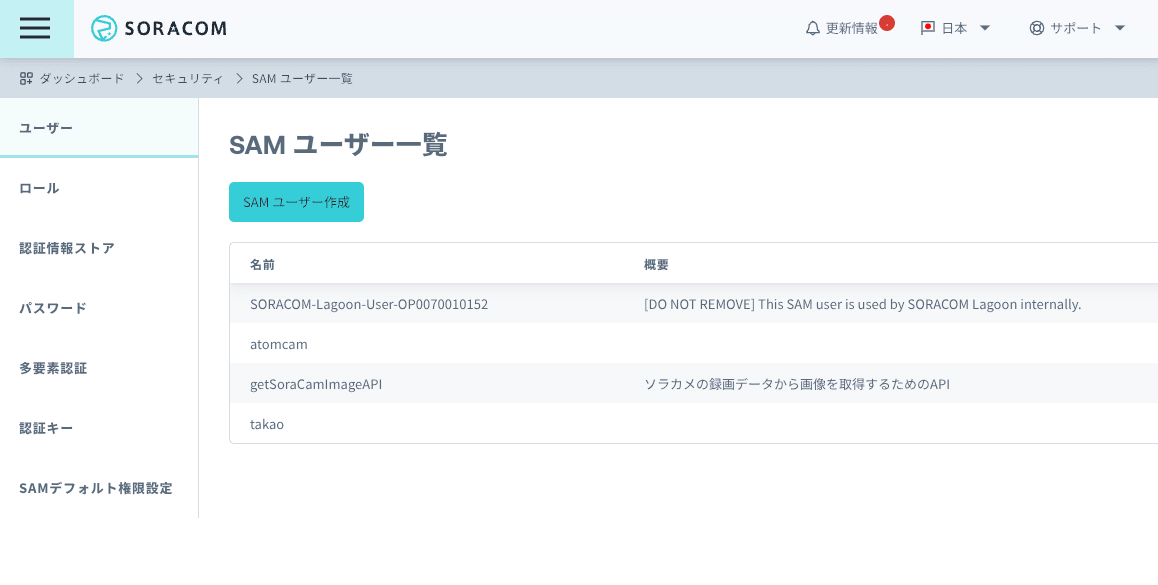
Confirm that the created SAM user is displayed in the list and click the name.
-
Set the permissions.
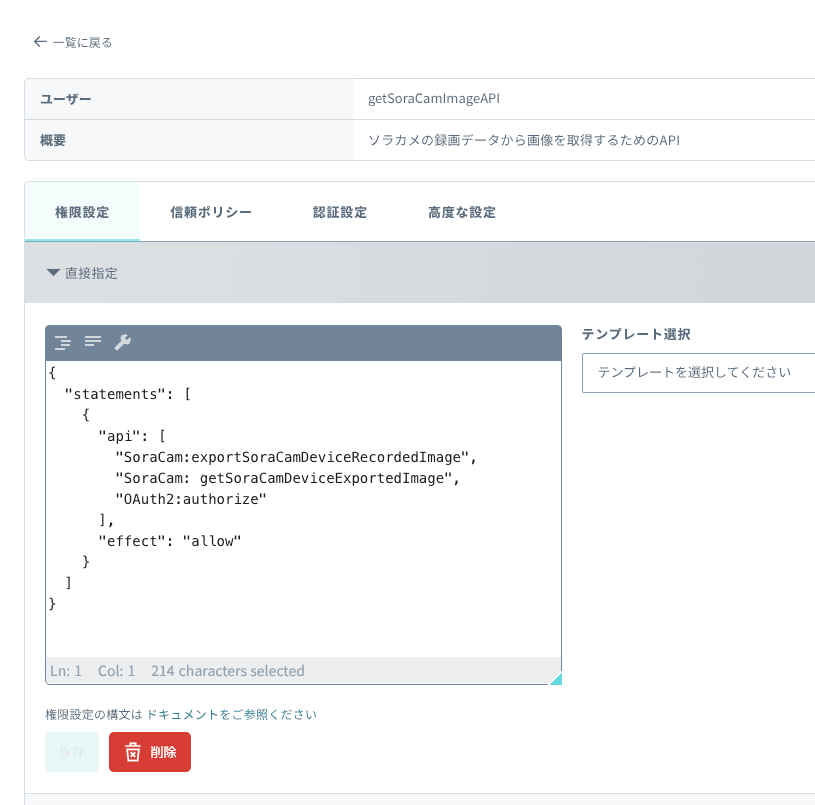
Copy and paste the following into "Directly specify".{ "statements": [ { "api": [ "SoraCam:exportSoraCamDeviceRecordedImage", "SoraCam:getSoraCamDeviceExportedImage", "OAuth2:authorize" ], "effect": "allow" } ] } -
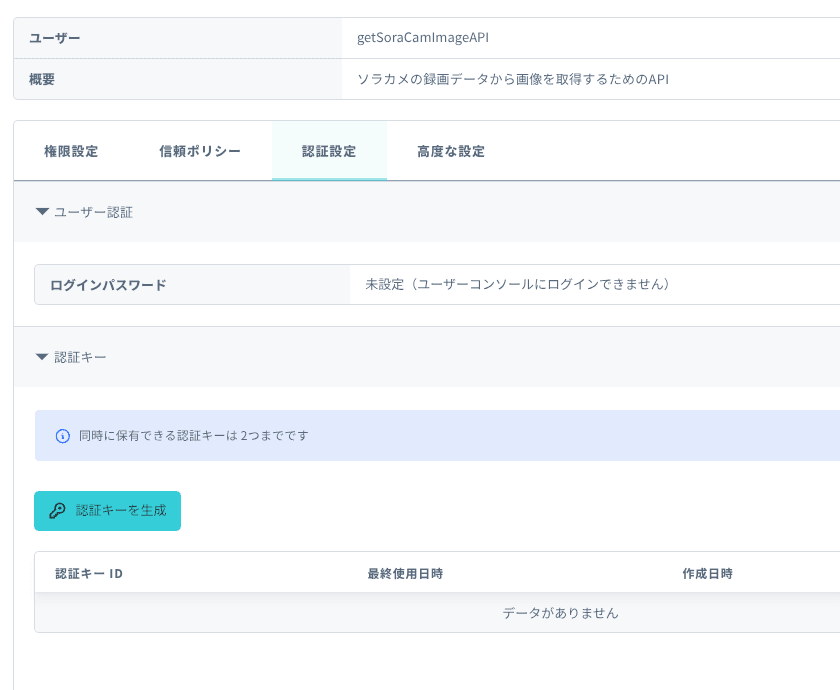
Move to the "Authentication settings" tab and click "Generate authentication key".
-
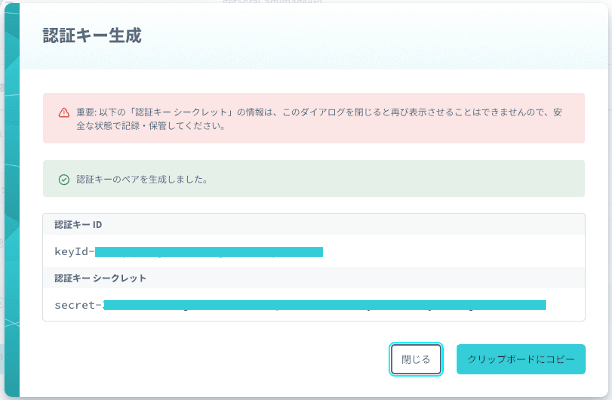
Copy the generated authentication key and save it in a notepad or similar.
Note that it will not be displayed again once you close the screen.
Create an S3 Bucket

Create an S3 bucket to save images obtained from SoraCam's recorded data.
-
Log in to the AWS Management Console and open S3.

-
Click "Create bucket".

-
Set Bucket type: General purpose, Bucket name: Any name (e.g., soracam-image-bucket, etc. A unique, special, one-of-a-kind name in the world).

-
Object Ownership: ACLs disabled, uncheck "Block all public access", and check the warning box.

-
Leave other items as default and click "Create bucket".

-
Click the created bucket and check the bucket's properties.


-
Create a "live-camera" folder to store images.


Click "Create folder".

-
Click the "Permissions" tab of the bucket properties and click the "Edit" button for the Bucket policy.

-
Set the bucket policy in the policy editor as follows.

Copy and paste the following JSON, and replace the bucket name part with the one you set.{ "Version": "2012-10-17", "Statement": [ { "Effect": "Allow", "Principal": "*", "Action": "s3:GetObject", "Resource": "arn:aws:s3:::your-unique-bucket-name/live-camera/*" } ] }Save and close.
Create a Lambda Function
We will create a Lambda function that authenticates with the SORACOM API, obtains an image from SoraCam's recorded data, and saves it to S3.

Create a Lambda function to obtain images from SoraCam's recorded data.
-
Log in to the AWS Management Console and open Lambda.
-
Click "Create function".

-
Select "Author from scratch", enter a "Function name", select "Python 3.12" for "Runtime", select "arm64" for "Architecture", and click "Create function".

-
Once navigated to the function page,

-
Copy and paste the following code into the "Code source".
import json import os import time import datetime import urllib.request import urllib.parse import boto3 # Getting environment variables AUTH_KEY_ID = os.environ['authKeyId'] AUTH_KEY = os.environ['authKey'] DEVICE_ID = os.environ['device_id'] S3_BUCKET = 'your-bucket-name' S3_FOLDER = 'live-camera' def lambda_handler(event, context): try: # 1. Authenticate and obtain API key and token auth_response = authenticate() api_key = auth_response['apiKey'] api_token = auth_response['token'] # 2. Request image export export_id = request_image_export(api_key, api_token) # 3. Check export progress image_url = check_export_status(api_key, api_token, export_id) # 4. Save image to S3 save_image_to_s3(image_url) return { 'statusCode': 200, 'body': json.dumps('Image successfully saved to S3') } except Exception as e: return { 'statusCode': 500, 'body': json.dumps(f'Error: {str(e)}') } # Authenticate and obtain API key and token def authenticate(): url = 'https://api.soracom.io/v1/auth' headers = { 'Content-Type': 'application/json' } data = json.dumps({ 'authKeyId': AUTH_KEY_ID, 'authKey': AUTH_KEY }).encode('utf-8') req = urllib.request.Request(url, headers=headers, data=data, method='POST') with urllib.request.urlopen(req) as response: if response.status != 200: raise Exception(f'Authentication failed: {response.status}') return json.loads(response.read().decode('utf-8')) # Request image export def request_image_export(api_key, api_token): url = f'https://api.soracom.io/v1/sora_cam/devices/{DEVICE_ID}/images/exports' headers = { 'Content-Type': 'application/json', 'X-Soracom-API-Key': api_key, 'X-Soracom-Token': api_token } current_time = int(time.time() * 1000) # Current UNIX timestamp (milliseconds) data = json.dumps({'time': current_time}).encode('utf-8') req = urllib.request.Request(url, headers=headers, data=data, method='POST') with urllib.request.urlopen(req) as response: if response.status != 200: raise Exception(f'Image export request failed: {response.status}') export_response = json.loads(response.read().decode('utf-8')) return export_response['exportId'] # Check export progress def check_export_status(api_key, api_token, export_id): url = f'https://api.soracom.io/v1/sora_cam/devices/{DEVICE_ID}/images/exports/{export_id}' headers = { 'Content-Type': 'application/json', 'X-Soracom-API-Key': api_key, 'X-Soracom-Token': api_token } retry_intervals = [1, 2, 4] # Retry intervals for interval in retry_intervals: req = urllib.request.Request(url, headers=headers, method='GET') with urllib.request.urlopen(req) as response: if response.status != 200: raise Exception(f'Check export status failed: {response.status}') status_response = json.loads(response.read().decode('utf-8')) # Return URL if export is completed if status_response['status'] == 'completed': return status_response['url'] # Retry if export is not completed time.sleep(interval) raise Exception('Image export not completed within allowed retries') # Save image to S3 def save_image_to_s3(image_url): # Get image data req = urllib.request.Request(image_url, method='GET') with urllib.request.urlopen(req) as response: if response.status != 200: raise Exception(f'Failed to download image: {response.status}') image_data = response.read() # Create S3 object name (JST time) jst = datetime.timezone(datetime.timedelta(hours=9)) current_time = datetime.datetime.now(jst) object_name = current_time.strftime('%Y%m%d_%H%M.jpg') # Upload image to S3 s3_client = boto3.client('s3') s3_client.put_object( Bucket=S3_BUCKET, Key=f'{S3_FOLDER}/{object_name}', Body=image_data, ContentType='image/jpeg' ) -
Configure environment variables.
Click the "Configuration" tab, then "Environment variables", and click "Edit" to set the following environment variables.

- authKeyId: ID of the SORACOM API key issued earlier
- authKey: SORACOM API key issued earlier
- device_id: SoraCam device ID

-
After entering the values, click "Save".
-
Click the "General configuration" tab, click "Edit", and set the timeout to 20 seconds.

-
Click the "Permissions" tab, and click the "Role name" to navigate to the role editing screen.

-
Click "Add permissions" and click "Create inline policy".

-
Click "JSON", copy and paste the following policy, and click "Create policy".
{
    "Version": "2012-10-17",
    "Statement": [
        {
            "Effect": "Allow",
            "Action": "s3:PutObject",
            "Resource": "arn:aws:s3:::your-unique-bucket-name/live-camera/*"
        }
    ]
}
-
Click "Create policy".

-
Click "Deploy" to deploy the Lambda function.
-
Click "Test", enter an appropriate event name, and save the test event.
(No need to edit the event JSON.)

-
Click "Invoke" and confirm that the Lambda function operates normally.
If a display like the following appears, it is successful.

Create an EventBridge Rule to Periodically Execute the Lambda Function for Saving Images to S3
We will create an EventBridge rule to periodically call the SORACOM API to obtain images and save them to S3.
Finally, all preparations will be complete.

-
From the function page, click "Add trigger".

-
On the "Add trigger" screen, click "Select a source" and select "EventBridge (CloudWatch Events)".

-
Select "Create a new rule", enter a "Rule name", and enter a "Schedule expression", then add it.
Example:rate(1 minute)(Runs every minute)


Display Images Saved in S3 with a Web App
-
Download the app (zip file) from the link below.
https://github.com/takao2704/public-zenn-docs/raw/refs/heads/main/files/soracam-viewer.zip -
Open AWS Amplify.

-
Proceed to deploy the app.
Select "Deploy without Git" from "Create new app" and click "Next".

-
Upload the zip file
Set an application name (optional), select the file via "drag and drop" to upload it, and then click "Save and deploy".
(You can also enter the URL from step 1 directly.) -
Once the deployment is complete, click the URL to access the application.
-
Enter the S3 bucket name and prefix, then click the "Display" button to confirm that the images are displayed.
If the image is displayed in the upper frame, it's a success (the lower frame will be developed later, so it won't be displayed yet).

Analyze SoraCam Images with Amazon Rekognition
-
Create a Lambda function from the AWS Management Console
- Runtime:
Python 3.13 - Architecture:
arm64
- Runtime:
-
Add the code
- Copy and paste the Lambda function code below
import json
import boto3
import os
import urllib.parse
from datetime import datetime
from io import BytesIO
from PIL import Image, ImageDraw, ImageFont

# Optimized for Python 3.13 ARM64

# Initialize AWS service clients
REGION = 'ap-northeast-1'  # Tokyo region
s3_client = boto3.client('s3', region_name=REGION)
rekognition_client = boto3.client('rekognition', region_name=REGION)

# Environment variables
MIN_CONFIDENCE = float(os.environ.get('MIN_CONFIDENCE', 70.0))  # Default confidence threshold: 70%
OUTPUT_PREFIX = os.environ.get('OUTPUT_PREFIX', 'analyzed-images/')  # Output directory

# Font size settings
LABEL_FONT_SIZE = 24  # Font size for label list
BOX_FONT_SIZE = 20    # Font size for bounding boxes

def lambda_handler(event, context):
    try:
        # Get bucket name and object key from the S3 event
        bucket = event['Records'][0]['s3']['bucket']['name']
        object_key = urllib.parse.unquote_plus(event['Records'][0]['s3']['object']['key'])

        print(f"Processing image: {object_key} from bucket: {bucket}")

        # Generate the full S3 path of the image
        s3_path = f"https://{bucket}.s3.{REGION}.amazonaws.com/{object_key}"

        # Get image from S3
        response = s3_client.get_object(Bucket=bucket, Key=object_key)
        image_content = response['Body'].read()

        # Detect labels with Rekognition
        rekognition_response = rekognition_client.detect_labels(
            Image={
                'S3Object': {
                    'Bucket': bucket,
                    'Name': object_key
                }
            },
            MinConfidence=MIN_CONFIDENCE
        )

        # Detailed log output of Rekognition results
        print(f"Rekognition results: {json.dumps(rekognition_response, indent=2, default=str)}")

        # Check for the presence of Instances for each label
        for label in rekognition_response['Labels']:
            label_name = label['Name']
            confidence = label['Confidence']
            instances_count = len(label.get('Instances', []))
            print(f"Label: {label_name}, Confidence: {confidence:.1f}%, Instance count: {instances_count}")

            # Log details if Instances are present
            if instances_count > 0:
                for i, instance in enumerate(label['Instances']):
                    if 'BoundingBox' in instance:
                        box = instance['BoundingBox']
                        print(f"  Instance {i+1}: BoundingBox = {box}")

        # Open image with PIL
        image = Image.open(BytesIO(image_content))
        draw = ImageDraw.Draw(image)

        # Font settings
        # Use try-except for compatibility with older PIL versions
        try:
            # New version of PIL
            label_font = ImageFont.load_default(size=LABEL_FONT_SIZE)
            box_font = ImageFont.load_default(size=BOX_FONT_SIZE)
        except TypeError:
            # Old version of PIL - default font without size specification
            print("Warning: Using default font without size specification")
            label_font = ImageFont.load_default()
            box_font = ImageFont.load_default()

        # Get image width and height
        width, height = image.size

        # Draw detected labels and bounding boxes
        for label in rekognition_response['Labels']:
            label_name = label['Name']
            confidence = label['Confidence']

            # Draw bounding box if present
            for instance in label.get('Instances', []):
                if 'BoundingBox' in instance:
                    box = instance['BoundingBox']
                    left = int(box['Left'] * width)
                    top = int(box['Top'] * height)
                    box_width = int(box['Width'] * width)
                    box_height = int(box['Height'] * height)

                    # Draw rectangle
                    draw.rectangle(
                        [(left, top), (left + box_width, top + box_height)],
                        outline='red',
                        width=3
                    )

                    # Draw label name and confidence
                    text = f"{label_name}: {confidence:.1f}%"
                    draw.text((left, top - 30), text, fill='red', font=box_font)

        # Display a list of detected labels at the top of the image
        y_position = 10
        for label in rekognition_response['Labels']:
            label_name = label['Name']
            confidence = label['Confidence']
            text = f"{label_name}: {confidence:.1f}%"
            draw.text((10, y_position), text, fill='blue', font=label_font)
            y_position += LABEL_FONT_SIZE + 10  # Adjust spacing based on font size

        # Convert processed image to byte stream
        output_image = BytesIO()
        image.save(output_image, format='JPEG')
        output_image.seek(0)

        # Generate the output object key
        filename = object_key.split('/')[-1]
        output_key = f" {OUTPUT_PREFIX}{filename}"

        # Upload processed image to S3
        s3_client.put_object(
            Bucket=bucket,
            Key=output_key,
            Body=output_image,
            ContentType='image/jpeg'
        )

        print(f"Processed image saved to: {output_key}")

        return {
            'statusCode': 200,
            'body': json.dumps(f'Successfully processed image {object_key} and saved to {output_key}')
        }

    except Exception as e:
        print(f"Error: {str(e)}")
        return {
            'statusCode': 500,
            'body': json.dumps(f'Error processing image: {str(e)}')
        }
-
Add a Pillow Layer
- Download the ZIP file
https://github.com/takao2704/public-zenn-docs/raw/refs/heads/main/files/pillow-layer.zip - Create a custom layer using the provided ZIP file (
pillow-layer.zip)

- Add the created layer to the Lambda function
Open the "Code" tab of the function settings, scroll to the bottom, and click "Add a layer"

- Download the ZIP file
-
Configure environment variables
-
MIN_CONFIDENCE:70.0 -
OUTPUT_PREFIX:analyzed-images/Prefix (directory name) for saving analyzed images to S3
-
-
Memory and Timeout Settings
- Memory:
256 MB - Timeout:
30 seconds
- Memory:
-
IAM Role Settings
Update the IAM policy for the Lambda function to allow access to S3 and Rekognition.{ "Version": "2012-10-17", "Statement": [ { "Effect": "Allow", "Action": [ "s3:GetObject", "s3:PutObject" ], "Resource": "arn:aws:s3:::your-unique-bucket-name/*" }, { "Effect": "Allow", "Action": [ "rekognition:DetectLabels" ], "Resource": "*" } ] } -
Update the S3 Bucket Policy
Modify it so that the analyzed images can be accessed. Add the target prefix.{ "Version": "2012-10-17", "Statement": [ { "Effect": "Allow", "Principal": "*", "Action": "s3:GetObject", "Resource": [ "arn:aws:s3:::your-unique-bucket-name/live-camera/*", "arn:aws:s3:::your-unique-bucket-name/analyzed-images/*" ] } ] } -
S3 Trigger Settings
- Add a trigger to the Lambda function
- Select S3
- Select the bucket name
- Set the event type to "All object create events"
- Specify
live-camera/for the prefix - Specify
.jpgfor the suffix - Click "Save"


Displaying the Images
Preparations are now complete to display both the pre-analysis and post-analysis images in the app.
-
Access the app you deployed with Amplify earlier.
-
Enter the S3 bucket name and prefix, then click the "Display" button.
Discussion