iTranslated by AI
Running FLUX.1 in a Local Environment




Introduction
Who is this article for?
- Those interested in image generation AI, especially FLUX.1
- Those who want to run FLUX.1 in a local environment (including Mac)
- Those who want to know the generation speeds of M2 Ultra and RTX 3060
1. Mac Studio (M2 Ultra 128GB)
2. Windows 10 (Main memory 96GB + RTX 3060 12GB)
Content
In this article, I am going to actually try using FLUX.1, the latest image generation AI model announced by Black Forest Labs. For an overview of FLUX.1, npaka's article below is a great reference.
This article will mainly cover the following:
- How to run FLUX.1 on ComfyUI
- How to run FLUX.1 on Mac
- Speed comparison between M2 Ultra and RTX 3060
Installation Procedure
There are many ways to run FLUX.1, but in this article, I'll document the steps to run it locally using ComfyUI as a memorandum.
I'll try to write the instructions to be as compatible as possible with Windows, Mac, and Ubuntu, but please adjust the CUDA-related parts according to your specific environment. Unless otherwise specified, please consider these as common steps that are environment-independent.
ComfyUI Installation
- From cloning the repository to creating a python virtual environment
$ git clone https://github.com/comfyanonymous/ComfyUI.git
$ cd ComfyUI
$ python3 -m venv venv
- Activating the virtual environment
$ source venv/bin/activate
$ .\venv\Scripts\activate
- Installing required modules
$ pip3 install --pre torch torchvision torchaudio --extra-index-url https://download.pytorch.org/whl/nightly/cpu
$ pip install -r requirements.txt
$ pip install -r requirements.txt
$ python -m pip install torch==2.1.2 torchvision==0.16.2 torchaudio==2.1.2 --index-url https://download.pytorch.org/whl/cu121 # Adjust version if necessary
This completes the ComfyUI installation. Now, you can access the GUI in your browser by running the following command.
- Launching
$ python main.py --listen
In my case, I wanted to access it from another terminal, so I passed --listen as an optional argument. Once it starts successfully, a message like the following will appear, and you can access the ComfyUI GUI screen by going to http://[Server IP Address]:8188/.
Starting server

To see the GUI go to: http://0.0.0.0:8188
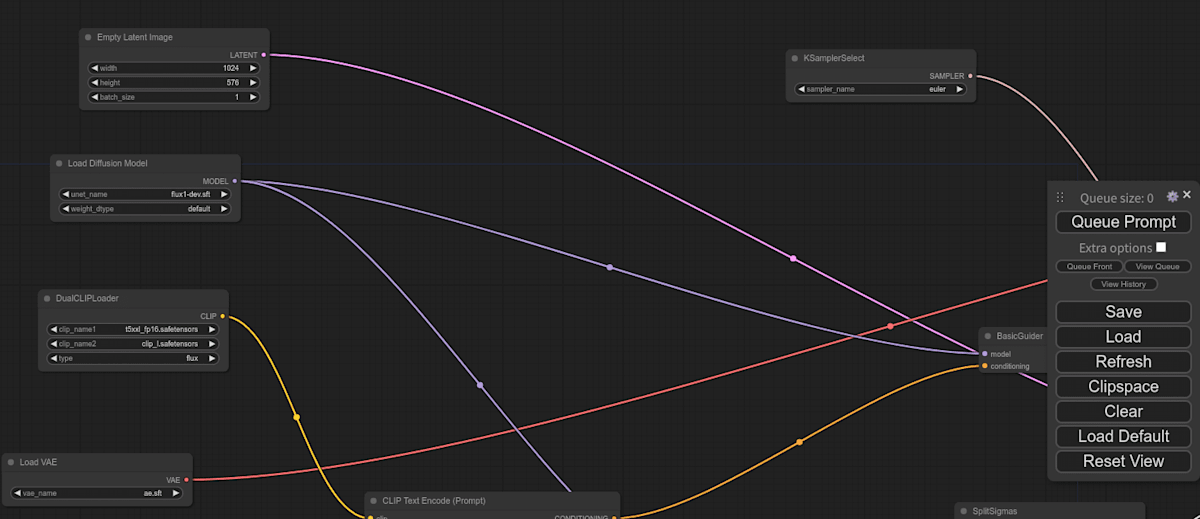
The screen should look something like this (note that this is not the default workflow):
Storing Necessary Files for FLUX.1
Even if you can use ComfyUI, you still cannot use FLUX.1 yet. To use it, you need to store the necessary files in the correct locations and update the workflow. Here, I will first explain storing the files necessary for using FLUX.1.
...Or so I thought, but Maki-san has already summarized the procedure in an article. Immense gratitude! So, please proceed with the file placement according to the article below.
Time to Generate Images!
Now the preparation for using the FLUX.1 model in ComfyUI is complete. I'd like to jump into image generation right away, but for that, a FLUX.1-compatible workflow is required.
I expected that I would need to import something to make it work, but surprisingly, in ComfyUI, you can copy a workflow by importing an image. Actually, this was my first time using ComfyUI, so this was the most surprising part for me.
Saving the Workflow (Image)
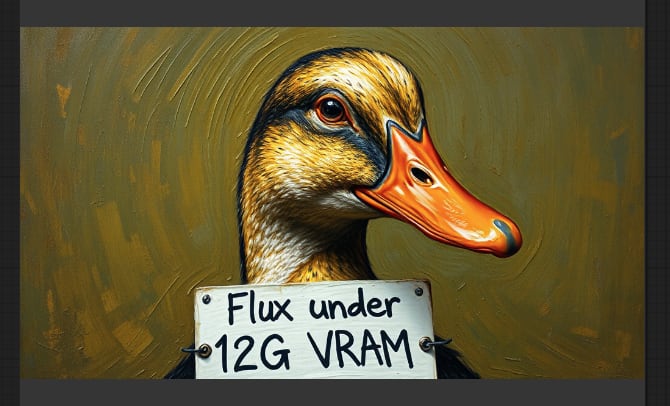
The workflow I used is the Flux under 12GB VRAM below. Since it supposedly runs on VRAM under 12GB, it looks like it can be run not only on M2 Ultra (128GB) but also on RTX 3060. However, please be aware that it might not work properly if your main memory is low.
Please save this image of a duck.

Importing the Workflow (Image)
You can import the workflow by clicking the Load button in the window on the right side of ComfyUI and selecting the image you just saved.
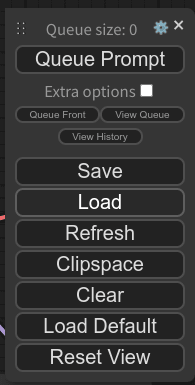
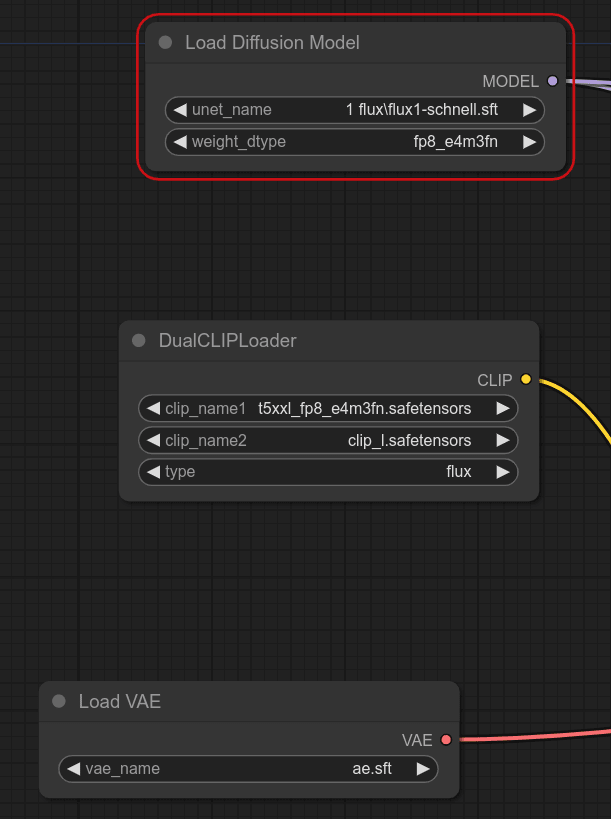
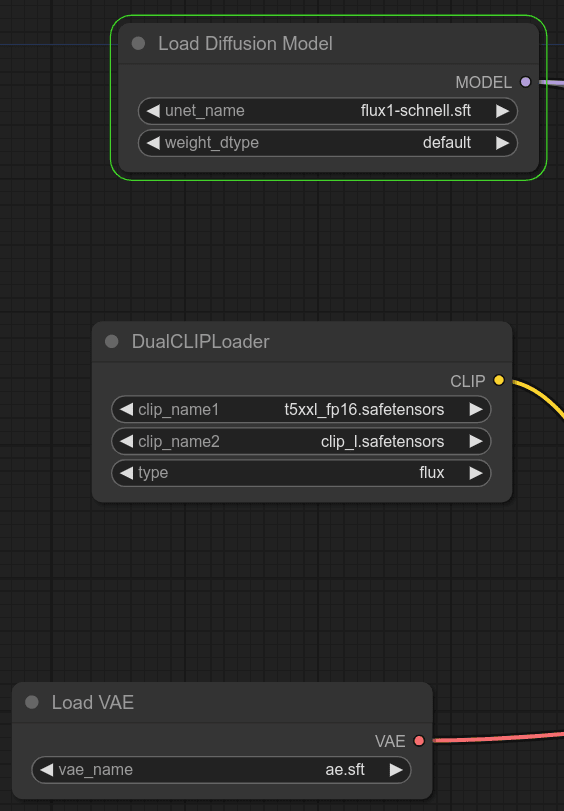
You can generate an image by clicking Queue Prompt, but it won't work with the default settings. Please modify unet_name, weight_dtype, and clip_name1 as shown below.
-
Default settings
-
After modification (when using schnell, fp16)
Clicking Queue Prompt again generated an image like the one below at the end of the workflow after a few dozen seconds (this is just one example). The output result is saved in the format ComfyUI/output/flux/ComfyUI_000XX_.png.
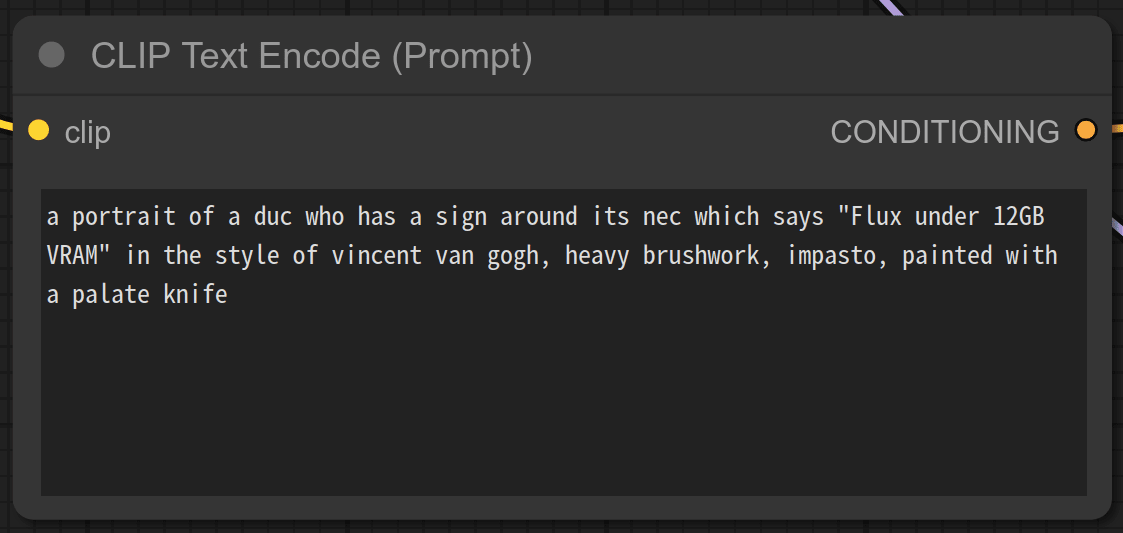
The prompt can be modified in the following block.
For your reference, here are some examples of image generation when the prompt is changed.
Generation Speed Comparison: RTX 3060 vs. M2 Ultra
Since I managed to set up image generation in both environments, I'll compare the generation speeds. Since the first image generation takes some time for model loading, I excluded that and calculated the average value of 10 generated images with the resolution fixed at the default 1024x576. The results are as follows:
| Model | RTX 3060 | M2 Ultra |
|---|---|---|
| flux1-schnell (4 steps) | 19.86 sec | 20.93 sec |
| flux1-dev (16 steps) | 70.13 sec | 80.24 sec |
From the table, we can observe the following:
- Generation speed is roughly proportional to the number of steps (which makes sense since the model size is the same).
- With schnell, there is almost no difference between the M2 Ultra and the RTX 3060.
The second point was unexpected. In SDXL, the M2 Ultra was about 60% slower than the RTX 3060, but here it's only about a 5% difference, which is almost negligible.
Regarding model selection, I'd say use flux1-dev if you want high-quality images regardless of speed, and schnell if you want to churn through generations quickly.
Conclusion
In this article titled "Trying Out FLUX.1 in a Local Environment," I summarized the steps for running FLUX.1 locally. While Apple Silicon usually struggles with image generation, I found that for FLUX.1, it can generate images at a speed comparable to an RTX 3060.
By integrating it with a local LLM, I think it could be used like a "locally running DALL-E 3" where you can create images by giving casual instructions in Japanese. If I have time, I'd like to try that as well.
Thank you for reading this far. I look forward to seeing you in the next one!
Discussion