Flutter入門-個人用スクラップ
世の中には色々と勉強する手段があるね
とにかく入門したい。何から手をつけようと考えあぐねて
- Google Codelabs
- Youtube
- Zenn/Qiita/Note
- Unity
- 書籍
などなどあってどれやろうか迷ってる
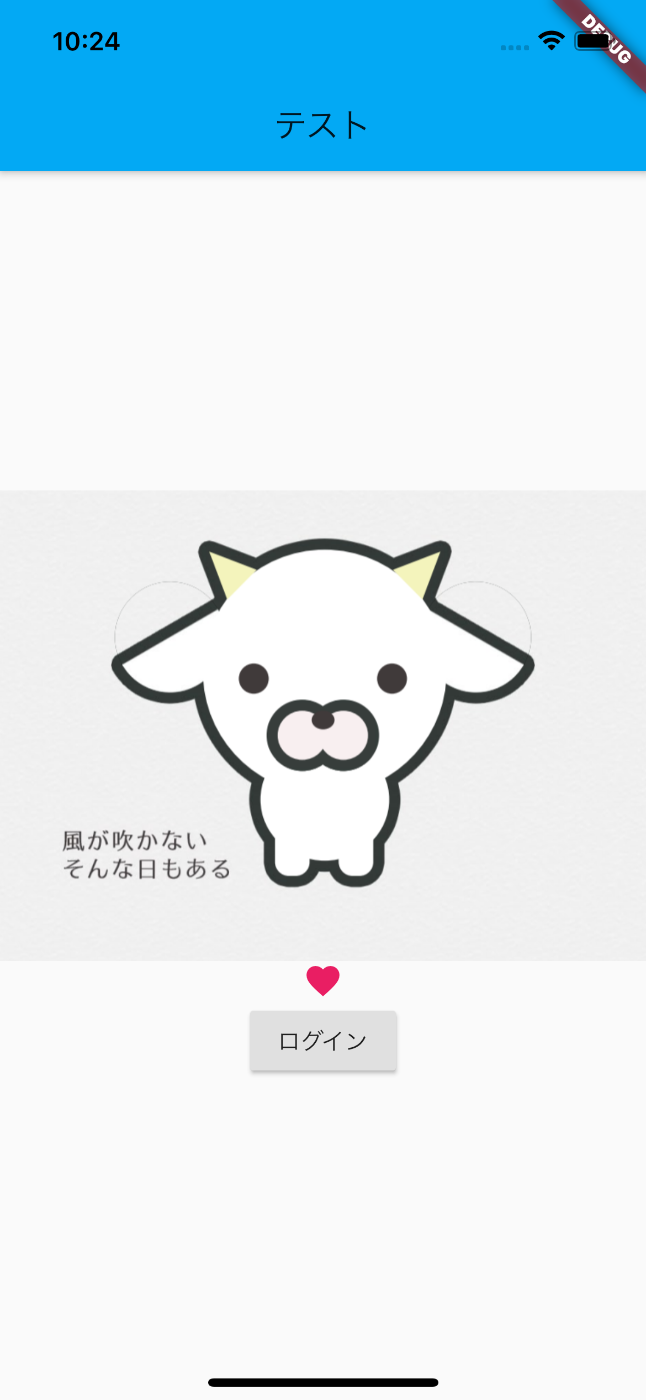
Udemyのキャンペーン時期だったからやってみた
やっぱり本でハンズオンした方が理解が深まるかな?
↑2つやってみた。Firebaseとの連携のイメージがついたのはよかった!
実際Firebaseもほぼ初めてだったんで概要掴めたのはよかった。
ただ、如何せんFlutterアプリの仕組みやらが理解できたから開発できるか?と問われると厳しいと思う。
(そりゃそうだハンズオンでなぞっただけだし)
他の方法を模索してみよ
Youtubeで解説動画やってくれてる方いらっしゃったのでみてみる。
全体像わかりやすかった!
個人的に全体像を教えてもらえたのはよかった!
短時間で大まかに教えてもらえたんで、開発中に何を調べれば良いかのヒントになると思う
開発環境やDartやらの基礎はスキップして、「Flutter基礎」の動画リストは最低限修めておいた方が良いかな?実践とかは観てから考えよ YouTubeのvideoIDが不正です
全体像〜基本的なWidgetの使い方
- 公式デフォのカウントアップアプリを改造しながらだからわかりやすかった!
- やっぱり有識者が話してると便利なショートカットやポイントを抑えてくれている事が◯
- option + Enter でWidgetに対する操作をショートカットできるのは嬉しい
- Ctrl + D デバック起動(Command + D だと行削除)
- 公式のカウントアップアプリではmaterialデザインのパッケージを利用してる(Androidアプリでよくみかける)
- へー!公式にCookBookってのがあるんだ
- Navigator仕込むと一気にアプリ作ってる気分になる!CookBook通りにして超簡単実装やで
- 画像扱うときは公式のWiget catalogみればいいんだね!
画面遷移
Root
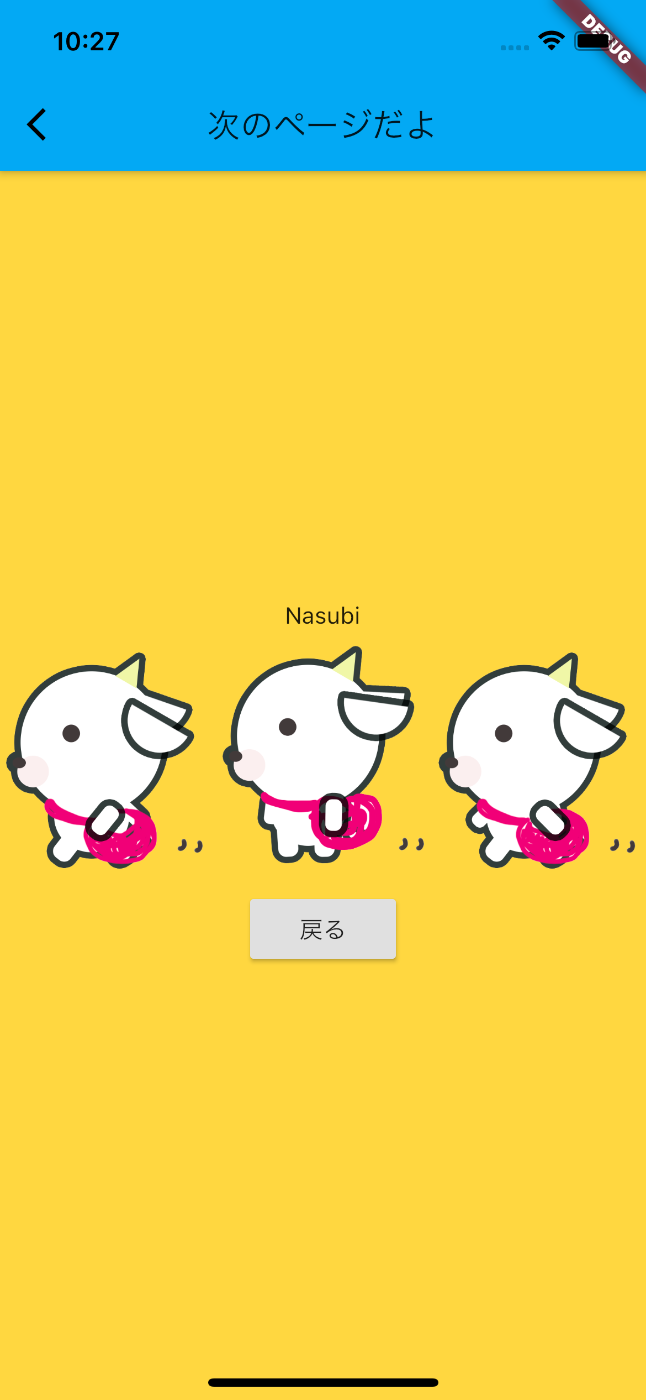
Next
- 新しい画面を作成する場合は、新しいファイルを作成し新しいクラスをその中に作成する
- RaiseButtonのonPressedで定義する関数内にNavigationを非同期で実装すると簡単に実現できる
- cookbookにある「Navigate to a new screen and back」か「Navigate with named routes」のやり方が基本
-
Navigate to a new screen and back
- Navigator.pushのMaterialPageRouteで遷移先のクラス指定
- Navigator.pop(context) で戻れる
-
Navigate with named routes
- RootAppのコンストラクターに追加のプロパティ(initialRoute およびroutes)を提供する
- routesにはルーティング全て定義する
- ナビゲーションの際には定義したルーティングを指定する ex) Navigator.pushNamed(context, '/second');
- Navigator.pop(context) で戻れる
- RootAppのコンストラクターに追加のプロパティ(initialRoute およびroutes)を提供する
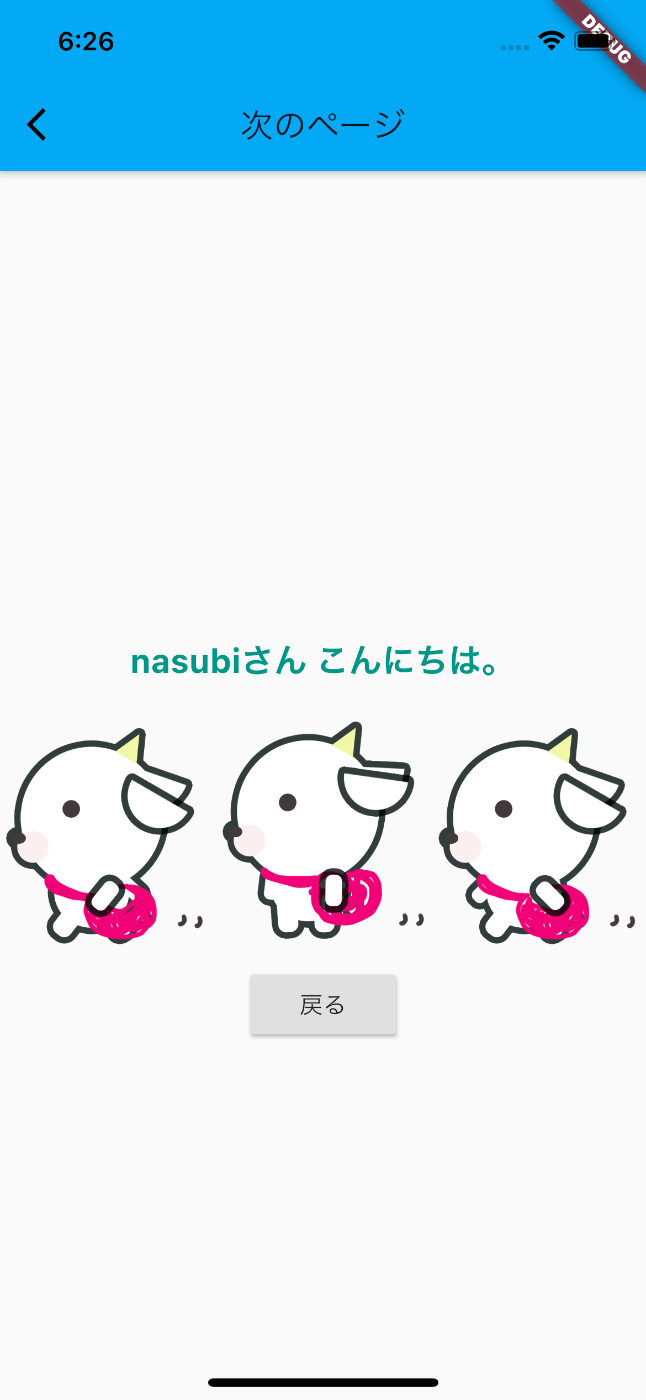
- 値渡し
- Secondページのクラス内直後に同名のコンストラクタを定義し、その際に引数をつけることで値渡し可能となる
- 遷移時のNavigatorのクラス指定時の引数に渡したい値を設定
- 値戻し
- Navigator.pushの戻り値を受け取るようにする(final res = Navigator.push( ... );)
- async/awaitで受け取ること
- Navigator.pop(context, {戻したい値})
- Navigator.pushの戻り値を受け取るようにする(final res = Navigator.push( ... );)
↑の画像で貼り付けた方なイメージ
画像やアイコンを配置する方法+文字装飾
- ネットワークから取得: Image.network('url')
-
アセットバンドルから取得したImageStream を表示するウィジェットを作成:
- imagesディレクトリ作成 -> imageファイル設置
- Image.asset('images/cat.png')
- pubspec.yamlファイルに定義しなければならない
flutter:
assets:
  - images/cat.png
  - images/2x/cat.png
  - images/3.5x/cat.png
- アイコン: Icon(Icons.audiotrack, color: Colors.green, size: 30.0)
文字装飾
- Textのstyleプロパティに設定。
- WidgetカタログのTextのTextStyleにある属性が利用可能
- colorとforegroundは同時に適用できない、などの制約があるので注意
- カスタムフォント: pubspec.yml のfont要素に設定することが可能
- RichText: 文章の中に異なるスタイルを当てた文字列を用意したい時などに利用する
- Default TextStyle: アプリのデフォルトのスタイルを定義できる。配下にあるテキストのスタイルに適用される。
入力フォーム
- 今回はWidget Catalogでなく、CookBookのFormsで紹介する
-
TextField(): テキストフィールドを使用すると、ユーザーはアプリにテキストを入力できます。これらは、フォームの作成、メッセージの送信、検索エクスペリエンスの作成などに使用されます。
- autofocusフィールド: 初期起動時にフォーカルが当たるので、ユーザのアクションが1つ省略できる
- forcusNode: (これは使わないと思うのでskip)
- onChanged: 値が変わるたびに呼び出される関数を定義する。
- 変数に格納しておいて、submit時にサーバーに送る感じで使う。
- TextFormField(): TextFieldの拡張(validate扱える)。Formで囲う必要あり。validatorについてはBuild a form with validationを参照。
- FormとGlobalKeyを作成する
- TextFormFieldを使用して検証ロジックを追加する
- フォーム送信ボタンを用意する: ボタンの中に_formKey.currentState.validate()で検証結果を判断する
閑話休題: flutter app 接続
- Flutterプロジェクトでiosアプリ登録(GoogleService-Info.plistをios/Runnerに保存)
- XcodeでAdd Files to "Runner" -> GoogleService-Info.plistを選択
- pubspec.ymlに
#...
dependencies:
  flutter:
    sdk: flutter
  cupertino_icons: ^1.0.2
  firebase_core: ^1.2.0 #この行を追加
-
$ flutter pub get実行 (flutter packages getでもいいかも) - Flutterプロジェクト上でFirebaseパッケージimport
import 'package:firebase_core/firebase_core.dart';
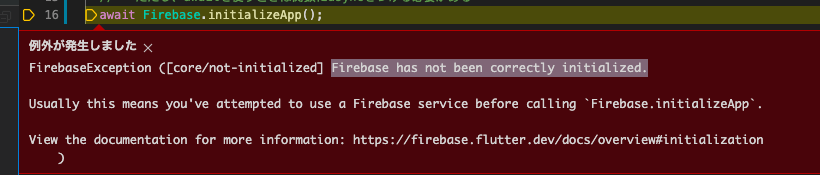
- Flutterアプリのmain()で以下コードで初期化する必要がある
void main() async {
  // Flutterの初期化処理を待つ
  WidgetsFlutterBinding.ensureInitialized();
  // アプリ起動時にFirebase初期化処理を入れる
  //   initializeApp()の返り値がFutureなので非同期処理
  //   非同期処理(Future)はawaitで処理が終わるのを待つことができる
  //   ただし、awaitを使うときは関数にasyncをつける必要がある
  await Firebase.initializeApp();

  runApp(MyApp());
}
Authentication(メール/パス手法)を準備するなら
- Firebaseプロジェクト画面にて、Authentication > Sign-in methios > メール/パスワードを有効にする
- pubspec.ymlに
#...
dependencies:
  flutter:
    sdk: flutter
  cupertino_icons: ^1.0.2
  firebase_core: ^1.2.0
  firebase_auth: ^1.2.0 #この行を追加
-
$ flutter pub get実行 (flutter packages getでもいいかも) - Flutterプロジェクト上でFirebaseパッケージimport
import 'package:firebase_auth/firebase_auth.dart';
Error
-
Error output from CocoaPods:
[!] Automatically assigning platform `iOS` with version `9.0` on target `Runner` because no platform was specified. Please specify a platform for this target in your Podfile. See `https://guides.cocoapods.org/syntax/podfile.html#platform`.
のエラーが出る
$ flutter clean
$ rm ios/Podfile
$ cd ios && rm -rf Pods/
$ flutter packages upgrade
$ pod update && pod install
クリーンビルドを試みたけど、install時に同エラーが出てしまう。
Firebase公式参照みたけどよくわからん。。
「[!] Automatically assigning platform iOS with version 9.0」とエラー出てるんで
PodFileでコメントアウトされているplatformの設定を
# Uncomment this line to define a global platform for your project
platform :ios, '10.0'
のように9.0->10.0に変更してみたら無事ビルドが通るようになった。
今回は、実は以前に立ち上げだけしたFlutterプロジェクトを再始動していたので
バージョンが上がってしまってこのようなエラーが発生してしまったのかもしれない。。?
分からん笑
結局firebase_authおよびcoreが見つからないエラーが取れなかったので、
以下改めて
$ flutter pub add firebase_core
$ flutter pub add firebase_auth
$ flutter run
これでビルド通って、アプリ起動までいけた!
(正直なんだったかは分からん。。)
以前のKindle本で読んだりした内容だと、Podfileやpubspec.ymlを編集してrunする流れだったけど、
コマンドラインで叩いた方が安全かな?
そう考えると、単純に指定バージョンが低過ぎただけだったのかもしれない。。知らんけど
新しいマシン購入したんで環境構築をもう一度。。
M1 mac ではAndroid Studio エミュで結構詰まるかも。。

flutter doctor うつと↓の表示になる
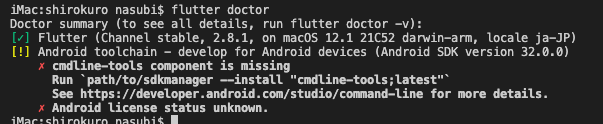
今回はコマンドでなくてAndroid StudioのSDKマネージャーからcmdline-toolsを落としてみる
↓だとおもう

できた

flutterインストールは公式みるよりflutter doctorの指示通りにやったほうが早いかも
flutter dockerクリア後、 旧マシンから取り込んだソースだとどうしても pod install時にクラッシュしてしまう
なので、綺麗にしてから再度やりなおし
- Android Studio: AndroidエミュのCPUがarmであれば起動ok -> おそらくx84_64のSDKいれればいけるかも
- Xcode: 起動ok
- VSCode: Xcode経由でok(↓のデバッグ起動時にエラー発生したが対処可能)
https://flutter.keicode.com/devenv/flutter-on-mac-catalina.php
ここからソース部分のみ引っ越し -> 完了
pubspec.yamlに追加
  firebase_auth: ^3.3.4
  firebase_core: ^1.10.6
↓
vscodeがpubspec.lockに反映してインストールまでしてくれてるっぽい
してなかったからpod install
するとクラッシュ再来
マジすか。。Mac M1の問題だったんだ。。。
指示通りterminalをintelで開き
iMac:~ nasubi$ sudo gem install ffi
その後vscodeでpod installすると問題なさそう!
↑の記事でもありましたが、やはりM1 Macのバグっぽい
pod とM1がまだ仲悪いので、パッチ当てられるその日までVSCode上のターミナルではなく
- intelで起動しているterminalでやる
- vscodeのターミナルでやるなら、
sudo arch -x86_64 gem install ffi実行。(なのでarchを駆使する?)
面倒なのでpod 関係はterminalでやることにする

あ、新しくつくったのでGoogleService-Info.plistをXcodeで設定しなければ。。

シミュレータ起動までできた!
キーボードから@が打てないので↓対応
JIS配列のキーボードでKarabiner設定変更しているので、これだけだと半角入力ができなかった
とりあえずはソフトウェアキーボードと併用してやることにする。
閑話休題
Google Cloud Platformを扱ってみるよ
このタスクを Cloud Shell エディタで直接行う際の順を追ったガイダンスについては、[ガイドを表示] をクリックしてください。
Cloud Shellガイドやってみる
App Engineへのデプロイまで
gcloud app create
git clone \
    https://github.com/GoogleCloudPlatform/python-docs-samples
cloudshell workspace \
    python-docs-samples/appengine/standard_python3/hello_world
virtualenv --python python3 \
    ~/envs/hello_world
source \
    ~/envs/hello_world/bin/activate
pip install -r requirements.txt
python main.py
gcloud config set project \
    windy-smoke-337506
gcloud app deploy
クリーンアップ
1. App Engine のナビゲーション メニューで [設定] をクリックします。
2. [アプリケーションを無効にする] をクリックします。
またはプロジェクト削除
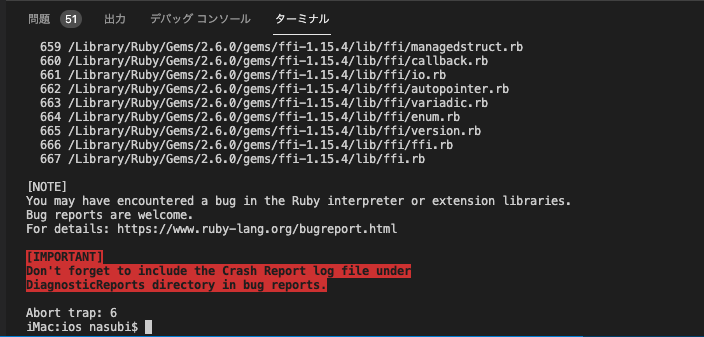
iosディレクトリでflutter updateを実行するとエラー発生する。
[!] Oh no, an error occurred.

Search for existing GitHub issues similar to yours:
https://github.com/CocoaPods/CocoaPods/search?q=dlopen%28%2FLibrary%2FRuby%2FGems%2F2.6.0%2Fgems%2Fffi-1.15.4%2Flib%2Fffi_c.bundle%2C+0x0009%29%3A+tried%3A+%27%2FLibrary%2FRuby%2FGems%2F2.6.0%2Fgems%2Fffi-1.15.4%2Flib%2Fffi_c.bundle%27+%28mach-o+file%2C+but+is+an+incompatible+architecture+%28have+%27x86_64%27%2C+need+%27arm64e%27%29%29%2C+%27%2Fusr%2Flib%2Fffi_c.bundle%27+%28no+such+file%29+-+%2FLibrary%2FRuby%2FGems%2F2.6.0%2Fgems%2Fffi-1.15.4%2Flib%2Fffi_c.bundle&type=Issues

If none exists, create a ticket, with the template displayed above, on:
https://github.com/CocoaPods/CocoaPods/issues/new

Be sure to first read the contributing guide for details on how to properly submit a ticket:
https://github.com/CocoaPods/CocoaPods/blob/master/CONTRIBUTING.md

Don't forget to anonymize any private data!

Looking for related issues on cocoapods/cocoapods...
Searching for inspections failed: undefined method `map' for nil:NilClass
↑はどうやらApple Silicon(M1チップ)のMacで発生するらしい。
公式をみると下の記載があった。
重要: 最新のApple M1プロセッサを搭載したMacにインストールする場合は、新しいAppleシリコンアーキテクチャのサポートが完了しているため、これらの補足メモを読むと役立つ場合があります。
↑によると↓のコマンド打てば良いなど書いてあるが、エラーは変わらず。。
$ sudo softwareupdate --install-rosetta --agree-to-license
Oh.. ↑の手順を忘れていた。。
あれ、違うエラーでてきた。
[!] CocoaPods could not find compatible versions for pod "Firebase/Auth":
  In snapshot (Podfile.lock):
    Firebase/Auth (= 8.9.0)

  In Podfile:
    firebase_auth (from `.symlinks/plugins/firebase_auth/ios`) was resolved to 3.3.8, which depends on
      Firebase/Auth (= 8.11.0)

Specs satisfying the `Firebase/Auth (= 8.9.0), Firebase/Auth (= 8.11.0)` dependency were found, but they required a higher minimum deployment target.
クリーンな形での起動手順。(flutter doctorは通っている前提)
$ flutter clean
$ rm ios/Podfile && rm ios/Podfile.lock && rm -rf Pods/
pubspec.yaml ↓を除去
  firebase_auth: ^3.3.4
  firebase_core: ^1.10.6
↓を実行して再度pubspec.yamlに追加
$ flutter pub add firebase_core
$ flutter pub add firebase_auth
↓とりあえず実行
$ flutter packages upgrade
↓Podfileの書き換え(参考)
# Uncomment this line to define a global platform for your project
platform :ios, '10.0'
↓Intelで起動したterminalで実行
iMac:~ nasubi$ sudo gem install ffi
$ pod update && pod install
↓
$ flutter run
$ flutter run
No supported devices connected.
The following devices were found, but are not supported by this project:
macOS (desktop) • macos  • darwin-arm64   • macOS 12.1 21C52 darwin-arm
Chrome (web)    • chrome • web-javascript • Google Chrome 99.0.4844.51
If you would like your app to run on macos or web, consider running `flutter create .` to generate projects for these platforms.
run 時に↑のエラーがでたらシミュレータ起動してないという状態なので↓実行
$ open -a Simulator
Simulatorが起動しない場合
「error returned in reply connection invalid」が表示される

おそらく異なるバージョンのXcodeを開いてしまったときに起こったのでこれが原因なのではないかなと思います。
Xcodeをアップデートした直後だったので、もしかするとバージョン差異が発生したのかな?
自分の場合はXcode&Simulatorアプリを終了させてから再度Xcodeを起動させた後に
open -a Simulatorをたたくと直ったようす。
良著。こちらを拝読させていただければ基本は大丈夫そう。
Flutter実践入門 ~環境構築からAndroid/iOS/Webに広告を付けて同時にリリース!!~
flutter-study.dev
CookBookも忘れずに。
時間があるときにはFlutter Doc JPも参照したい。
Firestoreからのデータ取得
snapshotの種類
DocumentSnapshot
QuerySnapshot
QueryDocumentSnapshot
この人のFirestoreからデータ取得した後のモデルにコンバートする処理が綺麗。。
CircleAvatar でプロフィール画像を丸く表示させたい
Flutter AppBar をもっとオサレにしたい
AppBarの背景を画像にしたい -> AppBar の flexibleSpace
AppBar をスクロールに合わせて隠す -> SliverAppBar
Wigetにユニークな形状を持たせたい場合

スクロール可能なList-> ListView
スクロール可能なWiget -> SingleChildscrollview
スクロールバーを表示させたWiget -> ScrollBar
Wigetを表示する時にスワイプ、表示ないでスクロール -> DraggableScrollableSheet
基本的にアプリはスクロール可能にしておいた方がよいとは思う。。
(不要な場合ももちろんある)
FABをめり込ませながらbottomNavigationBarに複数表示
↓掛け合わせ
サンプルコード
// floatingActionButtonをめり込ませながら、bottomNavigationBarに複数アイコン設置する
      floatingActionButtonLocation: FloatingActionButtonLocation.centerDocked,
      floatingActionButton: FloatingActionButton(
        onPressed: () => {},
        child: const Icon(Icons.catching_pokemon),
      ),
      bottomNavigationBar: BottomAppBar(
        color: Theme.of(context).primaryColor,
        // notchMargin: 6.0,
        shape: const CircularNotchedRectangle(),
        child: Padding(
          padding: const EdgeInsets.symmetric(horizontal: 8.0),
          child: Row(
            mainAxisSize: MainAxisSize.max,
            mainAxisAlignment: MainAxisAlignment.spaceBetween,
            children: <Widget>[
              IconButton(
                icon: const Icon(
                  Icons.favorite,
                  color: Colors.white,
                ),
                onPressed: () {},
              ),
              IconButton(
                icon: const Icon(
                  Icons.youtube_searched_for,
                  color: Colors.white,
                ),
                onPressed: () {},
              ),
              const SizedBox(),
              IconButton(
                icon: const Icon(
                  Icons.contact_support,
                  color: Colors.white,
                ),
                onPressed: () {},
              ),
              IconButton(
                icon: const Icon(
                  Icons.manage_accounts,
                  color: Colors.white,
                ),
                onPressed: () {},
              ),
            ],
          ),
        ),
      ),
