iTranslated by AI
Building Full-Stack TypeScript with TanStack Start and Drizzle ORM


Overview
In web applications, a technology stack that allows you to unify the frontend and backend using TypeScript is generally called Full-Stack TypeScript.
Recently, articles about T3 Turbo and Hono have been attracting a lot of attention.
- Developing with T3-Turbo: The Ultimate Goal of Full-Stack TypeScript
- Grasping the Big Picture of Full-Stack TypeScript with Hono
By combining TanStack Start, which recently entered beta, with Drizzle ORM, which allows for type-safe database operations in TypeScript, you can easily achieve a Full-Stack TypeScript application.
I call this tech stack TanStack Drizzle!
I have created a repository that can be used as a project boilerplate so that anyone can use it easily.
In this article, I will explain the stack based on this repository.
Setup Procedures
Clone the repository mentioned earlier, lef237/tanstack-drizzle.
gh repo clone lef237/tanstack-drizzle
Then, move into the directory and run npm install to complete the preparation.
cd tanstack-drizzle
npm install
We will be using PostgreSQL this time.
You need to prepare a database in advance. You can easily set it up with Docker by following this documentation (Docker Desktop is required).
After creating the database, place a .env file in the project root.
DATABASE_URL=postgres://postgres:mypassword@localhost:5432/postgres
It's all good if you can set it up like this!
Next, test whether the database is working correctly.
npx drizzle-kit push
If the connection to the DB is successful, you should see [✓] Changes applied.
Let's also run the test code that operates the DB via Drizzle.
npx tsx app/utils/test.ts
The following results will be output to the console.
inserted [ { id: 1, title: 'First Todo', completed: false } ]
results [ { id: 1, title: 'First Todo', completed: false } ]
updated [ { id: 1, title: 'First Todo', completed: true } ]
deleted [ { id: 1, title: 'First Todo', completed: true } ]
Once you've reached this point, the preparation is complete. 🤩
Execute the following code to start TanStack Start!
npm run dev
Opening http://localhost:3000/ should display the following screen.
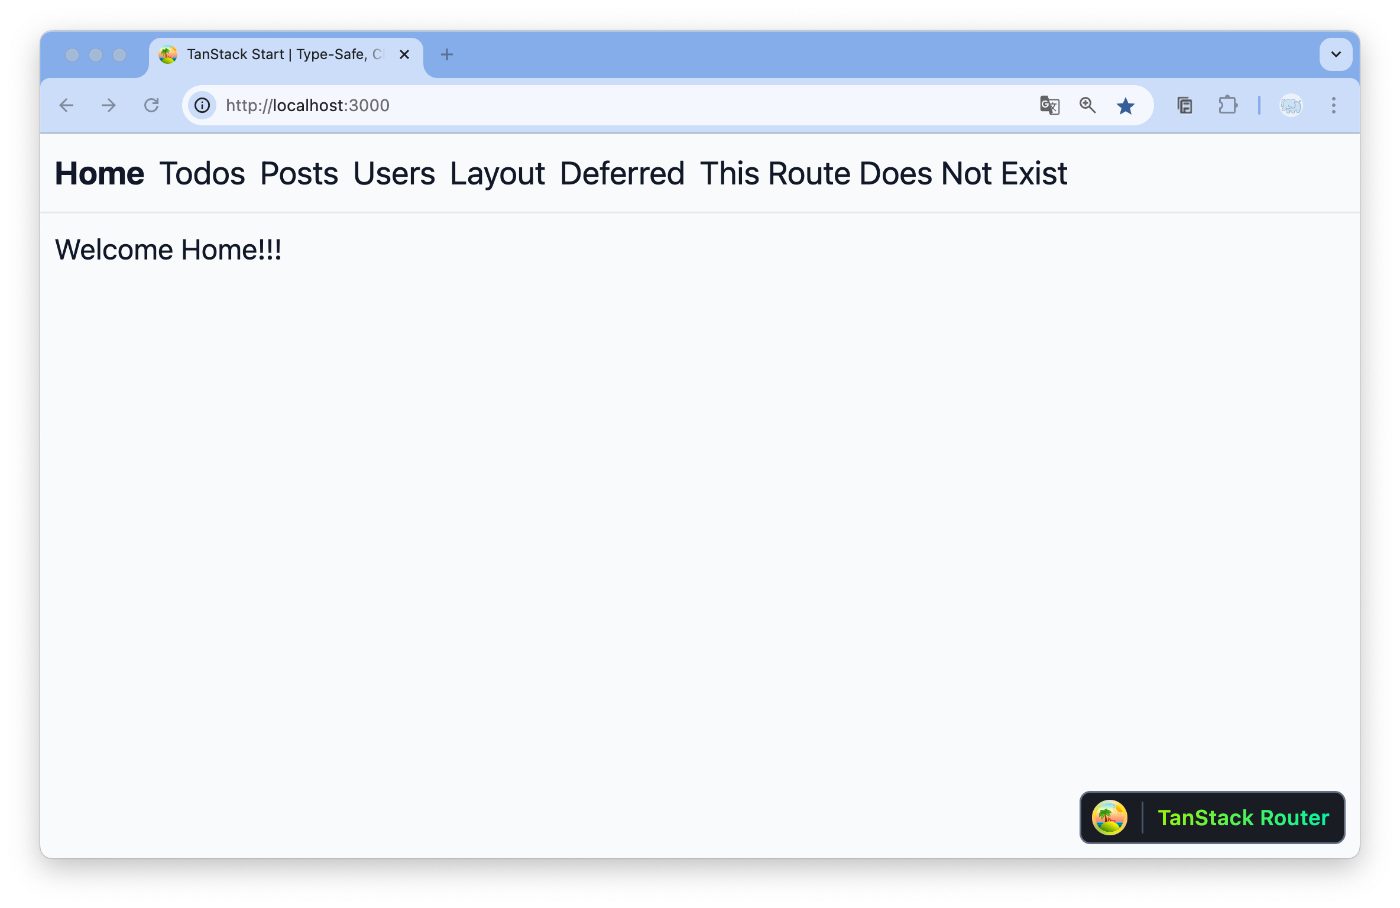
Try clicking "Todos" in the top header.
Here, you can try out CRUD operations using TanStack Start's Server Functions and DB operations with Drizzle ORM.
List/Add Screen

Edit/Delete Screen

From here, I will explain the actual code.
Drizzle ORM
There are many attractions to Drizzle ORM. Beyond type safety, it runs in Edge environments and doesn't require a DSL (you can write everything in TypeScript). Personally, it's my top recommendation among ORMs for TS.
Assuming that the attractions of Drizzle have been covered by the Fireship video above, let's move on to explaining the actual code.
db/schema.ts
The following code defines the schema:
import { pgTable, serial, text, boolean } from "drizzle-orm/pg-core";

export const todosTable = pgTable("todos", {
  id: serial("id").primaryKey(),
  title: text("title").notNull(),
  completed: boolean("completed").notNull().default(false),
});
Here, id is set as a SERIAL type primary key, and the Todo's title has a NOT NULL constraint. completed is defined for tracking completion status. By exporting it, we share the type.
Since it's written in TypeScript, code completion works effectively.
db/drizzleConnect.ts
This code connects the database to Drizzle.
import { drizzle } from "drizzle-orm/node-postgres";

export const db = drizzle(process.env.DATABASE_URL!);
Since we chose PostgreSQL this time, we use node-postgres.
If you use other databases such as MySQL or SQLite, please rewrite it accordingly by referring to the official documentation.
drizzle.config.ts
The configuration file is also written in TypeScript.
import "dotenv/config";
import { defineConfig } from "drizzle-kit";

export default defineConfig({
  out: "./drizzle",
  schema: "./app/db/schema.ts",
  dialect: "postgresql",
  dbCredentials: {
    url: process.env.DATABASE_URL!,
  },
});
Earlier, we performed migrations using the npx drizzle-kit push command. This file is necessary to use drizzle-kit.
The dialect is currently set to postgresql. If you use MySQL, it would be mysql, and for SQLite, it would be sqlite.
app/utils/test.ts
Earlier, we executed this command (npx tsx app/utils/test.ts) to verify the operation.
I will briefly introduce the contents of the test code to explain how Drizzle works.
The following code performs a series of operations: INSERT, SELECT, UPDATE, and DELETE.
import "dotenv/config";
import { eq } from "drizzle-orm";
import { todosTable } from "~/db/schema";
import { db } from "~/db/drizzleConnect";

async function main() {
  // INSERT
  const inserted = await db
    .insert(todosTable)
    .values({ title: "First Todo" })
    .returning();
  console.log("inserted", inserted);

  // SELECT
  const results = await db.select().from(todosTable);
  console.log("results", results);

  // UPDATE
  const updated = await db
    .update(todosTable)
    .set({ completed: true })
    .where(eq(todosTable.id, inserted[0].id))
    .returning();
  console.log("updated", updated);

  // DELETE
  const deleted = await db
    .delete(todosTable)
    .where(eq(todosTable.id, inserted[0].id))
    .returning();
  console.log("deleted", deleted);
}

main();
The structure is very readable for anyone comfortable with SQL.
You can also use .returning(), which corresponds to the RETURNING clause in PostgreSQL.
eq() is a function used for equality comparison (=) in a WHERE clause. Naturally, others like <>, EXISTS, BETWEEN, and LIKE are also defined as functions.
Detailed information can be found on the following page of the official documentation:
If you open this file in your IDE and hover over a variable, you can see that the types are correctly inferred.

Next, let's look at how to share these type definitions between the backend and frontend using Server Functions.
What is TanStack Start?
Before discussing Server Functions, let's briefly explain TanStack Start.
The tagline on the page mentioned above says:
Full-stack React framework powered by TanStack Router
It's easier to understand if you think of it as "TanStack Router features with added server capabilities like SSR and API Routes!"
And the main highlight of TanStack Start is Server Functions (RPCs).
What are the Benefits of Server Functions?
By using Server Functions, you can call functions in a type-safe manner from both the client and server sides.
These functions are executed on the server side. This means that if you perform database operations within these functions, you can facilitate communication between the frontend and backend without using API Routes.
Up to this point, it might sound like React Server Functions, but reading the official documentation reveals otherwise. TanStack Start's Server Functions are built to be framework-agnostic. In other words, they should (eventually) be applicable to frameworks other than React.
Furthermore, since they are implemented based on standard HTTP requests, you can call them as much as you like without being hindered by "serial-execution bottlenecks."
Server-side Code
First, let's look at the server-side code where Server Functions are defined.
This code can basically be placed anywhere; in the official sample code, it's located in utils/.
To create a specific location for files that only define Server Functions, we'll create a functions/ directory.
app/functions/todoServer.ts
This is the core file where the Server Functions reside.
I've named it todoServer.ts to correspond with the table name.
Let's look at the actual code.
import { createServerFn } from "@tanstack/start";
import { todosTable } from "~/db/schema";
import { eq } from "drizzle-orm";
import { z } from "zod";
import { db } from "~/db/drizzleConnect";

export const getTodos = createServerFn({ method: "GET" }).handler(async () => {
  return db.select().from(todosTable);
});

export const createTodo = createServerFn({ method: "POST" })
  .validator(z.object({ title: z.string().min(1) }))
  .handler(async ({ data }) => {
    const [inserted] = await db
      .insert(todosTable)
      .values({ title: data.title })
      .returning();
    return inserted;
  });

export const getTodoById = createServerFn({ method: "GET" })
  .validator(z.object({ id: z.number() }))
  .handler(async ({ data }) => {
    const [todo] = await db
      .select()
      .from(todosTable)
      .where(eq(todosTable.id, data.id));
    if (!todo) {
      throw new Error(`Todo not found: id=${data.id}`);
    }
    return todo;
  });

export const updateTodo = createServerFn({ method: "POST" })
  .validator(
    z.object({
      id: z.number(),
      title: z.string().optional(),
      completed: z.boolean().optional(),
    })
  )
  .handler(async ({ data }) => {
    const [updated] = await db
      .update(todosTable)
      .set({
        title: data.title,
        completed: data.completed,
      })
      .where(eq(todosTable.id, data.id))
      .returning();
    if (!updated) {
      throw new Error(`Todo not found: id=${data.id}`);
    }
    return updated;
  });

export const deleteTodo = createServerFn({ method: "POST" })
  .validator(z.object({ id: z.number() }))
  .handler(async ({ data }) => {
    const [deleted] = await db
      .delete(todosTable)
      .where(eq(todosTable.id, data.id))
      .returning();
    if (!deleted) {
      throw new Error(`Todo not found: id=${data.id}`);
    }
    return { success: true };
  });
You can see that five functions are defined. Their roles are as follows:
- getTodos
- Fetch the list of Todos
- createTodo
- Add a new Todo
- getTodoById
- Fetch a specific Todo based on its ID
- updateTodo
- Update a Todo
- deleteTodo
- Delete a Todo
Since it would be overwhelming to introduce all of them, I will focus on explaining getTodos and createTodo.
getTodos
export const getTodos = createServerFn({ method: "GET" }).handler(async () => {
  return db.select().from(todosTable);
});
First is createServerFn. You write the HTTP request method here. In this case, since we are fetching Todos, we specify GET.
Next, there is .handler. This is where you write the actual processing (handling) code as an asynchronous function.
Here, we are using Drizzle to fetch all data from the todosTable in the database.
Bonus: Type of getTodos at this point
The type of getTodos looks like this. You can see that the return type of the function is embedded.
const getTodos: OptionalFetcher<
  undefined,
  undefined,
  {
    id: number;
    title: string;
    completed: boolean;
  }[]
>;
createTodo
Next is the function for creating a new Todo.
export const createTodo = createServerFn({ method: "POST" })
  .validator(z.object({ title: z.string().min(1) }))
  .handler(async ({ data }) => {
    const [inserted] = await db
      .insert(todosTable)
      .values({ title: data.title })
      .returning();
    return inserted;
  });
Unlike getTodos earlier, this one uses POST.
Supplement: Method Type
*Currently, it seems only GET and POST are supported.
export type Method = 'GET' | 'POST';
What appears next is .validator. This is where you can validate the received data.
The return type of the validator function will be the input to the server function's handler.
In the code above, we are using Zod for validation.
z.object({ title: z.string().min(1) });
In this case, the data requires a "string of at least 1 character."
(It's also possible to use validators other than Zod!)
Then, we perform the database processing using the validated code.
  .handler(async ({ data }) => {
    const [inserted] = await db
      .insert(todosTable)
      .values({ title: data.title })
      .returning();
    return inserted;
  });
We are INSERTing the title from the data into the database.
Also, since Server Functions are functions, they can return values. In this function, inserted is returned to the caller.
If you don't need to return a result, you can write it even more simply as follows!
  .handler(async ({ data }) => {
    await db.insert(todosTable).values({ title: data.title });
  });
Client-side Code
Next, let's look at the client-side code that calls the Server Functions.
Listing Items
There is a file called app/routes/todos/index.tsx. This is the page that displays the Todo list.
TanStack Start supports Directory Routes (though it can also be configured to use Flat Routes).
Therefore, creating a hierarchical structure under app/routes/ maps directly to the URL. In the case of app/routes/todos/index.tsx, it can be accessed at /todos.
Let's look at the specific code.
import { createFileRoute } from "@tanstack/react-router";
import { getTodos, createTodo } from "~/functions/todoServer";

import { useRouter } from "@tanstack/react-router";

export const Route = createFileRoute("/todos/")({
  loader: async () => {
    const todos = await getTodos();
    return { todos };
  },

  component: TodosIndex,
});

function TodosIndex() {
  const { todos } = Route.useLoaderData();
  const router = useRouter();

  async function handleCreate(e: React.FormEvent<HTMLFormElement>) {
    e.preventDefault();
    const form = e.currentTarget;
    const formData = new FormData(form);
    const title = formData.get("title");

    if (typeof title !== "string" || !title.trim()) {
      alert("Title is required!");
      return;
    }

    try {
      await createTodo({
        data: { title: title },
      });
      form.reset();
      router.invalidate();
    } catch (err) {
      alert(String(err));
    }
  }

  return (
    <div style={{ padding: "1rem" }}>
      <h1>Todo List</h1>

      <form onSubmit={handleCreate}>
        <input type="text" name="title" placeholder="New Todo" />
        <button type="submit">Create</button>
      </form>

      <ul>
        {todos.map((todo) => (
          <li key={todo.id}>
            <a href={`/todos/${todo.id}`}>
              {todo.completed ? <s>{todo.title}</s> : todo.title}
            </a>
          </li>
        ))}
      </ul>
    </div>
  );
}
First, we use createFileRoute() to control the behavior when /todos is accessed.
The key point is the following part from the linked documentation:
- Critical data fetching is coordinated from a Route's loader
In other words, we load the function as a loader within createFileRoute() and display the screen based on the data retrieved from it.
Here, we call the Server Function getTodos.
  loader: async () => {
    const todos = await getTodos();
    return { todos };
  },
Let's check the type of todos.
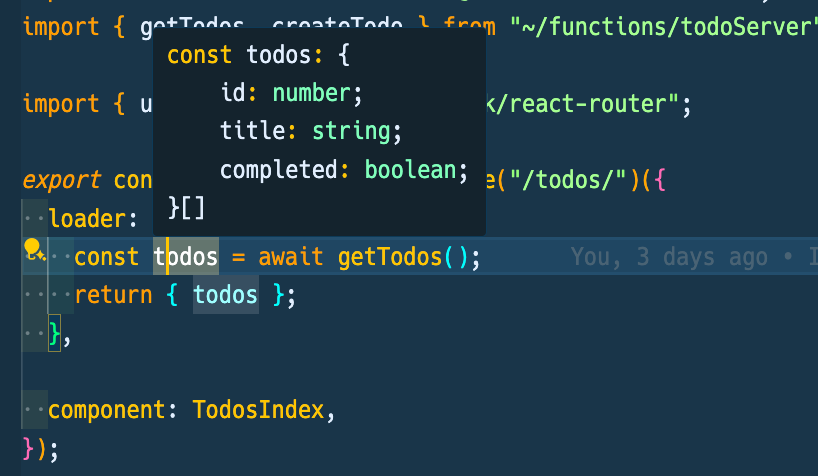
The types defined with Drizzle are successfully retrieved!
Continuing through createFileRoute(), we are passing TodosIndex to component.
component: TodosIndex,
This refers to the TodosIndex component located immediately below.
function TodosIndex() {
  const { todos } = Route.useLoaderData();

  // omitted
Then, we use Route.useLoaderData() to retrieve todos and display them on the screen.
<ul>
  {todos.map((todo) => (
    <li key={todo.id}>
      <a href={`/todos/${todo.id}`}>
        {todo.completed ? <s>{todo.title}</s> : todo.title}
      </a>
    </li>
  ))}
</ul>
The logic for the display part changes whether a strikethrough is drawn on the title based on whether it is completed.

Creating a Todo
Next, let's trace the behavior of the "Create" button, which creates a new Todo.
First, handleCreate is called via onSubmit.
<form onSubmit={handleCreate}>
  <input type="text" name="title" placeholder="New Todo" />
  <button type="submit">Create</button>
</form>
Let's take a look at handleCreate.
async function handleCreate(e: React.FormEvent<HTMLFormElement>) {
  e.preventDefault();
  const form = e.currentTarget;
  const formData = new FormData(form);
  const title = formData.get("title");

  if (typeof title !== "string" || !title.trim()) {
    alert("Title is required!");
    return;
  }

  try {
    await createTodo({
      data: { title: title },
    });
    form.reset();
    router.invalidate();
  } catch (err) {
    alert(String(err));
  }
}
We use preventDefault to prevent the page from automatically reloading, then we retrieve the form element and create a FormData object (which makes it easier to extract values).
The following if statement double-checks that the form's title is a string and that text has been entered (performing narrowing).
Then, createTodo() is called within a try~catch block.
Here, we pass { title: title } as data. If title were anything other than a string, it would violate the .validator defined in createServerFn, resulting in a type error.
For example, if the previous if statement were missing, a type error like the following would be displayed:

We've confirmed that data can be passed in a type-safe manner!
Next, createTodo() is executed to add a new record to the database.
Finally, we call router.invalidate(). This is subtly important; it calls the invalidate() method of TanStack Router to re-run the loader associated with this route.
This causes the data fetching, such as getTodos(), to run again, and the screen is updated with the latest Todo list.
(If invalidate() weren't used, the user would need to reload the page manually, which would be inconvenient.)
Summary
I've summarized this based on my research of the official documentation and source code. 🔍️
I hope I was able to explain the appeal of combining TanStack Start and Drizzle ORM.
I wrote this late at night (?), so there might be some mistakes in the content. Please feel free to let me know in the comments!
The repository is also public, so please feel free to use it 💖
Discussion